8 Vegetables That Can Survive Frosts

8 Vegetables That Can Survive Frosts

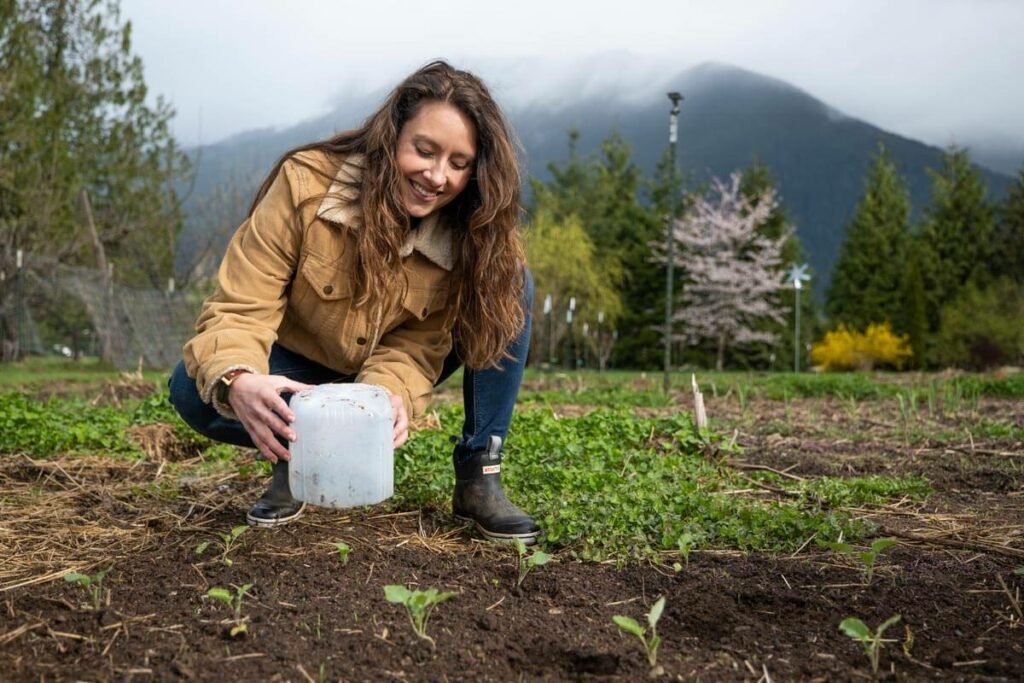
When the first frost warning hits, many gardeners rush to harvest whatever they can before their crops freeze. But not all vegetables are fragile. In fact, some thrive in chilly weather, using the cold to enhance their flavor and texture. Knowing which vegetables can survive frost—and even prefer it—means you can extend your growing season and enjoy fresh produce long after summer has ended.

Here’s a detailed look at eight frost-tolerant vegetables that deserve a spot in your fall and early winter garden, along with tips on how to help them thrive when temperatures drop.


Why Frost Isn’t Always the Enemy

Before we get into the vegetables themselves, it’s important to understand why certain plants handle frost better than others.

When temperatures dip below 32°F (0°C), frost forms as water vapor freezes on leaves. Tender, warm-season plants (like tomatoes and peppers) can’t handle this—they blacken and die. But cool-weather crops, especially those in the brassica (cabbage) and root vegetable families, have adapted to survive these cold snaps.

Many of them contain natural sugars that act like antifreeze, lowering the freezing point of their cell sap. This process not only keeps the plants alive but often makes them sweeter after frost exposure.


1. Kale (Brassica oleracea var. sabellica)

Frost Tolerance: Extremely hardy — survives temperatures as low as 20°F (-6°C).

Kale is the undisputed champion of the cold-weather garden. As the temperature drops, kale converts starches into sugars, making its leaves tender and noticeably sweeter. Many gardeners even wait until after the first frost to harvest for the best flavor.

Growing tips:

  • Planting time: Late summer for fall and winter harvest.
  • Soil: Rich, well-drained soil with good organic matter.
  • Protection: A light mulch or row cover helps extend its life through snow and frost.

Bonus: Varieties like ‘Winterbor’ and ‘Red Russian’ are especially cold-resistant.


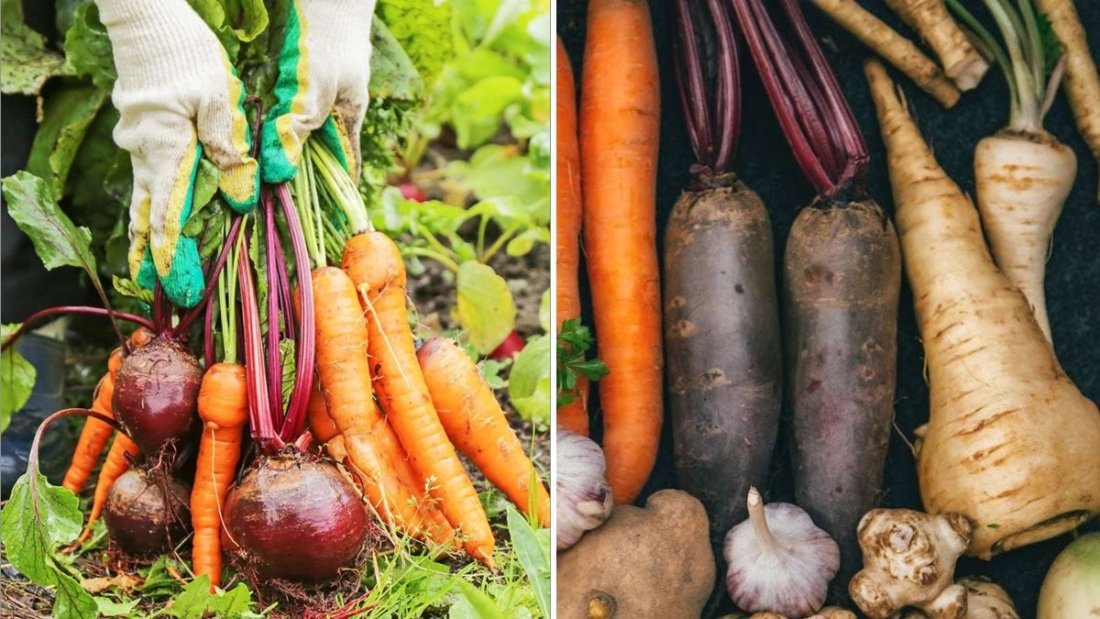
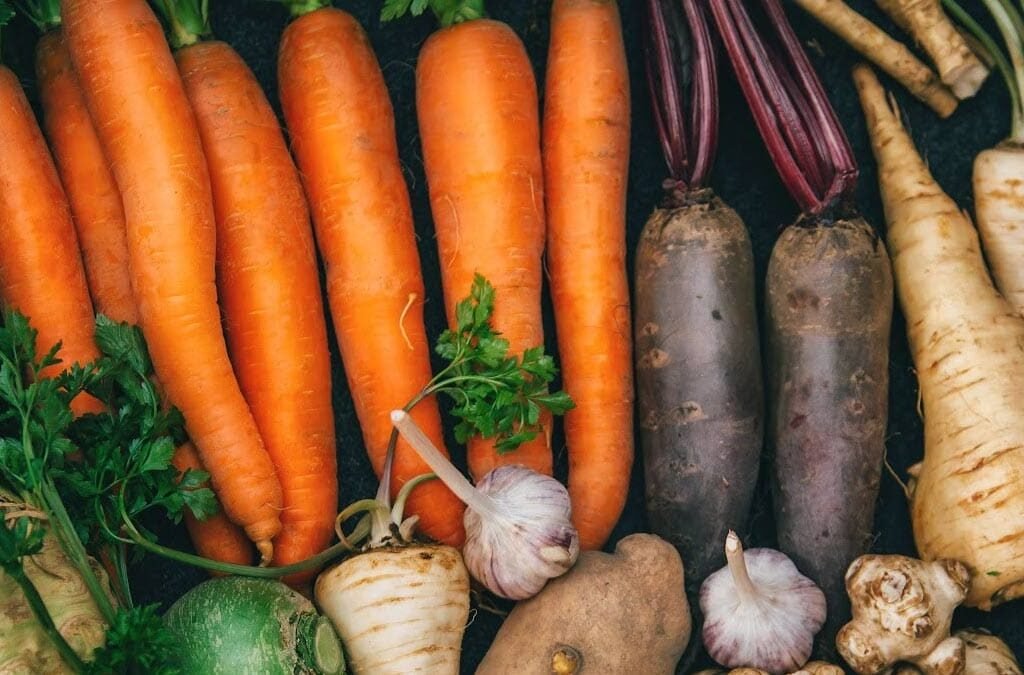
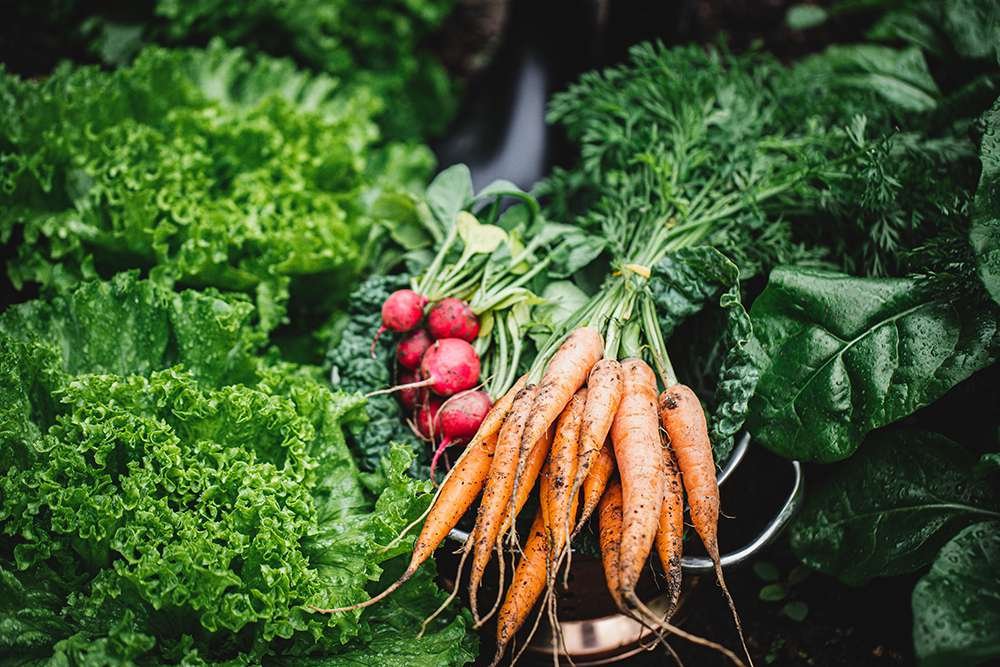
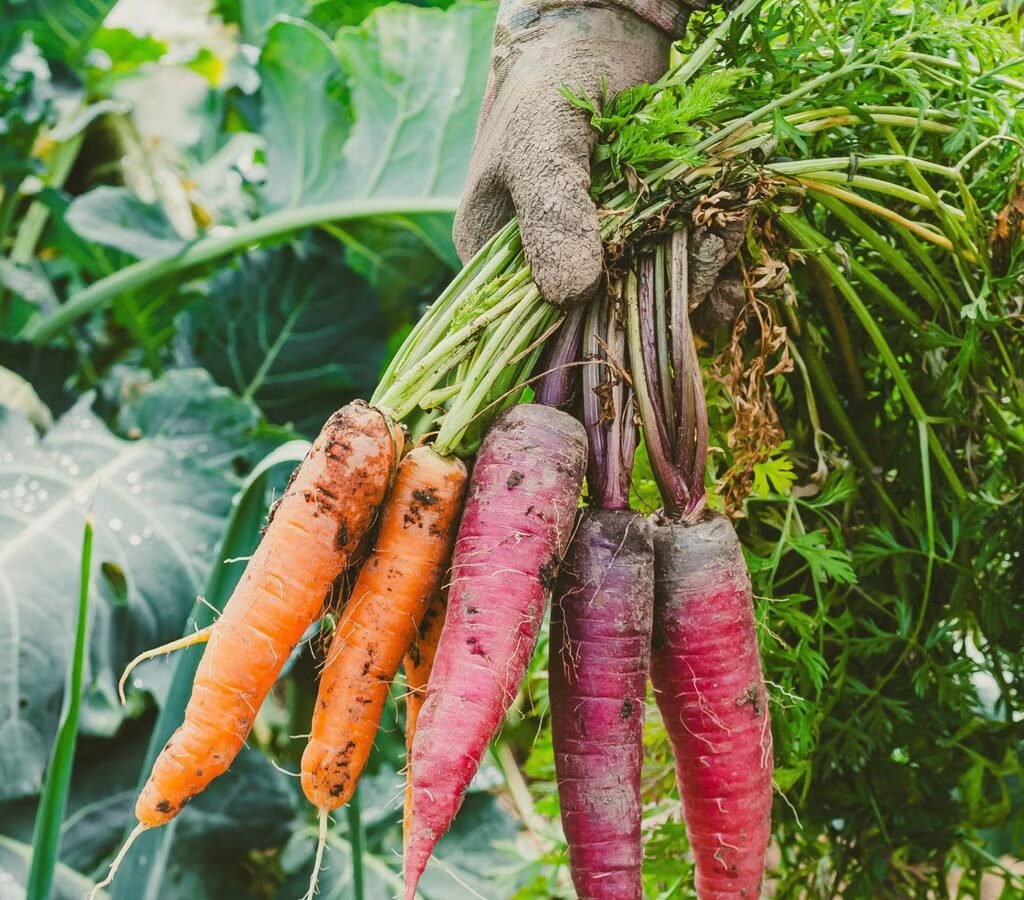
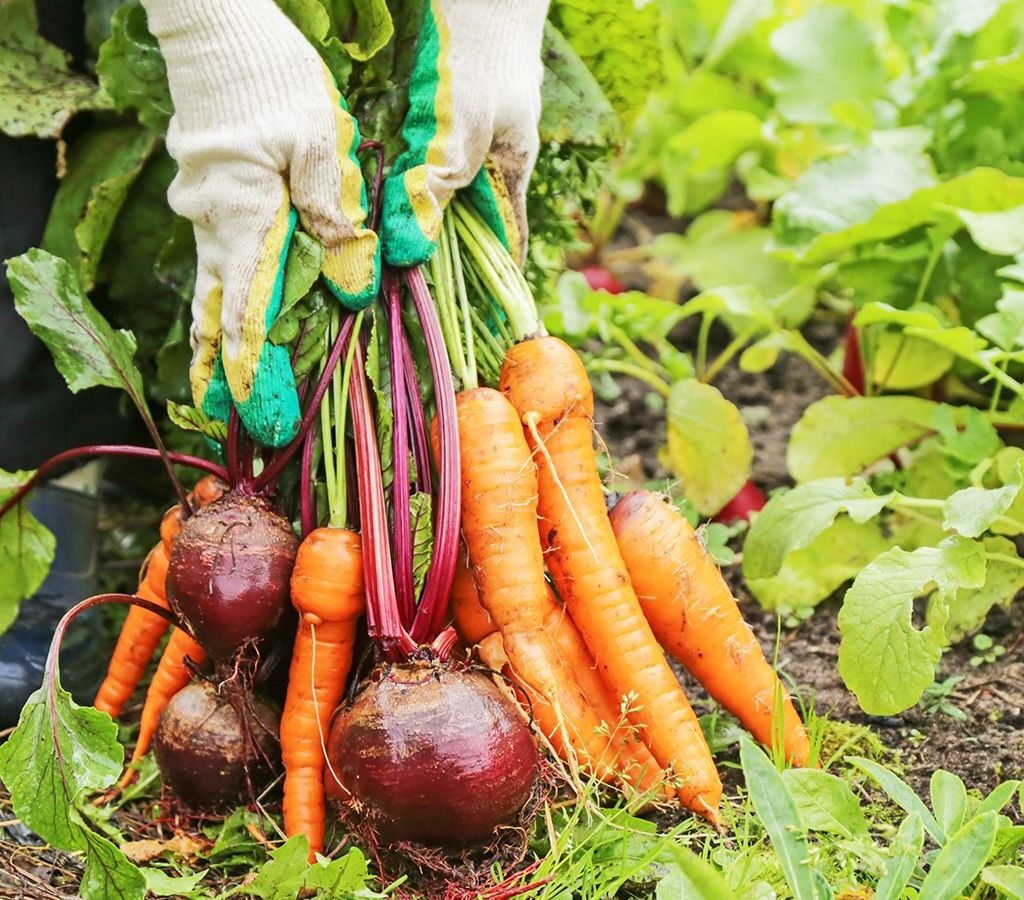
2. Carrots (Daucus carota subsp. sativus)

Frost Tolerance: Can survive down to 15°F (-9°C) with mulch protection.

Carrots are another vegetable that gets sweeter after frost. The cold causes sugars to concentrate in the root, improving flavor and texture.

Growing tips:

  • Planting time: Late summer or early fall for overwintering.
  • Soil: Loose, deep soil to encourage straight roots.
  • Protection: Add a thick layer of straw or shredded leaves once frost begins—this keeps the soil from freezing solid, allowing you to pull fresh carrots even in winter.

Bonus: Leave carrots in the ground and harvest as needed—they’ll store naturally until early spring.


3. Brussels Sprouts (Brassica oleracea var. gemmifera)

Frost Tolerance: Can handle temperatures down to 20°F (-6°C).

Brussels sprouts actually need a few frosty nights to develop their best flavor. The cold converts starches into sugars, cutting their natural bitterness and giving them a delicious nutty sweetness.

Growing tips:

  • Planting time: Start seeds indoors in midsummer, then transplant outdoors 90–100 days before your first frost.
  • Soil: Fertile and evenly moist.
  • Protection: A layer of mulch at the base helps prevent soil freezing and keeps roots stable.

Pro Tip: Harvest from the bottom up as sprouts mature—the upper ones continue growing even as frost sets in.


4. Spinach (Spinacia oleracea)

Frost Tolerance: Survives down to 15°F (-9°C); can overwinter under cover.

Spinach is one of the hardiest leafy greens, capable of growing right through light snowfalls. When protected by a cold frame or hoop house, it can continue producing into winter.

Growing tips:

  • Planting time: Sow seeds 6–8 weeks before your first expected frost.
  • Soil: Moist, fertile soil with good drainage.
  • Protection: Apply mulch or row covers during extreme cold to prevent frost burn on leaves.

Bonus: Fall-planted spinach often regrows in early spring as soon as the ground thaws, giving you a jump-start on the new season.


5. Cabbage (Brassica oleracea var. capitata)

Frost Tolerance: Can survive temperatures as low as 20°F (-6°C), sometimes even 15°F (-9°C).

Cabbage’s dense heads and waxy leaves make it a natural cold-weather survivor. After a few frosty nights, the flavor of cabbage actually improves, becoming milder and sweeter.

Growing tips:

  • Planting time: Mid to late summer for fall harvest.
  • Soil: Well-drained, fertile soil rich in organic matter.
  • Protection: Apply a 2–3 inch mulch layer around the base to insulate roots.

Pro Tip: Late-season varieties like ‘January King’ or ‘Savoy’ can even survive under snow if well-mulched.


6. Beets (Beta vulgaris)

Frost Tolerance: Survive light frosts down to 28°F (-2°C); roots tolerate colder temps with mulch.

Beets are surprisingly tough. While the leafy tops may suffer during hard frosts, the roots beneath the soil remain well-protected and can continue growing as long as the ground doesn’t freeze solid.

Growing tips:

  • Planting time: Late summer or early fall for a late harvest.
  • Soil: Loamy and loose; avoid compact soil to prevent misshapen roots.
  • Protection: Mulch heavily with straw or leaves to insulate the roots.

Bonus: Like carrots, beets get sweeter after frost exposure due to sugar concentration in the roots.


7. Broccoli (Brassica oleracea var. italica)

Frost Tolerance: Can withstand down to 25°F (-4°C) without damage.

Broccoli is another cool-season favorite that thrives in chilly air. In fact, hot temperatures can cause it to bolt (flower too soon), but cool conditions encourage compact, flavorful heads.

Growing tips:

  • Planting time: Start in midsummer for fall harvests.
  • Soil: Fertile and evenly moist with plenty of compost.
  • Protection: Mulch around the base to retain warmth and moisture.

Pro Tip: If frost kills the main head, side shoots will often continue producing tender florets well into early winter.


8. Parsnips (Pastinaca sativa)

Frost Tolerance: Extremely hardy — can survive down to 10°F (-12°C).

Parsnips are perhaps the sweetest of all frost-tolerant root crops. Like carrots, they use cold weather to convert starches into sugars, producing a sweet, nutty flavor that’s at its best after multiple frosts.

Growing tips:

  • Planting time: Early spring or midsummer for a late fall harvest.
  • Soil: Deep, stone-free soil is ideal for long roots.
  • Protection: Mulch with straw or leaves if you plan to leave them in the ground through winter.

Bonus: Parsnips can be left in frozen ground and harvested in early spring as soon as the soil thaws.


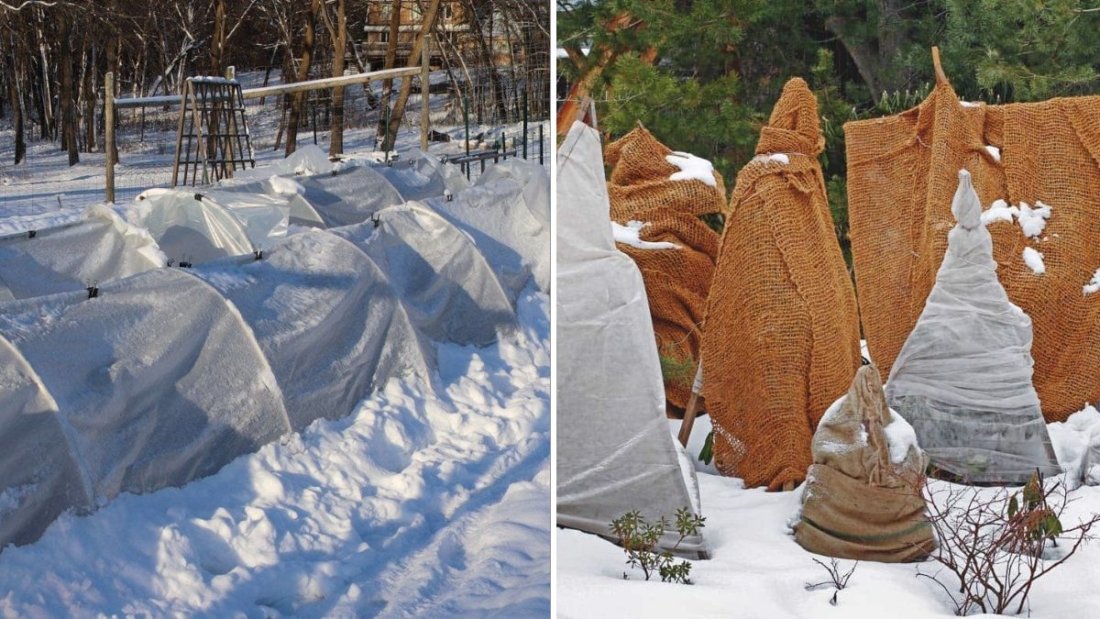
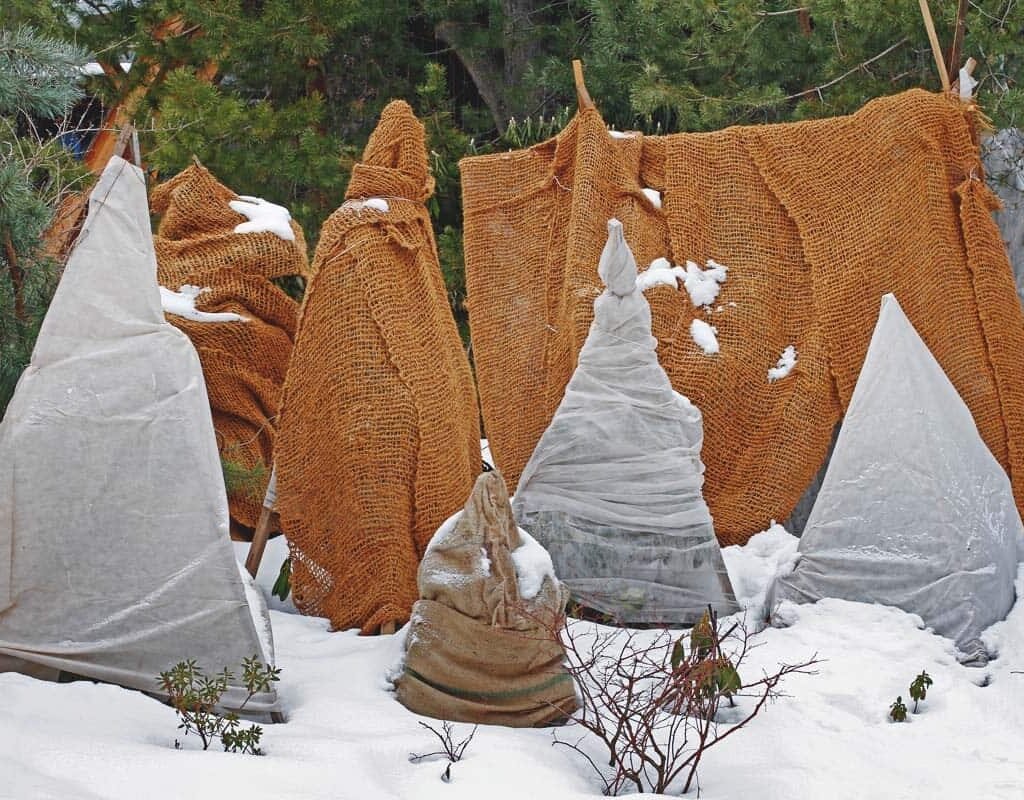
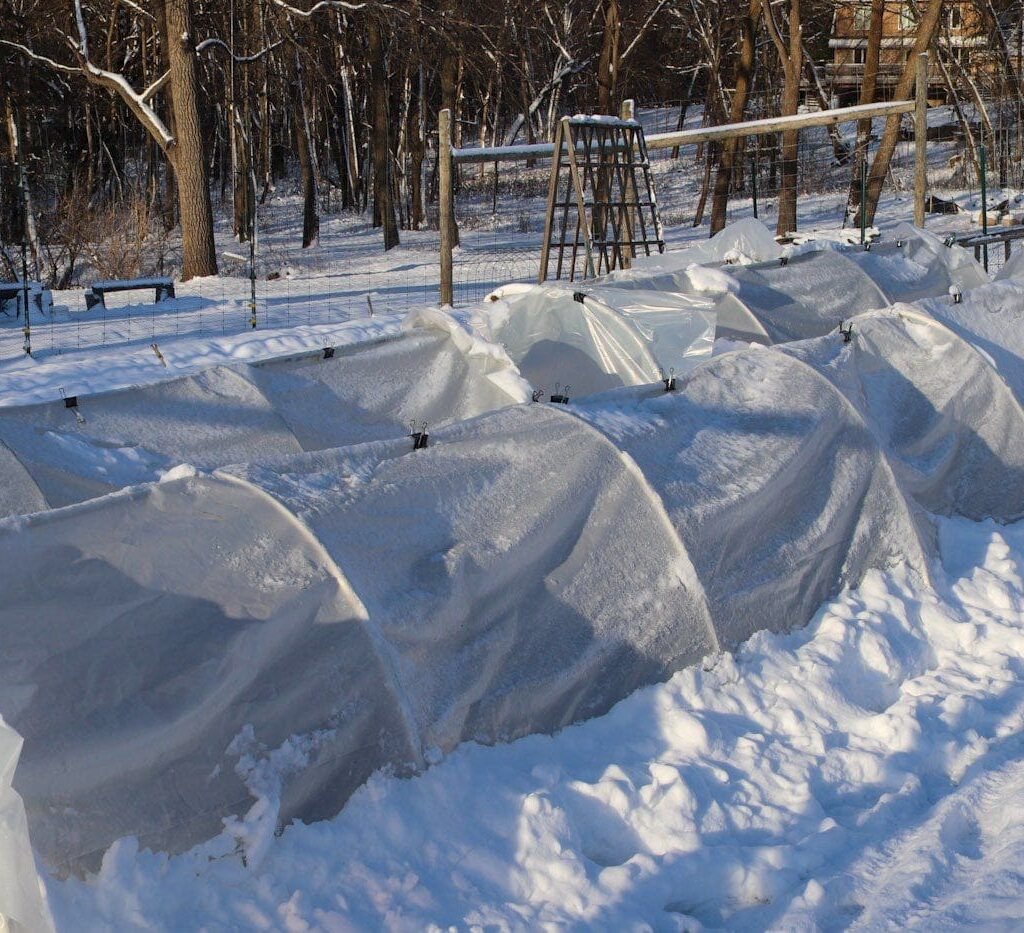
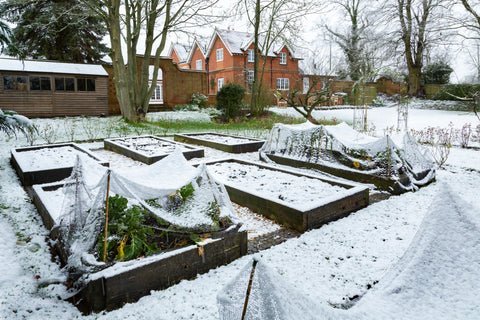
Tips for Protecting Frost-Hardy Vegetables

Even frost-tolerant crops appreciate a little protection during deep freezes. Here’s how to help them survive and thrive:

  1. Mulch generously: Use straw, shredded leaves, or compost to insulate the soil and stabilize temperatures.
  2. Use row covers or cold frames: Lightweight fabric or mini tunnels trap warmth and protect against windburn.
  3. Water before frost: Moist soil holds more heat than dry soil, reducing root freeze risk.
  4. Harvest strategically: Pick leafy greens before a hard freeze, but leave root crops in place—they’ll sweeten as temperatures fall.
  5. Don’t panic about light frost: A light layer of frost can actually improve flavor in many crops.

Planning a Frost-Friendly Garden

If you want a garden that produces beyond summer, focus on succession planting and cold-hardy varieties.

For example:

  • Sow spinach, kale, and beets in late August or September for fall and winter harvests.
  • Add parsnips and carrots early enough that roots mature before deep freezes.
  • Choose cold-hardy cultivars—look for terms like “winter,” “frost-tolerant,” or “cold-hardy” on seed packets.

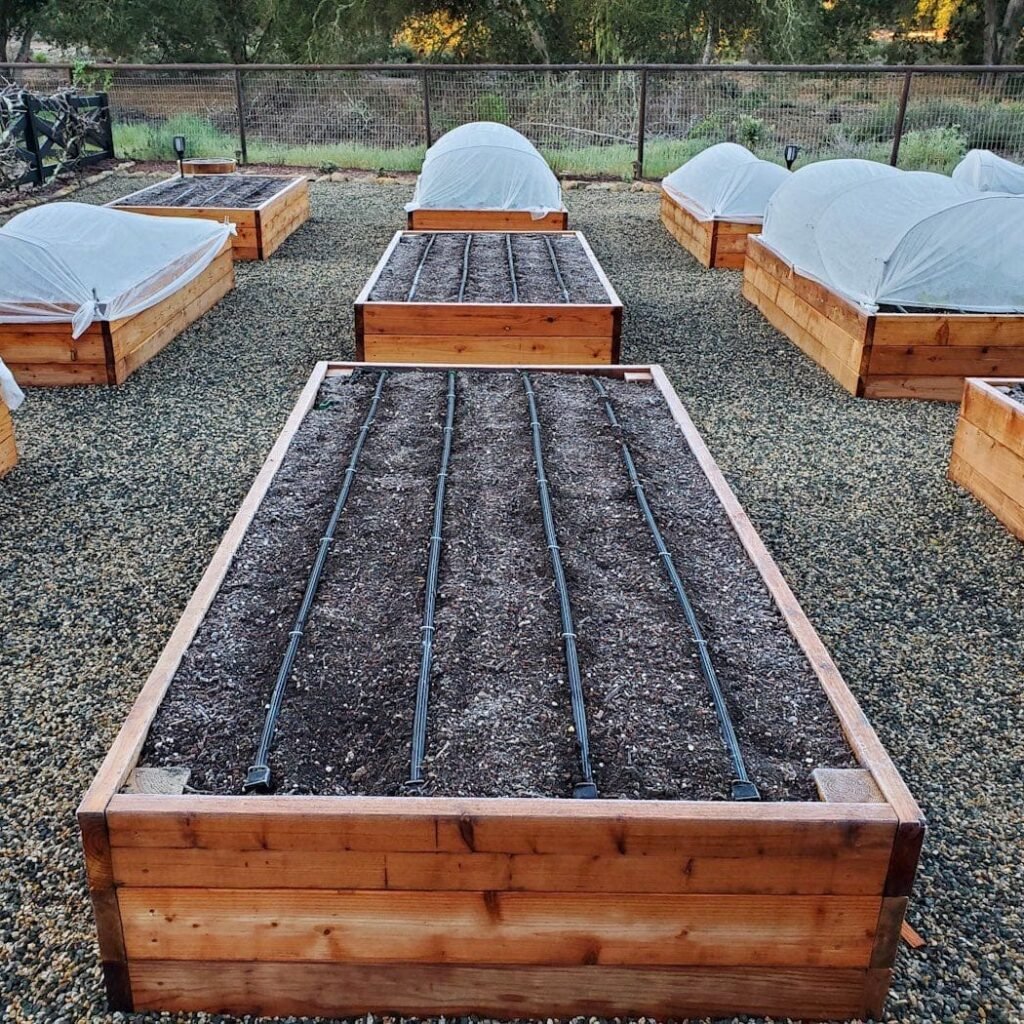
You can even pair these crops in raised beds with frost covers to extend the harvest season into December or beyond, depending on your climate.


Final Thoughts

Frost doesn’t have to mark the end of your growing season—it can be a new beginning for a hardier, sweeter harvest. Vegetables like kale, carrots, and parsnips not only endure cold weather but also reward you with richer flavors and improved textures that summer heat can’t replicate.

By choosing the right varieties, planting at the right times, and providing simple frost protection, you can turn your late-season garden into a thriving source of fresh food when everyone else’s beds are bare.

So, don’t pack away your gardening gloves just yet—embrace the chill, and let these resilient vegetables prove that the coldest months can yield some of the most rewarding crops of all.

 How to Start a Pollinator Garden on a Budget

 How to Start a Pollinator Garden on a Budget

Pollinators like bees, butterflies, hummingbirds, and even beetles play a vital role in the ecosystem—and in your own garden’s productivity. Without them, many fruits, vegetables, and flowers wouldn’t exist. Creating a pollinator-friendly space not only helps the environment but also turns your yard into a vibrant, buzzing paradise.

The good news? You don’t need a big budget or a fancy landscape design to make it happen. With a few smart choices and some creativity, you can build a pollinator garden that thrives without draining your wallet. Here’s a step-by-step guide to doing just that.


Why Pollinator Gardens Matter

Pollinator populations are declining due to habitat loss, pesticides, and climate change. By dedicating even a small patch of your yard—or a few containers on your balcony—you provide food, shelter, and safe passage for these essential creatures.

Benefits include:

  • Increased yields in fruit and vegetable gardens.
  • Greater biodiversity and healthier ecosystems.
  • Natural beauty from colorful flowers and fluttering visitors.

Step 1: Plan with Purpose (and Budget in Mind)

Before buying plants, take a moment to map out your space.

Tips:

  • Start Small: A 3×3-foot plot or a few large pots can still make a difference.
  • Choose Local: Native plants are cheaper, hardier, and more attractive to local pollinators.
  • Think Long-Term: Invest in perennials that return year after year, reducing costs over time.

Budget Tip: Draw a simple sketch of your garden to avoid buying unnecessary plants or materials.


Step 2: Choose Affordable, Pollinator-Friendly Plants

Not all flowers are equal in the eyes of pollinators. Single-petal, nectar-rich blooms are best.

Budget-Friendly Plant Options:

  • Native Wildflowers: Coneflowers, black-eyed Susans, milkweed, and coreopsis are often available as inexpensive seed packets.
  • Herbs: Mint, thyme, oregano, basil, and lavender are inexpensive, useful in the kitchen, and loved by bees.
  • Annuals: Zinnias, cosmos, and sunflowers provide vibrant color and nectar all season long.
  • Perennials: Bee balm, echinacea, and goldenrod return each year, offering long-term savings.

Budget Tip: Look for seed swaps in your community or ask neighbors for cuttings.


Step 3: Prepare the Soil Without Breaking the Bank

Healthy soil = healthy plants. But you don’t need costly fertilizers to get there.

Low-Cost Soil Boosters:

  • Compost: Make your own from kitchen scraps and yard waste.
  • Mulch Alternatives: Use shredded leaves, grass clippings, or straw instead of bagged mulch.
  • Soil Testing: Many county extension offices offer free or cheap soil testing so you know exactly what your soil needs (and don’t overspend on amendments).

Step 4: Provide Water Sources for Pollinators

Pollinators need water as much as nectar. You don’t need a fancy fountain to provide it.

Budget-Friendly Water Ideas:

  • Shallow dish filled with pebbles and water (for bees and butterflies to land safely).
  • Upcycled birdbath from an old bowl or basin.
  • A small rain garden that captures runoff for insects and birds.

Budget Tip: Change the water every few days to prevent mosquitoes.


Step 5: Add Shelter and Habitat

Pollinators need safe spaces to rest, nest, and overwinter.

Affordable Options:

  • Bee Hotels: DIY with scrap wood or drilled logs.
  • Butterfly Houses: Simple wooden boxes with vertical slits.
  • Natural Shelter: Leave some bare soil patches for ground-nesting bees.
  • Logs and Brush Piles: Offer homes for beetles and other beneficial insects.

Budget Tip: Resist the urge to over-clean your garden. Fallen leaves and sticks provide valuable habitat at no cost.


Step 6: Go Pesticide-Free

Chemical pesticides are harmful to pollinators, and organic gardening practices save money in the long run.

Alternatives:

  • Hand-pick pests like caterpillars.
  • Use homemade sprays (like diluted soap water) for minor infestations.
  • Attract beneficial insects—ladybugs, lacewings, and praying mantises—to handle pests naturally.

Step 7: Stretch Your Budget with Smart Shopping

Creating a pollinator garden doesn’t mean buying everything brand new.

Money-Saving Hacks:

  • Buy Seeds, Not Plants: A packet of seeds costs less and yields more.
  • Share and Swap: Many gardeners exchange seeds and cuttings locally.
  • DIY Containers: Upcycle buckets, barrels, or crates as planters.
  • Shop End-of-Season Sales: Nurseries often discount plants at the end of summer—perfect for perennials that will bounce back next year.

Step 8: Design for Continuous Blooms

Pollinators need food year-round, not just in spring. Plant flowers that bloom in succession to keep nectar flowing.

Bloom Schedule Example:

  • Spring: Crocus, phlox, and violets.
  • Summer: Lavender, sunflowers, and bee balm.
  • Fall: Goldenrod, asters, and sedum.

Budget Tip: Mixing annuals and perennials helps cover gaps in bloom times without overspending.


Step 9: Keep It Low-Maintenance

Pollinator gardens don’t need to be labor-intensive. In fact, less fuss often means a healthier habitat.

Low-Maintenance Tips:

  • Mulch to suppress weeds and retain moisture.
  • Group plants by water needs to avoid over-watering.
  • Let some plants go to seed—pollinators love it, and you’ll have free seeds for next year.

The Rewards of a Budget Pollinator Garden

When your first bee buzzes in or a monarch butterfly lands on your milkweed, you’ll see the immediate payoff of your efforts. Beyond beauty, you’re contributing to the survival of essential species and making your garden more productive.

And the best part? You don’t need to spend hundreds of dollars to make it happen. With careful planning, resourcefulness, and a little creativity, a pollinator garden can be one of the most affordable—and rewarding—projects you’ll ever take on.


Final Thoughts

Starting a pollinator garden on a budget isn’t just possible—it’s practical, sustainable, and fun. By choosing the right plants, repurposing materials, and focusing on what pollinators truly need, you’ll create a thriving habitat that brings life, beauty, and abundance to your outdoor space.

Every flower you plant is an invitation to pollinators. With even the smallest effort, you’re helping bees, butterflies, and birds thrive while enjoying the vibrant, colorful garden you’ve always dreamed of.

 5 Outdoor Decor Trends That Gardeners Love

 5 Outdoor Decor Trends That Gardeners Love

A garden is more than just a patch of greenery—it’s an extension of your home and personality. For many gardeners, outdoor spaces are becoming just as important as indoor ones, offering a sanctuary for relaxation, creativity, and entertaining. And just like interior design, garden decor trends evolve each year, blending function with beauty in exciting ways.

From sustainable choices to stylish design upgrades, today’s outdoor decor goes far beyond simple flowerbeds. Here are five outdoor decor trends that gardeners love right now, along with practical tips on how to bring them into your own backyard.


1. Sustainable and Eco-Friendly Design

With growing awareness of climate change and environmental impact, sustainability is at the heart of modern garden decor. Gardeners aren’t just looking for beauty—they want their outdoor spaces to be environmentally responsible, too.

What’s Trending:

  • Reclaimed Materials: Old wooden pallets, recycled bricks, and repurposed metal find new life as planters, pathways, or furniture.
  • Solar Lighting: Eco-friendly string lights, lanterns, and pathway lights powered by solar energy reduce electricity costs and environmental impact.
  • Water-Wise Features: Rain barrels, drip irrigation, and native plant landscaping help conserve water while keeping gardens thriving.

How to Try It:

  • Turn an old ladder into a vertical planter.
  • Use recycled glass or stone chips as mulch for pathways.
  • Add solar lanterns to create a soft evening glow without increasing your power bill.

Why Gardeners Love It: Sustainable design not only saves money but also creates a garden that works in harmony with nature—making it both beautiful and purposeful.


2. Outdoor Living Rooms

Gardens are no longer just for plants—they’re becoming true extensions of the home. The outdoor living room trend focuses on creating cozy, functional spaces where you can dine, lounge, and socialize.

What’s Trending:

  • Weatherproof Furniture: Sofas, chairs, and tables made with durable outdoor fabrics and materials.
  • Layered Textures: Cushions, throw blankets, and outdoor rugs in earthy tones or bold patterns.
  • Fire Features: Fire pits, outdoor fireplaces, or modern bio-ethanol fire bowls add warmth and ambiance.
  • Pergolas & Shade Structures: Providing comfort while defining “rooms” in the garden.

How to Try It:

  • Start small with a bistro table and chairs on your patio.
  • Add string lights overhead to create atmosphere.
  • Incorporate a portable fire pit for chilly evenings.

Why Gardeners Love It: These spaces allow you to enjoy your garden at any time of day, turning it into a year-round hub for relaxation and entertaining.


3. Vertical and Hanging Gardens

As urban living spaces shrink, gardeners are getting creative with vertical solutions. Vertical gardens add greenery without taking up ground space, making them perfect for small yards, balconies, or patios.

What’s Trending:

  • Living Walls: Lush panels of plants mounted on fences or house walls.
  • Hanging Planters: Macramé hangers, wall baskets, or even repurposed tin cans.
  • Trellises & Climbers: Decorative trellises covered in clematis, jasmine, or climbing roses.
  • Modular Plant Systems: Stackable planters that let you customize and expand over time.

How to Try It:

  • Install a simple pallet planter for herbs in the kitchen garden.
  • Hang a row of terracotta pots on a sunny wall.
  • Use trailing plants like ivy or pothos for dramatic cascading effects.

Why Gardeners Love It: Vertical gardens maximize limited space while doubling as living art. They also add privacy, shade, and natural insulation to outdoor areas.


4. Statement Lighting and Ambience

Lighting has gone from functional to decorative, transforming gardens into magical retreats after sunset. The latest outdoor decor trend focuses on layering lighting to highlight plants, structures, and pathways.

What’s Trending:

  • String Lights: Twinkling fairy lights strung across patios, pergolas, or trees.
  • Lanterns: Rustic candle lanterns, Moroccan-style fixtures, or modern LED lanterns.
  • Spotlighting: Uplights to highlight trees, sculptures, or garden beds.
  • Smart Lighting Systems: App-controlled lights that allow you to change brightness and color tones.

How to Try It:

  • Outline a garden path with solar stake lights.
  • Hang lanterns or fairy lights from tree branches.
  • Add uplights to your favorite tree for a dramatic nighttime centerpiece.

Why Gardeners Love It: Thoughtful lighting creates atmosphere, extends the time you can enjoy your garden, and makes outdoor gatherings unforgettable.


5. Edible Gardens with a Stylish Twist

Growing your own food is nothing new, but the latest trend makes it just as decorative as it is practical. Gardeners are blending edible plants with ornamental landscaping, creating outdoor spaces that look good and taste good.

What’s Trending:

  • Container Edibles: Fruit trees in large pots, herbs in decorative planters, and colorful lettuces in window boxes.
  • Mixing Flowers & Veggies: Pairing marigolds with tomatoes or lavender with strawberries for beauty and pest control.
  • Designer Raised Beds: Sleek metal or wood raised beds arranged in geometric layouts.
  • Outdoor Kitchen Gardens: Mini edible gardens designed near patios or grilling areas for easy harvest while cooking.

How to Try It:

  • Plant herbs like rosemary, thyme, and basil in stylish ceramic pots.
  • Add rainbow chard or purple kale to flower beds for bursts of color.
  • Build a set of raised planters in your backyard to grow salad greens and root vegetables.

Why Gardeners Love It: Edible gardens save money, encourage healthier eating, and add a sense of accomplishment. Plus, mixing edibles with decor makes gardens more functional and visually appealing.


Bonus Trend: Naturalistic Design

Many gardeners are leaning toward a more organic look rather than perfectly manicured lawns. Wildflower meadows, pollinator gardens, and natural stone pathways create a relaxed, eco-friendly atmosphere. This trend blends seamlessly with sustainability and biodiversity goals.


Final Thoughts

From stylish lighting to eco-conscious materials, these five outdoor decor trends (plus one bonus) reflect how modern gardeners view their spaces: not just as gardens, but as living, breathing extensions of their homes and lifestyles.

Whether you want to create a cozy outdoor living room, experiment with vertical gardening, or grow your own food in chic containers, there’s a trend here to suit every space and budget.

At the heart of each is a shared goal: blending functionality, beauty, and sustainability. By embracing these trends, you’ll not only create a garden that’s on-trend—you’ll design a personal retreat that brings joy, comfort, and inspiration every time you step outside.


 How to Build a DIY Green Wall for Indoors

 How to Build a DIY Green Wall for Indoors

Indoor plants don’t just look beautiful—they improve air quality, reduce stress, and create a calming environment. But what if you could take the benefits of houseplants to the next level? That’s where indoor green walls, also called living walls or vertical gardens, come in. These lush, plant-covered walls transform blank spaces into vibrant displays while boosting your home’s atmosphere and even its value.

The good news: you don’t need a professional contractor or a huge budget to build one. With some planning, basic materials, and creativity, you can create a DIY green wall that fits your style and space. Here’s a complete step-by-step guide to help you get started.


What Is a Green Wall?

A green wall is a vertical structure covered with plants, often integrated into a frame, planter pockets, or modular system. Indoors, they can range from a small framed herb garden in the kitchen to a full wall installation in a living room. Unlike potted plants on shelves, green walls maximize vertical space and create a striking natural focal point.

Why build one indoors?

  • Improves air quality by filtering toxins.
  • Acts as natural insulation, regulating temperature and humidity.
  • Reduces stress and enhances mood.
  • Adds a modern, eco-friendly design element to interiors.

Step 1: Choose the Right Location

Before you start building, select a spot that meets the following criteria:

  • Light: Most indoor plants need bright, indirect light. Place your wall near a window with filtered sunlight or plan to add grow lights.
  • Accessibility: You’ll need to water and trim plants regularly. Choose a spot that’s easy to reach.
  • Wall Strength: Ensure the wall can support the weight of your frame, planters, soil, and plants.

Pro Tip: Avoid placing your green wall directly above electrical outlets or appliances to prevent water damage.


Step 2: Decide on the Type of Green Wall

There are several DIY approaches depending on your budget and design preferences.

  1. Wall Planter Pockets
    • Fabric or felt planters that hang directly on the wall.
    • Easy to install and lightweight.
    • Great for small herbs, trailing plants, and low-maintenance greenery.
  2. Mounted Pots or Shelves
    • Use wall-mounted racks, shelves, or grid panels with small pots attached.
    • Offers flexibility for rearranging plants.
  3. Framed Green Wall
    • Build or buy a wooden frame with rows of planting cells or pockets.
    • Creates a polished, “living artwork” effect.
  4. Hydroponic Green Wall
    • Advanced option where plants grow without soil, using a nutrient-rich water system.
    • Requires more setup but reduces mess and watering needs.

Step 3: Gather Materials

For a simple framed or pocket-style green wall, you’ll need:

  • Wooden frame or grid panel (metal mesh or trellis works, too)
  • Mounting brackets, screws, and anchors
  • Waterproof backing (pond liner or heavy-duty plastic sheet)
  • Planting pockets (fabric planters, recycled bottles, or wooden boxes)
  • Potting soil or hydroponic medium
  • Indoor plants (see recommendations below)
  • Drip irrigation kit or watering can
  • Optional: grow lights for low-light rooms

Step 4: Select the Right Plants

Not all indoor plants thrive on vertical walls. Choose species that tolerate close planting, variable moisture, and partial shade.

Best Indoor Green Wall Plants:

  • Air-purifying plants: Spider plant, pothos, peace lily, Boston fern.
  • Trailing plants: Philodendron, English ivy, string of pearls.
  • Compact plants: Fittonia, peperomia, ferns, dwarf herbs.
  • Herbs for kitchens: Basil, thyme, parsley, mint (if wall gets enough light).

Mix textures and shades of green for visual interest, and add pops of color with flowering plants like orchids or bromeliads.


Step 5: Build Your Frame and Backing

  1. Measure your wall and build or buy a wooden or metal frame.
  2. Attach a waterproof sheet or pond liner to protect your wall from moisture.
  3. Fix your planting pockets, shelves, or containers securely to the frame.
  4. Mount the frame onto the wall using heavy-duty brackets and wall anchors.

Safety Tip: Always check the wall’s weight capacity before installation.


Step 6: Planting and Arrangement

  • Fill containers or pockets with lightweight potting soil.
  • Arrange larger plants at the bottom and trailing plants toward the top for balance.
  • Group plants with similar light and water needs together.
  • Consider a pattern or gradient for design impact (e.g., alternating dark and light foliage).

Step 7: Watering and Maintenance System

The key to a successful green wall is consistent watering. Options include:

  • Manual watering: Use a long-spout watering can; suitable for small setups.
  • Drip irrigation system: Install tubing at the top that drips water downward through pockets.
  • Self-watering planters: Some modular systems have built-in reservoirs.

Maintenance tips:

  • Trim plants regularly to keep them healthy and avoid overcrowding.
  • Rotate or replace plants as needed.
  • Fertilize every few weeks with a diluted liquid fertilizer.

Step 8: Add Lighting (If Needed)

If your green wall is in a dim area, add full-spectrum LED grow lights. Place them above the wall or use adjustable spotlights to mimic natural sunlight.


Design Ideas for Inspiration

  • Kitchen Herb Wall: Keep fresh basil, thyme, and mint within arm’s reach.
  • Living Room Statement Wall: Combine ferns, philodendrons, and peace lilies for a lush, jungle look.
  • Small-Space Vertical Shelf: Use wall-mounted racks with trailing plants for apartments.
  • Framed Green Art: Create a plant “painting” using succulents or moss for a modern vibe.

Benefits of an Indoor Green Wall

  • Aesthetic Appeal: Turns a blank wall into living art.
  • Health Benefits: Improves indoor air quality and reduces stress.
  • Space Saving: Maximizes vertical space in small apartments.
  • Eco-Friendly: Adds natural insulation and reduces noise.

Final Thoughts

A DIY green wall is more than just decoration—it’s a way to bring nature indoors, improve your environment, and enjoy the therapeutic benefits of gardening without needing a large yard.

With the right location, plants, and care system, you can transform any wall into a lush oasis. Whether you opt for a simple pocket planter in the kitchen or a dramatic floor-to-ceiling installation, the project offers a rewarding blend of creativity and functionality.

So roll up your sleeves, gather your materials, and get ready to build a living wall that brings life, beauty, and a touch of the outdoors into your home.

8 Plants That Symbolize Prosperity Around the World

8 Plants That Symbolize Prosperity Around the World

For centuries, humans have associated plants with meanings beyond their beauty and utility. Some symbolize love, others healing, and many are believed to bring good fortune. Across cultures, prosperity has been a recurring theme tied to greenery, with specific plants revered as lucky charms, wealth magnets, and spiritual protectors.

Whether displayed in homes, gifted during celebrations, or grown in gardens, these plants are believed to carry blessings of abundance. Let’s take a journey around the world to discover eight plants that symbolize prosperity—and why they’re still treasured today.


1. Money Tree (Pachira aquatica) – East Asia & Beyond

Perhaps the most famous prosperity plant of all, the money tree is popular in feng shui practices. Its braided trunk is thought to “lock in” financial luck, while its five-lobed leaves represent the five elements (earth, water, fire, wood, and metal).

  • Symbolism: Wealth, financial stability, and good fortune.
  • How it’s used: Often placed in offices or living rooms to attract money and positive energy. It’s also a popular gift for new business ventures.
  • Care tip: Money trees thrive in bright, indirect light and should be watered only when the top soil dries out.

2. Lucky Bamboo (Dracaena sanderiana) – China

Despite its name, lucky bamboo is not true bamboo but a resilient plant from the Dracaena family. In Chinese culture, the number of stalks in an arrangement has special meaning:

  • Two stalks = love and partnership.
  • Three stalks = happiness, wealth, and long life.
  • Eight stalks = prosperity and growth (eight is a highly auspicious number in Chinese culture).
  • Symbolism: Fortune, harmony, and prosperity.
  • How it’s used: Often displayed in homes, shops, or gifted during Chinese New Year.
  • Care tip: It grows easily in water-filled vases with pebbles but does best when transferred to soil for long-term health.

3. Jade Plant (Crassula ovata) – South Africa & Worldwide

Native to South Africa, the jade plant (also called the money plant or friendship tree) has fleshy, coin-shaped leaves that naturally evoke wealth. In feng shui, it’s thought to bring prosperity when placed near an entryway or in the southeast corner of a home.

  • Symbolism: Wealth, success, and friendship.
  • How it’s used: Commonly gifted as a housewarming present or business-opening gift.
  • Care tip: Jade plants are hardy succulents that prefer plenty of sunlight and occasional deep watering.

4. Basil (Ocimum basilicum) – India & the Mediterranean

In many cultures, basil is more than just a culinary herb. In Hindu tradition, holy basil (Tulsi) is revered as sacred, symbolizing both prosperity and spiritual purity. In Mediterranean regions, basil has long been associated with love, wealth, and protection.

  • Symbolism: Prosperity, protection, and spiritual blessing.
  • How it’s used: Tulsi is often grown near temples and homes in India, while in Europe, basil is kept as a charm to invite wealth and ward off negativity.
  • Care tip: Basil loves warmth and sunlight—keep it on a sunny windowsill or in a summer garden.

5. Citrus Trees (Oranges & Lemons) – Mediterranean & Asia

Citrus trees are a universal symbol of abundance. In Chinese culture, oranges and tangerines are especially lucky during Lunar New Year because their round shape and golden color resemble coins. In Mediterranean traditions, lemon trees symbolize longevity and wealth.

  • Symbolism: Good fortune, abundance, and renewal.
  • How it’s used: Citrus fruits are often exchanged during celebrations and displayed at home to invite prosperity.
  • Care tip: Dwarf citrus trees can thrive indoors with enough light, while outdoor trees prefer warm, sunny climates.

6. Lotus (Nelumbo nucifera) – Asia

The lotus is deeply spiritual in many Asian cultures, particularly in Hinduism and Buddhism. It grows from muddy waters yet emerges pure and beautiful, symbolizing enlightenment, resilience, and abundance. While not directly tied to money, it represents the prosperity of the spirit—a wealth that transcends material success.

  • Symbolism: Purity, spiritual prosperity, and resilience.
  • How it’s used: Lotus motifs are common in temples, art, and gardens. Lotus flowers are also offered in religious rituals.
  • Care tip: Lotuses require shallow ponds or containers of still water with plenty of sun.

7. Peony (Paeonia spp.) – China & Europe

Peonies are lush, fragrant flowers prized for their beauty. In China, they are known as the “king of flowers” and symbolize wealth, honor, and good fortune. They are especially popular during weddings and festivals as symbols of romance and prosperity.

  • Symbolism: Wealth, honor, and happy marriage.
  • How it’s used: Often depicted in Chinese art and planted in gardens to attract prosperity and beauty.
  • Care tip: Peonies thrive in well-drained soil with full sun, but they require patience—sometimes taking years to establish before blooming fully.

8. Corn (Maize) – The Americas

For Indigenous peoples of the Americas, corn has long symbolized life and abundance. Known as the “staff of life,” it represents nourishment, prosperity, and the cycle of growth. Even today, corn remains a powerful cultural symbol of harvest and plenty.

  • Symbolism: Fertility, abundance, and sustenance.
  • How it’s used: Corn husks are used in rituals, decorations, and festivals celebrating harvest.
  • Care tip: Corn requires ample sunlight, space, and fertile soil—often planted alongside beans and squash in the traditional “Three Sisters” system.

Why Prosperity Plants Matter Today

Even in our modern world, where success is measured in bank accounts rather than talismans, prosperity plants hold cultural and emotional importance. They remind us that abundance is not just about wealth—it’s about growth, health, happiness, and connection to nature.

Placing a jade plant in your living room, gifting a basil plant to a loved one, or planting citrus trees in your garden isn’t just about luck. It’s about participating in centuries-old traditions that connect humans to plants as sources of hope and prosperity.


Final Thoughts

From the braided trunks of the money tree to the sacred waters of the lotus, plants have carried symbolic meaning for generations. Whether you’re drawn to their beauty, history, or spiritual associations, prosperity plants can bring more than just aesthetic charm into your life—they carry a sense of abundance and positive energy.

Incorporating them into your home or garden may not guarantee instant wealth, but it can certainly cultivate a mindset of gratitude, growth, and possibility. After all, prosperity comes in many forms, and plants remind us of the richness that surrounds us every day.

Should You Try Aquaponics at Home?

Should You Try Aquaponics at Home?

Growing your own food has become more than just a hobby—it’s a way to eat healthier, save money, and live more sustainably. But what if you could grow vegetables and raise fish at the same time, in a system that essentially runs itself? That’s the promise of aquaponics, a method that combines aquaculture (raising fish) with hydroponics (growing plants in water).

For home gardeners, aquaponics sounds like a dream: fresh fish and fresh vegetables from the same system. But is it really practical? Should you try aquaponics at home? Let’s explore how it works, what the benefits are, and what challenges you should know before diving in.


What Is Aquaponics?

Aquaponics is a closed-loop food production system. Here’s how it works:

  1. Fish produce waste in the water (mainly ammonia).
  2. Beneficial bacteria convert ammonia into nitrates.
  3. Plants absorb the nitrates as nutrients, cleaning the water.
  4. Clean water returns to the fish tank.

The result is a symbiotic relationship where both fish and plants benefit. It’s like creating a small ecosystem in your backyard, basement, or even indoors.


The Benefits of Aquaponics

1. Grow Food in Less Space

Because aquaponics doesn’t rely on soil, plants can be grown vertically or in compact setups. This makes it ideal for urban gardeners with limited space.

2. Two Harvests from One System

Unlike traditional gardening, aquaponics gives you both plants and fish. Tilapia, trout, catfish, or koi are commonly used, providing either edible fish or ornamental species.

3. Faster Plant Growth

Since plants get a constant supply of nutrient-rich water, they often grow faster than in soil. Leafy greens, herbs, and even tomatoes thrive in aquaponic systems.

4. Water Efficiency

Aquaponics uses up to 90% less water than soil-based gardening because water is continually recycled instead of lost through runoff.

5. Chemical-Free Gardening

There’s no need for synthetic fertilizers—fish waste provides all the nutrients plants need. Plus, pesticides can’t be used (they’d harm the fish), which encourages natural, organic practices.


The Challenges of Aquaponics

While aquaponics is exciting, it’s not without its hurdles.

  • Startup Costs: Building or buying an aquaponics system can be more expensive than traditional gardening. Pumps, tanks, and grow beds add up.
  • Learning Curve: You’re managing both plants and fish, plus bacteria. Balancing pH, water temperature, and nutrient levels takes monitoring.
  • Electricity Dependence: Pumps and aerators need consistent power. Outages can harm fish and plants quickly.
  • Fish Care: Not everyone is comfortable raising live animals. Feeding schedules, tank cleaning, and disease prevention are part of the process.

Expert Note: “Aquaponics is incredibly rewarding, but it’s not as simple as dropping a goldfish in a tank and planting lettuce,” says Dr. Miguel Santos, an aquaculture researcher. “It requires patience and regular attention.”


What Can You Grow in Aquaponics?

Best Plants for Beginners:

  • Lettuce
  • Kale
  • Spinach
  • Basil
  • Mint
  • Green onions

These plants thrive because they don’t need high nutrient levels.

For Intermediate Growers:

  • Tomatoes
  • Cucumbers
  • Peppers
  • Beans

These require more nutrients and careful system management.

Fish Options:

  • Tilapia: Hardy, fast-growing, and one of the most popular choices.
  • Trout: Good for cooler climates.
  • Catfish: Tolerant of varied water conditions.
  • Koi/Goldfish: Ideal if you prefer ornamental fish over edible ones.

Types of Aquaponic Systems

  1. Media Bed Systems
    • Plants grow in gravel or clay pellets, which filter solids.
    • Simple and ideal for beginners.
  2. Nutrient Film Technique (NFT)
    • Plants grow in long channels where a thin film of water flows past roots.
    • Great for leafy greens but not suited for large plants.
  3. Deep Water Culture (Raft System)
    • Plants float on rafts with roots submerged in nutrient water.
    • Efficient for commercial setups but requires more space.
  4. Vertical Towers
    • Plants grow in stacked towers with water pumped from the bottom.
    • Perfect for small spaces and urban gardeners.

Setting Up a Home Aquaponics System

If you’re intrigued, here’s a simple beginner setup:

  1. Fish Tank: Start with 20–50 gallons for small systems.
  2. Grow Bed: A shallow container filled with clay pebbles or gravel.
  3. Water Pump: Moves water between fish tank and grow bed.
  4. Aerator: Ensures fish get enough oxygen.
  5. Plants & Fish: Choose beginner-friendly species.

Cycle the System First: Before adding fish, run the system with ammonia (or compost tea) to build up beneficial bacteria. This prevents toxic water conditions.


Maintenance Tips for Success

  • Test Water Weekly: Check pH, ammonia, nitrite, and nitrate levels.
  • Feed Fish Properly: Don’t overfeed—uneaten food pollutes water.
  • Maintain Temperature: Most systems do best between 65–75°F (18–24°C).
  • Clean Filters: Prevent clogging and keep water flow steady.
  • Harvest Smart: Stagger planting so you have a continuous supply of vegetables.

Is Aquaponics Right for You?

Aquaponics is ideal if you:

  • Love experimenting with new gardening techniques.
  • Want a sustainable food source that saves water.
  • Have some patience for the learning curve.
  • Don’t mind taking care of fish as well as plants.

It may not be right if you’re looking for a low-cost, low-maintenance system right away. Traditional raised beds or container gardening are simpler for beginners.


Final Thoughts

So, should you try aquaponics at home? If you’re intrigued by sustainable food systems, enjoy experimenting, and want both fish and vegetables from the same setup, the answer is yes. While it requires an investment of time, money, and learning, the rewards can be enormous: fresh produce, home-raised fish, and the satisfaction of running a miniature ecosystem in your own home.

For many gardeners, aquaponics becomes more than a food source—it’s a fascinating hobby and a step toward self-sufficiency. Whether you build a simple balcony setup with goldfish and herbs or scale up to a backyard greenhouse with tilapia and tomatoes, aquaponics is a glimpse into the future of home gardening.

5 Spring Tasks That Save You Summer Maintenance

5 Spring Tasks That Save You Summer Maintenance

Spring is the season of new beginnings in the garden. As temperatures warm, soil thaws, and plants burst back to life, it’s tempting to dive straight into planting and enjoy the lush growth. But experienced gardeners know that a little extra effort in spring can save countless hours of weeding, watering, and troubleshooting later in the hot, busy summer months.

Here are five essential spring tasks that drastically cut down on summer maintenance, giving you more time to enjoy your garden instead of battling problems.


1. Prepare and Amend the Soil Properly

Healthy soil is the foundation of a low-maintenance garden. Investing time in soil prep during spring reduces the need for fertilizers, pest control, and even watering in summer.

  • Test your soil: Check pH and nutrient levels. If it’s too acidic or alkaline, correct it early. Balanced soil makes plants stronger and more resilient.
  • Add compost and organic matter: A 2–3 inch layer of compost enriches soil, improves structure, and boosts moisture retention—meaning less watering in summer heat.
  • Loosen compacted soil: Use a garden fork or broadfork to aerate soil so roots grow deeper, accessing more water and nutrients.

Summer savings: Well-prepared soil grows healthier plants, which means fewer pest outbreaks, stronger resistance to drought, and reduced need for constant fertilizing.


2. Apply Mulch Early to Suppress Weeds

Weeds thrive when the weather warms. Tackling them in spring—before they take hold—saves you hours of pulling them later.

  • Apply mulch now: Spread 2–4 inches of straw, shredded leaves, bark chips, or compost around plants and over bare soil.
  • Block sunlight: Mulch prevents weed seeds from germinating.
  • Retain moisture: Mulch keeps soil cooler and reduces evaporation, cutting down your summer watering chores.

Pro tip: Apply mulch after soil has warmed slightly in spring. Mulching too early can keep soil too cool for planting.

Summer savings: Early mulching means fewer weeds to pull, fewer waterings, and healthier soil microbes working behind the scenes.


3. Install or Repair Irrigation Systems

Hand-watering is time-consuming in summer. Setting up efficient watering systems in spring ensures your garden gets consistent moisture with minimal effort.

  • Drip irrigation or soaker hoses: These deliver water directly to roots, reducing waste and preventing leaf diseases caused by overhead watering.
  • Timers: Attach a simple timer to automate watering, so your plants stay hydrated even during vacations or hot spells.
  • Check for leaks: Repair hoses, sprinklers, or connectors now, before peak summer demands.

Summer savings: Automated systems cut watering chores to near zero, conserve water, and keep plants healthier during heat waves.


4. Prune and Divide Early for Healthier Growth

Spring is the best time to shape and strengthen plants before they put energy into full growth.

  • Prune shrubs and perennials: Remove dead, diseased, or crossing branches. This prevents pest problems and improves air circulation.
  • Divide crowded perennials: Plants like daylilies, hostas, and irises benefit from dividing in spring. It rejuvenates growth and reduces summer maintenance like flopping or overcrowding.
  • Shape fruit trees and vines: Proper pruning improves fruit production and makes harvesting easier later.

Summer savings: Healthy, well-pruned plants need less staking, fewer disease treatments, and produce better results with less fuss.


5. Plan and Plant Strategically

A thoughtful planting strategy in spring saves time and effort later.

  • Group plants by water needs: Place thirsty plants together and drought-tolerant ones separately. This makes watering more efficient.
  • Choose low-maintenance varieties: Opt for disease-resistant vegetables, drought-hardy flowers, and native perennials.
  • Stagger plantings: Succession planting ensures a steady harvest instead of a glut that overwhelms you mid-summer.
  • Use companion planting: Pairing plants that repel pests (like marigolds with tomatoes) reduces the need for pesticides.

Summer savings: Smarter planting means fewer pests, less water waste, and more manageable harvests.


Bonus Task: Maintain Your Tools in Spring

Sharp, clean tools make every job easier. Take time to clean, sharpen, and oil garden tools in spring. This prevents breakdowns mid-summer and keeps chores fast and efficient.


Final Thoughts

By tackling these five spring tasks—soil preparation, mulching, irrigation setup, pruning, and strategic planting—you’ll drastically reduce the time and energy needed to maintain your garden through summer. Instead of spending long, hot days pulling weeds or hauling watering cans, you can relax and enjoy thriving plants, steady harvests, and a beautiful outdoor space.

In gardening, a little forethought goes a long way. Do the work in spring, and your summer will be all about enjoyment—not endless maintenance.

How to Water Plants During Winter Without Overdoing It

How to Water Plants During Winter Without Overdoing It

Winter often tricks gardeners into thinking their plants don’t need much care. While plants do slow down during colder months, they don’t stop needing water altogether. The challenge is striking the right balance—providing enough moisture to keep roots healthy without drowning them in soggy soil. Overwatering in winter can be just as harmful, if not more so, than underwatering.

This article walks you through everything you need to know about watering plants in winter—whether they’re indoor houseplants, outdoor perennials, or overwintering vegetables—so you can keep them alive and thriving until spring.


Why Watering in Winter Is Different

During summer, plants are actively growing and transpiring, which means they need more frequent watering. In winter, however:

  • Growth slows down: Shorter days and colder temperatures reduce photosynthesis and water use.
  • Evaporation decreases: Cooler air and lower sun intensity mean soil dries out more slowly.
  • Dormancy kicks in: Many plants enter rest mode, using just enough moisture to sustain root health.

Because of these changes, watering schedules that work in summer can lead to overwatering in winter.


General Winter Watering Principles

  1. Check Soil Before Watering
    Always feel the soil with your finger before watering. If the top inch (for houseplants) or 2–3 inches (for garden beds) is dry, it’s time to water. If it’s still damp, wait.
  2. Water Less Frequently but More Thoroughly
    Instead of frequent light sprinkles, water deeply and then let the soil dry to the right level before watering again. This prevents shallow root growth and reduces fungal issues.
  3. Avoid Watering in the Evening Outdoors
    Water earlier in the day so moisture has time to soak in before temperatures drop at night. Evening watering in winter can create ice around roots and stems.
  4. Use Room-Temperature Water Indoors
    Cold water can shock houseplants. Let tap water sit for a few hours before using it.

Watering Indoor Plants in Winter

Indoor plants are especially vulnerable to overwatering because of lower light and slower growth.

  • Reduce watering frequency: Many tropical houseplants only need water every 2–3 weeks in winter. Succulents and cacti may need even less.
  • Check for drafts and heaters: Plants near radiators or vents dry out faster, so check their soil more often.
  • Mind humidity: Dry indoor air from heating systems can stress plants. Instead of watering more, use a humidifier or place trays of water near plants to raise humidity levels.
  • Drainage matters: Make sure pots have holes. Water should flow out the bottom, not collect at the roots.

Pro tip: Pick plants up—if a pot feels lighter than usual, it’s probably time to water.


Watering Outdoor Perennials, Trees, and Shrubs

Perennials and woody plants need some moisture to get through winter, especially in areas with dry winters.

  • Before the ground freezes: Water deeply in late fall to ensure soil is moist heading into winter. Dry roots are more susceptible to cold damage.
  • During mild winter spells: If temperatures rise above freezing and the ground isn’t frozen, give perennials and shrubs a deep soak.
  • Evergreens need extra care: Plants like pines, boxwoods, and hollies lose moisture through their needles and leaves all winter. A deep watering before frost arrives helps prevent winter burn.
  • Mulch to lock in moisture: A 2–3 inch layer of mulch around perennials and shrubs slows evaporation and insulates roots.

Caution: Avoid piling mulch directly against plant stems to prevent rot.


Watering Raised Beds and Winter Vegetables

If you’re growing cold-hardy greens or overwintering garlic and onions in raised beds, watering strategies are different.

  • Check soil under covers: If you’re using row covers or low tunnels, soil may dry out less quickly. Don’t assume rain or snow is reaching underneath.
  • Water sparingly: Cold crops like spinach and kale need less water in winter, but soil should never dry out completely.
  • Avoid frozen soil: Don’t water when soil is solidly frozen. The water won’t penetrate and may instead form ice, damaging roots.

Common Winter Watering Mistakes

  • Overwatering houseplants: The biggest mistake gardeners make in winter. More houseplants die from excess water than lack of it.
  • Watering frozen ground: Pouring water on frozen soil risks ice damage and wasted effort.
  • Ignoring drainage: Winter rain and snow can saturate garden beds. Ensure good drainage to prevent root rot.
  • Using softened water indoors: Salt from water softeners builds up in soil and harms roots. Use filtered or tap water that has been allowed to sit out.

How to Tell If You’re Overwatering in Winter

Signs of too much water include:

  • Yellowing or wilting leaves despite damp soil
  • Mushy stems or roots (root rot)
  • Fungus gnats around houseplants
  • Mold or green algae growing on soil surface

If you spot these issues, cut back watering immediately, improve drainage, and repot if necessary.


Final Thoughts

Watering plants in winter requires a gentle, mindful approach. Instead of sticking to a rigid schedule, pay attention to the soil, the plant’s needs, and the weather. Less is often more—your goal is to keep roots hydrated without drowning them.

Think of it this way: in winter, plants sip rather than gulp. By giving just the right amount of water at the right time, you’ll help your garden and houseplants glide through the cold season healthy and strong—ready to burst into life again when spring arrives.

7 Tasks You Should Always Do Before First Frost

7 Tasks You Should Always Do Before First Frost

Every gardener knows that the first frost marks a turning point in the growing season. It’s the line between summer abundance and winter rest. Once temperatures dip below freezing, tender crops are lost, soil conditions change, and many plants go dormant until spring. But with the right preparation, you can protect your garden, extend your harvest, and set the stage for next year’s success.

Here are seven essential tasks you should always complete before the first frost arrives—straight from the playbook of experienced gardeners.


1. Harvest Tender Crops Before They’re Damaged

Frost-sensitive vegetables like tomatoes, peppers, cucumbers, and basil won’t survive once the temperature drops below 32°F (0°C).

  • What to do: Pick every ripe and nearly ripe fruit. For green tomatoes, try ripening them indoors in a paper bag or on a sunny windowsill. Harvest herbs like basil, parsley, and cilantro—they blacken at the first sign of frost.
  • Pro tip: Root crops (carrots, parsnips, beets) are more frost-tolerant and can stay in the ground longer with a layer of mulch.

By gathering tender crops before frost, you prevent sudden losses and maximize your harvest.


2. Protect Cold-Sensitive Plants

Some crops and ornamentals can be saved with a little extra care.

  • Covering plants: Use row covers, frost blankets, or even old sheets to shield plants from sudden cold snaps. Anchor covers at the edges to trap heat.
  • Using cloches or cold frames: Place glass or plastic covers over lettuce, spinach, or young seedlings to keep them going longer.
  • Mulching perennials: Add 2–3 inches of straw, shredded leaves, or pine needles around perennials and shrubs to insulate their roots.

This step is especially important if an early frost arrives unexpectedly but warm days are still ahead.


3. Clean Up Garden Beds

Diseased plant material, pest eggs, and fungal spores often overwinter in dead leaves and stems, ready to reemerge in spring. Cleaning up beds before frost reduces future problems.

  • Remove diseased plants: Do not compost plants with blight, powdery mildew, or rust. Instead, burn them or bag them for disposal.
  • Pull spent annuals: Clear out crops that won’t survive frost, such as beans or squash.
  • Weed thoroughly: Many weeds go to seed in fall—removing them now prevents a bigger battle in spring.

Expert tip: For healthy plant material, chop it up and add it to your compost pile to recycle nutrients.


4. Add Compost or Amend Soil

Fall is the perfect time to improve soil health. Adding organic matter before winter gives microbes time to break it down, enriching the soil by spring.

  • Spread compost: Apply 2–3 inches of compost across garden beds. Worms and winter rains will help work it into the soil.
  • Test and amend soil: If your soil test shows low nutrients, fall is a good time to add lime, rock phosphate, or organic fertilizers.
  • Cover bare soil: Prevent erosion and nutrient leaching by mulching or planting cover crops.

This step ensures that your garden starts spring with healthy, nutrient-rich soil ready for planting.


5. Plant Fall Bulbs and Cover Crops

The weeks before the first frost are prime planting time for many future blooms and soil-protecting crops.

  • Bulbs: Tulips, daffodils, crocuses, and hyacinths all need a period of cold to bloom in spring. Plant them in well-drained soil a few weeks before frost.
  • Garlic and shallots: Plant cloves in late fall to harvest the following summer. Mulch heavily for protection.
  • Cover crops: Winter rye, hairy vetch, and clover prevent erosion, fix nitrogen, and add organic matter when tilled under in spring.

By planting now, you set the stage for early color in spring and healthier soil year-round.


6. Prepare Perennials, Trees, and Shrubs

Woody perennials and fruit trees benefit from special care before frost sets in.

  • Water deeply: Give trees and shrubs a good soaking before the ground freezes, as dry roots are more vulnerable to cold.
  • Mulch at the base: Spread mulch 3–4 inches thick around the base of perennials and trees, leaving a gap around the trunk to prevent rot.
  • Prune lightly: Remove dead or diseased branches, but avoid heavy pruning, which can stimulate new growth that’s vulnerable to frost.
  • Wrap young trees: Protect thin-barked trees (like young maples or fruit trees) with tree wrap to prevent frost cracks and rodent damage.

This care helps perennials and woody plants survive harsh winters and thrive again in spring.


7. Winterize Your Garden Tools and Infrastructure

Your garden isn’t just plants—the tools, hoses, and structures that support your work also need protection.

  • Clean and store tools: Wash dirt off shovels, pruners, and hoes. Sharpen blades, then oil metal parts to prevent rust.
  • Drain hoses and irrigation: Remove hoses, empty them completely, and store them indoors. Drain drip irrigation systems to avoid burst lines.
  • Protect raised beds: If you garden in raised beds, add a layer of mulch or compost to shield soil. In very snowy areas, consider temporary covers to prevent soil compaction.
  • Check structures: Secure greenhouses, trellises, and hoop houses so they withstand wind and snow.

Taking care of tools and infrastructure saves money and ensures you’re ready to start strong in spring.


Common Mistakes to Avoid Before Frost

  • Waiting until the last minute: Frost dates can vary year to year. Keep an eye on forecasts so you’re not caught unprepared.
  • Overwatering: Watering late in the evening before frost can increase freezing damage. Water earlier in the day.
  • Forgetting tender container plants: Move potted plants indoors or into a garage before frost arrives.
  • Skipping mulch: Bare soil loses nutrients and compacts more easily over winter.

Final Thoughts

The first frost doesn’t have to spell disaster for your garden. By tackling these seven essential tasks ahead of time, you’ll preserve tender harvests, protect soil health, and prepare your garden for next spring’s growth.

Think of fall preparation as an investment: a few hours of work now ensures months of healthier soil, thriving plants, and less stress when spring planting rolls around.

So, watch your local frost dates, mark the calendar, and get ahead of the freeze—your garden will thank you for it.

How to Protect Garden Beds From Heavy Snow

How to Protect Garden Beds From Heavy Snow

For gardeners in colder regions, snow is both a blessing and a challenge. A light blanket of snow can act as natural insulation for plants and soil, but heavy snow loads can crush delicate structures, compact soil, and damage overwintering crops. With winter storms becoming more unpredictable, it’s important to know how to safeguard your garden beds from the weight and stress of heavy snow.

This guide explores practical, expert-recommended strategies to protect your raised beds, perennials, and overwintering vegetables when snow starts piling up.


Why Heavy Snow Can Be Harmful

Snow itself isn’t inherently bad for gardens—in fact, a few inches can shield soil and roots from freezing winds. However, too much snow can cause problems:

  • Compacted Soil: Repeated heavy snowfalls can press soil particles tightly together, reducing air pockets needed by roots and beneficial microbes.
  • Crushed Plants: Perennials, shrubs, or overwintering vegetables may break or smother under snow’s weight.
  • Damaged Structures: Raised beds, trellises, row covers, and hoops can collapse under accumulated snow.
  • Delayed Spring Warm-Up: Thick snow layers insulate soil so well that it stays frozen longer, delaying spring planting.

The key is finding balance—using snow as insulation while preventing its excess weight from doing harm.


Step 1: Mulch to Insulate Soil

A layer of mulch helps stabilize soil temperatures and prevents frost heaving (when soil repeatedly freezes and thaws, pushing plants upward).

  • Best mulches for snow-heavy areas: Straw, shredded leaves, pine needles, or compost.
  • Application depth: Spread 3–4 inches over bare soil or around perennials, making sure not to suffocate plant crowns.
  • Expert tip: Mulch before the first major snowfall so it’s in place to buffer plants.

Step 2: Protect Perennials with Covers

Delicate perennials and overwintering crops need added shielding against heavy snow pressure.

  • Burlap Wraps: Wrapping shrubs and perennials in burlap helps them hold shape while shedding snow.
  • Row Covers: Lightweight fabric stretched over hoops prevents snow from sitting directly on crops like spinach or kale.
  • Evergreen Boughs: Laying pine or fir branches over beds adds insulation while allowing snow to filter through more gently.

Step 3: Strengthen Garden Structures

Snow load can quickly collapse flimsy supports. Preparing in advance keeps your garden protected.

  • Hoop Houses & Tunnels: Use sturdy PVC or metal hoops spaced closely together to prevent sagging. Reinforce with a center ridge pole if possible.
  • Cold Frames: Check that lids close tightly and frames are solid. Slanted tops shed snow more effectively than flat ones.
  • Raised Beds: Inspect wooden frames for rot or loose screws—snow adds weight, and weak boards may bow or split.

Step 4: Manage Snow Buildup

Sometimes, snow removal is necessary to prevent damage.

  • Shake Shrubs Gently: Use a broom to lightly tap branches, knocking off excess snow without breaking them.
  • Clear Structures: After storms, brush snow off row covers, tunnels, and cold frames before it freezes solid.
  • Leave Some Snow: A light layer over mulched soil provides beneficial insulation—avoid over-clearing.

Step 5: Prevent Ice Damage

Heavy snow often leads to ice buildup, which is harder on plants and soil.

  • Avoid Salt: Don’t use salt near beds, as it damages soil and roots. Instead, spread sand or gravel on walkways.
  • Drainage Check: Ensure garden beds have good drainage so melting snow doesn’t create ice pools that suffocate roots.
  • Sloped Covers: Row covers or cold frames with angled tops shed both snow and ice more effectively.

Step 6: Support Overwintering Crops

If you grow vegetables through winter, protecting them from heavy snow ensures extended harvests.

  • Double Layer Protection: Combine low tunnels with row covers for insulation and snow resistance.
  • Cold-Hardy Vegetables: Spinach, kale, and mache can survive under snow if shielded by mulch or row covers.
  • Harvest Smart: Pick outer leaves before big storms to reduce stress on plants under snow weight.

Step 7: Prepare for Spring Recovery

Despite best efforts, snow may still cause damage. Planning for recovery minimizes setbacks.

  • Loosen Soil: If soil becomes compacted after winter, gently loosen it with a fork—avoid over-tilling.
  • Replenish Mulch & Compost: Refresh nutrients lost over winter by adding compost or organic fertilizer.
  • Prune Damaged Plants: Cut back broken branches or stems on perennials to encourage healthy regrowth.

Common Mistakes to Avoid

  • Using Plastic Tarps Directly on Soil: They trap moisture, encouraging mold and rot.
  • Over-Mulching: More than 6 inches of mulch can suffocate roots and delay spring warm-up.
  • Waiting Too Long: Protective measures should be in place before the first heavy snowfall.
  • Ignoring Drainage: Poor drainage under melting snow leads to root rot.

Final Thoughts

Heavy snow is inevitable in many climates, but it doesn’t have to ruin your garden beds. By combining mulch, strong structures, proper covers, and careful snow management, you can shield your soil and plants from winter’s harshest blows.

Think of snow protection as a long-term investment—every effort you make in fall and early winter safeguards your soil health, perennials, and crops for spring. With the right preparation, your garden won’t just survive under the snow; it will thrive when the thaw arrives.