This Farmer Earns ₹5 Lakh Per Acre From Guava Using a Trellis System, Harvesting for 6 Months Straight

This Farmer Earns ₹5 Lakh Per Acre From Guava Using a Trellis System, Harvesting for 6 Months Straight

A Shift From Traditional Farming to Innovation

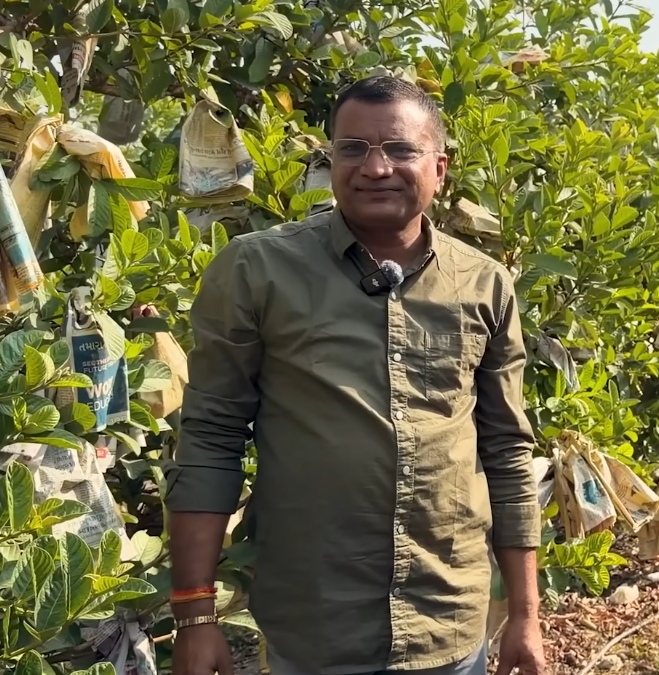
In many parts of India, guava farming still follows traditional methods where plants are grown densely, limiting sunlight and airflow and resulting in lower yields. Farmers often depend on one or two harvest cycles, which leads to unstable income. But in Rupakheda village of Madhya Pradesh, farmer Amrit Patidar is proving that a small change in technique can completely transform farming economics.

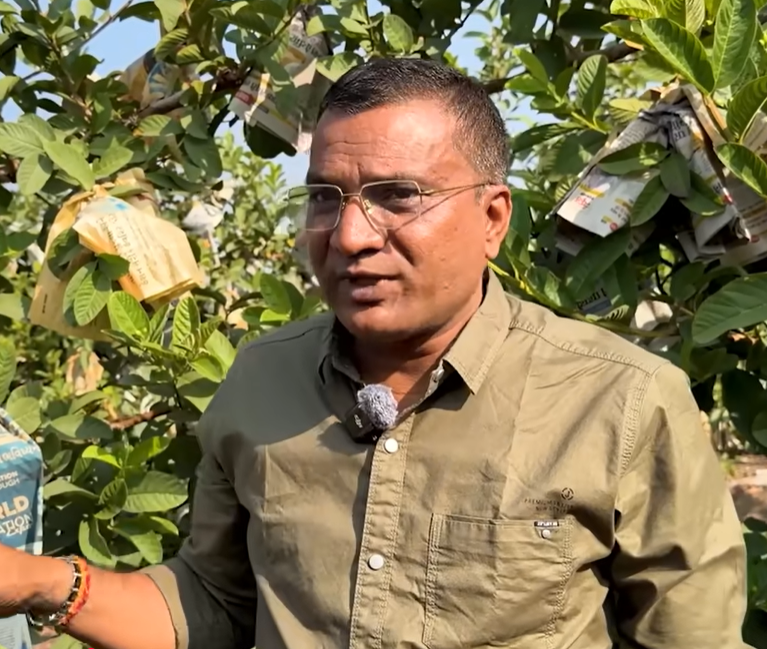
Amrit began his journey like most farmers, cultivating soybean and wheat with limited returns. “We used to earn just ₹10,000 to ₹15,000 per bigha,” he says. Like many, he accepted this as the reality of farming until a visit to progressive farms in Raipur around 2012 changed everything.

“There we saw guava plants grown on wires like grapes. At first, we didn’t believe it,” he recalls. “We thought—how will fewer branches give us more production?”

Despite his doubts, the results he saw convinced him to experiment. By 2015, he had adopted the trellis system on his own farm.


What Makes the Trellis System Different

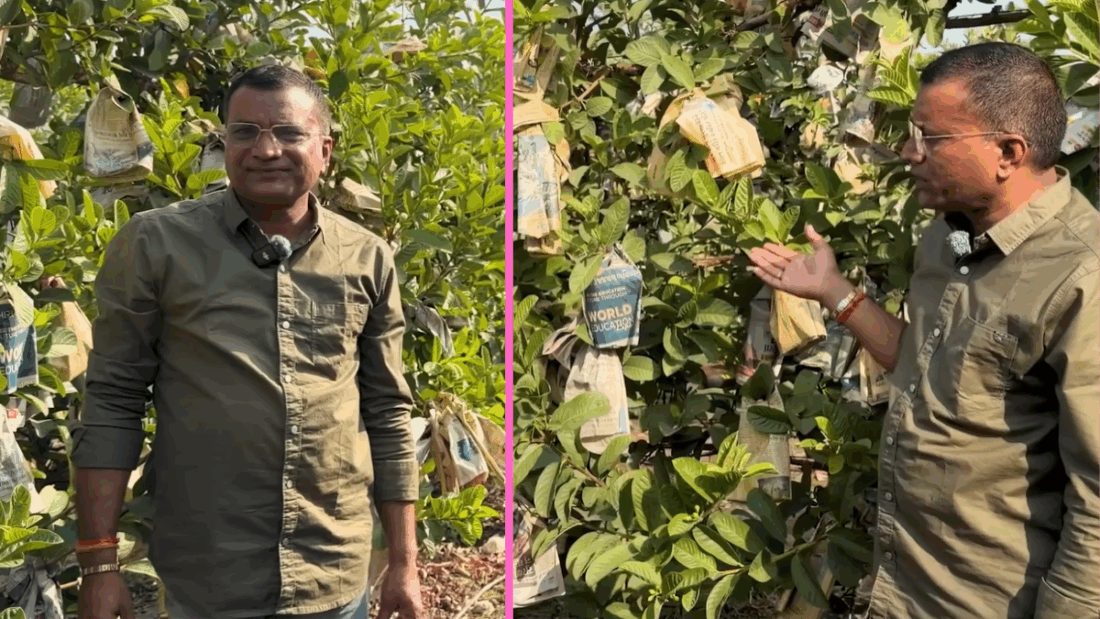
Unlike traditional guava trees that grow in dense, unstructured forms, Amrit trains each plant along horizontal wires supported by a trellis system. The plant grows vertically at first, and then branches are spread across multiple wire levels, creating an open canopy.

“This is just like grape farming,” he explains. “You can see every branch clearly, sunlight reaches everywhere, and the plant stays healthy.”

The benefits are immediately visible. With proper airflow and sunlight, disease pressure reduces, and farm operations become easier. “Even tractors can move inside the farm for spraying and harvesting,” he adds.


Better Spacing, Stronger Plants

Amrit follows a spacing of 13 by 8 feet, allowing around 418 plants per acre. While this is fewer than traditional plantations, each plant performs far better.

“Earlier we also thought fewer plants means less production,” he admits. “But when we did it practically, we saw the opposite.”

Each plant now produces between 40 to 55 kilograms of guava, and total production reaches around 20 tons per acre. However, he is careful not to overburden the plants.

“We don’t push beyond 55 kg per plant,” he says. “If the plant weakens once, it takes a long time to recover.”


Image Source: YouTube – Indian Farmer Channel

Six Months of Continuous Harvesting

One of the biggest advantages of this system is the extended harvesting period. Unlike traditional farming, where harvesting is limited, Amrit’s farm produces continuously for months.

“Our harvesting starts from October end and continues till May,” he explains. “It keeps going for almost six months.”

This continuous production ensures regular income instead of a one-time earning. “It’s not like everything comes at once and then stops. Income keeps coming,” he adds.


Turning Farming Into a Profitable Business

The financial results are impressive. Amrit earns around ₹7 to ₹8 lakh per acre annually, with costs of ₹2 to ₹2.5 lakh. This leaves him with a net profit of ₹4 to ₹5 lakh per acre.

“If you compare this with soybean or wheat, the difference is huge,” he says. “Farming should be treated like an industry.”

He also highlights the importance of quality in the market. “In the same truck, one farmer’s produce sells at ₹40 and another’s at ₹70 per kg,” he explains. “Quality makes all the difference.”


Scientific Practices Behind His Success

Amrit’s success is built on consistent and scientific farming practices. He prefers planting in April and May to ensure strong root development before the monsoon.

“If you plant before rains, the plant becomes much stronger,” he says. “A two-month difference can make the plant look 8–10 months older.”

He uses drip irrigation with multiple lines to ensure water reaches deep into the soil. For nutrition, he applies organic inputs like cow dung and oil cake mixtures.

“We give 20–22 kg of cow dung per plant every year,” he explains. “Along with that, we use neem, mustard, and other oil cakes.”

Pruning is another critical task. “Work starts right after pruning,” he says. “You have to decide which branches to keep and which to remove.”


Challenges That Need Attention

Despite the benefits, the system comes with challenges. Pests like nematodes and mealybugs can affect the crop if not managed properly.

“Nematodes are inside the soil, and mealybugs attack from above,” he explains. “You have to keep working continuously to control them.”

However, the open structure of the trellis system makes monitoring easier compared to traditional dense farming.


Image Source: YouTube – Indian Farmer Channel

A Clear Warning for Farmers

Amrit is very clear in his advice to other farmers. He cautions against blindly copying what they see online.

“Don’t jump into anything directly after watching videos,” he says. “Many farmers invest without understanding and then face losses.”

Instead, he recommends a gradual approach. “Start with half an acre, learn properly, visit farms, and then expand,” he advises.


Farming as an Industry

For Amrit, farming is not just a tradition—it is a business.

“I believe farming is an industry,” he says. “If you treat it like a business, it will give you income like a business.”

His journey reflects a larger shift in agriculture, where knowledge, planning, and innovation are becoming more important than ever.


The Bigger Lesson

Amrit Patidar’s story is not just about guava farming, but about a shift in mindset. By adopting a trellis system and focusing on plant health, quality, and efficiency, he has transformed a single acre into a sustainable and high-income source.

“If you understand farming properly, it can give you everything,” he says.

His journey highlights that farming is no longer limited to survival—it can become a scalable and profitable venture for those willing to learn, adapt, and apply scientific practices.

Reported based on field interaction and farmer interview in Ratlam, Madhya Pradesh.
Income and yield figures may vary depending on location, soil, and farm management practices.

Sources

Trellis system: https://en.wikipedia.org/wiki/Trellis_(architecture)

Field interview with farmer Amrit Patidar, Ratlam (Madhya Pradesh)

Instagram: https://www.instagram.com/amrit.patidar.9/

Guava farming guide: https://www.agrifarming.in/guava-farming

aboutinner

PWD Invites Urgent Tender for Electrical Setup Ahead of West Bengal Assembly Elections 2026

In preparation for the upcoming West Bengal Assembly Elections 2026, the Public Works Department (PWD), Howrah Electrical Division, has issued an urgent short notice inviting tenders for temporary electrical installations at a key accommodation site for security personnel.

According to the official notice (NIT No. WBPWD/EE/HED/NIT-113 of 2025–2026), the project involves setting up temporary electrical infrastructure and related utilities at B.E. College Model School, IIEST Campus in Howrah, where male and female Central Armed Police Forces (CAPF) personnel will be housed during election deployment.

The tender process has been marked as “Election Urgent”, highlighting the time-sensitive nature of the work. Interested and eligible contractors with prior experience in similar government projects—particularly election-related infrastructure—are encouraged to apply.

Strict Eligibility Criteria

The PWD has outlined stringent qualification requirements for bidders. Contractors must possess:

  • Valid GST registration, PAN card, and trade license
  • Professional Tax clearance
  • Electrical contractor license
  • Credentials demonstrating similar work completed in the past three years
  • Income tax records for the last three years

Preference will be given to agencies with prior experience in setting up facilities for police or security forces during elections.

Submission Timeline

  • Last date for permission to participate: March 30, 2026 (12:30 PM)
  • Final submission deadline: March 30, 2026 (1:30 PM)
  • Tenders will be opened on the same day in the presence of bidders’ representatives.

Officials have emphasized that late submissions will not be considered under any circumstances.

Project Scope and Duration

The selected contractor will be responsible for executing the work in accordance with government norms. The project duration is specified as 46 days or until the election process concludes, whichever is longer.

Transparency and Compliance Measures

The department has reiterated strict anti-corruption guidelines. Any attempt at canvassing or offering inducements to government officials will lead to immediate disqualification. Additionally, bidders are required to deposit earnest money equivalent to 2% of the tender value.

PWD authorities have also reserved the right to reject any or all bids without assigning reasons, reinforcing procedural transparency.

Check official pdf here – https://semmozhipoonga.org/wp-content/uploads/2026/03/nit-113.pdf

Coimbatore Corporation Hands Over Semmozhi Poonga Maintenance to Private Firm at ₹6.7 Crore Annual Cost

Coimbatore Corporation Hands Over Semmozhi Poonga Maintenance to Private Firm at ₹6.7 Crore Annual Cost

The Coimbatore City Municipal Corporation has taken a significant step in ensuring the long-term upkeep and sustainability of the newly developed Semmozhi Poonga by entrusting its maintenance to a private agency. The decision, formalized through a resolution passed by the Corporation Council on March 6, 2026, reflects a growing trend among urban local bodies to collaborate with private firms for efficient management of public infrastructure.

Spread across 45 acres, Semmozhi Poonga is one of Coimbatore’s most ambitious green projects, designed to serve as a major recreational and ecological space for residents. With landscaped gardens, children’s play zones, water features, and dining areas, the park is expected to attract a large number of visitors daily. Maintaining such a vast and dynamic space requires consistent effort, technical expertise, and a sizeable workforce—factors that influenced the Corporation’s decision to outsource the responsibility.

Under the new arrangement, M/s Srinivas Waste Management Services Pvt. Ltd. has been awarded the maintenance contract. The firm is already familiar with the city’s waste management systems, as it handles garbage collection across all Corporation zones under the solid waste management programme. Leveraging its existing experience and operational network, the agency is expected to ensure high standards of cleanliness and upkeep within the park.

A total of 228 personnel will be deployed for the maintenance of Semmozhi Poonga, highlighting the scale and complexity of the operation. The workforce will include sanitary workers, gardeners, supervisors, and specialized staff such as electricians, plumbers, and CCTV monitoring personnel. Additionally, security staff and pantry workers will be engaged to enhance visitor safety and convenience. This diverse team will work collectively to ensure that all aspects of the park—from landscaping to sanitation—are managed effectively.

The responsibilities assigned to the private agency are comprehensive. Apart from routine cleaning, the firm will be tasked with maintaining toilets, children’s play areas, and dining zones. Special emphasis has been placed on preventing water stagnation, a critical factor in avoiding mosquito breeding and the spread of vector-borne diseases. Regular spraying and quality checks will also be conducted to maintain hygiene standards and safeguard public health.

Another key aspect of the contract involves the procurement of necessary materials and equipment. The agency will supply personal protective equipment (PPE) for workers, cleaning materials, restroom accessories, and gardening tools. This integrated approach ensures that the maintenance process is not hindered by shortages or delays in acquiring essential supplies.

The annual cost of maintaining Semmozhi Poonga has been estimated at ₹6.70 crore. This expenditure covers wages for the workforce, procurement of materials, and other operational costs. While the amount is substantial, officials believe that investing in proper maintenance is crucial to preserving the park’s infrastructure and ensuring a positive experience for visitors. Well-maintained public spaces not only enhance the city’s aesthetic appeal but also contribute to the overall quality of life.

The decision to involve a private firm has sparked discussions among residents and civic observers. Supporters argue that professional agencies bring efficiency, accountability, and specialized expertise, which can lead to better outcomes compared to traditional municipal management. Critics, however, emphasize the need for strict monitoring and transparency to ensure that public funds are utilized effectively and that service standards are consistently met.

Municipal authorities have assured that the Corporation will closely supervise the agency’s performance. Regular inspections and performance reviews are expected to be part of the oversight mechanism. By maintaining a balance between outsourcing and accountability, the Corporation aims to set a benchmark for public-private partnerships in urban governance.

Semmozhi Poonga represents a significant investment in Coimbatore’s green infrastructure and urban development. Its success will depend not only on its design and facilities but also on the quality of its maintenance. With the new arrangement in place, the Corporation is hopeful that the park will remain clean, safe, and welcoming for years to come.

As cities continue to expand and public spaces become increasingly important, initiatives like this highlight the evolving strategies adopted by local governments. The collaboration between the Coimbatore Corporation and a private agency could serve as a model for other cities seeking sustainable and efficient ways to manage large-scale public amenities.

Growing Strawberries at Home By Shalini Kapruwan (Beginner’s Guide from 5+ Years Experience)

Growing Strawberries at Home By Shalini Kapruwan (Beginner’s Guide from 5+ Years Experience)

Growing strawberries at home is one of the most rewarding gardening experiences—especially for beginners. With the right care and a little patience, you can harvest fresh, juicy, organic strawberries even in small containers.

I’ve been growing strawberries in my terrace garden for over 5 years, focusing on container gardening in Indian conditions. Using simple grow bags and natural inputs, I’ve harvested over 4 kg of strawberries in a single season.

In this guide, I’ll share practical, real-world tips that actually worked for me.


Why Strawberries Are Perfect for Beginners

Strawberries are ideal if you’re new to gardening because:

  • They grow easily in containers
  • Require very little space
  • Start producing fruit within a few months
  • Multiply naturally through runners (baby plants)

Even if you only have a small balcony or terrace, you can grow a healthy strawberry garden.


Best Time to Plant Strawberries in India

The ideal planting season is:

September to November

During this period:

  • Plants focus on vegetative growth
  • Runners (baby plants) develop
  • Flowering and fruiting begin in winter

In my experience, planting in October gave the best results, as plants had enough time to establish before flowering.


Seed vs Nursery Plants: What Should You Choose?

While strawberries can be grown from seeds, I don’t recommend it for beginners.

My Recommendation:

  • Buy plants from a local nursery (₹40–₹50 per plant)
  • Choose runner-producing varieties like Chandler

Why nursery plants?

  • Seeds often have low germination rates
  • Growth is slow and inconsistent
  • Nursery plants are faster, stronger, and more reliable

Understanding Strawberry Runners (Natural Propagation)

Strawberry plants naturally produce long shoots called runners.

  • Each runner forms a baby plant at the tip
  • When it touches soil, it develops roots
  • You can later cut and grow it as a new plant

From just 2 plants, I was able to grow 20+ plants in one season using runners.


Choosing the Right Container

Strawberries grow well in small spaces, but container size directly affects yield.

Ideal Container:

  • Grow bag size: 24 × 9 inches
  • Height: At least 9 inches

Why Grow Bags Work Best:

  • Better aeration for roots
  • Prevent waterlogging
  • Healthier root development

You can also use:

  • Hanging baskets
  • Plastic pots

From my experience, very small pots produce only a few strawberries and reduce yield after 2–3 harvest cycles.


Perfect Soil Mix for Strawberries

Strawberries are heavy feeders, so nutrient-rich soil is essential.

Ideal Soil Mix:

  • 40% cow dung manure
  • 30% garden soil
  • 30% cocopeat

Cocopeat improves moisture retention and aeration, which is important because strawberry roots are shallow.

Feeding Schedule:

  • Add 1–2 handfuls of vermicompost every 15 days

Healthy soil = bigger leaves = more fruit production.


Sunlight & Watering Requirements

Sunlight:

  • Needs good sunlight (5–6 hours daily)
  • Can tolerate heat up to 45°C, only if:
    • Watering is consistent
    • Plants are given partial shade during extreme heat

Watering:

  • Keep soil consistently moist
  • Avoid overwatering (can cause root rot)

A common mistake I made early on was overwatering, which led to weak plants and fewer fruits.


How Many Plants Per Container?

In a 24 × 9 inch grow bag:

  • Grow 10–12 plants comfortably
  • Avoid overcrowding

Use runners to expand into new containers instead of crowding one pot.


How to Propagate Strawberry Plants

Simple Method:

  1. Place the runner (baby plant) into a new pot
  2. Let it root naturally
  3. Once established, cut it from the parent plant

After Transplanting:

  • Keep plants in shade for 3–4 days
  • Gradually move to sunlight

Flowering & Harvest Timeline

  • Flowering: January–February
  • Harvesting: Continues until June

Fruits take longer to ripen in cold weather but ripen faster as temperatures rise.


Important Care Tips During Fruiting

  • Do not let fruits touch the soil (prevents rotting)
  • Use mulching (dry leaves work well)

After Each Harvest:

  • Add vermicompost
  • Continue regular watering

I noticed that consistent feeding after harvest helped my plants produce continuously for months.


Common Mistakes to Avoid

  • Overwatering → root rot
  • Too much nitrogen → more leaves, fewer fruits
  • Small containers → reduced yield
  • Letting fruits touch soil → rotting

Real Results from My Garden

From my terrace garden setup:

  • Grown entirely in small containers
  • Expanded plants using runners
  • Harvested over 4 kg of strawberries

The fruits were fresh, juicy, and completely organic.


Final Thoughts

Growing strawberries at home is simple if you follow the basics:

✔ Start with healthy nursery plants
✔ Use nutrient-rich soil
✔ Provide proper sunlight and watering
✔ Multiply plants using runners

With a little patience and care, you can enjoy fresh, homegrown strawberries for months.

How to Grow Carrots at Home: Carrot Types, Benefits, Nutrition, Juice & Recipe Ideas

How to Grow Carrots at Home: Carrot Types, Benefits, Nutrition, Juice & Recipe Ideas

Carrots are one of the easiest and most rewarding vegetables to grow at home. Whether you have a spacious backyard or a small balcony garden, carrots can thrive with just a little care and attention. Beyond their vibrant color and crunchy texture, carrots are packed with nutrients and offer numerous health benefits. In this guide, we’ll walk you through how to grow carrots at home, explore different carrot types, understand their nutritional value, and even share juice and recipe ideas.


Why Grow Carrots at Home?

Growing carrots at home ensures you get fresh, chemical-free produce straight from your garden. Homegrown carrots are often sweeter, more flavorful, and more nutritious than store-bought ones. Plus, gardening itself is a relaxing and fulfilling activity.

Carrots are also beginner-friendly. With proper soil preparation and watering, you can successfully grow them even if you’re new to gardening.


Carrot Types You Should Know

Carrot Types You Should Know

Carrots come in various shapes, sizes, and colors. Choosing the right type depends on your soil and space.

1. Nantes Carrots

  • Cylindrical shape with blunt tips
  • Sweet and tender
  • Ideal for beginners

2. Imperator Carrots

  • Long and slender
  • Commonly found in supermarkets
  • Require deep, loose soil

3. Danvers Carrots

  • Medium length with a conical shape
  • Good for heavy or clay soil
  • Strong flavor

4. Chantenay Carrots

  • Short and thick
  • Perfect for shallow or container gardening
  • Very hardy

5. Rainbow Carrots

  • Available in purple, yellow, red, and white
  • Rich in different antioxidants
  • Visually appealing for meals

How to Grow Carrots at Home

Growing carrots is simple if you follow these steps:

1. Choose the Right Location

Carrots need full sunlight for at least 5–6 hours a day. Choose a spot that gets plenty of natural light.

2. Prepare the Soil

  • Soil should be loose, sandy, and well-drained
  • Remove stones and debris to prevent misshapen roots
  • Add compost to enrich the soil

3. Sowing Seeds

  • Sow seeds directly into the soil (carrots don’t transplant well)
  • Plant seeds about ¼ inch deep
  • Space rows 1–2 feet apart

4. Watering

  • Keep the soil consistently moist
  • Avoid overwatering, which can cause rot
  • Light watering daily works best during germination

5. Thinning

Once seedlings grow about 2 inches tall, thin them out to give space for proper root development.

6. Fertilizing

Use a low-nitrogen fertilizer. Too much nitrogen leads to leafy growth instead of root growth.

7. Harvesting

  • Carrots are ready in 60–80 days depending on the variety
  • Gently pull them out when they reach the desired size

Common Problems and Tips

  • Forked carrots: Caused by hard soil or stones
  • Slow growth: Lack of nutrients or sunlight
  • Pests: Use natural remedies like neem oil
  • Weeds: Keep the area weed-free to avoid competition

Carrot Benefits for Health

Carrots are a powerhouse of health benefits:

1. Improves Eye Health

Rich in beta-carotene, carrots help maintain good vision and prevent eye disorders.

2. Boosts Immunity

Loaded with antioxidants and vitamins, carrots strengthen your immune system.

3. Supports Heart Health

Fiber and potassium help regulate blood pressure and cholesterol levels.

4. Promotes Skin Health

Carrots contribute to glowing skin due to their high vitamin A content.

5. Aids Digestion

Dietary fiber helps improve digestion and prevent constipation.


Carrot Nutrition Facts

Carrots are low in calories but high in essential nutrients. Here’s what you get in a 100g serving:

  • Calories: ~41
  • Carbohydrates: 9.6g
  • Fiber: 2.8g
  • Vitamin A: Over 300% of daily requirement
  • Vitamin K, Vitamin C, and Potassium

The high beta-carotene content converts into vitamin A, which is essential for vision, immunity, and skin health.


Refreshing Carrot Juice Recipe

Carrot juice is one of the healthiest drinks you can make at home.

Ingredients:

  • 4–5 fresh carrots
  • 1 small piece of ginger
  • ½ lemon (optional)
  • Honey (optional)

Method:

  1. Wash and peel the carrots
  2. Cut into small pieces
  3. Blend with ginger and a little water
  4. Strain if needed
  5. Add lemon juice and honey for taste

Benefits of Carrot Juice:

  • Detoxifies the body
  • Improves skin glow
  • Boosts energy levels

Easy Carrot Recipe Ideas

Carrots are versatile and can be used in a variety of dishes.

1. Carrot Salad

  • Grated carrots with lemon juice, salt, and coriander
  • Light, fresh, and nutritious

2. Carrot Halwa (Indian Dessert)

  • Made with grated carrots, milk, sugar, and ghee
  • A delicious traditional treat

3. Carrot Soup

  • Blend cooked carrots with spices and herbs
  • Perfect for a healthy meal

4. Stir-Fried Carrots

  • Quick sauté with garlic and spices
  • Great side dish

5. Carrot Smoothie

  • Blend carrots with banana, milk, and honey
  • A healthy breakfast option

Tips for Growing Carrots in Containers

If you don’t have a garden, you can still grow carrots in pots.

  • Use deep containers (at least 12 inches)
  • Choose short varieties like Chantenay
  • Ensure proper drainage
  • Keep soil loose and well-aerated

Container gardening is perfect for urban homes and balconies.


Best Time to Grow Carrots

Carrots prefer cooler weather.

  • In India: Best grown during winter (October to February)
  • Avoid extreme heat as it affects root development

Final Thoughts

Growing carrots at home is simple, rewarding, and highly beneficial. From choosing the right carrot types to understanding their benefits and nutrition, carrots truly deserve a place in your garden. Not only do they provide fresh produce, but they also contribute to a healthier lifestyle.

With their versatility, you can enjoy carrots in juices, salads, desserts, and cooked dishes. Whether you’re a gardening enthusiast or a beginner, carrots are a perfect crop to start with.

So grab some seeds, prepare your soil, and start growing your own delicious and nutritious carrots today!

How to Grow Broccoli in Your Kitchen Garden: Its Benefits, Nutrition & How to Cook Broccoli

How to Grow Broccoli in Your Kitchen Garden: Its Benefits, Nutrition & How to Cook Broccoli

Broccoli is one of the most nutritious and versatile vegetables you can grow in your kitchen garden. Packed with essential vitamins, minerals, and antioxidants, this green superfood is not only easy to cultivate but also offers numerous health benefits. Whether you are a beginner gardener or an experienced grower, learning how to grow broccoli at home can be a rewarding experience.

In this guide, we’ll explore everything you need to know—from planting and caring for broccoli in your kitchen garden to understanding broccoli benefits, broccoli nutrition, and how to cook broccoli in delicious ways.

How to Grow Broccoli in Your Kitchen Garden

Why Grow Broccoli in Your Kitchen Garden?

Growing broccoli at home has several advantages. First, you get fresh, chemical-free produce right at your doorstep. Second, broccoli plants don’t require too much space, making them perfect for small kitchen gardens or even balcony pots.

Additionally, homegrown broccoli tastes better than store-bought ones and retains more nutrients. It is also cost-effective in the long run and gives you full control over how your vegetables are grown.


How to Grow Broccoli in Your Kitchen Garden

1. Choosing the Right Variety

There are different types of broccoli, but the most common ones for kitchen gardening include:

  • Calabrese broccoli
  • Sprouting broccoli
  • Purple broccoli

Choose a variety that suits your local climate. In India, broccoli grows best during the winter season.


2. Ideal Climate and Soil

Broccoli is a cool-season crop and thrives in temperatures between 18°C to 24°C. It grows best in well-drained, fertile soil rich in organic matter.

Soil requirements:

  • pH level: 6.0 to 7.0
  • Rich in compost or organic manure
  • Good drainage

Before planting, mix compost into the soil to improve fertility.


3. Planting Broccoli Seeds

You can grow broccoli either from seeds or seedlings.

Steps to plant:

  1. Sow seeds about 0.5 cm deep in seed trays.
  2. Keep the soil moist but not waterlogged.
  3. Seeds germinate in 5–10 days.
  4. Transplant seedlings when they have 4–5 leaves.

Maintain spacing of about 30–45 cm between plants.


4. Watering and Care

Broccoli requires consistent moisture for proper growth.

  • Water regularly, especially during dry periods
  • Avoid overwatering
  • Use mulch to retain moisture

Ensure the plants receive at least 5–6 hours of sunlight daily.


5. Fertilizing

Feed your broccoli plants with organic fertilizers like compost, vermicompost, or liquid fertilizers every 2–3 weeks. Nitrogen-rich fertilizers help in healthy leaf and head development.


6. Pest and Disease Control

Common pests include aphids, cabbage worms, and flea beetles.

Natural solutions:

  • Neem oil spray
  • Hand-picking pests
  • Companion planting (like mint or marigold)

Keep your garden clean and monitor plants regularly.


7. Harvesting Broccoli

Broccoli is ready to harvest in 60–90 days after planting.

  • Cut the main head when it is firm and tight
  • Harvest before flowers start to open
  • Side shoots will continue to grow after cutting

Broccoli Benefits

Broccoli Benefits

Broccoli is often called a “superfood” due to its incredible health benefits.

1. Boosts Immunity

Broccoli is rich in vitamin C, which strengthens the immune system and helps fight infections.

2. Supports Heart Health

It contains fiber, antioxidants, and compounds that reduce cholesterol levels and improve heart health.

3. Aids in Digestion

The high fiber content promotes healthy digestion and prevents constipation.

4. Helps in Weight Loss

Low in calories and high in nutrients, broccoli is perfect for weight management.

5. Fights Inflammation

Broccoli contains powerful antioxidants that reduce inflammation in the body.

6. Supports Bone Health

It provides calcium and vitamin K, which are essential for strong bones.


Broccoli Nutrition

Broccoli Nutrition

Broccoli is loaded with essential nutrients that your body needs daily.

Nutritional value per 100g (approx.):

  • Calories: 34 kcal
  • Protein: 2.8 g
  • Fiber: 2.6 g
  • Vitamin C: 89 mg
  • Vitamin K: 101 mcg
  • Folate: 63 mcg
  • Potassium: 316 mg

It is also rich in antioxidants like sulforaphane, which is known for its anti-cancer properties.


How to Cook Broccoli

Cooking broccoli the right way ensures that you retain its nutrients while enhancing its taste. Here are some easy and healthy methods:


1. Steamed Broccoli

Steaming is one of the healthiest ways to cook broccoli.

Steps:

  • Cut broccoli into florets
  • Steam for 5–7 minutes
  • Add salt, pepper, and lemon juice

This method preserves most nutrients.


2. Stir-Fried Broccoli

A quick and flavorful option.

Steps:

  • Heat oil in a pan
  • Add garlic and broccoli
  • Stir-fry for 5–6 minutes
  • Season with salt and soy sauce

3. Boiled Broccoli

Boiling is simple but may reduce some nutrients.

Steps:

  • Boil water with salt
  • Add broccoli and cook for 3–5 minutes
  • Drain and serve

4. Roasted Broccoli

Roasting enhances flavor and texture.

Steps:

  • Toss broccoli with olive oil, salt, and spices
  • Roast at 200°C for 20 minutes
  • Serve crispy and golden

5. Broccoli Soup

A healthy and comforting dish.

Steps:

  • Cook broccoli with onions and garlic
  • Blend into a smooth paste
  • Add salt, pepper, and cream (optional)

Delicious Broccoli Recipes to Try

Here are some easy broccoli recipes you can make at home:

  • Broccoli salad with lemon dressing
  • Broccoli pasta
  • Broccoli paratha
  • Broccoli stir-fry with paneer
  • Creamy broccoli soup

These recipes are not only tasty but also packed with nutrients.


Tips for Growing Broccoli Successfully

  • Choose the right season (winter is best in India)
  • Use organic compost regularly
  • Avoid overcrowding plants
  • Keep soil moist but well-drained
  • Harvest at the right time

Conclusion

Growing broccoli in your kitchen garden is a simple and rewarding process that provides you with fresh, nutritious vegetables right at home. With proper care, the right climate, and a little patience, you can enjoy a healthy harvest.

Not only does broccoli offer numerous health benefits, but it is also highly versatile in the kitchen. From steamed dishes to soups and stir-fries, there are countless ways to include this superfood in your daily diet.

Start growing broccoli today and take a step toward a healthier and more sustainable lifestyle!

Bird’s Eye Chili The Fiery Little Pepper That Packs a Big American Kick

Bird’s Eye Chili The Fiery Little Pepper That Packs a Big American Kick

When it comes to chili peppers that deliver explosive heat and unforgettable flavor, few can match the Bird’s Eye Chili. Small but incredibly potent, this pepper has earned a global reputation for its fiery punch, and it’s quickly becoming a favorite ingredient among spice lovers and chefs across the United States. Known for lighting up everything from Thai curries to American hot sauces, the Bird’s Eye chili is proof that size doesn’t define strength.

In this article, we’ll dive deep into the origin, flavor profile, heat level, health benefits, growing guide, and culinary uses of Bird’s Eye chili. Whether you’re a home gardener, a spicy food enthusiast, or a chef seeking to elevate your dishes, this guide will show you how to use this fiery chili to bring bold energy to your kitchen.


What Is Bird’s Eye Chili?

The Bird’s Eye Chili (Capsicum frutescens) is a small, slender chili pepper that grows to about 1–2 inches long. Despite its tiny size, it’s one of the hottest peppers used in everyday cooking, ranking between 50,000 and 100,000 Scoville Heat Units (SHU) on the Scoville scale. That’s about 10 times hotter than a jalapeño!

Bird’s Eye chili is sometimes called Thai chili, though the two are slightly different varieties of the same species. These chilies are typically bright red or green, with thin skin and a sharp, clean heat that lingers.

Their flavor is fruity, peppery, and slightly smoky, making them perfect for adding both heat and depth to soups, sauces, and stir-fries.


The Origin and Global Journey of Bird’s Eye Chili

The Bird’s Eye chili has a fascinating history that spans continents. It originated in Central and South America, like most chili peppers, and was introduced to Southeast Asia by Portuguese traders in the 16th century. There, it thrived in tropical climates and became a staple in regional cuisines—especially Thai, Indonesian, Vietnamese, and Filipino dishes.

The pepper’s name comes from the birds that eat the chilies and spread their seeds across wide areas. Birds are unaffected by capsaicin (the compound that makes chilies spicy), making them the perfect natural distributors of this fiery fruit.

In recent years, Bird’s Eye chili has made its way into American kitchens, especially among fans of fusion cuisine and hot sauce enthusiasts who crave its sharp, consistent heat and vibrant flavor.


Scoville Heat and Flavor Profile

With a heat range of 50,000 to 100,000 SHU, Bird’s Eye chili is hotter than cayenne and Tabasco peppers, but milder than habaneros or ghost peppers.

Here’s how it stacks up:

Pepper VarietyScoville Heat Units (SHU)Heat Level
Jalapeño2,500 – 8,000Mild
Cayenne30,000 – 50,000Medium Hot
Bird’s Eye Chili50,000 – 100,000Hot
Habanero100,000 – 350,000Very Hot
Ghost Pepper1,000,000+Super Hot

The flavor of Bird’s Eye chili is bright and bold, with a slightly fruity and floral taste that enhances the complexity of any dish. Unlike some other hot peppers, the Bird’s Eye doesn’t overwhelm the palate—it builds up gradually, delivering a clean and lingering heat.


Nutritional and Health Benefits

Beyond the burn, Bird’s Eye chilies are nutritional powerhouses. Packed with vitamins, antioxidants, and capsaicin, they support multiple aspects of your health.

Here are some key benefits:

  • Boosts Metabolism: Capsaicin increases thermogenesis, helping your body burn calories more efficiently.
  • Rich in Vitamins: High in Vitamin C (for immune health) and Vitamin A (for skin and vision).
  • Improves Heart Health: May help lower cholesterol and improve blood circulation.
  • Natural Pain Relief: Capsaicin is used in topical creams to alleviate pain and inflammation.
  • Mood Enhancer: The spicy kick releases endorphins—your body’s natural “feel-good” hormones.

So, adding a touch of Bird’s Eye chili to your diet not only ignites your taste buds but also nourishes your body in remarkable ways.


How to Grow Bird’s Eye Chili in the U.S.

For spice lovers who enjoy gardening, growing Bird’s Eye chilies at home is both fun and rewarding. These hardy plants thrive in warm, sunny climates and are perfect for backyard gardens, patios, or even indoor containers.

Here’s how to grow them successfully:

  1. Start from Seeds Indoors:
    Begin seeds 6–8 weeks before the last frost. Use seed trays with well-draining soil and keep them warm (80–90°F).
  2. Transplant Outdoors:
    Move seedlings outside once temperatures are consistently above 65°F. Choose a sunny spot with nutrient-rich, well-drained soil.
  3. Watering:
    Keep the soil moist but not soggy. Water regularly, especially during dry spells.
  4. Fertilizing:
    Use a balanced fertilizer once every two weeks to encourage flowering and fruiting.
  5. Harvesting:
    Peppers mature in about 90–120 days. Pick them when they turn bright red for maximum heat and flavor.
  6. Storage:
    You can dry Bird’s Eye chilies for long-term storage or freeze them to maintain freshness.

Each plant can produce dozens of chilies, making it a perfect addition to your garden if you love hot food.


Culinary Uses: How to Cook with Bird’s Eye Chili

Bird’s Eye chili is famous for its versatility. Whether you’re cooking classic Asian dishes or adding a spicy twist to American favorites, these chilies can do it all.

Here are some delicious ways to use them:

1. Thai-Style Stir-Fries

Crush or chop Bird’s Eye chilies and toss them into a sizzling wok with garlic, soy sauce, and vegetables. Their heat complements the savory and sweet flavors beautifully.

2. Hot Sauces and Salsas

Blend Bird’s Eye chilies with vinegar, garlic, and lime juice for a fiery homemade hot sauce. It’s perfect on tacos, grilled chicken, or burgers.

3. Spicy Soups and Curries

Add whole or chopped chilies to soups like tom yum, or curry dishes for authentic Southeast Asian heat.

4. Infused Oils and Vinegars

Steep Bird’s Eye chilies in olive oil or vinegar to create flavorful condiments for salads, pasta, or pizza.

5. American Fusion Dishes

Use minced Bird’s Eye chilies in Buffalo wings, chili con carne, or mac and cheese to add a bold, exotic kick.

6. Pickled Bird’s Eye Chilies

Preserve them in vinegar, salt, and garlic for a tangy topping on sandwiches, wraps, and grilled meats.


Homemade Bird’s Eye Chili Hot Sauce Recipe

Ingredients:

  • 1 cup fresh Bird’s Eye chilies (stems removed)
  • ½ cup white vinegar
  • 2 cloves garlic
  • 1 tablespoon sugar
  • ½ teaspoon salt

Instructions:

  1. Blend all ingredients until smooth.
  2. Pour the mixture into a small pot and simmer for 10 minutes.
  3. Let it cool, then strain into a sterilized glass bottle.
  4. Store in the refrigerator for up to 3 months.

This simple sauce adds an instant burst of heat to eggs, tacos, pasta, or grilled vegetables.


Bird’s Eye Chili vs. Other Hot Peppers

Here’s how Bird’s Eye chili compares to other popular varieties:

Pepper TypeFlavor ProfileBest For
JalapeñoMild, grassyNachos, salsa, poppers
CayenneSharp, earthySoups, powders, sauces
Bird’s Eye ChiliBright, fruity, clean heatAsian dishes, hot sauces, oils
HabaneroFruity, floral, intenseCaribbean cuisine, extreme sauces
TabascoTangy, smokyHot sauces, Cajun dishes

The Bird’s Eye chili stands out for its balanced flavor and versatile heat, making it ideal for everyday use without overpowering your meals.


Pro Tips for Cooking with Bird’s Eye Chili

  • Use Gloves: The high capsaicin content can irritate skin and eyes.
  • Balance with Sweet or Fatty Foods: Coconut milk, honey, or cheese help tone down the spice.
  • Start Small: Even a single chili can dramatically change a dish’s heat level.
  • Dry or Smoke Them: Dried Bird’s Eye chilies make flavorful chili flakes or powder.

Final Thoughts: Why America Loves Bird’s Eye Chili

The Bird’s Eye Chili is more than just a spice—it’s a symbol of bold flavor and culinary adventure. From its tropical origins to American kitchens, this tiny pepper has made a big impact with its clean heat, fruity flavor, and endless versatility.

Whether you’re whipping up spicy stir-fries, crafting homemade sauces, or growing your own chili plants, Bird’s Eye chili adds excitement to every meal. It’s not just a pepper—it’s an experience for those who crave the perfect balance of flavor and fire.

So, next time you’re shopping for peppers, don’t overlook these small red flames. Bring home a handful of Bird’s Eye chilies, and discover how this global favorite can turn your everyday meals into fiery works of art.


Tabasco Peppers The Fiery Flavor Behind America’s Favorite Hot Sauce

Tabasco Peppers The Fiery Flavor Behind America’s Favorite Hot Sauce

If there’s one name that instantly sparks the thought of bold heat and tangy spice, it’s Tabasco. This small but mighty pepper has become a symbol of fiery flavor across the United States, especially thanks to the world-famous Tabasco sauce that bears its name. Native to Central America but deeply rooted in American cuisine, the Tabasco pepper is celebrated for its vibrant taste, moderate heat, and culinary versatility. Whether you’re a home cook, spice lover, or hot sauce connoisseur, understanding this iconic chili will transform the way you use heat in your kitchen.

In this in-depth guide, we’ll explore everything you need to know about the Tabasco pepper—its origin, Scoville heat, nutritional value, growing tips, and mouthwatering recipes to bring a burst of Louisiana-style heat to your table.


What Is a Tabasco Pepper?

The Tabasco pepper (Capsicum frutescens) is a small, tapered chili measuring about 1.5 to 2 inches long. It’s most recognized for its bright red color, thin skin, and juicy flesh—unlike most other chilies that are dry inside. This juicy characteristic makes Tabasco peppers perfect for creating hot sauces with smooth texture and tangy kick.

On the Scoville Heat Scale, Tabasco peppers range from 30,000 to 50,000 Scoville Heat Units (SHU). That places them hotter than jalapeños (2,500–8,000 SHU) but milder than habaneros or Thai chilies. In terms of flavor, they’re tangy, fruity, and slightly smoky, which makes them ideal for Louisiana-style cuisine, soups, marinades, and, of course, hot sauces.


The Origin and History of Tabasco Peppers

The story of Tabasco peppers dates back centuries, originating in southern Mexico and Central America. The name “Tabasco” comes from a Mexican state that shares the same name—an early indication of the pepper’s Latin roots.

However, it wasn’t until the mid-1800s that the Tabasco pepper gained fame in the United States. In 1868, Edmund McIlhenny, a Louisiana businessman, crafted a fiery condiment from these peppers, mixing them with salt and vinegar. He bottled the sauce in old cologne bottles, and thus, the legendary Tabasco Sauce was born.

Today, the McIlhenny Company, based on Avery Island, Louisiana, still produces this sauce using the same original family recipe. Every bottle sold worldwide continues to carry the legacy of the Tabasco pepper—making it one of America’s most iconic exports.


Heat Level and Flavor Profile

The heat of Tabasco peppers is often described as a “pleasant burn.” It’s intense enough to satisfy spice enthusiasts yet manageable enough to complement a wide range of dishes. Unlike some peppers that deliver a sharp, fleeting sting, Tabasco heat builds gradually and lingers with a slightly tangy, vinegary finish.

Flavor notes include:

  • Tangy and slightly fruity
  • Lightly smoky
  • Juicy with a clean, crisp finish

This unique combination of heat and brightness makes Tabasco peppers an excellent choice for hot sauces, salsas, soups, and seafood dishes.


Nutritional Benefits of Tabasco Peppers

Like many chili peppers, Tabasco peppers aren’t just about heat—they’re packed with nutrients and antioxidants that boost health and wellness.

Here’s a quick look at what these tiny fireballs contain:

  • Vitamin C: Strengthens immunity and promotes healthy skin.
  • Capsaicin: The compound responsible for the heat; helps reduce inflammation, improve metabolism, and may aid in pain relief.
  • Vitamin A: Supports vision and immune system function.
  • Antioxidants: Help fight free radicals and promote cellular health.

In moderation, adding Tabasco peppers or hot sauce to your meals can even boost endorphins—the feel-good hormones that give you that post-spice rush.


How to Grow Tabasco Peppers at Home

If you love gardening and spice, growing your own Tabasco pepper plants is a rewarding experience. These peppers thrive in warm, humid climates, making them ideal for southern states like Louisiana, Texas, and Florida.

Here’s a step-by-step growing guide:

  1. Start Indoors: Begin seeds indoors 6–8 weeks before the last frost. Keep the soil warm (around 75–85°F).
  2. Transplant Outdoors: Move seedlings outdoors once temperatures stay consistently above 60°F.
  3. Choose a Sunny Spot: Tabasco plants love full sunlight—at least 6–8 hours daily.
  4. Water Consistently: Keep soil moist but not soggy. Overwatering can lead to root rot.
  5. Fertilize Moderately: Use a balanced fertilizer once a month to encourage steady growth.
  6. Harvest Time: Peppers mature in 80–100 days. They start green and turn yellow, orange, and finally bright red when ripe.

Each plant can yield dozens of peppers, which you can use fresh, dried, or pickled—or make your own signature hot sauce!


Culinary Uses of Tabasco Peppers

From zesty sauces to spicy soups, Tabasco peppers bring bold flavor to countless recipes. Here are some creative ways to use them in your kitchen:

1. Homemade Hot Sauce

Blend ripe Tabasco peppers with vinegar and salt, then ferment the mixture for a few weeks. The result? A tangy, Louisiana-style hot sauce that’s perfect for eggs, tacos, or fried chicken.

2. Spicy Soups and Stews

Add chopped Tabasco peppers to gumbo, jambalaya, or chili for authentic Southern heat.

3. Pickled Tabasco Peppers

Preserve fresh peppers in a vinegar brine with garlic and herbs. They make a great topping for sandwiches or burgers.

4. Marinades and Rubs

Puree Tabasco peppers into a paste and mix with olive oil, lime juice, and honey for a fiery marinade for chicken, shrimp, or tofu.

5. Cocktail Enhancer

A few drops of Tabasco-infused vinegar can elevate your Bloody Mary, margarita, or spicy michelada.


How Tabasco Compares to Other Hot Peppers

Pepper TypeScoville Heat Units (SHU)Flavor ProfileCommon Uses
Jalapeño2,500 – 8,000Mild, earthySalsas, nachos, poppers
Cayenne30,000 – 50,000Sharp, earthyHot sauces, powders, soups
Tabasco30,000 – 50,000Tangy, juicy, slightly smokyHot sauces, seafood, Cajun cuisine
Habanero100,000 – 350,000Fruity, floralCaribbean dishes, extreme sauces

As you can see, Tabasco peppers fall in the medium-hot range, making them one of the most versatile chilies for American home cooking.


Fun Fact: The Tabasco Sauce Fermentation Process

One of the secrets behind the famous Tabasco sauce is fermentation. After harvesting, the peppers are mashed with salt and aged in white oak barrels for up to three years. This process develops complex flavors and deepens the sauce’s signature tang. Once matured, the mash is blended with vinegar, stirred for several weeks, and then strained and bottled.

This dedication to craftsmanship is why Tabasco sauce remains a global staple and has been exported to over 190 countries for more than 150 years.


Try This: Simple Tabasco Pepper Hot Sauce Recipe

Ingredients:

  • 1 cup fresh Tabasco peppers (stems removed)
  • ½ cup white vinegar
  • ½ teaspoon sea salt

Instructions:

  1. Combine peppers and vinegar in a blender until smooth.
  2. Pour mixture into a saucepan and bring to a boil.
  3. Lower heat and simmer for 5 minutes.
  4. Add salt and let the mixture cool.
  5. Strain into sterilized bottles and refrigerate.

You now have a homemade, all-natural Tabasco-style sauce ready to add heat to any meal!


Final Thoughts: The Enduring Heat of Tabasco Peppers

The Tabasco pepper is more than just a chili—it’s a symbol of bold American flavor and culinary tradition. Its tangy, vinegary heat has shaped the hot sauce industry, elevated Southern cuisine, and found its way into kitchens around the globe.

Whether you’re crafting homemade sauces, spicing up gumbo, or exploring heirloom pepper varieties, Tabasco remains a timeless favorite for those who crave a perfect balance of heat, flavor, and history.

So the next time you reach for that familiar red bottle or see fresh Tabasco peppers at the farmer’s market, remember—you’re not just tasting spice; you’re tasting over a century of Louisiana heritage.

Cherry Peppers The Sweet, Spicy, and Vibrant Gem of American Kitchens and Gardens

Cherry Peppers The Sweet, Spicy, and Vibrant Gem of American Kitchens and Gardens

If there’s one pepper that perfectly balances sweetness, spice, and color, it’s the cherry pepper — also known as the pimento or pimiento pepper. These small, round, cherry-shaped peppers bring both visual appeal and a burst of flavor to countless American dishes. From stuffed appetizers to sandwich toppings and homemade pickles, cherry peppers are a true kitchen gem that deserve more attention.

Loved by home gardeners, chefs, and pepper enthusiasts alike, cherry peppers offer a mild to medium heat and a juicy, crisp bite that enhances everything from salads to charcuterie boards. Whether you’re exploring new flavors or expanding your home garden, this detailed guide will help you understand everything about cherry peppers — from their origins and varieties to their culinary uses, health benefits, and growing tips.


What Are Cherry Peppers?

Cherry peppers (Capsicum annuum) are small, round chili peppers that resemble bright red cherries — hence the name. They typically measure about 1 to 2 inches in diameter and ripen from green to red, sometimes orange or yellow.

These peppers are often called pimentos (though pimentos are technically a sweet variety of cherry pepper). Their flavor profile ranges from sweet and tangy to slightly spicy, depending on the type.

In American cuisine, cherry peppers are best known for:

  • Being stuffed with cheese or meats as appetizers.
  • Adding zesty flavor to deli sandwiches and pizzas.
  • Being a star ingredient in pimento cheese spread — a Southern classic.

How Hot Are Cherry Peppers?

Cherry peppers fall on the mild to medium side of the Scoville Heat Scale.

Pepper TypeScoville Heat Units (SHU)Heat Level
Bell Pepper0None
Pimento (Sweet Cherry Pepper)100–500Mild
Hot Cherry Pepper2,500–5,000Moderate
Jalapeño2,500–8,000Moderate
Serrano10,000–23,000Hot

That means cherry peppers are spicy enough to add flavor but not so hot that they overpower dishes. The sweet pimento variety is especially mild, making it great for people who love flavor without fire.


The Flavor Profile: Sweet, Tangy, and Perfectly Balanced

Cherry peppers are loved for their sweet, juicy, and slightly smoky flavor. They deliver a pop of brightness to savory dishes while offering just enough heat to wake up your taste buds.

When roasted, they develop a rich, caramelized sweetness that makes them perfect for spreads, sauces, or antipasto platters.

Flavor notes:

  • Sweet and fruity
  • Slightly smoky when roasted
  • Tangy when pickled
  • Mild to moderate heat

Their vibrant flavor and color make them an ideal complement to cheese, meats, and vinegar-based sauces.


Types of Cherry Peppers

There are two main categories of cherry peppers — sweet and hot, each with distinct culinary uses.

1. Sweet Cherry Pepper (Pimento)

  • Bright red and heart-shaped.
  • Very mild heat (100–500 SHU).
  • Commonly used to make pimento cheese, stuffed olives, and roasted pepper spreads.

2. Hot Cherry Pepper

  • Slightly smaller and rounder.
  • Moderate heat (2,500–5,000 SHU).
  • Popular for pickling or stuffing with cheese or prosciutto.

3. Dwarf or Ornamental Varieties

  • Grown primarily for their colorful, decorative appeal.
  • Can range in color from yellow to purple.
  • Still edible but often used as garden accents.

Health Benefits of Cherry Peppers

Beyond their great taste, cherry peppers offer impressive nutritional and health benefits:

1. Packed with Vitamins

  • Vitamin C: Boosts immunity and supports collagen production.
  • Vitamin A: Promotes eye and skin health.
  • Vitamin B6: Aids metabolism and brain function.

2. Rich in Antioxidants

Their bright red pigment contains carotenoids and capsaicin, which help reduce inflammation and protect cells from oxidative damage.

3. Low in Calories

A 100-gram serving contains only 30 calories, making cherry peppers ideal for healthy snacking and clean eating.

4. Improves Digestion

Their natural fiber content supports healthy digestion and gut function.

5. Boosts Metabolism

Capsaicin (present in hotter varieties) helps slightly increase metabolism and fat oxidation.


How to Grow Cherry Peppers in the U.S.

Cherry peppers are easy to grow, making them a favorite among American home gardeners. Their compact size also makes them perfect for pots, patios, and raised beds.

1. Starting from Seeds

  • Start seeds indoors 8–10 weeks before the last frost.
  • Keep soil temperature between 75°F and 85°F for successful germination.
  • Seeds usually sprout within 10–14 days.

2. Transplanting Outdoors

  • Transplant seedlings when daytime temperatures stay above 65°F.
  • Choose a sunny location with 6–8 hours of sunlight daily.
  • Space plants 18–24 inches apart.

3. Soil and Watering

  • Use well-draining, loamy soil with a pH of 6.0–6.8.
  • Keep the soil consistently moist but not soggy.
  • Mulch around plants to retain moisture and prevent weeds.

4. Fertilization

Use a balanced fertilizer (10-10-10) every few weeks to promote healthy growth and fruit production.

5. Harvesting

  • Harvest when fruits are bright red and firm (usually 70–80 days after transplanting).
  • Regular picking encourages more fruit development.

Cherry peppers thrive in warm American states such as Florida, Texas, California, and Georgia, but can also be grown in northern climates during summer.


Culinary Uses: The Many Ways to Enjoy Cherry Peppers

Cherry peppers’ versatility makes them a must-have in any American kitchen. Here’s how you can make the most of them:

1. Stuffed Cherry Peppers

A classic appetizer!

  • Stuff with cream cheese, mozzarella, or prosciutto.
  • Roast or marinate them in olive oil and herbs.
  • Serve on charcuterie boards or as antipasto.

2. Pickled Cherry Peppers

A pantry staple that adds tang and crunch to sandwiches and pizzas.

  • Combine vinegar, garlic, sugar, and salt for a quick brine.
  • Store in jars for up to 6 months.

3. Roasted Cherry Peppers

  • Roast under a broiler or on a grill until skins char.
  • Peel, marinate in olive oil, and use for pasta or salads.
  • Perfect for Italian-style roasted pepper spreads.

4. Pimento Cheese Spread

This Southern classic uses roasted pimentos (sweet cherry peppers) mixed with cheddar cheese and mayonnaise — a staple for sandwiches, crackers, and snacks.

5. Pizza and Sandwich Toppings

Add sliced or pickled cherry peppers to pizza, burgers, subs, or wraps for a flavorful, tangy kick.

6. Salads and Bowls

Toss fresh cherry peppers into salads for a crunchy, colorful twist.

7. Sauces and Salsas

Blend roasted cherry peppers with tomatoes, garlic, and herbs for a smoky-sweet salsa or dipping sauce.


Fresh vs. Pickled: Which Is Better?

Both fresh and pickled cherry peppers have their place in American cuisine.

TypeFlavorBest Uses
FreshSweet, crisp, mildly spicyStuffed, salads, roasting
PickledTangy, zesty, slightly hotSandwiches, pizzas, charcuterie

Pickled cherry peppers are more common in American delis, while fresh ones shine in home-cooked meals and gourmet recipes.


Preserving Cherry Peppers

If you grow cherry peppers in abundance, here’s how to store them for year-round use:

  1. Pickling: Slice or leave whole, then preserve in vinegar and spices.
  2. Freezing: Wash, dry, and freeze whole or chopped peppers in airtight bags.
  3. Drying: Dehydrate to make crushed pepper flakes.
  4. Canning: Great for pickled cherry peppers and pimento spreads.

Cherry Peppers vs. Pimentos: What’s the Difference?

While the terms are often used interchangeably, there are key distinctions:

FeatureCherry PepperPimento
ShapeRound or heart-shapedHeart-shaped and slightly larger
Heat100–5,000 SHU100–500 SHU
FlavorSweet or moderately spicySweet and mild
UsesStuffed, pickled, grilledPimento cheese, olives, spreads

In short, all pimentos are cherry peppers, but not all cherry peppers are pimentos.


Fun Facts About Cherry Peppers

  • Cherry peppers were originally cultivated in Central and South America, later spreading globally.
  • The word “pimento” comes from the Spanish word pimiento, meaning “pepper.”
  • Cherry peppers are often used to stuff green olives, a staple in martinis.
  • Their bright red color makes them a favorite ornamental pepper for garden displays.
  • In the U.S., cherry peppers are a key ingredient in Italian-American antipasto dishes.

Cherry Peppers in American Cuisine

From East Coast delis to Southern kitchens, cherry peppers have earned a beloved place in American food culture:

  • Italian-American antipasto platters loaded with meats, cheeses, and pickled peppers.
  • Southern-style pimento cheese — a comfort food favorite.
  • New York-style subs and pizzas, topped with spicy cherry pepper rings.
  • Barbecue dishes that use cherry pepper sauces for a sweet-spicy glaze.

Their versatility, mild heat, and brilliant color make them the perfect bridge between sweet bell peppers and fiery chilies.


Conclusion: Sweet Heat for Every Occasion

Cherry peppers prove that great flavor doesn’t need to be extreme. With their balance of sweetness, spice, and tang, they bring life to sandwiches, appetizers, and homemade preserves across American kitchens.

Whether you’re growing them in your garden, pickling them for later, or stuffing them with creamy cheese, cherry peppers offer a burst of flavor and color that elevates any meal.

From backyard barbecues to gourmet kitchens, cherry peppers are a timeless ingredient that captures the heart of America’s love for food — bold, colorful, and full of personality.

Banana Peppers The Sweet, Tangy, and Mildly Spicy Secret to America’s Favorite Dishes

Banana Peppers The Sweet, Tangy, and Mildly Spicy Secret to America’s Favorite Dishes

If you’re looking for a pepper that offers flavor without overpowering heat, banana peppers are your perfect pick. Their sweet, tangy, and mildly spicy flavor makes them a versatile ingredient in everything from subs and salads to pizzas and pickles.

In American households and restaurants alike, banana peppers have become a beloved condiment and cooking ingredient. You’ll find them in sandwich shops, Italian delis, pizza chains, and backyard gardens. Their cheerful yellow color and crisp texture make them not only delicious but also visually appealing on any plate.

This detailed guide will explore everything you need to know about banana peppers — from their origins and varieties to growing tips, culinary uses, and health benefits — so you can make the most of this delightful pepper in your kitchen.


What Are Banana Peppers?

Banana peppers, also known as yellow wax peppers or banana chilis, are members of the Capsicum annuum species — the same family as bell peppers, jalapeños, and cayenne.

They get their name from their banana-like shape and color, typically ranging from bright yellow to orange or red as they ripen. But unlike hot peppers, banana peppers have a gentle, sweet flavor that makes them ideal for anyone who loves spice without the burn.

They’re popular in both fresh and pickled forms, often sliced into rings and used as toppings or garnishes.


How Hot Are Banana Peppers?

Banana peppers are mild compared to most chili varieties. On the Scoville Heat Scale, they measure between 0 and 500 Scoville Heat Units (SHU) — similar to a mild bell pepper with just a whisper of heat.

Pepper TypeScoville Heat Units (SHU)Flavor
Bell Pepper0Sweet
Banana Pepper0–500Mild, tangy
Poblano1,000–2,000Earthy, mild heat
Jalapeño2,500–8,000Moderate heat
Serrano10,000–23,000Hot

This makes banana peppers perfect for kids, spice-sensitive eaters, and flavor lovers alike.


Banana Pepper Varieties

There are several banana pepper varieties, each with its own unique characteristics:

1. Sweet Banana Pepper

  • The most common type found in grocery stores.
  • Mild, crisp, and slightly tangy.
  • Ideal for salads, sandwiches, and pickling.

2. Hot Banana Pepper

  • A spicier cousin, with heat up to 5,000 SHU.
  • Perfect for those who enjoy a little kick without going overboard.
  • Great for pizzas, sausages, and spicy relishes.

3. Hungarian Wax Pepper

  • Often mistaken for a banana pepper but significantly hotter (5,000–10,000 SHU).
  • Similar shape but thicker walls and bolder flavor.

When shopping or growing banana peppers, always check the label or seed type — what looks like a banana pepper could surprise you with unexpected heat!


The Flavor Profile: Mild Heat with Tangy Sweetness

Banana peppers are beloved for their sweet-tart flavor and crunchy texture. When fresh, they offer a juicy bite with a tang similar to bell peppers but slightly sharper. When pickled, they take on a zesty, vinegary flavor that adds brightness to any dish.

Their mild heat and fruity undertones make them a great balance to richer foods like cheese, meats, and fried items.

Flavor descriptors:

  • Sweet and tangy (fresh or pickled)
  • Crunchy and juicy texture
  • Mildly spicy with fruity undertones

Health Benefits of Banana Peppers

Banana peppers aren’t just tasty — they’re also packed with nutrients and health benefits.

1. High in Vitamins

  • Vitamin C: Boosts immune health and skin vitality.
  • Vitamin A: Supports eye health and immunity.
  • Vitamin B6: Aids metabolism and brain function.

2. Rich in Antioxidants

Their bright yellow pigment comes from carotenoids, natural antioxidants that help fight inflammation and oxidative stress.

3. Low-Calorie and Fiber-Rich

Banana peppers are low in calories (about 30 per cup) and high in fiber, making them great for digestion and weight management.

4. Contains Capsaicin

Even mild peppers like banana peppers contain small amounts of capsaicin, which may help boost metabolism and improve heart health.

5. Great for Gut Health

Pickled banana peppers contain beneficial probiotics that support healthy digestion when prepared through natural fermentation.


How to Grow Banana Peppers in the U.S.

Banana peppers are one of the easiest peppers to grow at home. They thrive in warm climates and produce abundantly in both garden beds and containers.

1. Planting

  • Start seeds indoors 8–10 weeks before the last frost.
  • Transplant outdoors once temperatures stay above 60°F.
  • Choose a sunny location with at least 6 hours of direct sunlight.

2. Soil

  • Use well-draining, fertile soil with a pH between 6.0–6.8.
  • Mix in compost or organic fertilizer before planting.

3. Watering

  • Keep the soil consistently moist but not soggy.
  • Water deeply once or twice a week.

4. Harvesting

  • Harvest when the peppers reach 4–6 inches long and turn bright yellow.
  • For a sweeter flavor, let them ripen to orange or red.
  • Frequent picking encourages more fruit production.

5. Common Growing Regions

Banana peppers grow beautifully across the southern and midwestern United States, especially in Texas, Florida, California, and North Carolina.


Culinary Uses: How to Enjoy Banana Peppers

Banana peppers are kitchen chameleons — they adapt beautifully to a wide range of recipes. From salads to sandwiches, here’s how Americans love to use them:

1. Pickled Banana Peppers

The most popular way to enjoy them!

  • Combine sliced banana peppers, vinegar, sugar, and salt.
  • Let them sit for a few days for that perfect tangy crunch.
    Use them on pizzas, burgers, subs, or nachos for instant zest.

2. Stuffed Banana Peppers

Fill fresh banana peppers with cream cheese, sausage, or rice, then bake until tender. A hit at parties and game nights!

3. Fresh in Salads

Slice them thinly and toss into garden salads for added crunch and flavor. They pair beautifully with Italian dressings, olives, and feta cheese.

4. On Sandwiches and Subs

Banana pepper rings add a zesty kick to deli sandwiches and cold cuts, especially turkey, ham, or roast beef subs.

5. In Pizzas and Calzones

Their tang complements melted cheese and rich tomato sauce perfectly. That’s why you’ll find them as a favorite pizza topping across the U.S.

6. In Omelets or Scrambles

Add chopped banana peppers to your breakfast eggs for a refreshing, mildly spicy twist.

7. Salsas and Relishes

Mix with onions, tomatoes, and vinegar for a bright relish that enhances grilled meats or seafood.


Pickled vs. Fresh: Which Is Better?

Both fresh and pickled banana peppers offer unique advantages:

TypeFlavorBest Uses
FreshSweet, mild, crispSalads, sandwiches, grilling, stuffing
PickledTangy, vinegary, zestyPizzas, subs, burgers, tacos

Pickled banana peppers are more common in American households because they last longer and add instant flavor to everyday meals.


Preserving Banana Peppers

If you grow banana peppers or buy them in bulk, preservation helps you enjoy them year-round:

  1. Pickling: The classic method — store in vinegar with garlic and spices.
  2. Freezing: Wash, slice, and freeze raw or blanched peppers.
  3. Dehydrating: Dry slices for use in soups and stews.
  4. Canning: Preserve pickled banana peppers for long-term storage.

Banana Peppers in American Cuisine

Banana peppers have made their mark in American comfort food. They’re featured prominently in:

  • Italian-American dishes like subs, calzones, and antipasto platters.
  • Southern cooking, often fried or stuffed.
  • Tex-Mex recipes, where they add a tangy element to tacos and fajitas.
  • Fast food favorites, from Papa John’s pizzas to Subway sandwiches.

Their mild flavor bridges the gap between sweet bell peppers and spicy chilis, making them universally loved.


Fun Facts About Banana Peppers

  • Despite the name, banana peppers don’t taste like bananas — the name refers only to their shape and color.
  • The world’s largest banana pepper weighed over 1 pound, grown in the U.S.
  • Banana peppers are often confused with pepperoncini, but the latter are slightly more bitter and wrinkled.
  • In gardening circles, banana peppers are called “gateway peppers” because they’re perfect for beginner growers.

How to Tell Banana Peppers Apart from Pepperoncini

FeatureBanana PepperPepperoncini
ShapeSmooth and elongatedWrinkled and short
FlavorSweet and tangyBitter and slightly salty
ColorBright yellow to redGreen to light yellow
Heat0–500 SHU100–500 SHU

If your pickled peppers taste slightly bitter or wrinkled — you probably have pepperoncini, not banana peppers!


Conclusion: Mild Heat, Maximum Flavor

Banana peppers may not set your mouth on fire, but they’ll light up your meals with flavor, crunch, and color. From zesty sandwich toppings to homegrown garden gems, they prove that you don’t need extreme heat to enjoy great taste.

Whether you’re a gardener looking for an easy crop, a home cook experimenting with new flavors, or a food lover searching for the perfect tangy topping — banana peppers deliver every time.

So next time you’re at the grocery store or farmers’ market, grab a bunch of these golden beauties — and taste the perfect blend of sweet, mild, and satisfying spice that Americans have loved for generations.