How To Boost Pepper Yields With Simple Pruning Tricks

How To Boost Pepper Yields With Simple Pruning Tricks

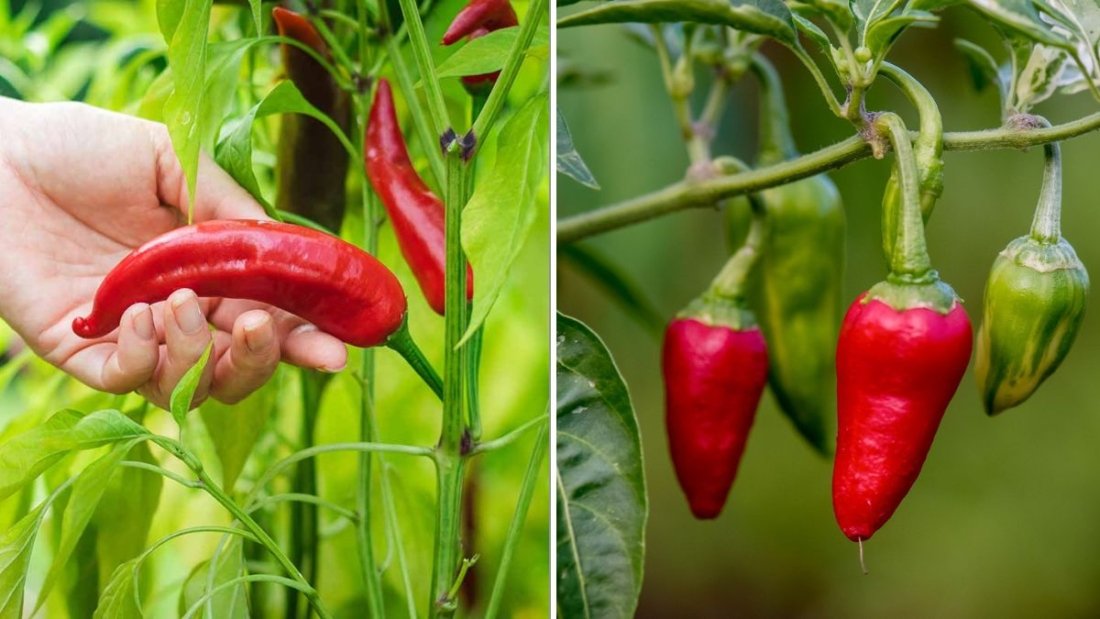
Peppers are one of the most rewarding crops a home gardener can grow—vibrant, flavorful, and versatile. Whether you love sweet bell peppers or fiery hot chilies, nothing beats harvesting basketfuls of colorful fruits from your own plants. But if your pepper plants tend to produce fewer or smaller fruits than you hoped, the secret to bigger, more abundant yields might be simpler than you think: pruning.

Pruning peppers may sound intimidating, but with a few easy techniques, you can transform spindly, slow-growing plants into bushy, fruit-loaded powerhouses. In this guide, we’ll walk you through why pruning works, when to do it, and the exact steps to follow for each growth stage—plus a few pro tips that seasoned gardeners swear by.


Why Pruning Matters for Peppers

Unlike many vegetables, pepper plants have a natural tendency to grow tall and leggy. Left alone, they often spend too much energy producing leaves and stems instead of focusing on flowers and fruits.

Pruning redirects the plant’s energy into what matters most: producing larger, healthier, and more flavorful peppers.

Here’s what proper pruning helps accomplish:

  1. Encourages bushier growth: Cutting back the main stems encourages side branches to grow, resulting in more flowering sites and higher yields.
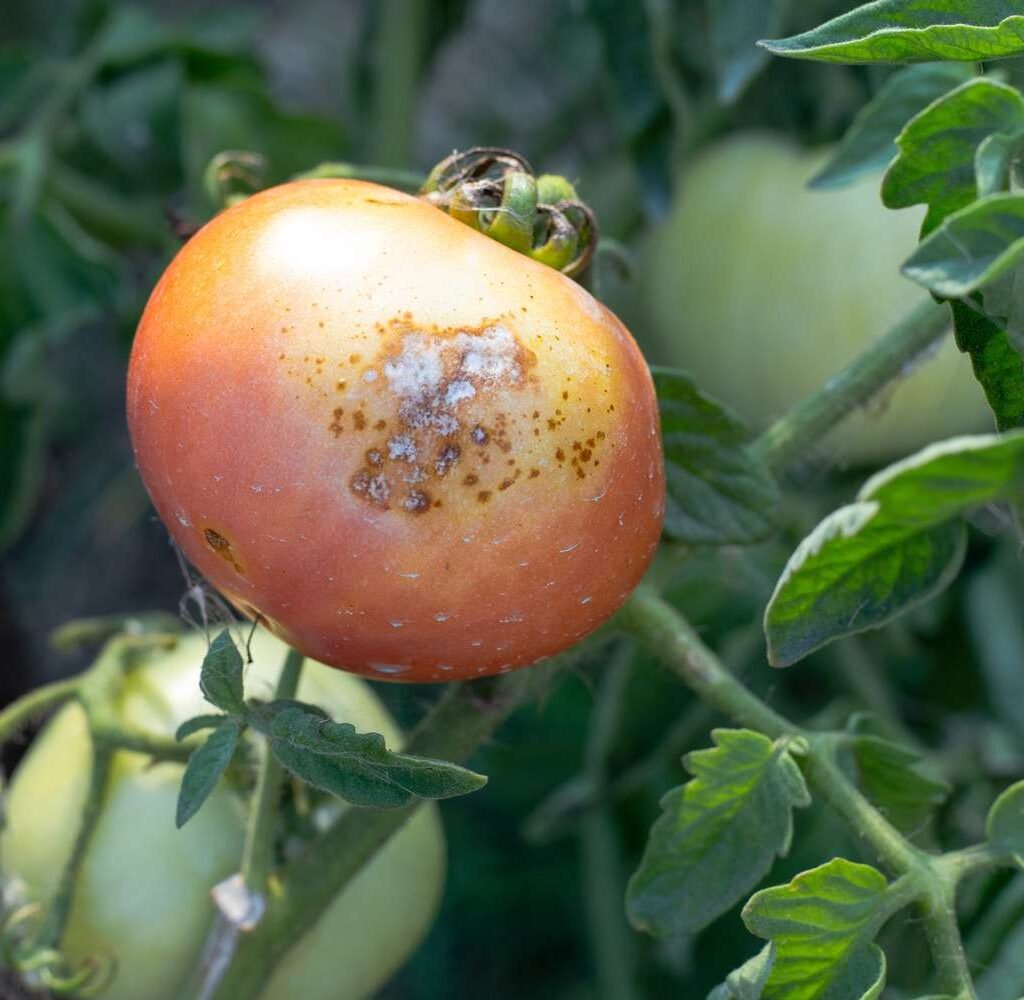
  2. Improves air circulation: A well-pruned plant is less prone to fungal diseases like powdery mildew or bacterial leaf spot.
  3. Increases light exposure: Sunlight can reach more parts of the plant, helping fruits ripen evenly.
  4. Strengthens stems: Pruned plants develop thicker, sturdier branches that can support heavy fruit loads.
  5. Reduces pest problems: Fewer hidden areas make it harder for pests like aphids or spider mites to thrive.

In short, pruning helps your pepper plants stay healthier, sturdier, and more productive all season long.


When to Prune Pepper Plants

Timing is everything. Pruning at the wrong stage can stress young plants or reduce fruit production. Here’s the right schedule to follow:

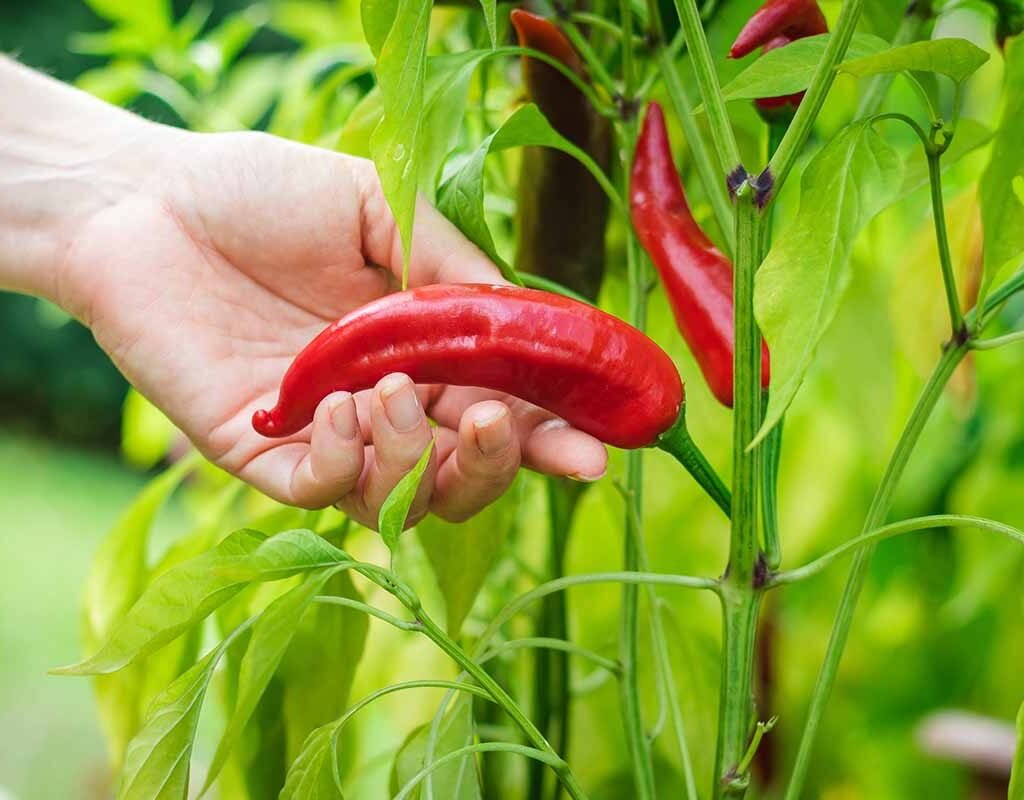
1. Early Pruning (Seedling Stage – 4 to 6 Weeks Old)

Once your pepper seedlings are about 6 inches tall and have developed at least 3–4 sets of true leaves, it’s time for their first haircut.

This stage is all about shaping your plant. Pinch or snip off the top growing tip just above a leaf node. This signals the plant to branch out from below instead of shooting straight upward.

2. Mid-Season Pruning (Before Flowering)

As your pepper plant matures, you’ll notice multiple branches forming. At this point, your goal is to:

  • Remove lower leaves and branches near the soil line (to prevent disease splashback).
  • Thin out any crowded interior branches that block sunlight or airflow.

This mid-season shaping keeps your plant open and encourages energy to flow to flowering branches.

3. Late Pruning (During Fruit Production)

Once the plant is covered in blossoms and young fruits, avoid heavy pruning. However, you can still:

  • Snip off damaged or diseased leaves.
  • Remove small, non-fruiting branches that drain energy.
  • Trim excess foliage at the top to redirect resources to ripening peppers.

Step-by-Step: How To Prune Pepper Plants

Pruning isn’t complicated, but doing it correctly makes all the difference. Follow these easy steps:

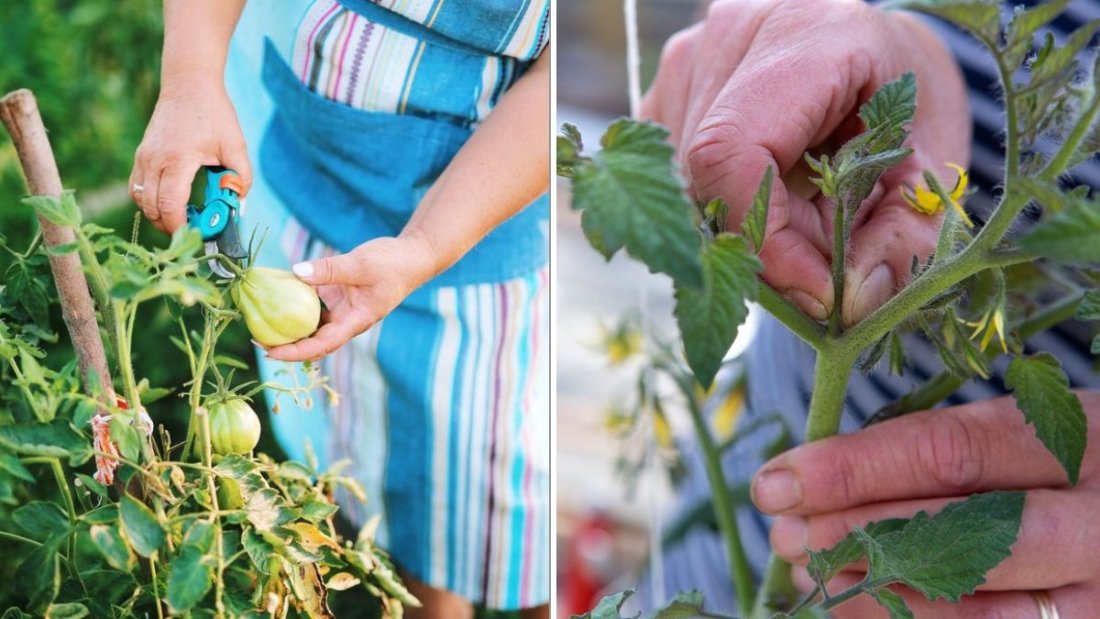
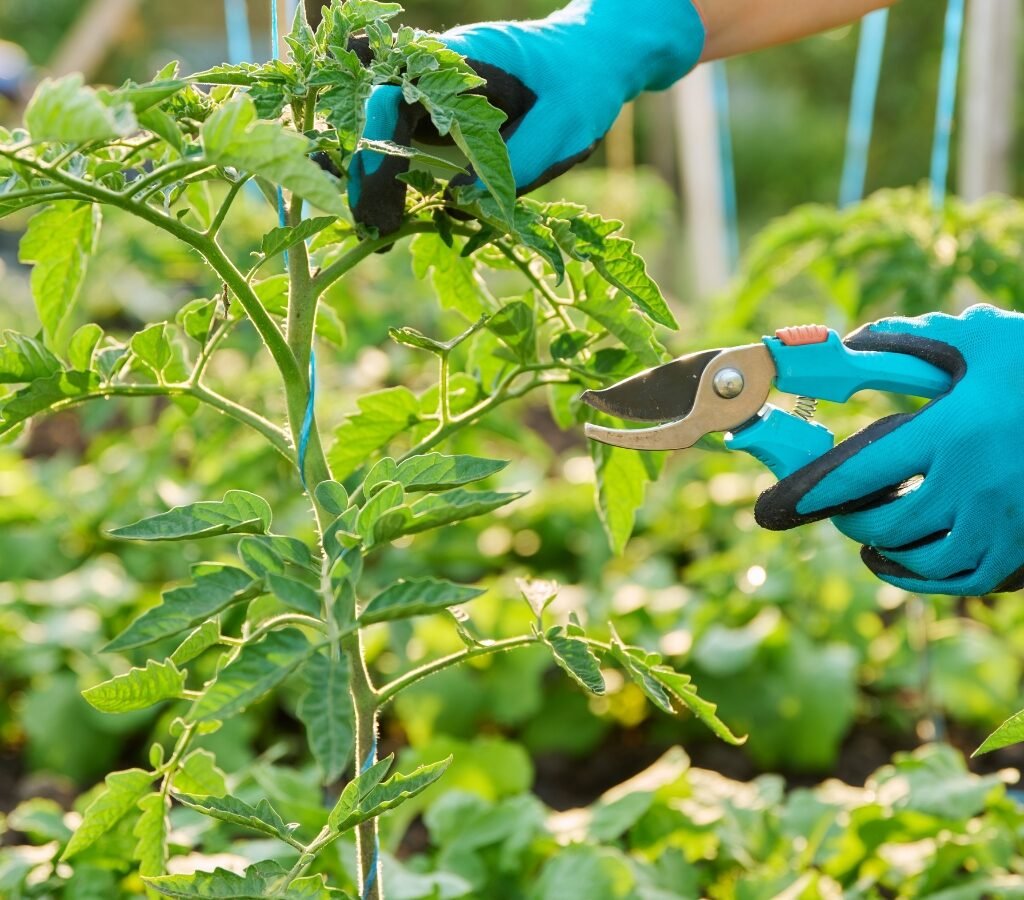
Step 1: Prepare Your Tools

Always use clean, sharp scissors or pruning shears. Sterilize the blades with rubbing alcohol or a 10% bleach solution before use to prevent spreading disease between plants.

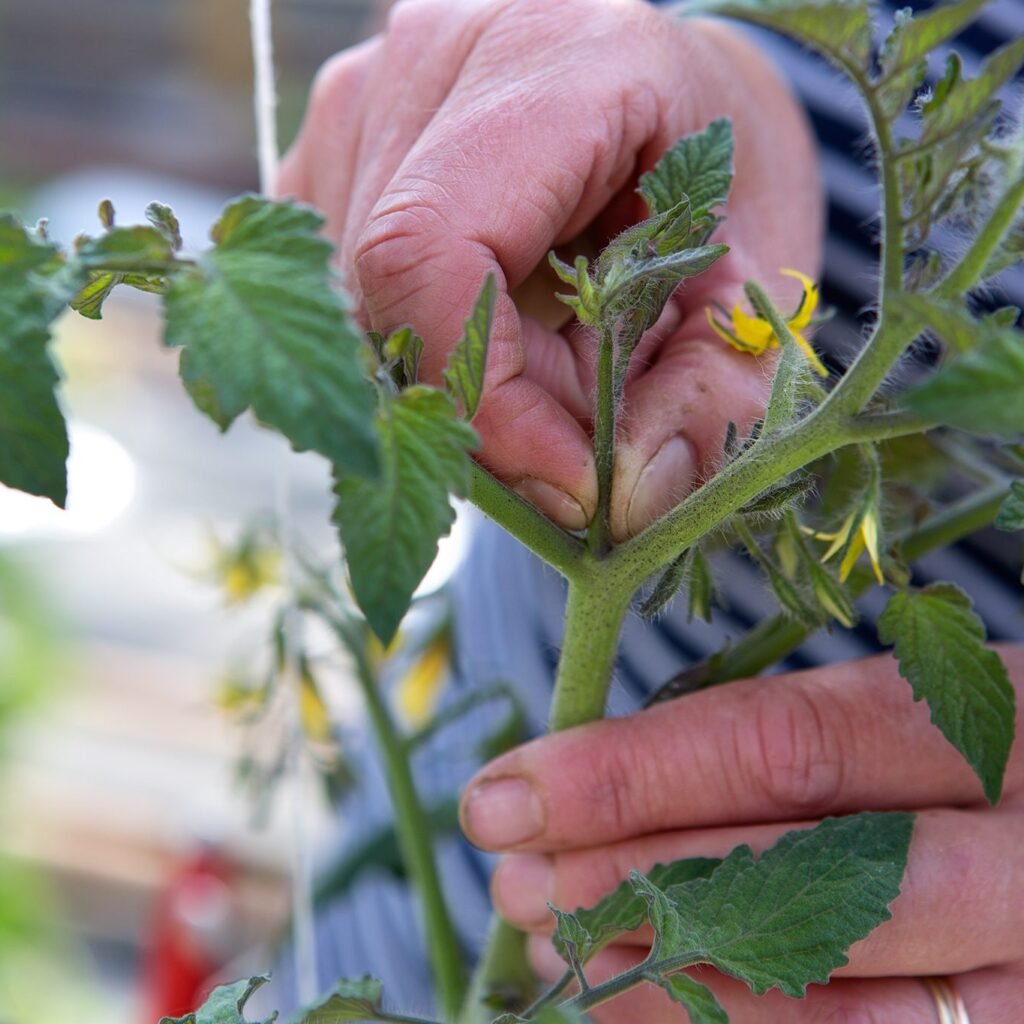
Step 2: Identify the “Y” Shape

When your pepper plant is about 6–8 inches tall, you’ll notice the main stem naturally splitting into a “Y” shape. This is where the first set of branches form.

Snip off the topmost growing tip right above this “Y.” Doing so encourages the plant to produce two main stems, leading to a bushier shape with more flowering sites.

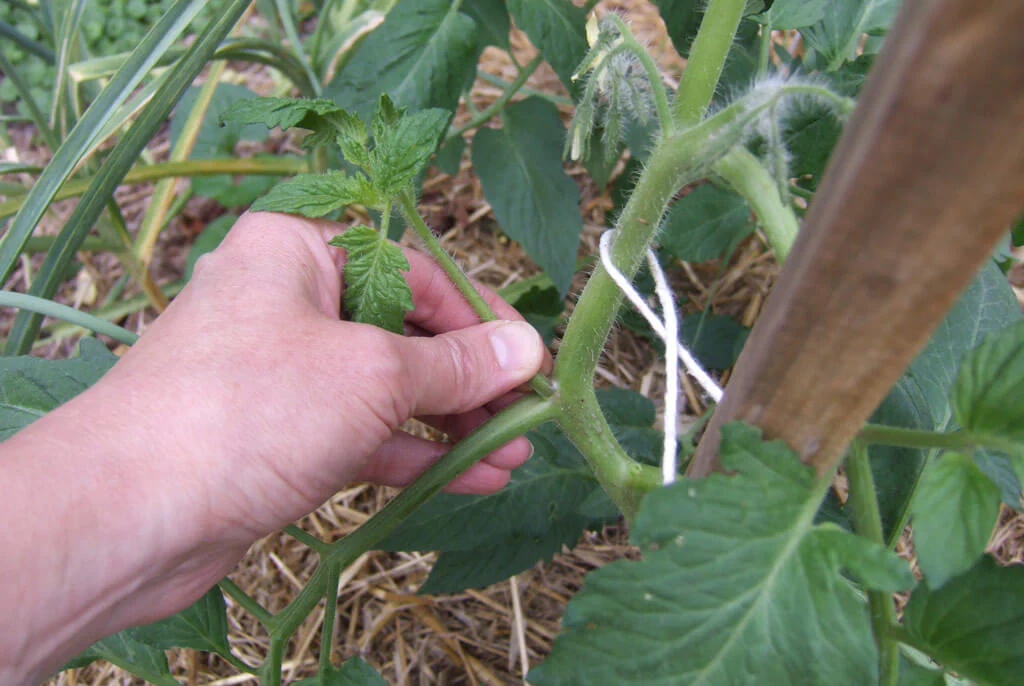
Step 3: Remove Suckers

After topping, watch for small shoots growing in the “crotches” where branches meet the main stem. These are suckers—they compete for nutrients and shade the interior of the plant.

Pinch or cut these suckers off when they’re small (about 1–2 inches). Focus especially on lower suckers that won’t receive much sunlight.

Step 4: Clean the Lower Stem

Remove all leaves and small branches up to about 6 inches from the soil surface. This prevents soil-borne pathogens from splashing up onto your plant and improves airflow around the base.

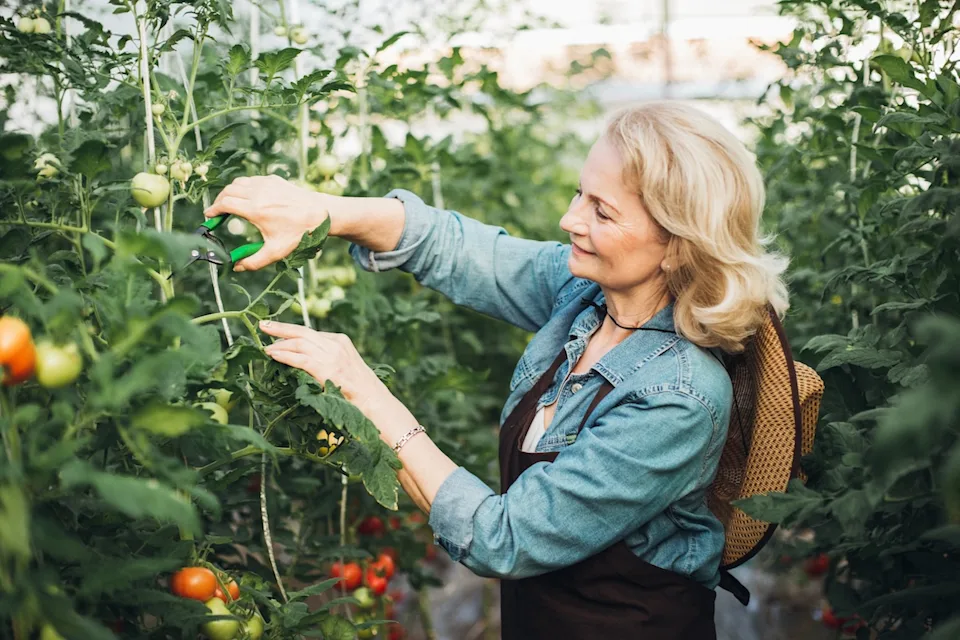
Step 5: Thin the Canopy

Once your plant is producing fruit, prune selectively to open up the canopy. Remove crowded branches so sunlight can reach deep inside the plant. This helps peppers ripen evenly and reduces the risk of fungal infections.


Light, Water, and Feeding Tips to Maximize Results

Pruning works best when paired with good cultural practices. A stressed plant can’t make the most of its new shape, so support it with these essential tips:

1. Provide Full Sun

Peppers love sunlight. Aim for at least 6–8 hours of direct sun daily. If growing indoors or in partial shade, supplement with grow lights to encourage healthy growth and strong stems.

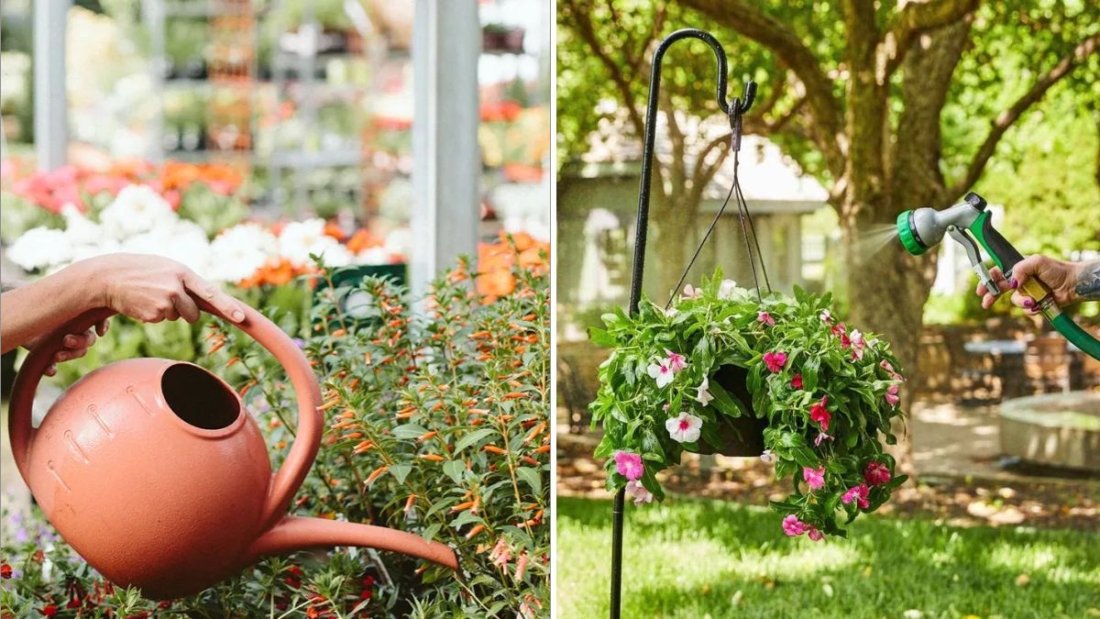
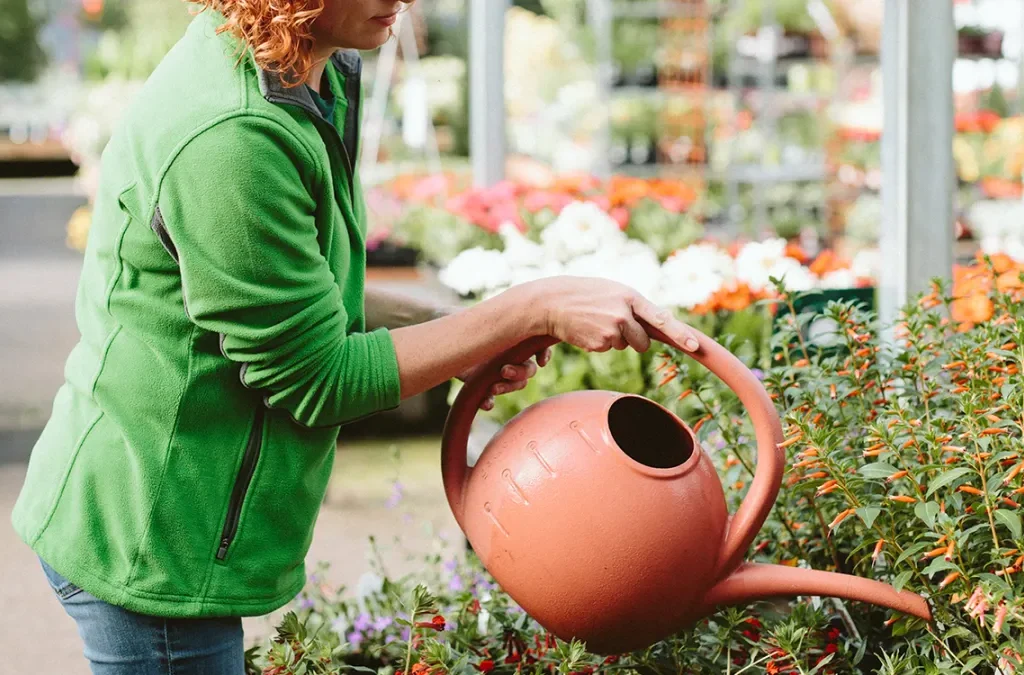
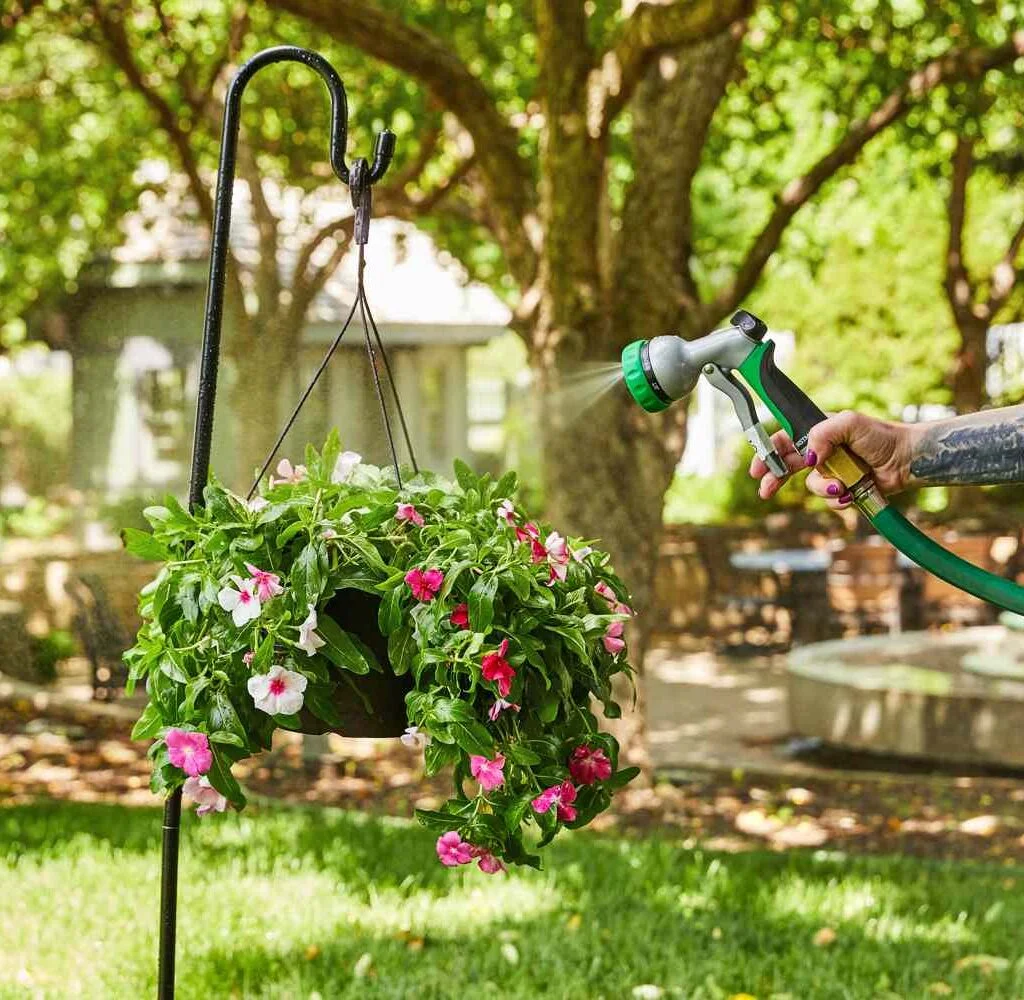
2. Maintain Even Moisture

Uneven watering can stress pruned plants and affect fruit development. Keep the soil consistently moist but not waterlogged. A layer of mulch helps retain moisture and stabilize soil temperature.

3. Feed Regularly

After pruning, your plants will redirect energy toward new growth and fruiting. Boost them with a balanced, slow-release fertilizer or a liquid feed with an N-P-K ratio around 5-10-10. Too much nitrogen encourages leafy growth rather than fruiting.

4. Support Your Plants

Pruned plants often grow heavy with fruit. Use stakes or cages to support branches and prevent them from snapping under the weight.


Bonus Trick: Early Blossom Removal for Bigger Yields

It might sound counterintuitive, but removing the first few flowers that appear on young plants actually leads to a higher yield later.

Here’s why:
Early blooms divert energy toward fruiting before the plant has developed a strong enough root system and foliage. By removing the first blossoms, you allow the plant to grow stronger and more capable of producing large clusters of peppers later on.


Common Mistakes to Avoid

Even with good intentions, many gardeners make a few missteps when pruning peppers. Here are the most common mistakes—and how to fix them:

  1. Pruning too late: Heavy pruning during fruiting can shock the plant. Focus on shaping early in the season.
  2. Over-pruning: Removing too many leaves exposes fruits to sunscald. Always keep enough foliage to shade developing peppers.
  3. Using dirty tools: Dirty shears can spread disease like wildfire. Always sterilize before and after pruning.
  4. Ignoring plant stress: Avoid pruning during extreme heat or drought; wait until the plant is hydrated and healthy.

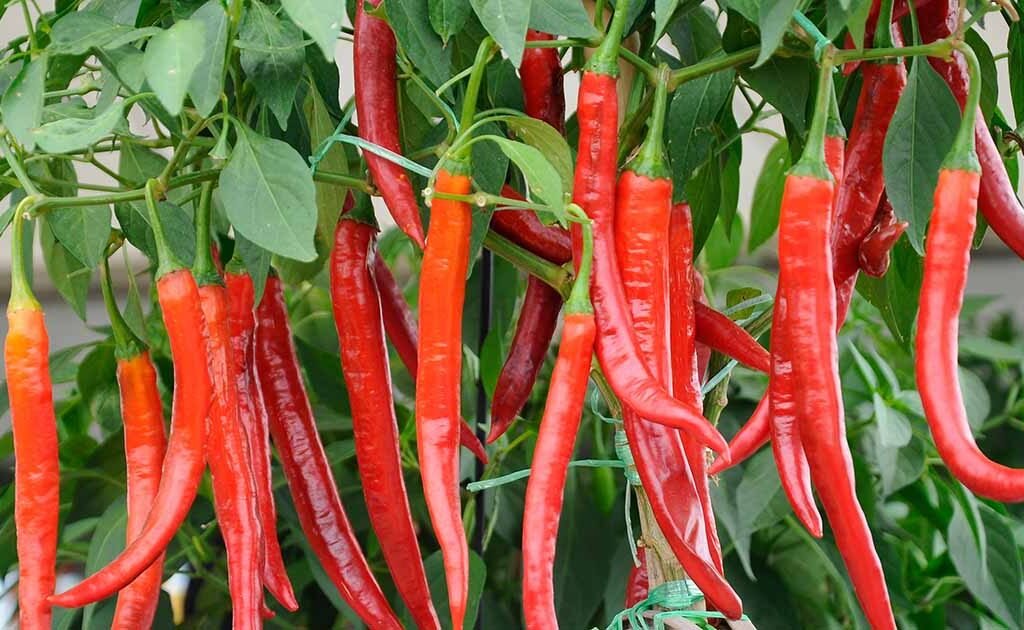
The Payoff: Healthier Plants and Heavier Harvests

When done correctly, pruning transforms pepper plants into compact, highly productive bushes loaded with fruit. The difference can be dramatic—double the number of peppers, fewer pest problems, and better airflow and sunlight throughout the plant.

You’ll also notice that your pruned plants:

  • Produce larger, thicker-walled peppers
  • Ripen faster and more evenly
  • Stay disease-free longer
  • Remain manageable in size, especially in containers

Final Thoughts

Learning how to prune your pepper plants is one of the simplest and most powerful ways to boost your yield. With just a few well-placed cuts, you can direct your plant’s energy where it counts—into producing more flowers, stronger stems, and heavier fruit clusters.

So, grab your pruning shears and give it a try. Start small, observe how your plants respond, and adjust your technique over time. Within a few weeks, you’ll see the difference—not only in plant health but in the sheer number of peppers you’ll harvest.

Because in the end, pruning isn’t just about cutting—it’s about shaping your plants for success. And once you see your pepper garden bursting with vibrant, glossy fruits, you’ll never skip this simple but game-changing step again.

Why Your Tomato Plant Isn’t Producing Fruit

Why Your Tomato Plant Isn’t Producing Fruit

Few things frustrate gardeners more than a lush, leafy tomato plant that simply refuses to bear fruit. You’ve watered, fed, staked, and nurtured it with care—yet the flowers fall off or never turn into tomatoes. Don’t worry—you’re not alone. This is one of the most common (and solvable) problems in home gardening.

In this article, we’ll explore why your tomato plant isn’t producing fruit, what environmental and care factors are to blame, and how you can fix them to get those juicy red tomatoes growing again.


Understanding How Tomato Plants Produce Fruit

Before troubleshooting, it helps to understand the fruiting process. Tomato plants go through three key stages:

  1. Vegetative stage: The plant focuses on developing stems and leaves.
  2. Flowering stage: Blossoms form, signaling the start of fruit production.
  3. Fruiting stage: Flowers are pollinated, then develop into tomatoes.

If your plants are stuck in the vegetative or flowering stage, something is interrupting this natural progression. That “something” usually falls into one (or more) of the following categories: temperature stress, pollination failure, improper pruning, nutrient imbalance, or environmental stress.


1. Temperature Extremes: The Silent Fruit Blocker

Tomatoes are heat-loving plants—but they’re also picky about how much heat they get. Both too much and too little can stop fruiting altogether.

Ideal Temperature Range:

  • Day: 70–85°F (21–29°C)
  • Night: 55–70°F (13–21°C)

When Temperatures Go Wrong:

  • Above 90°F (32°C): Flowers often dry out and fall off before pollination occurs (a condition called blossom drop).
  • Below 55°F (13°C): Pollination slows down or stops completely.

Fixes:

  • Provide shade: Use shade cloths during heatwaves to reduce sun intensity.
  • Mulch generously: A 2–3 inch layer of straw or shredded leaves helps moderate soil temperature.
  • Water deeply and regularly: Especially in hot climates, consistent moisture keeps plants from stressing.
  • For cold snaps: Cover plants at night with frost cloths or plastic tunnels to retain warmth.

Temperature fluctuations are the number one reason tomato plants stop producing fruit, so stabilizing their environment is your first line of defense.


2. Poor Pollination: No Pollination, No Tomatoes

Tomato plants need their flowers to be pollinated before fruit can form. While they’re self-pollinating, meaning each flower has both male and female parts, they still need vibration or movement (from wind or insects) to transfer pollen.

Causes of Poor Pollination:

  • Low bee or pollinator activity.
  • Still air (especially in greenhouses).
  • High humidity, which causes pollen to clump.
  • Extreme heat, which sterilizes pollen.

How to Fix It:

  • Attract pollinators: Plant bee-friendly flowers nearby—like lavender, basil, or marigolds.
  • Encourage air movement: Use a small fan in enclosed spaces to simulate wind.
  • Hand-pollinate: Gently shake or tap flower clusters, or use a soft brush or electric toothbrush to move pollen.
  • Avoid pesticides: Many insecticides drive away or harm pollinators.

A little help from you—or the bees—can often jump-start fruit production within a week or two.


3. Too Much Nitrogen: All Leaves, No Fruit

If your tomato plant looks healthy, tall, and covered in lush green leaves—but not a single tomato is in sight—it’s probably getting too much nitrogen.

Nitrogen promotes leafy growth, but an excess throws the plant’s hormonal balance off, reducing flower and fruit development.

The Signs:

  • Very tall plants with thick foliage.
  • Few or no blossoms.
  • Delayed fruiting despite vigorous growth.

The Fix:

  • Switch to a balanced or low-nitrogen fertilizer, such as one labeled 5-10-10 or 4-6-8 (N-P-K ratio).
  • Add bone meal or rock phosphate to boost phosphorus levels for better flowering.
  • Incorporate compost instead of synthetic fertilizers for slow, steady nutrient release.

A simple feeding adjustment often brings plants back into balance, encouraging them to focus on flowering instead of just foliage.


4. Lack of Sunlight

Tomatoes are sun lovers. Without at least 6–8 hours of direct sunlight per day, your plant will struggle to produce flowers and fruit.

Symptoms:

  • Long, leggy growth.
  • Sparse blossoms.
  • Weak stems and pale leaves.

Solutions:

  • Relocate container plants to the sunniest spot available.
  • Prune nearby trees or tall plants that cast shade.
  • Use reflective mulch or white garden fabric to redirect light onto your plants.

More sunlight equals more energy for flowering and fruiting—simple as that.


5. Overcrowding and Poor Airflow

Tomatoes need space to breathe. When plants are too close together, airflow decreases, humidity rises, and diseases spread—creating stress that hinders fruit formation.

Recommended Spacing:

  • Indeterminate varieties: 24–36 inches apart.
  • Determinate varieties: 18–24 inches apart.

Fixes:

  • Thin out crowded plants.
  • Prune lower leaves and unnecessary suckers.
  • Stake or cage plants to keep them upright and airy.

Good spacing not only encourages fruiting but also prevents common issues like blight and mildew.


6. Inconsistent Watering Habits

Tomatoes need steady moisture—but not too much. Irregular watering (alternating between drought and flood) stresses plants and leads to flower drop, fruit cracking, or small yields.

What Happens:

  • Drought = Flowers dry up.
  • Overwatering = Roots suffocate, preventing nutrient uptake.

How To Fix It:

  • Water deeply and infrequently. Aim for about 1–1.5 inches of water per week.
  • Use mulch. This keeps soil moisture even.
  • Check soil regularly. Stick your finger 2 inches deep—if it’s dry, it’s time to water.

Consistency is the secret to healthy, fruit-bearing tomato plants.


7. Stress From Pruning or Transplanting

Overzealous pruning or rough transplanting can shock your plant into a temporary pause in growth.

How To Avoid This:

  • Prune gradually. Never remove more than one-third of the plant at once.
  • Transplant carefully. Disturb the root ball as little as possible.
  • Water immediately after transplanting or pruning to help recovery.
  • Apply mulch to stabilize temperature and moisture.

Tomatoes can be surprisingly sensitive—gentle handling keeps them in productive mode.


8. Variety and Timing Issues

Sometimes, the problem isn’t you—it’s the plant variety or the timing of your planting.

What To Know:

  • Some tomato varieties take 70–90 days from transplanting to fruiting.
  • If planted too early or late in the season, plants may face temperatures unsuitable for fruit set.
  • Certain heirloom types are naturally slower producers.

Solutions:

  • Choose heat-tolerant or early-maturing varieties (like ‘Early Girl’ or ‘Sun Gold’) for hot regions.
  • Stagger plantings every 2–3 weeks for a longer harvest window.
  • Track local growing seasons using a planting calendar.

9. Diseases and Pests Interfering With Fruit Set

Pests and diseases weaken your plant and interfere with its reproductive process.

Common Culprits:

  • Aphids and whiteflies: Suck sap and transmit viruses.
  • Spider mites: Cause stippled, yellowing leaves.
  • Fungal diseases: Such as blight or wilt, which stress the plant.

Natural Treatments:

  • Spray with neem oil or insecticidal soap weekly.
  • Remove infected leaves promptly.
  • Avoid overhead watering to reduce fungal spread.
  • Encourage beneficial insects like ladybugs and lacewings.

A healthy, pest-free plant has more energy to produce flowers and fruits.


10. Environmental Stress (Wind, Pollution, or Nearby Chemicals)

Tomatoes are sensitive to environmental pollutants and physical damage.

  • Strong winds can break stems or blow away pollen.
  • Herbicide drift from neighboring yards can distort leaves and halt flowering.
  • Dust or pollution can coat leaves, reducing photosynthesis.

Solutions:

  • Use windbreaks like fences or garden fabric.
  • Avoid planting tomatoes near lawns treated with herbicides.
  • Rinse leaves gently with water during dry, dusty periods.

How To Encourage Fruit Production

Once you’ve identified the likely cause, use these strategies to kickstart fruiting:

  1. Feed wisely: Apply a balanced fertilizer every 2–3 weeks.
  2. Trim excess growth: Prune suckers and lower leaves for better airflow.
  3. Water evenly: Avoid extremes of drought or soaking.
  4. Control temperature: Shade in heat, cover in cold.
  5. Help pollination: Shake flower clusters daily or use a soft brush.
  6. Patience: Once conditions improve, your plant will refocus its energy on fruiting.

Final Thoughts

A tomato plant that isn’t producing fruit isn’t a lost cause—it’s simply a signal that something’s off in its environment. Whether it’s too much heat, too little pollination, or an overload of nitrogen, every problem has a fix.

By paying attention to the plant’s cues and making small adjustments in care—consistent watering, balanced feeding, good airflow, and the right temperatures—you’ll soon see those tiny green tomatoes forming.

And once they ripen, all the patience and observation will have been worth it—because nothing tastes sweeter than the first juicy tomato from a plant you’ve nursed back to fruiting health.

How To Prune Tomato Plants For Bigger, Juicier Fruits

How To Prune Tomato Plants For Bigger, Juicier Fruits

Tomatoes are one of the most rewarding crops to grow—but they can also be among the most demanding. If you’ve ever looked at your tomato plants and wondered why they’re sprawling everywhere but not producing much fruit, pruning may be the missing link.

Pruning is more than just trimming—it’s about helping your plant focus its energy on producing fewer but bigger, juicier, and tastier tomatoes. Done right, it improves airflow, prevents disease, and maximizes sunlight exposure—all key factors for a successful harvest.

In this detailed guide, you’ll learn why pruning matters, when and how to do it, and which mistakes to avoid to get the best results.


Why Pruning Tomato Plants Matters

Many gardeners hesitate to prune, fearing they’ll harm their plants. But pruning tomatoes isn’t just cosmetic—it directly impacts growth and yield.

Here’s what proper pruning does:

  1. Improves air circulation: Reduces the risk of fungal diseases like blight and mildew.
  2. Encourages fruit growth: The plant diverts energy from excess foliage to fruit production.
  3. Enhances sunlight exposure: Allows lower leaves and fruits to receive adequate light.
  4. Reduces pest problems: Less dense foliage means fewer hiding spots for pests.
  5. Keeps plants manageable: Easier to stake, tie, and harvest without tangles.

Simply put, pruning helps create a healthier plant that produces more flavorful, high-quality tomatoes instead of a jungle of leaves.


Know Your Tomato Type Before Pruning

Before picking up your shears, identify whether your tomato variety is determinate or indeterminate, because their pruning needs differ.

1. Determinate Tomatoes (Bush Type)

  • Grow to a fixed size (usually 3–4 feet tall).
  • Produce fruit all at once.
  • Prune minimally—just remove dead or diseased leaves.
  • Over-pruning can reduce yield because fruit forms on a set number of stems.

Examples: Roma, Celebrity, Patio Princess.

2. Indeterminate Tomatoes (Vining Type)

  • Continue growing and producing fruit all season.
  • Require regular pruning to control size and improve yield.
  • Benefit most from training and staking systems.

Examples: Brandywine, Cherokee Purple, Beefsteak, Sungold.

If your goal is continuous harvest and larger fruits, indeterminate varieties respond best to structured pruning.


When To Start Pruning Tomato Plants

Timing is crucial. Start pruning once your tomato plant is about 12–18 inches tall and has begun to develop its first flower cluster.

Key moments to prune:

  • Early season: Shape the plant as it grows.
  • Midseason: Maintain airflow and remove suckers.
  • Late season: Remove excess growth to speed up ripening.

Avoid heavy pruning during very hot, sunny days, as it may expose fruits to sunscald. Early morning or evening is ideal for trimming.


The Anatomy of a Tomato Plant (Know What to Cut)

Understanding where and what to prune helps avoid accidental damage.

Here are the main parts you’ll work with:

  • Main stem: The central leader of the plant.
  • Leaves: Essential for photosynthesis—don’t remove too many.
  • Flower clusters: Future tomatoes—never cut these!
  • Suckers: The small shoots that grow in the joint between a stem and a leaf branch.

Suckers are the primary focus when pruning tomatoes.


Step-by-Step Guide: How To Prune Tomatoes Properly

Step 1: Gather Your Tools

You’ll need:

  • Sharp pruning shears or scissors.
  • Gloves.
  • Sanitizing spray (like diluted rubbing alcohol) to prevent disease spread.

Clean your tools before and after pruning—tomatoes are prone to fungal infections that spread easily through cuts.


Step 2: Remove the Bottom Leaves

Once your plant reaches about 18 inches tall, remove the bottom 6–12 inches of leaves. These lower leaves are closest to the soil, where moisture and disease spores linger.

  • Use clean shears to snip them off.
  • Do not tear leaves by hand—it can damage stems.
  • This step greatly reduces the risk of early blight and soil-borne diseases.

Step 3: Identify and Remove Suckers

Suckers are the small shoots growing in the “V” between a main stem and a branch.

Why remove them:
Left unchecked, suckers turn into full stems that compete for nutrients and create dense foliage.

How to remove them:

  • Pinch them off with your fingers when they’re 2–3 inches long.
  • For larger suckers, use sterilized pruning shears.
  • Leave one or two main stems depending on your training system.

Tip: If your goal is maximum fruit size, prune more aggressively (keeping one main stem). For higher quantity, leave two stems.


Step 4: Thin Out Dense Growth

As the plant grows, remove leaves that block sunlight from reaching the interior.

  • Focus on the middle section where airflow gets restricted.
  • Always keep at least 60% of the foliage intact—tomatoes need leaves for photosynthesis.
  • Avoid stripping too many at once to prevent sunburned fruits.

This “selective thinning” helps light reach ripening tomatoes while reducing disease risk.


Step 5: Top the Plant (End-of-Season Pruning)

In late summer (about 4 weeks before the first expected frost), you can top your tomato plants to encourage ripening of existing fruit.

  • Cut off the main stem just above the last cluster of developing fruit.
  • This redirects the plant’s energy from producing new flowers to ripening existing tomatoes.

Result? A sweeter, fuller harvest before cold weather hits.


Pruning Techniques for Different Setups

1. Single-Stem Pruning (For Vertical Growth)

  • Ideal for small spaces or when using cages, stakes, or trellises.
  • Keep only one main stem.
  • Remove all suckers and side shoots.
  • Produces fewer but larger, juicier fruits.

2. Double-Stem Pruning

  • Leave one sucker just below the first flower cluster to grow as a secondary stem.
  • Offers a balance between fruit size and total yield.
  • Easier to manage than multi-stem plants.

3. Minimal Pruning (For Busy Gardeners)

  • Remove only the bottom leaves and diseased or crowded branches.
  • Best for bush-type (determinate) tomatoes.

Pro Tips for Effective Tomato Pruning

  1. Never prune wet plants: Moisture spreads fungal diseases like wildfire.
  2. Sanitize tools regularly: A quick wipe with alcohol prevents contamination.
  3. Mulch after pruning: It keeps the soil from splashing onto lower stems and retains moisture.
  4. Don’t over-prune: Too few leaves mean less energy for fruit development.
  5. Train as you prune: Tie vines gently to stakes or cages as they grow.
  6. Observe your plants: Some varieties naturally grow more compactly; prune according to their growth habit.

Common Pruning Mistakes to Avoid

Even experienced gardeners make these errors:

  • Over-pruning: Cutting too much foliage at once stresses plants and exposes fruit to sunscald.
  • Ignoring suckers for too long: Once large, they divert major nutrients from fruiting branches.
  • Pruning too late: Early pruning (before flowering) gives better results.
  • Neglecting airflow: Dense growth encourages fungal issues like leaf spot and mold.
  • Cutting above flower clusters: Always prune below or beside them to avoid losing fruiting potential.

Aftercare: Helping Plants Recover

Pruning slightly stresses your tomato plants, so help them bounce back quickly:

  • Water deeply after pruning.
  • Feed lightly with compost tea or diluted seaweed extract to replenish nutrients.
  • Mulch around the base to conserve moisture and stabilize soil temperature.
  • Monitor for pests—open spaces may temporarily attract them until new growth appears.

Within a few days, you’ll notice sturdier stems and stronger flower clusters.


Final Thoughts

Pruning tomato plants is both an art and a science. It’s about guiding growth, not restricting it. By removing the right leaves and suckers at the right time, you allow your plants to focus on what truly matters—producing bigger, juicier, and more flavorful tomatoes.

Think of each snip as a way to redirect your plant’s energy toward abundance. Combine smart pruning with proper watering, feeding, and staking, and your tomato patch will reward you with a bumper crop of sun-ripened perfection.

Remember: a well-pruned tomato plant isn’t just healthier—it’s happier, more productive, and a joy to harvest from all season long.

The Best Fertilizer Schedule For Healthy Tomato Growth

The Best Fertilizer Schedule For Healthy Tomato Growth

Tomatoes are hungry plants. To produce plump, flavorful fruit, they need a steady supply of nutrients throughout the growing season. But too much or too little fertilizer at the wrong time can harm your plants—causing lush leaves but few fruits, or stunted growth and yellowing foliage.

That’s why following a smart fertilizer schedule is essential. With the right nutrients applied at the right time, your tomato plants will thrive from seedling to harvest.

In this guide, we’ll walk through the best fertilizer schedule for healthy tomato growth, including what nutrients tomatoes need, when to apply them, and how to use both organic and natural options effectively.


Understanding Tomato Nutrient Needs

Before diving into the schedule, it helps to understand what tomatoes actually crave. Like all plants, tomatoes rely on three key macronutrients:

  • Nitrogen (N): Promotes leafy green growth early in the season.
  • Phosphorus (P): Stimulates root development, flower production, and fruit set.
  • Potassium (K): Supports overall plant health, disease resistance, and fruit quality.

They also benefit from secondary nutrients and trace minerals such as:

  • Calcium: Prevents blossom end rot.
  • Magnesium: Important for chlorophyll production.
  • Sulfur, Iron, Zinc, and Boron: Support metabolism and growth.

A healthy tomato fertilizer program balances all of these elements at different growth stages.


Phase 1: Pre-Planting Preparation (2–3 Weeks Before Planting)

Healthy tomato growth starts before your seedlings even hit the soil.

Goal: Build a nutrient-rich foundation.

What to Do:

  1. Test your soil: Use a home soil test kit to check nutrient levels and pH. Tomatoes prefer slightly acidic soil (pH 6.0–6.8).
  2. Amend your soil:
    • Mix 2–3 inches of compost or well-rotted manure into the top 8–12 inches of soil.
    • Add bone meal or rock phosphate for phosphorus (2–3 tablespoons per planting hole).
    • Add wood ash or greensand for potassium if your soil test shows a deficiency.
  3. Optional boost: Mix in a slow-release organic fertilizer labeled for vegetables (something near 5-5-5 NPK).

This ensures your plants start in nutrient-rich soil that supports strong roots and early growth.


Phase 2: At Planting Time

Goal: Establish deep roots and healthy seedlings.

When transplanting your tomato starts into the garden, give them a nutrient boost that focuses on phosphorus and calcium.

Fertilizer type: A starter fertilizer high in phosphorus (like 4-12-4 or 5-10-5).

How to apply:

  • Add 1–2 tablespoons of the fertilizer directly into the planting hole and mix well with soil before placing the seedling.
  • You can also sprinkle crushed eggshells or a tablespoon of bone meal to supply calcium and phosphorus.

Avoid high-nitrogen fertilizers at this stage—excess nitrogen promotes leafy growth at the expense of root and flower development.


Phase 3: Early Growth (Weeks 1–4 After Planting)

Goal: Encourage steady vegetative growth without overstimulation.

During this period, your tomato plants are establishing roots and producing healthy foliage.

Best fertilizer: Balanced formula, such as 10-10-10 or organic compost tea.

How to apply:

  • Feed once every 2 weeks with a liquid organic fertilizer diluted to half strength.
  • Water plants thoroughly before and after feeding to prevent root burn.

Organic options:

  • Compost tea (rich in microbial life).
  • Fish emulsion (high in nitrogen but gentle).
  • Seaweed extract (adds micronutrients and boosts resilience).

Tip: Keep nitrogen moderate. Too much will create lush, leafy plants that delay flowering.


Phase 4: Flowering Stage (Weeks 4–6)

Goal: Support flowering and fruit set.

As your plants begin to bloom, their nutritional focus shifts from growing leaves to producing flowers and fruit.

Fertilizer type: Low-nitrogen, high-phosphorus formula—something like 5-10-10 or 4-6-8.

How to apply:

  • Apply fertilizer every 2–3 weeks, depending on plant vigor.
  • Use a liquid fertilizer for quick absorption or a granular fertilizer scratched into the soil around the plant base.
  • Stop using nitrogen-heavy feeds.

Organic alternatives:

  • Bone meal or fish bone meal for phosphorus.
  • Banana peel tea for potassium.
  • Kelp meal to improve flower retention and stress tolerance.

Extra Tip: Mulch around the plants with straw or compost to regulate soil moisture and reduce nutrient loss.


Phase 5: Fruit Development (Weeks 6–12)

Goal: Promote healthy, flavorful fruits.

At this stage, your tomato plants are busy setting and growing fruit. They need potassium and calcium more than nitrogen.

Fertilizer type:

  • Organic 4-6-8 or 3-4-6 formula.
  • Or, use tomato-specific fertilizers (such as Espoma Tomato-Tone or Jobe’s Organic Tomato Food).

How to apply:

  • Fertilize every 2–3 weeks throughout fruiting.
  • Water thoroughly before and after applying fertilizer.
  • Side-dress with compost or worm castings midseason for a natural nutrient boost.

Calcium tip: If you notice small black spots at the bottom of fruits (blossom end rot), spray a calcium solution (1 tablespoon of calcium nitrate per liter of water) once a week.


Phase 6: Late Season (After Peak Harvest)

Goal: Maintain plant health and extend production.

As plants age, nutrient demand decreases slightly, but they still need steady potassium and micronutrients to keep producing quality fruit.

Fertilizer type:

  • Low-nitrogen formula, such as 3-4-6 or 2-3-5.
  • Continue organic feeding every 3–4 weeks until the final harvest.

If you’re growing in containers, fertilize a bit more frequently, as nutrients wash out faster due to frequent watering.

Pro Tip: Use liquid seaweed extract or compost tea in late summer to help plants recover from heat stress and maintain vigor.


Sample Fertilizer Schedule (Summary Table)

Growth StageTimeframeFertilizer TypeFrequencyFocus Nutrients
Pre-Planting2–3 weeks before plantingCompost + Bone MealOncePhosphorus, Potassium
TransplantingPlanting dayStarter Fertilizer (5-10-5)OncePhosphorus, Calcium
Early GrowthWeeks 1–4Balanced Feed (10-10-10 or Compost Tea)Every 2 weeksNitrogen, Micronutrients
FloweringWeeks 4–6Low-Nitrogen, High-P (5-10-10)Every 2–3 weeksPhosphorus, Potassium
FruitingWeeks 6–12Tomato Fertilizer (4-6-8)Every 2–3 weeksPotassium, Calcium
Late SeasonAfter Peak HarvestSeaweed or Compost TeaEvery 3–4 weeksMicronutrients

Organic Fertilizer Options for Tomatoes

If you prefer to keep your garden natural, try these organic fertilizers that deliver a balanced nutrient profile:

  • Compost or worm castings: Improves soil structure and microbial health.
  • Fish emulsion: Great for early vegetative growth.
  • Bone meal: Encourages flower and fruit development.
  • Kelp meal or seaweed extract: Adds trace minerals and promotes resilience.
  • Epsom salt (magnesium sulfate): 1 tablespoon per gallon of water every month supports chlorophyll production and prevents leaf yellowing.

Additional Tips for Fertilizer Success

  1. Water wisely: Always water before fertilizing—dry soil can cause nutrient burn.
  2. Don’t overfeed: More fertilizer doesn’t mean more fruit; it can stunt or stress plants.
  3. Mulch generously: Reduces nutrient leaching and keeps roots cool.
  4. Monitor growth: Pale leaves indicate nitrogen deficiency, while dark green but flowerless plants suggest too much nitrogen.
  5. Use slow-release options: Organic fertilizers feed gradually, preventing over-fertilization.

Final Thoughts

A consistent and balanced fertilizer routine is the secret to healthy, high-yielding tomato plants. By feeding according to your plant’s growth stage—starting with phosphorus for roots, balanced nutrients for leaves, and potassium for fruit—you’ll help your tomatoes reach their full potential.

Remember: healthy soil equals healthy plants. Combine a good fertilizer schedule with compost, mulch, and proper watering, and your tomato garden will reward you with flavorful, abundant harvests all season long.

How To Grow Tomatoes Vertically To Save Space

How To Grow Tomatoes Vertically To Save Space

If you’ve ever struggled to fit all your favorite plants into a small garden, patio, or balcony, vertical tomato growing might be the perfect solution. Instead of sprawling across the ground and taking up valuable space, tomato plants can be trained to grow upward—yielding healthier fruit, fewer pests, and easier harvesting.

Growing tomatoes vertically isn’t just for small gardens. Even gardeners with ample space are embracing this method because it improves air circulation, reduces disease, and boosts productivity. Whether you’re growing in containers or garden beds, this guide will show you how to grow tomatoes vertically to save space and increase yield.


Why Grow Tomatoes Vertically?

Before diving into the how-to, let’s look at why vertical tomato growing has become so popular:

  1. Saves Space: Ideal for small gardens, patios, or balconies where horizontal space is limited.
  2. Improves Air Circulation: Reduces the risk of fungal diseases like blight and mildew.
  3. Simplifies Harvesting: Fruits are easier to see and pick without bending or crawling.
  4. Reduces Pest Problems: Keeps fruit off the soil, deterring slugs and rot.
  5. Encourages Stronger Stems: Vertical training promotes healthier growth and larger yields.
  6. Cleaner Fruit: Tomatoes stay free of soil splashes and debris.

Now let’s explore how to do it successfully.


Step 1: Choose the Right Tomato Variety

Not all tomato varieties perform equally well when grown vertically.

Best choices:

  • Indeterminate varieties (vining types): These grow tall and continuously produce fruit throughout the season.
    Examples: Better Boy, Sungold, Sweet Million, Cherokee Purple, Big Beef.
  • Avoid determinate (bush) varieties: They grow to a set height and stop producing once they’ve reached maturity, making them less ideal for vertical systems.

If space is very limited or you’re growing on a balcony, choose a compact indeterminate like Gardener’s Delight or Tumbler.


Step 2: Pick Your Vertical Growing System

There are several effective structures you can use depending on your space and budget.

1. Stakes

  • Simple and inexpensive.
  • Drive a 6–8-foot wooden, bamboo, or metal stake 12 inches deep into the ground next to each plant.
  • Tie the plant to the stake every 8–10 inches as it grows using soft ties or garden twine.
  • Ideal for single plants or small gardens.

2. Cages

  • Great for beginner gardeners.
  • Use wire tomato cages that are 4–6 feet tall.
  • Place cages at planting time to avoid damaging roots later.
  • Support the stems inside the cage as they grow.

3. Trellises

  • Excellent for multiple plants in a row.
  • Construct using wood or metal posts with strong horizontal wires or netting.
  • Gently weave stems through the structure as they climb.
  • Perfect for raised beds or long garden rows.

4. String Support System

  • Popular in greenhouse or indoor setups.
  • Tie twine from a high support bar down to the base of each plant.
  • Wrap the main stem around the string as it grows.
  • Provides excellent airflow and efficient use of space.

Step 3: Prepare the Soil and Plant Properly

Tomatoes love deep, rich, well-draining soil.

Soil preparation:

  • Loosen soil 12–18 inches deep.
  • Mix in compost or aged manure for nutrients.
  • Add a slow-release organic fertilizer (such as 5-5-5 NPK).

Planting tips:

  • Plant seedlings deep—bury two-thirds of the stem. This encourages strong root growth along the buried portion.
  • Space plants about 18–24 inches apart if using stakes or strings, and 2–3 feet apart if using cages.

Deep planting and proper spacing ensure that your vertical system can handle healthy, tall plants without overcrowding.


Step 4: Train and Prune Regularly

Training your tomatoes to grow vertically requires some ongoing attention.

Training technique:

  • Once plants reach 10–12 inches tall, begin tying them loosely to the support.
  • Always tie just below a leaf node to prevent stem breakage.
  • Check every few days to guide new growth upward.

Pruning essentials:

  • Remove suckers—the small shoots that grow between the main stem and leaf branches. These divert energy from fruit production and cause overcrowding.
  • Keep the lower 12 inches of the plant free of leaves to improve airflow and prevent soil splash.
  • Limit each plant to one or two main stems for best results.

Regular pruning keeps plants manageable, improves fruit size, and prevents disease.


Step 5: Water and Feed Consistently

Vertical tomatoes depend heavily on consistent watering and nutrition.

Watering tips:

  • Water deeply at the base of the plant 2–3 times per week, depending on weather.
  • Avoid overhead watering to keep leaves dry and reduce fungal issues.
  • Apply mulch (like straw or shredded leaves) around the base to retain moisture.

Feeding:

  • Feed every 2–3 weeks with an organic liquid fertilizer such as fish emulsion or compost tea.
  • During fruiting, switch to a low-nitrogen fertilizer to encourage more fruit and fewer leaves.

Pro Tip: Irregular watering causes blossom end rot, a common issue in container-grown tomatoes. Maintain steady moisture levels.


Step 6: Support Heavy Fruit Clusters

As tomatoes develop, the weight of the fruit can strain stems. Prevent breakage by:

  • Adding extra ties below large clusters.
  • Using soft cloth or elastic plant ties to avoid damaging stems.
  • For trellised plants, use mesh netting to cradle the fruit gently.

If you’re growing large varieties like Beefsteak, be extra vigilant about providing strong, sturdy support.


Step 7: Manage Pests and Diseases Naturally

Growing vertically already helps minimize pest problems, but some vigilance is still necessary.

Natural control tips:

  • Inspect leaves regularly for aphids, whiteflies, and hornworms.
  • Spray neem oil or insecticidal soap at first signs of infestation.
  • Encourage beneficial insects like ladybugs and lacewings.
  • Remove any yellow or diseased leaves promptly.
  • Maintain airflow by pruning regularly and spacing plants correctly.

Mulching and bottom watering also help prevent soil-borne diseases like blight and root rot.


Step 8: Harvest and Maintain Your Plants

When fruits begin to ripen, the benefits of vertical growing become clear—you’ll see clusters of tomatoes hanging neatly in view.

Harvesting tips:

  • Pick fruits as soon as they reach full color to encourage new growth.
  • Use pruning shears or gently twist the fruit off the vine.
  • Regular harvesting keeps plants productive and prevents splitting.

As the season progresses, remove lower leaves and dead foliage to keep plants healthy and focused on fruit production.


Bonus: Growing Vertically in Containers

Don’t have a garden bed? You can still grow vertically on a patio or balcony.

Container requirements:

  • Minimum size: 18–24 inches deep and wide.
  • Use high-quality potting mix with compost added.
  • Add a stake, cage, or trellis directly into the pot before planting.
  • Water more frequently since containers dry out faster.

Choose compact indeterminate or dwarf varieties that adapt well to smaller spaces, such as Patio Princess or Tiny Tim.


Common Mistakes to Avoid

  1. Using weak supports: Always ensure your stakes or trellises are strong enough for mature plants.
  2. Tying too tightly: Restricts growth and damages stems.
  3. Neglecting pruning: Leads to overcrowded, disease-prone plants.
  4. Inconsistent watering: Causes stress and poor fruit quality.
  5. Planting too close together: Reduces airflow and invites disease.

A little extra attention early in the season prevents big problems later.


Final Thoughts

Growing tomatoes vertically is one of the smartest ways to make the most of limited space while improving plant health and yield. It transforms messy, sprawling vines into tidy, productive towers of flavor.

With the right structure, regular pruning, and consistent care, you’ll enjoy cleaner fruit, easier harvesting, and healthier plants—all without sacrificing precious garden space.

Whether you’re a balcony gardener or managing a large backyard plot, vertical tomato growing will reward you with beautiful, abundant harvests that make every inch of your garden count.

10 Common Tomato Diseases—And How To Treat Them Naturally

10 Common Tomato Diseases—And How To Treat Them Naturally

Tomatoes are the crown jewel of any home garden—lush, flavorful, and incredibly rewarding to grow. But every tomato grower eventually faces the heartbreak of discovering black spots, yellowing leaves, or stunted plants. These are signs of tomato diseases, many of which can spread quickly and devastate your crop if not managed early.

The good news? You don’t need harsh chemicals to save your tomatoes. With natural and organic methods, you can treat and prevent most tomato diseases while keeping your garden ecosystem healthy.

Here’s a detailed guide to the 10 most common tomato diseases—what causes them, how to recognize the symptoms, and how to treat them naturally.


1. Early Blight (Alternaria solani)

Symptoms:

  • Dark brown or black spots with concentric rings on lower leaves.
  • Leaves yellow and drop off as the disease progresses.
  • Fruit may develop sunken, leathery patches near the stem.

Cause:
A fungal disease that thrives in warm, humid conditions and spreads through soil or splashing water.

Natural Treatments:

  • Neem oil spray: Mix 2 teaspoons of neem oil with 1 liter of water and spray every 7–10 days.
  • Prune infected leaves: Dispose of them away from the garden (don’t compost).
  • Mulch heavily: Prevents soil-borne spores from splashing onto leaves.
  • Rotate crops: Avoid planting tomatoes or potatoes in the same spot for 2–3 years.

2. Late Blight (Phytophthora infestans)

Symptoms:

  • Irregular gray or dark patches on leaves and stems.
  • Leaves develop white fuzzy mold on undersides in humid weather.
  • Fruits show greasy, dark, firm spots that spread rapidly.

Cause:
A highly destructive fungal-like pathogen responsible for the Irish potato famine, thriving in cool, moist conditions.

Natural Treatments:

  • Remove affected parts immediately.
  • Spray with copper fungicide (OMRI-approved organic formula).
  • Increase airflow: Stake plants and prune lower branches.
  • Avoid overhead watering to keep foliage dry.
  • Plant resistant varieties like Mountain Magic or Defiant PhR.

3. Septoria Leaf Spot (Septoria lycopersici)

Symptoms:

  • Tiny, circular gray spots with dark borders on older leaves.
  • Rapid yellowing and leaf drop from the bottom up.
  • Fruit remains mostly unaffected but loses vigor due to defoliation.

Cause:
A fungus that survives on infected plant debris in the soil.

Natural Treatments:

  • Remove infected leaves as soon as spots appear.
  • Apply a baking soda spray: Mix 1 tablespoon of baking soda, 1 teaspoon of mild soap, and 1 gallon of water.
  • Use drip irrigation to keep leaves dry.
  • Mulch and rotate crops annually.

4. Fusarium Wilt (Fusarium oxysporum)

Symptoms:

  • Yellowing begins on one side of the plant or a single branch.
  • Leaves wilt during the day and recover at night—eventually, they stay wilted.
  • Brown streaks visible inside stems when cut open.

Cause:
A soil-borne fungus that blocks water transport inside the plant, thriving in warm climates.

Natural Treatments:

  • Plant resistant varieties: Look for “F” or “FF” after the tomato name (e.g., Better Boy F1).
  • Solarize soil: Cover the garden bed with clear plastic for 4–6 weeks during peak summer to kill fungal spores.
  • Add compost and beneficial microbes: Improves soil health and suppresses pathogens.
  • Rotate crops: Avoid nightshade family plants for 3 years.

5. Verticillium Wilt (Verticillium albo-atrum)

Symptoms:

  • Yellow “V-shaped” marks at leaf edges.
  • Wilting begins with lower leaves and moves upward.
  • Slower progression than fusarium wilt but equally damaging.

Cause:
Another soil-borne fungus, active in cooler conditions than Fusarium.

Natural Treatments:

  • Crop rotation and soil solarization as above.
  • Boost soil biology: Add mycorrhizal fungi or compost tea to outcompete pathogens.
  • Remove and destroy infected plants to prevent spread.
  • Grow resistant varieties: Celebrity and Big Beef are good options.

6. Bacterial Spot (Xanthomonas campestris)

Symptoms:

  • Tiny, dark, greasy-looking spots on leaves and fruits.
  • Leaves may turn yellow, curl, and drop prematurely.
  • Fruit spots are scabby and unsightly, reducing quality.

Cause:
Spread by contaminated seeds, splashing rain, or handling wet plants.

Natural Treatments:

  • Use disease-free seeds or treat seeds in hot water (122°F/50°C for 25 minutes).
  • Apply copper-based organic sprays at the first sign of symptoms.
  • Avoid touching plants when leaves are wet.
  • Mulch and space plants properly for airflow.

7. Bacterial Canker (Clavibacter michiganensis)

Symptoms:

  • Wilting and browning from the base upward.
  • Leaves curl inward and develop “bird’s-eye” spots (white centers, dark margins) on fruit.
  • Stems ooze yellowish sap when cut.

Cause:
A serious bacterial infection that spreads quickly through pruning tools or water.

Natural Treatments:

  • Disinfect tools with a 10% bleach solution between plants.
  • Remove infected plants immediately—do not compost them.
  • Improve drainage to prevent bacterial growth.
  • Spray neem oil or copper soap weekly during humid conditions.

8. Tomato Mosaic Virus (ToMV)

Symptoms:

  • Mottled, mosaic-like yellow and green patches on leaves.
  • Leaf curling and distortion.
  • Smaller, hardened fruits with uneven ripening.

Cause:
A viral disease spread by contaminated hands, tools, or even tobacco products.

Natural Treatments:

  • No chemical cure—focus on prevention.
  • Wash hands and tools before handling plants.
  • Remove and destroy infected plants immediately.
  • Disinfect stakes and cages with 10% bleach.
  • Grow resistant varieties such as Celebrity or Better Boy.

Pro Tip: Avoid smoking near plants—tobacco can carry the virus!


9. Blossom End Rot

Symptoms:

  • Dark, sunken spots on the bottom (blossom end) of tomatoes.
  • Spots enlarge and turn leathery as fruit grows.
  • Leaves remain healthy, making it easy to mistake for a disease.

Cause:
A physiological disorder—not infectious—caused by calcium deficiency due to inconsistent watering or root stress.

Natural Treatments:

  • Maintain even watering: Don’t let soil dry out between sessions.
  • Add crushed eggshells or bone meal to soil before planting.
  • Mulch heavily to regulate moisture.
  • Spray calcium solution: Mix 1 tablespoon of calcium nitrate per liter of water and apply to leaves weekly.

Prevention: Healthy soil rich in organic matter helps stabilize calcium availability.


10. Powdery Mildew

Symptoms:

  • White, powdery patches on leaves and stems.
  • Leaves curl, yellow, and die back from the bottom up.
  • Fruits usually remain unaffected but plant growth stalls.

Cause:
Fungal spores that spread in dry, warm environments with poor air circulation.

Natural Treatments:

  • Spray milk solution: Mix 1 part milk to 2 parts water and apply weekly—it acts as a natural fungicide.
  • Use neem oil to control active infections.
  • Increase airflow: Space plants and prune overcrowded areas.
  • Avoid high-nitrogen fertilizers, which promote soft tissue vulnerable to infection.

Bonus: Natural Preventive Strategies for All Tomato Diseases

  1. Rotate Crops Every Year: Avoid planting tomatoes where other nightshades (peppers, eggplants, potatoes) grew recently.
  2. Mulch Generously: Prevents soil-borne spores from splashing onto lower leaves.
  3. Water at the Base: Keep foliage dry to reduce fungal spread.
  4. Prune Wisely: Remove lower branches for better airflow but leave enough leaves to protect fruits.
  5. Feed with Compost Tea: Boosts beneficial microbes that suppress pathogens.
  6. Attract Beneficial Insects: Ladybugs, lacewings, and bees help maintain ecological balance.
  7. Keep Tools Clean: Sanitize regularly to prevent cross-contamination.

When to Remove a Plant

If more than half of your tomato plant is affected, removal is often the best choice to protect the rest of your garden. Always dispose of infected material in the trash—not the compost pile.


Final Thoughts

Tomato diseases may seem overwhelming, but most can be managed naturally with early action and preventive care. The key is observation—check your plants daily for early symptoms, maintain good soil health, and keep your garden environment balanced.

By combining organic sprays, smart gardening practices, and disease-resistant varieties, you can keep your tomatoes strong, vibrant, and productive all season long—without relying on harsh chemicals.

A healthy tomato plant doesn’t just happen—it’s cultivated through consistent, mindful care. And when you see those bright red fruits thriving despite the challenges, every ounce of effort will feel worth it.

How to Revive Plants After a Hot Summer

How to Revive Plants After a Hot Summer

Summer can be brutal for gardens. Scorching sunlight, relentless heat, and inconsistent watering can leave even the toughest plants wilted, scorched, or near death. By the time the first cool breezes of autumn arrive, your once-thriving greenery might look tired, brown, and hopeless. But don’t give up—most plants can bounce back with the right post-summer recovery plan.

Reviving plants after a hot summer isn’t just about watering more—it’s about rebuilding strength from the roots up, repairing heat damage, and helping your garden regain balance before winter arrives. Let’s explore how to assess the damage, restore vitality, and prevent future heat stress.


Step 1: Assess the Damage Before Acting

Before grabbing the hose or pruning shears, take time to inspect each plant carefully. Some may only be superficially damaged, while others could be beyond saving.

Look for these key signs:

  • Wilted or drooping leaves – often from dehydration, but sometimes due to root rot if overwatered.
  • Crispy, brown leaf edges – a sign of sun scorch or nutrient imbalance.
  • Yellowing leaves – could mean stress, compacted soil, or fertilizer burn.
  • Soft or mushy stems – often caused by watering during peak heat when roots can’t absorb moisture fast enough.

The scratch test:
If you’re unsure whether a plant is still alive, lightly scratch a small section of the stem or branch with your fingernail.

  • Green underneath: The plant is still alive and can recover.
  • Brown and brittle: That section is dead; prune it off to prevent decay.

Once you’ve identified which plants are worth saving, you can begin the revival process.


Step 2: Trim Back the Damage

One of the best ways to help stressed plants recover is through strategic pruning. Removing damaged or dead parts allows the plant to redirect energy into new, healthy growth.

How to prune effectively:

  1. Cut away dead or scorched leaves using clean, sharp shears.
  2. Remove wilted flowers to stop the plant from wasting energy on seed production.
  3. Trim back leggy or heat-stressed stems to encourage bushier regrowth.
  4. Avoid heavy pruning (especially on shrubs or perennials) until temperatures stabilize, as cutting too much can shock the plant further.

Pro Tip: Always sanitize your pruning tools between plants to prevent the spread of disease, especially if you notice mold or mildew on leaves.


Step 3: Rehydrate Deeply—but Smartly

After a summer of heat stress, your instinct might be to drench the soil—but overwatering is just as harmful as drought. The goal is deep, consistent moisture, not soggy soil.

Follow this watering recovery plan:

  • Water early in the morning so plants can absorb moisture before the heat of the day.
  • Use a slow, deep soak method—either with a drip hose or by watering at the base of each plant until the soil is moist 6–8 inches deep.
  • Avoid frequent shallow watering; it encourages weak, surface-level roots.
  • Check soil moisture daily by sticking your finger a few inches down. If it feels dry, it’s time to water again.

Pro Tip: Add mulch (more on that below) after watering to lock in moisture and stabilize soil temperature.


Step 4: Refresh the Soil and Roots

Heatwaves often bake the soil, reducing its ability to retain nutrients and oxygen. A tired, compacted soil base can suffocate roots—even if you water regularly.

Here’s how to rejuvenate it:

  1. Loosen compacted soil using a hand fork or cultivator, being careful not to disturb roots too deeply.
  2. Mix in compost or organic matter to boost moisture retention and restore beneficial microbes.
  3. For potted plants, consider repotting into fresh soil if the current mix is dry, hardened, or crusted with white mineral deposits.
  4. Add root boosters or compost tea to help repair damaged root systems and encourage regrowth.

Pro Tip: A one-inch layer of compost spread across garden beds can revitalize the entire soil ecosystem naturally.


Step 5: Mulch Generously for Protection

Mulching is one of the simplest yet most powerful ways to prevent heat damage—and to help your plants recover afterward.

Benefits of mulching post-summer:

  • Retains soil moisture by reducing evaporation.
  • Keeps soil temperatures cooler and more consistent.
  • Prevents new weed growth (which competes for nutrients).
  • Adds organic matter as it decomposes.

How to do it right:

  • Apply a 2–3 inch layer of organic mulch (like shredded bark, straw, or leaf compost) around the base of plants.
  • Keep mulch 2 inches away from stems to prevent rot and insect damage.
  • For container plants, use lighter mulch like coconut coir or small wood chips.

If you already have mulch, fluff it up with a rake to improve air circulation and break up compacted layers.


Step 6: Feed Gently—Don’t Overfertilize

Heat-stressed plants have fragile roots. A heavy dose of fertilizer can burn them and do more harm than good. Instead, use mild, organic nutrition to gradually rebuild strength.

Best feeding approach:

  • Wait one to two weeks after rehydration and pruning before applying fertilizer.
  • Use compost tea, liquid seaweed, or fish emulsion for a gentle nutrient boost.
  • For perennials and shrubs, consider a slow-release organic fertilizer with balanced NPK ratios (e.g., 5-5-5).
  • Avoid high-nitrogen formulas—they push leafy growth before roots are ready to support it.

Healthy feeding helps your plants rebuild cell structure, enhance chlorophyll production, and prepare for cooler growing conditions in fall.


Step 7: Move or Shade Vulnerable Plants

Some plants just aren’t suited for direct summer sun—especially potted ones. If you noticed severe leaf scorch or wilting, it’s time to rethink placement.

For container plants:

  • Move them to a location with morning sun and afternoon shade.
  • Elevate pots slightly off hot concrete or decks to reduce heat reflection.
  • Choose light-colored containers that reflect, rather than absorb, heat.

For garden beds:

  • Use temporary shade cloths or garden umbrellas during late-summer heatwaves.
  • Plant taller, heat-tolerant species nearby (like ornamental grasses or sunflowers) to create natural shade layers.

Adjusting light exposure reduces stress and helps damaged plants rebuild safely.


Step 8: Address Pest and Disease Problems

Weakened plants are more susceptible to pests and diseases after summer heat. Aphids, spider mites, and whiteflies often appear when plants are stressed.

Here’s how to regain control:

  • Rinse plants with a strong blast of water to knock off visible pests.
  • Spray leaves with a mild neem oil or insecticidal soap solution weekly until infestations stop.
  • Prune any moldy or infected areas immediately.
  • Improve airflow between plants by trimming excess foliage or spacing pots apart.

Healthy plants with balanced watering and nutrition naturally resist pest resurgence.


Step 9: Encourage Regrowth with Patience

Reviving plants is a gradual process—it might take several weeks before you see new growth. Be patient and observe closely.

Signs of successful recovery:

  • New green shoots or buds emerging from stems.
  • Leaves regaining color and firmness.
  • Stronger, upright posture as roots stabilize.

If a plant continues to decline despite care, consider cutting it back to soil level and letting it regrow naturally. Some perennials, herbs, and tropicals (like basil or hibiscus) can surprise you with fresh growth once conditions improve.


Step 10: Plan Ahead to Prevent Future Heat Damage

Once your plants recover, use what you’ve learned to prevent heat stress next year.

Long-term strategies:

  • Install drip irrigation or soaker hoses for efficient, consistent watering.
  • Mulch early in the season before heat peaks.
  • Group plants by water needs—keeping drought-tolerant species separate from moisture-loving ones.
  • Add shade-loving varieties to fill exposed spots.
  • Improve soil health year-round with compost, mulch, and organic feeding.

A resilient garden starts with healthy soil and smart design.


Bonus Tip: Know Which Plants Can Handle Heat

Some plants bounce back faster than others. If your garden struggles every summer, consider adding more heat-tolerant species that can thrive even under tough conditions.

Examples include:

  • Perennials: Coneflower, blanket flower, Russian sage, lavender
  • Shrubs: Oleander, bougainvillea, lantana
  • Vegetables: Okra, eggplant, peppers, sweet potatoes
  • Groundcovers: Sedum, creeping thyme, vinca

These plants not only endure heat but also recover quickly when temperatures cool.


Final Thoughts

A hot summer doesn’t have to spell disaster for your garden. While plants may look beyond saving, most can rebound with a bit of patience and strategic care.

The secret is simple: start with the roots, rebuild the soil, and restore hydration slowly. Then, protect and feed your plants gently as they regain strength.

By pruning, mulching, watering deeply, and reviving soil health, you’ll soon see fresh green shoots replacing those brittle stems—and by fall, your garden will be alive and thriving again.

Remember, every heatwave teaches your plants (and you) resilience. With each recovery, your garden becomes tougher, healthier, and better prepared for whatever next summer brings.

6 Fall Tasks That Prevent Lawn Problems in Spring

6 Fall Tasks That Prevent Lawn Problems in Spring

As the crisp air of autumn settles in and your lawn’s growth begins to slow, it might be tempting to stash away the mower and call it quits until next year. But here’s the truth: what you do for your lawn in fall determines how healthy and green it will look in spring.

Neglecting fall maintenance leads to compacted soil, patchy grass, and early weed infestations—issues that can take months to fix once the growing season begins. The good news? With a few strategic tasks now, you can prevent most spring lawn problems before they start.

Here are six essential fall lawn tasks that will help your grass thrive when winter fades and the growing season returns.


1. Keep Mowing (But Adjust the Height)

Many homeowners stop mowing as soon as the weather cools, but grass continues to grow until soil temperatures drop below 50°F (10°C). Regular mowing through late fall keeps the lawn neat and helps prevent snow mold and fungal diseases that thrive in long, matted grass.

What to do:

  • Continue mowing every 10–14 days until growth stops.
  • Gradually lower the cutting height to about 2½ inches for cool-season grasses (like fescue, bluegrass, or rye).
  • Never remove more than one-third of the blade at once—shortening too quickly can stress the grass.

Why it matters:
Shorter grass before winter allows better airflow, reduces mold, and prevents matting under snow. It also helps sunlight reach the crown of each plant, strengthening it for early spring growth.

Pro Tip: Sharpen your mower blade before the final mow. A clean cut prevents tearing and disease entry.


2. Rake and Remove Leaves Regularly

It’s easy to assume that fallen leaves will decompose naturally and feed your soil—but when left in thick layers, they smother grass and create perfect breeding grounds for mold, pests, and fungi like snow mold or dollar spot.

Why raking matters:

  • A layer of wet, decomposing leaves blocks light and air from reaching your turf.
  • Moisture trapped beneath the leaves encourages rot and suffocates roots.

How to manage leaves efficiently:

  • Rake or blow leaves weekly throughout fall rather than waiting until all have dropped.
  • Instead of bagging them, mulch the leaves using your mower with a mulching blade—finely shredded leaves can decompose safely and return organic matter to your soil.
  • For thick leaf cover (like under large trees), rake and compost the excess to use as mulch in your flower beds.

Pro Tip: A thin layer of mulched leaves can actually insulate and enrich your lawn—so don’t overdo removal, just keep it breathable.


3. Aerate Compacted Soil

By the end of summer, your lawn soil is likely compacted from foot traffic, play, and dry conditions. Compaction reduces the movement of air, water, and nutrients to the roots—leading to patchy grass and weak growth in spring.

Fall aeration relieves that compaction, creating small holes in the soil that allow your lawn to “breathe” again.

How to do it:

  • Use a core aerator (available for rent or purchase) that pulls out plugs of soil about 2–3 inches deep.
  • Focus on high-traffic areas and spots that often pool water.
  • Leave the extracted plugs on the surface—they’ll break down naturally, returning nutrients to the soil.

Timing:
Aerate when the soil is moist but not soggy—ideally after a rainfall or light watering.

Why fall is perfect:
Cool-season grasses are still actively growing and can quickly recover, making this the best time to aerate and strengthen root systems before winter dormancy.


4. Overseed Bare or Thin Areas

Bare patches or thinning turf don’t fix themselves—they usually worsen after winter. Overseeding in fall gives new grass the best possible start: warm soil for germination, cool air for growth, and minimal competition from weeds.

Steps to overseed effectively:

  1. Mow low (around 2 inches) and rake to expose soil.
  2. Spread a high-quality seed mix suitable for your region and lawn type.
  3. Lightly rake again to ensure good soil contact.
  4. Water daily for 10–14 days or until germination.

For large lawns, use a broadcast spreader to distribute seed evenly.

Pro Tip: Combine overseeding with aeration. The holes from aeration create perfect pockets for seeds to settle in and establish strong roots.

Bonus: Fall seeding allows young grass to develop deep roots before winter, ensuring it greens up faster and thicker in spring.


5. Fertilize for Strong Roots

Spring fertilizing boosts growth above the soil, but fall fertilizing is all about building what’s beneath—deep, resilient roots.

When the grass blade growth slows in autumn, the plant naturally shifts its energy toward root and carbohydrate storage. Applying a slow-release, nitrogen-rich fertilizer at this stage supports that process and gives your lawn a nutritional reserve for early spring growth.

Best timing:

  • Apply fertilizer 4–6 weeks before the ground freezes.
  • For most regions, that means late October or early November.

Choose a fertilizer labeled “Fall Lawn Food” or one with a higher potassium content (the last number on the fertilizer label). Potassium helps strengthen cell walls and increase cold tolerance.

Application tips:

  • Use a spreader for even coverage.
  • Water lightly after fertilizing to help nutrients soak into the root zone.
  • Avoid over-fertilizing—it can cause excessive top growth before winter, leaving grass vulnerable to frost.

Result:
A well-fed lawn in fall wakes up lush, green, and full of vigor in spring—with fewer weeds and bare spots.


6. Control Weeds and Repair Edges

Weeds like dandelions, chickweed, and clover are opportunists—they thrive in weak lawns and often overwinter to reappear stronger in spring. Tackling them now ensures they don’t steal nutrients from your grass during the dormant months.

Fall weed control strategy:

  • Spot-treat broadleaf weeds using a selective herbicide while they’re still actively growing.
  • For organic gardens, use vinegar-based or iron-based natural weed killers, or hand-pull weeds after a light rain (when roots come up easily).
  • Follow up with overseeding to fill in bare spots and crowd out new weed growth.

Don’t forget the edges!
Neatening up the borders of your lawn not only improves appearance but also prevents grass from encroaching onto walkways or flower beds. Use a sharp edging tool to redefine borders before winter.

Pro Tip: After weed control, add a thin layer of compost or topsoil over treated areas to restore microbial balance and aid healthy regrowth.


Bonus Task: Clean and Service Lawn Tools

Once you’ve finished your fall lawn prep, take a few minutes to clean, sharpen, and oil your garden tools. Drain fuel from the mower, clean filters, and store everything in a dry space.

A little maintenance now prevents rust, saves money on repairs, and ensures you’re ready to go next spring without delay.


Putting It All Together: A Fall-to-Spring Timeline

Here’s how these six tasks fit into an ideal fall lawn care schedule:

TaskBest TimingPurpose
Mow and lower cutting heightEarly–mid fallPrevents snow mold and strengthens turf
Rake or mulch leavesThroughout fallPrevents suffocation and disease
Aerate compacted soilMid fallImproves root growth and oxygen flow
Overseed thin areasMid–late fallPromotes dense spring coverage
Apply fall fertilizerLate fallBuilds strong roots and nutrient reserves
Weed and edge lawnEarly–mid fallReduces spring weed problems

Follow this sequence, and your lawn will enter winter strong and emerge in spring thick, healthy, and ready to impress.


Final Thoughts

Think of fall as the “recharge” season for your lawn. It’s when your grass quietly stores energy and prepares for the next growth cycle. Neglect it, and you’ll spend spring battling weeds, disease, and bare patches.

But with just a few extra hours of care this fall—mowing smartly, feeding deeply, aerating, and clearing debris—you’re setting up a lawn that will reward you with lush, vibrant growth next year.

So before the first frost hits, roll up your sleeves and give your lawn the attention it deserves. Come spring, when your neighbors are reseeding and patching up winter damage, you’ll already be enjoying a carpet of green that’s the envy of the block.

How to Protect Plants From Late Spring Snow

How to Protect Plants From Late Spring Snow

Spring often feels like a season of promise—buds opening, soil warming, and color returning to the garden. But just when you think the danger of winter has passed, a surprise late snowstorm can strike. These unexpected cold snaps are notorious for damaging tender new growth, young transplants, and blooming flowers. Fortunately, with a little preparation and quick action, you can protect your garden from spring snow and minimize lasting damage.

Here’s everything you need to know about why late snow is dangerous, how to shield your plants effectively, and what to do after the storm passes to help your garden recover.


Why Late Spring Snow Can Be So Damaging

A light dusting of snow isn’t always a disaster—in fact, it can act as an insulating blanket. The real threat comes when heavy, wet snow combines with freezing temperatures and wind.

Here’s why spring snow is risky for plants:

  1. Tender growth is vulnerable. After weeks of warmth, plants often push out new shoots, blossoms, and leaves that haven’t hardened against frost.
  2. Temperature fluctuations cause stress. Rapid swings from warm to freezing can shock plant cells and slow growth.
  3. Snow load breaks branches. Wet, heavy snow can snap delicate limbs, especially on shrubs and fruit trees.
  4. Soil compaction and root damage. Melting snow can oversaturate the ground, suffocating roots or promoting rot.
  5. Delayed growth or death. Even if plants survive, damaged tissues and frostbitten buds can reduce yields and blooms for the season.

To protect your garden, you need both preventive strategies and emergency responses.


Step 1: Watch the Weather and Prepare Early

Late frosts and snowfalls are most common when warm air has lured plants out of dormancy but winter still lingers. Keep a close eye on extended forecasts in April and May—especially if you live in regions prone to erratic spring weather.

When a cold snap is predicted:

  • Prepare protective covers in advance.
  • Water the garden thoroughly before the freeze (moist soil retains heat better).
  • Move containers and potted plants to sheltered spots.

Having a plan in place means you can act quickly when snow is on the way.


Step 2: Cover Plants Before the Snow Hits

The most effective way to protect tender growth is by covering plants to trap heat and keep snow from direct contact with foliage. Different plants require different approaches, but the goal is always insulation without suffocation.

Use Frost Cloths or Garden Blankets

  • Lightweight frost fabrics, row covers, or garden blankets are designed to let air and light in while shielding plants from cold.
  • Secure the edges to the ground with rocks or garden staples to keep out wind.
  • Avoid plastic touching the plants—it transfers cold directly to leaves and can cause freeze burn.

Household Alternatives

If you don’t have frost cloths, you can improvise using:

  • Old bedsheets or towels
  • Cardboard boxes for smaller shrubs or seedlings
  • Plastic buckets or flower pots (remove them during the day so plants don’t overheat)

Pro Tip: Always remove covers once temperatures rise above freezing to allow air circulation and prevent mold or overheating.


Step 3: Mulch Heavily Around the Base

Mulch is one of the simplest and most powerful defenses against temperature swings.

Apply 2–4 inches of straw, shredded leaves, or wood chips around the base of plants to insulate the soil and root zone. This helps retain ground warmth and prevents the freezing and thawing cycle that can push roots upward.

For delicate perennials or early vegetable seedlings, you can even mound mulch lightly over the lower stems during a snow event—just be sure to remove the excess once the weather stabilizes.

Bonus: Mulch also helps absorb the moisture from melting snow, preventing waterlogging.


Step 4: Protect Trees and Shrubs From Snow Load

Late spring snow is often wet and heavy—perfect for breaking branches weighted down by leaves or blossoms. You can prevent breakage with a few quick measures.

Before the Snow:

  • Gently tie branches together using soft twine or garden tape to reduce strain.
  • For small fruit trees or shrubs, wrap with burlap or breathable fabric to hold branches upright.
  • Stake young trees to help them withstand wind and weight.

During or After the Snow:

  • If snow starts to pile up, gently brush it off using a broom or soft rake, starting from the top down.
  • Never shake branches aggressively—frozen limbs can snap easily.

Pro Tip: Don’t remove ice from branches until temperatures rise above freezing; you’ll do more harm than good.


Step 5: Move and Protect Container Plants

Container-grown plants are especially vulnerable because their roots are more exposed to cold air.

  • Move pots to sheltered areas—like a garage, porch, or greenhouse—before the snow starts.
  • If you can’t move them, wrap pots in old blankets, burlap, or bubble wrap to insulate the roots.
  • Group containers together and cover them collectively with a frost blanket for extra warmth.

After the storm, allow them to thaw gradually—rapid temperature changes can stress root systems.


Step 6: Use Cloches and Cold Frames for Early Crops

If you’ve already planted early vegetables—like lettuce, peas, or spinach—you can protect them using mini greenhouses.

Cloches:

Individual covers made from glass, plastic, or even cut-off milk jugs can be placed over young plants. They trap heat and prevent snow contact.

Cold Frames:

Small, box-like structures with transparent tops, cold frames are perfect for shielding seedlings and extending your growing season.

  • Keep the lid closed during snow or freezing nights.
  • Open it during sunny days to prevent overheating.

These protective tools are reusable, easy to maintain, and can make the difference between losing your early crops or enjoying a thriving spring harvest.


Step 7: After the Snow—Help Your Plants Recover

Once the storm passes and temperatures rise, it’s time to assess and revive your garden.

1. Remove Covers Gradually

Lift frost cloths or blankets in the morning once temperatures reach above 40°F (4°C). Sudden exposure to bright sunlight can shock delicate growth, so uncover plants slowly.

2. Check for Damage

Inspect for broken branches, frostburned leaves, or bent stems. Prune only damaged tissue once it’s clear the plant is actively regrowing. Avoid cutting too early—you might accidentally remove living parts that can still recover.

3. Water Wisely

Melting snow may have already saturated the soil, so check moisture before watering. When the ground dries, give plants a gentle drink to rehydrate their roots and encourage recovery.

4. Feed Lightly

A diluted liquid fertilizer or compost tea can help stressed plants bounce back, but don’t overfertilize immediately—it can worsen shock. Wait a week or two before applying heavier feeding.

5. Watch for Delayed Symptoms

Frost damage sometimes appears days later. Wilted leaves, blackened edges, or slowed growth are signs of stress, but many plants can recover fully with patience and consistent care.


Step 8: Choose Cold-Tolerant Plants for the Future

One of the best long-term strategies is prevention—by selecting plants that can handle the occasional spring chill.

Cold-hardy flowers and crops include:

  • Pansies, violas, and snapdragons (can survive light snow)
  • Kale, spinach, peas, and broccoli (tolerate frost)
  • Daffodils and tulips (already adapted to cold seasons)

If your region frequently experiences unpredictable springs, it’s wise to delay planting tender crops—like tomatoes or cucumbers—until nighttime temperatures consistently stay above 50°F (10°C).


Extra Protection Tricks from Seasoned Gardeners

  • Use water-filled jugs or barrels near plants: They absorb heat during the day and release it slowly overnight, keeping the air slightly warmer.
  • Create windbreaks using hay bales or temporary screens to reduce cold air exposure.
  • Use raised beds: They drain better, warm up faster, and prevent roots from sitting in icy water.
  • Keep backup seeds or transplants: If a few plants don’t survive, you can quickly replant without losing your season.

Final Thoughts

Late spring snow may be frustrating, but it doesn’t have to spell disaster for your garden. With preparation and swift action, you can shield tender growth, preserve blooms, and help your plants recover quickly once the weather stabilizes.

Think of these surprise storms as nature’s test of your gardening resilience. The key is to stay alert, stay flexible, and protect your plants before the snow arrives. When you pull back those covers and see your flowers and vegetables standing strong after a storm, you’ll be reminded that even in unpredictable weather, a little care and planning can make your garden thrive—no matter what spring throws your way.

Should You Plant Bulbs in Fall or Spring?

Should You Plant Bulbs in Fall or Spring?

Few things are as delightful as watching your garden burst into color after a long winter. Whether it’s cheerful tulips in early April or vibrant lilies in midsummer, flowering bulbs are the secret to continuous, effortless beauty throughout the year. But one question confuses many gardeners: when should you plant your bulbs—fall or spring?

The short answer? It depends on the bulb.
Different bulbs have different biological cycles. Some need the chill of winter to bloom, while others prefer to wake up in warm soil. Understanding how bulbs grow, rest, and flower is the key to deciding the right planting season.

In this guide, we’ll explore how bulbs work, the pros and cons of each planting season, and which bulbs perform best in fall versus spring planting—plus expert tips for success no matter when you plant.


Understanding Bulb Basics

A bulb is essentially a self-contained plant waiting to grow. Inside that papery covering is everything it needs to sprout—leaves, stems, and flower buds—along with stored food.

Bulbs can be divided into two broad categories:

  1. Hardy (Cold-loving) Bulbs: These require a period of cold dormancy (chilling) to trigger blooming.
  2. Tender (Warm-loving) Bulbs: These can’t tolerate frost and grow best when the soil and air are warm.

This difference determines when you should plant them.


Why Fall Is the Best Time for Most Bulbs

For most flowering bulbs, fall is planting season. These bulbs—like tulips, daffodils, hyacinths, and crocuses—need a prolonged cold period to develop strong roots and flower properly in spring.

The Science Behind It

Fall bulbs are hardy perennials that have evolved to thrive in temperate climates. When planted in cool autumn soil (ideally 50–60°F / 10–15°C), they start developing roots before the ground freezes. Over winter, they go dormant, and the cold triggers biochemical changes inside the bulb that allow it to bloom once temperatures rise.

Without that chilling period (known as vernalization), many fall bulbs simply won’t flower—or they’ll produce weak, distorted blooms.


Best Bulbs to Plant in Fall

Here are some of the most reliable and beloved bulbs that should go in the ground before winter sets in:

1. Tulips

  • Bloom time: Early to late spring (depending on variety)
  • Why fall planting works: Tulips need 12–16 weeks of cold to bloom. Planting in fall allows enough root growth before frost.
  • Tip: Plant 6–8 inches deep in well-drained soil and use a bulb fertilizer to support root growth.

2. Daffodils (Narcissus)

  • Bloom time: Early to mid-spring
  • Why fall planting works: Daffodils establish roots during winter and bloom early as soon as temperatures warm.
  • Tip: These are among the most cold-hardy bulbs and will naturalize easily over time.

3. Hyacinths

  • Bloom time: Mid-spring
  • Why fall planting works: They rely heavily on a chilling period for their signature scent and color intensity.
  • Tip: Plant in clusters for a strong fragrance impact.

4. Crocuses

  • Bloom time: Late winter to early spring
  • Why fall planting works: These small bulbs (technically corms) can bloom through melting snow.
  • Tip: Plant in sunny spots or under deciduous trees—they’ll bloom before leaves shade them.

5. Alliums

  • Bloom time: Late spring to early summer
  • Why fall planting works: As hardy perennials, alliums overwinter easily and produce large, striking globe-shaped flowers.
  • Tip: They thrive in well-drained soil and full sun.

6. Snowdrops (Galanthus)

  • Bloom time: Very early spring (sometimes February)
  • Why fall planting works: Snowdrops need cold dormancy and will often push through frost to bloom when little else is awake.
  • Tip: Plant them in moist, humus-rich soil for best results.

Timing for Fall Bulb Planting

The ideal time to plant fall bulbs is 6 to 8 weeks before the ground freezes. This gives bulbs enough time to develop roots without prematurely sprouting.

  • Cold climates (Zones 3–5): Late September to October
  • Moderate climates (Zones 6–7): October to November
  • Mild climates (Zones 8–9): November to December (chill bulbs in the refrigerator for 8–10 weeks before planting)

Avoid planting when the soil is soggy, as excessive moisture can cause bulbs to rot before winter.


How to Plant Fall Bulbs Properly

  1. Choose a sunny, well-drained site. Bulbs hate sitting in waterlogged soil.
  2. Dig holes 2–3 times as deep as the bulb’s height. For example, if your bulb is 2 inches tall, plant it 4–6 inches deep.
  3. Place bulbs pointed side up. That’s where the sprout will emerge.
  4. Add a light bulb fertilizer or compost. This boosts root establishment before dormancy.
  5. Water thoroughly after planting. Moisture helps trigger root growth.
  6. Mulch lightly. A thin layer of leaves or straw keeps the soil insulated and prevents heaving during freeze-thaw cycles.

Why Some Bulbs Should Be Planted in Spring

Not all bulbs can handle winter’s chill. Tender bulbs—those native to tropical or subtropical regions—will rot or freeze if left in cold ground. These should be planted in spring, after the danger of frost has passed.

They grow through summer, bloom in warm weather, and then die back before the next cold season. You can dig them up and store them indoors for replanting next year.


Best Bulbs to Plant in Spring

1. Dahlias

  • Bloom time: Mid to late summer through fall
  • Why spring planting works: Dahlia tubers are frost-sensitive and will rot in cold soil. Plant after frost for fast growth.
  • Tip: Start tubers indoors in pots for an early bloom.

2. Gladiolus

  • Bloom time: Summer
  • Why spring planting works: These bulbs (technically corms) prefer warm soil and full sun.
  • Tip: Plant in batches every two weeks for continuous flowering through summer.

3. Lilies

  • Bloom time: Early to midsummer
  • Why spring planting works: Although some lilies can be planted in fall, many varieties do well when planted in warming soil.
  • Tip: Plant bulbs 6 inches deep in loose, well-drained soil.

4. Begonias

  • Bloom time: Summer to early fall
  • Why spring planting works: Begonias love warmth and consistent moisture but can’t tolerate cold.
  • Tip: Start indoors 8 weeks before transplanting outdoors.

5. Calla Lilies

  • Bloom time: Late spring to early summer
  • Why spring planting works: These tropical beauties need warm soil and can be lifted in fall to overwinter indoors.
  • Tip: Use rich, moist soil and partial shade for long-lasting blooms.

6. Cannas

  • Bloom time: Summer to early fall
  • Why spring planting works: Cannas love heat and humidity but won’t survive frost.
  • Tip: In cooler zones, dig and store rhizomes indoors after the first frost.

Fall vs. Spring Bulbs: Quick Comparison

FeatureFall-Planted BulbsSpring-Planted Bulbs
TypeHardy, cold-tolerantTender, frost-sensitive
ExamplesTulips, daffodils, hyacinths, alliumsDahlias, gladiolus, calla lilies, cannas
Bloom TimeLate winter to springSummer to early fall
Cold RequirementNeeds chilling (vernalization)Cannot tolerate frost
LifespanOften perennial, returns yearlyUsually annual unless stored indoors
Best Planting Time6–8 weeks before ground freezesAfter danger of frost passes

Tips for Success in Both Seasons

  1. Plan for continuous blooms: Combine fall and spring bulbs to ensure flowers from early spring through fall.
  2. Label your planting areas: Use markers to avoid accidentally digging up bulbs in the off-season.
  3. Amend your soil yearly: Add compost or bone meal to nourish bulbs before planting.
  4. Mulch wisely: In both seasons, mulch helps regulate temperature and retain soil moisture.
  5. Don’t forget drainage: Standing water is the number one cause of bulb rot.

Can You Plant Fall Bulbs in Spring (or Vice Versa)?

If you miss the ideal window, don’t despair.

  • Fall bulbs in spring: You can try pre-chilling them in your refrigerator for 10–12 weeks, then plant immediately. They might bloom later or the following year.
  • Spring bulbs in fall: Only if you’re in a frost-free region (Zones 8–10). Otherwise, dig and store them indoors through winter.

Final Thoughts

Whether you plant in fall or spring depends on the type of bulbs you choose and the climate you live in. Fall bulbs—like tulips, daffodils, and hyacinths—need the chill of winter to bloom beautifully in spring. Spring bulbs—like dahlias, gladiolus, and cannas—thrive in warmth and deliver bold, tropical color through summer.

By learning your bulbs’ natural cycles, you can plan a year-round garden full of seasonal color and texture. Imagine early snowdrops peeking through melting snow, followed by waves of tulips, and then bold summer lilies—each season handing off to the next in a continuous parade of blooms.

The secret to that seamless beauty? Planting the right bulbs at the right time. With a bit of planning now, your garden will reward you with breathtaking color, no matter the season.