9 Plants That Bloom Even in the Dead of Winter

9 Plants That Bloom Even in the Dead of Winter

As autumn sets in and your summer crops fade, you might wonder what to do with your garden beds before winter arrives. Should you leave them bare, or is it better to cover them? According to gardening experts, covering your garden beds in fall is one of the smartest steps you can take to protect your soil and set yourself up for success in the next growing season.

Covering your garden beds doesn’t just mean throwing on a tarp. There are several methods—mulch, cover crops, compost blankets, and protective sheeting—each with specific benefits. Understanding why covering is important, and how to do it properly, can make all the difference in the health of your soil and crops.

Here’s what the experts say about whether you should cover your beds in fall, and the best ways to do it.


Why Cover Garden Beds in Fall?

Leaving your garden beds bare during fall and winter exposes them to the elements. Rain, snow, and wind can wash away nutrients and compact the soil. Worse, weeds and pests can settle in, creating challenges come spring. Covering your beds helps to:

  1. Protect Soil from Erosion – Rain and melting snow can strip away topsoil, which is the most fertile layer. A cover helps keep it in place.
  2. Preserve Nutrients – Covering prevents nutrient leaching, especially nitrogen, which can easily wash out of unprotected soil.
  3. Suppress Weeds – Many weed seeds germinate in fall. Covering prevents light from reaching them, reducing spring weeding.
  4. Improve Soil Health – Organic covers feed soil microbes, creating rich, fertile ground.
  5. Insulate Soil – Covers act as a blanket, keeping soil temperatures more stable and protecting overwintering perennials.

The Best Ways to Cover Garden Beds in Fall

Experts recommend several options for covering beds, depending on whether you want to keep them dormant or continue growing cold-hardy crops.


1. Mulching with Organic Materials

Mulching is perhaps the easiest and most common method. Applying a thick layer of organic matter protects soil from erosion and feeds it as the material decomposes.

  • Best materials: Straw, shredded leaves, pine needles, untreated wood chips, or compost.
  • How to do it: Spread 2–4 inches of mulch over the entire bed. Avoid piling it right against plant stems to prevent rot.
  • Expert tip: Shredded leaves are especially valuable—they’re free, abundant in fall, and decompose quickly to enrich the soil.

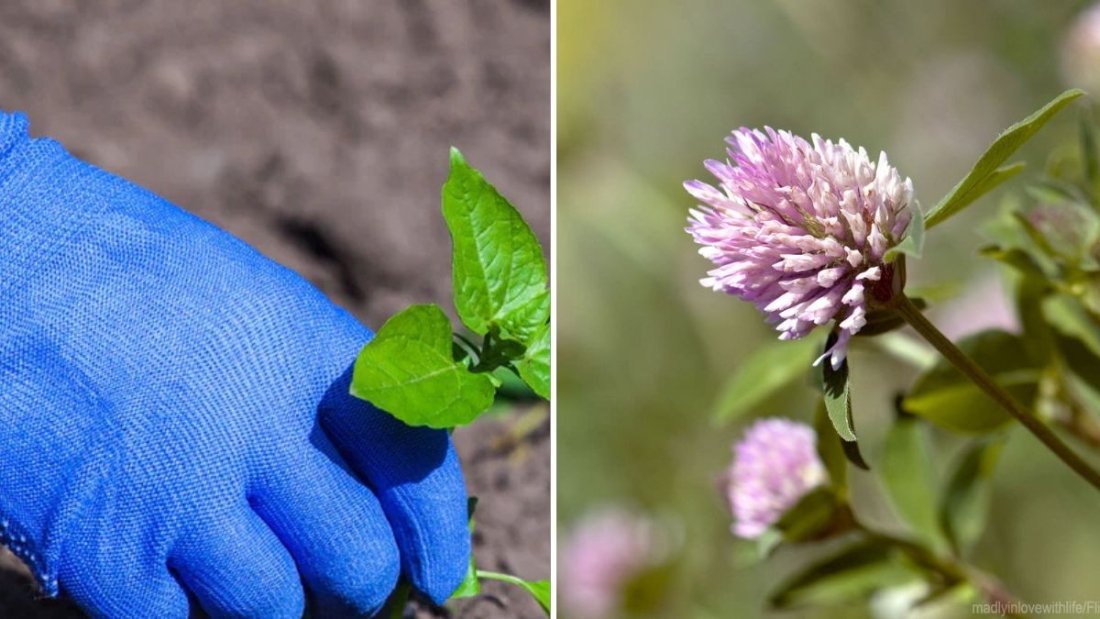
2. Planting Cover Crops (Green Manure)

Cover crops, also called green manure, are living covers that grow through fall and sometimes into winter. They protect soil while actively improving it.

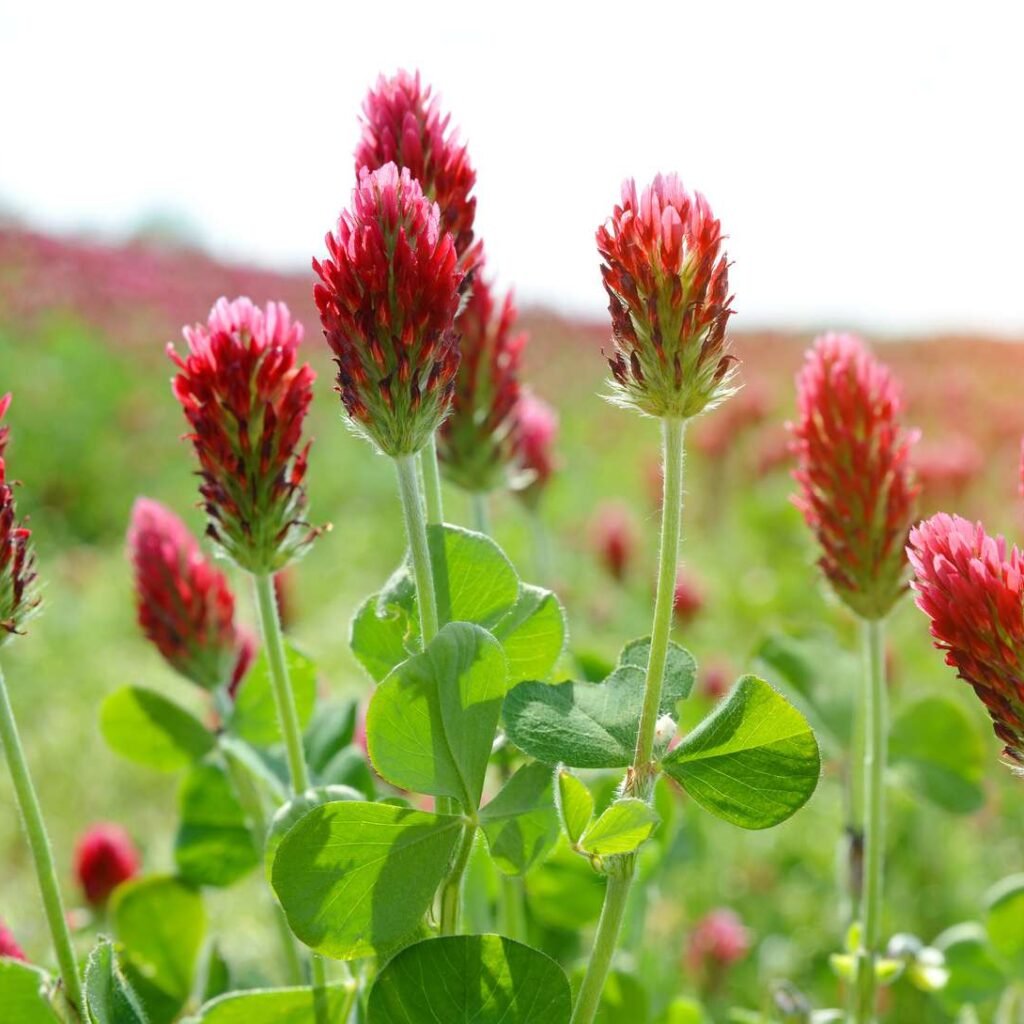
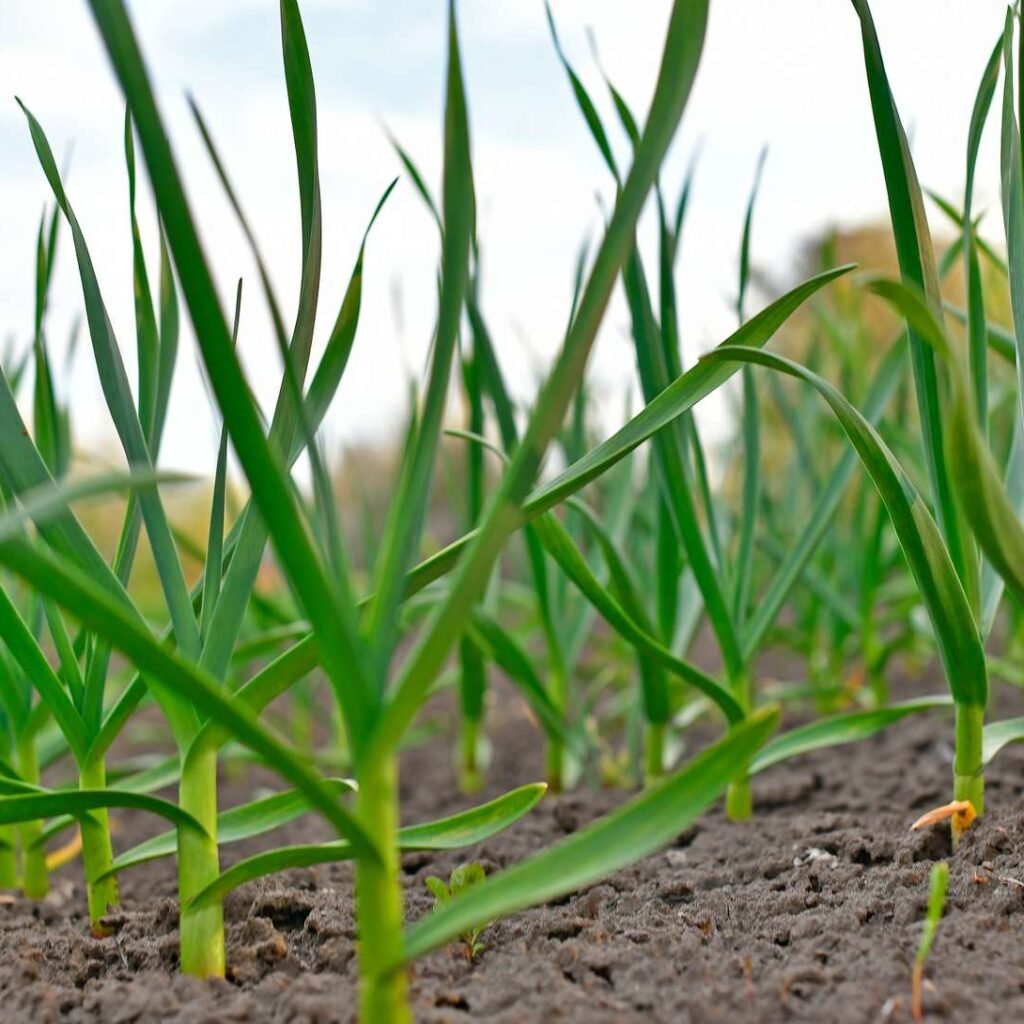
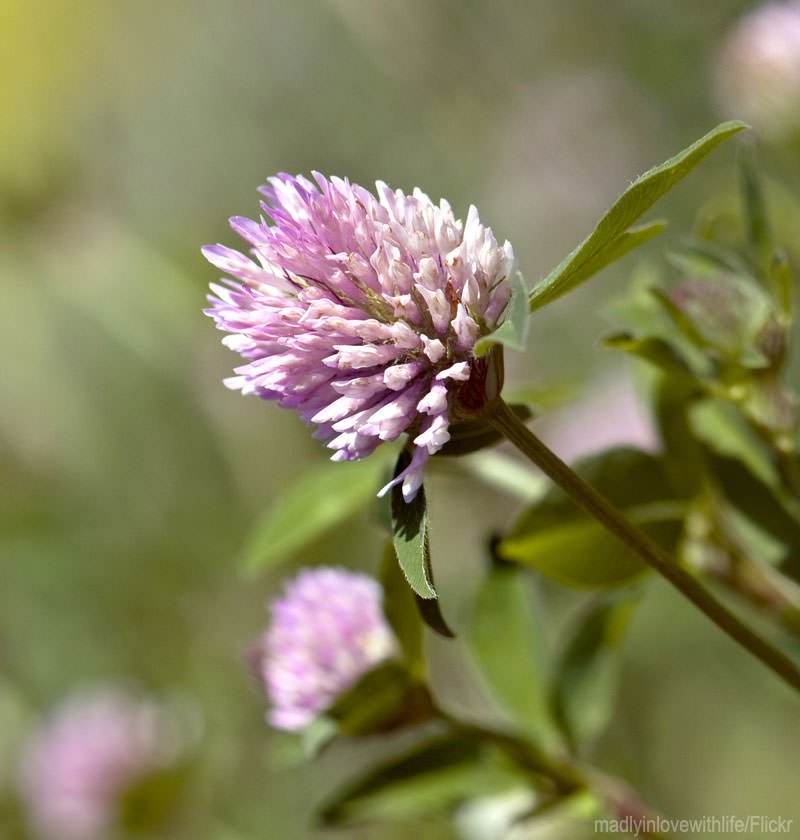
  • Best choices: Winter rye, crimson clover, hairy vetch, and winter wheat.
  • Benefits: They prevent weeds, fix nitrogen, and build organic matter. In spring, chop them down and mix them into the soil.
  • Expert tip: Plant cover crops as soon as summer crops are cleared to give them time to establish before frost.

3. Compost Blanketing

Instead of mulching with leaves or straw, some gardeners prefer to blanket beds with a layer of finished compost.

  • Benefits: Compost adds nutrients, improves soil structure, and acts as a protective cover. Over winter, worms and microbes pull it deeper into the soil.
  • How to do it: Apply 2–3 inches of compost evenly across the bed. In spring, you’ll have nutrient-rich soil ready for planting.
  • Expert tip: Combine compost with a light mulch (like shredded leaves) for insulation and nutrient benefits.

4. Plastic or Tarp Covers

Sometimes gardeners use plastic sheeting or tarps to protect soil, especially if they want to block weeds completely.

  • Clear plastic: Can warm soil slightly, allowing earlier spring planting.
  • Black plastic or tarps: Block light, killing weeds and protecting soil from erosion.
  • Expert tip: If using plastic, secure edges with rocks or boards to prevent wind from lifting it. Remove it in early spring to let the soil breathe.

5. Row Covers and Cold Frames

If you’d like to continue growing hardy greens (like spinach, kale, or lettuce) through fall and into winter, row covers or cold frames are great choices.

  • Row covers: Lightweight fabric that shields crops from frost while letting in light and water.
  • Cold frames: Mini greenhouses built with glass or plastic lids that insulate plants.
  • Expert tip: This method allows you to harvest fresh vegetables even when snow is on the ground.

Common Mistakes to Avoid

While covering garden beds is highly recommended, there are a few mistakes experts warn against:

  • Using Diseased Plant Material: Never cover beds with debris from plants that had blight, mildew, or pests. This spreads problems into the next season.
  • Over-Mulching: Too thick a mulch layer (over 6 inches) can suffocate soil and delay warming in spring.
  • Ignoring Timing: Don’t wait until the ground is frozen. Cover beds in mid to late fall while the soil is still workable.
  • Plastic Without Drainage: Solid plastic sheeting can trap excess moisture, causing waterlogging. Always check drainage or opt for breathable fabric.

When Covering Isn’t Necessary

There are a few cases where covering isn’t required:

  • Perennial Beds: If your raised beds are planted with hardy perennials (like asparagus, strawberries, or herbs), you may only need a light mulch to protect roots.
  • Winter Gardening Beds: If you’re actively growing under cold frames or tunnels, the crops themselves and their covers serve as protection.
  • Very Mild Climates: In regions without hard freezes, a light compost layer may be sufficient.

Final Thoughts

So, should you cover your garden beds in fall? Experts say the answer is almost always yes. Covering protects soil from erosion, improves fertility, and suppresses weeds, ensuring you start the next growing season with healthy, nutrient-rich soil.

The method you choose—mulching, composting, planting cover crops, or using tarps—depends on your gardening goals and climate. Whether you want to simply protect soil or extend your growing season, there’s a covering strategy that will work for you.

Think of it as tucking your garden into bed for the winter. With a little preparation in fall, your soil will rest, recharge, and be ready to reward you with vigorous growth and abundant harvests when spring returns.

How to Build a DIY Vertical Garden for Small Spaces

How to Build a DIY Vertical Garden for Small Spaces

If you love the idea of growing your own plants but feel limited by space, a vertical garden might be your perfect solution. Instead of spreading plants across a wide plot, vertical gardening allows you to grow upward—using walls, fences, or custom frames to maximize every inch. Whether you live in an apartment with a balcony, a townhouse with a small yard, or simply want to make your garden more efficient, this creative approach offers beauty and practicality.

Here’s a step-by-step guide on how to build your own DIY vertical garden, plus tips on choosing plants, keeping costs low, and making the most of your space.


Why Choose a Vertical Garden?

Vertical gardens are more than just space-savers. They come with several added benefits:

  • Maximizes small spaces: Perfect for balconies, patios, courtyards, and small yards.
  • Improves air quality: Plants absorb pollutants and release oxygen, even in urban areas.
  • Reduces heat and noise: Living plant walls act as natural insulation.
  • Creates privacy: Vertical gardens double as green screens, blocking unwanted views.
  • Adds beauty: From lush greenery to colorful blooms, they transform plain walls into living art.

As landscape designer Sarah Keene explains: “Vertical gardens make small spaces feel alive, layered, and full of character, while also making gardening accessible for those without traditional yards.”


Step 1: Choose the Right Location

Your vertical garden’s success depends on light, accessibility, and support.

  • Light: Observe how much sunlight your space receives. Most herbs and vegetables need at least 6 hours of sun, while ferns and shade-loving plants thrive in lower light.
  • Accessibility: Place your garden somewhere you can easily water, prune, and harvest.
  • Support: Make sure your wall, fence, or chosen structure can handle the weight of soil, plants, and water.

Step 2: Pick Your Vertical Garden Structure

There are many ways to build a vertical garden, ranging from simple to elaborate. Here are popular options:

  1. Wall-mounted planters: Small pots or planters attached to wooden boards or metal grids.
  2. Hanging pockets: Fabric or felt pocket organizers designed for plants—lightweight and easy to mount.
  3. Stacked planters: Tiered shelving or recycled crates stacked on top of each other.
  4. Pallet gardens: Recycled wooden pallets lined with landscape fabric and filled with soil.
  5. Trellises or climbing frames: Perfect for beans, cucumbers, and flowering vines.

If you’re handy with tools, you can build a custom wooden frame. If not, upcycling everyday items like shoe organizers or old bookshelves works just as well.


Step 3: Select Plants for Vertical Growing

Not every plant adapts well to vertical systems. Choose species that are compact, trailing, or climbing.

Best choices include:

  • Herbs: Basil, thyme, mint, parsley, chives, oregano.
  • Leafy greens: Lettuce, spinach, kale, arugula.
  • Climbers: Peas, pole beans, cucumbers, cherry tomatoes.
  • Flowers: Petunias, nasturtiums, fuchsias, marigolds.
  • Ornamentals: Ferns, ivy, succulents, pothos.

Pro tip: Group plants with similar water and light needs to make maintenance easier.


Step 4: Soil, Watering, and Fertilization

  • Soil: Use lightweight, nutrient-rich potting mix instead of heavy garden soil. Consider adding perlite or coconut coir for better drainage.
  • Watering: Vertical gardens dry out more quickly, so invest in a drip irrigation system or self-watering planters. For smaller projects, a watering can or spray bottle works fine.
  • Fertilization: Since nutrients wash away faster, feed plants with liquid fertilizer every few weeks.

Step 5: Build and Plant Your Garden

  1. Assemble your structure – Mount pallets, hang planters, or set up trellises.
  2. Add liners if needed – Fabric liners help retain soil and prevent mess.
  3. Fill with soil – Use a lightweight mix to avoid stressing the structure.
  4. Plant strategically – Place taller or trailing plants higher up, and heavier plants in lower pockets for stability.
  5. Water thoroughly – Give your plants a deep first watering to help them settle in.

Step 6: Maintain Your Vertical Garden

Like any garden, vertical gardens need regular care:

  • Prune and harvest frequently to encourage new growth.
  • Check for pests—aphids and mites can spread quickly in compact systems.
  • Rotate plants seasonally to refresh soil and add variety.
  • Clean structures once or twice a year to prevent buildup of algae or mold.

Budget-Friendly Tips

  • Repurpose wooden pallets, tin cans, or shoe organizers instead of buying new planters.
  • Start with seeds instead of mature plants to cut costs.
  • Use compost from kitchen scraps to feed your garden naturally.
  • Swap cuttings and seedlings with neighbors to expand your plant variety for free.

Creative Vertical Garden Ideas

If you want your project to stand out, here are some fun twists:

  • Kitchen herb wall: Grow fresh herbs right outside your kitchen door.
  • Succulent art panel: Arrange drought-tolerant succulents in a wooden frame for a living picture.
  • Privacy screen: Train vines on trellises to create natural green dividers.
  • Seasonal rotation: Swap in holiday flowers or themed colors throughout the year.

Final Thoughts

A DIY vertical garden is one of the most rewarding ways to maximize limited space while enjoying greenery, fresh food, and a healthier environment. With a little creativity and planning, you can transform even the smallest balcony or patio into a lush, thriving oasis.

As Sarah Keene says: “Vertical gardening proves you don’t need a large backyard to enjoy the benefits of nature—just a wall, a few plants, and a vision.”

Whether you dream of homegrown salads, a vibrant flower wall, or a calming green backdrop, a vertical garden can make it happen—without requiring extra square footage.

7 Garden Trends That Will Be Everywhere Next Year

7 Garden Trends That Will Be Everywhere Next Year

Gardening never stands still. Each year, fresh ideas, new research, and shifting lifestyles shape the way we grow and enjoy our outdoor spaces. From climate-conscious designs to creative backyard makeovers, the latest trends reflect a growing desire to connect with nature, simplify maintenance, and create sustainable landscapes.

If you’re planning to refresh your garden in the coming year, here are seven garden trends experts say will dominate—and how you can embrace them in your own yard.


1. Climate-Resilient Gardens

With unpredictable weather patterns becoming the new normal, gardeners are turning toward climate-smart practices.

  • Drought-tolerant plants: Expect to see more succulents, ornamental grasses, and native species that thrive with little water.
  • Rain gardens: These planted depressions capture stormwater runoff, reducing flooding while nourishing pollinator-friendly plants.
  • Shade solutions: Pergolas, trellises, and living shade structures help protect tender crops and create comfortable spaces for people.

Expert tip: Mix deep-rooted natives with tough perennials to create a resilient landscape that weathers droughts, floods, and heatwaves.


2. No-Mow and Low-Mow Lawns

The traditional lawn is losing ground—literally. More homeowners are embracing eco-friendly alternatives that save time, money, and water.

  • Microclover lawns: Green year-round, soft underfoot, and loved by pollinators.
  • Meadow-style yards: Native wildflowers mixed with low-growing grasses for a natural, colorful look.
  • Thyme or sedum carpets: Fragrant, hardy groundcovers that eliminate weekly mowing.

This trend reflects a larger shift toward biodiversity and sustainability. You’ll still enjoy green space, but with far less upkeep.


3. Edible Landscaping

Why separate beauty and function when you can have both? Edible landscaping blends fruits, vegetables, and herbs into ornamental gardens.

  • Fruit shrubs as hedges: Blueberries, currants, and elderberries double as decorative screens and food sources.
  • Herb borders: Rosemary, lavender, and sage create fragrant, pollinator-friendly edges.
  • Vegetables with flair: Rainbow chard, kale, and purple basil add color as well as harvests.

Budget bonus: Edible gardens save on grocery bills while providing fresher, more nutritious food right at your doorstep.


4. Wildlife-Friendly Spaces

Gardeners are becoming stewards of biodiversity, creating habitats that attract birds, bees, butterflies, and beneficial insects.

  • Pollinator gardens: Nectar-rich flowers like coneflowers, milkweed, and sunflowers will be everywhere.
  • Water features: Even small birdbaths or mini ponds draw wildlife in.
  • Habitat zones: Brush piles, log corners, and native shrubs provide nesting and shelter.

This trend isn’t just about conservation—it’s also about the joy of watching your yard come alive with nature.


5. Vertical and Small-Space Gardening

Urban living and smaller yards are fueling a surge in vertical and container gardening.

  • Living walls: Panels filled with herbs or flowers add green space where square footage is scarce.
  • Stacked planters: Multi-tier systems maximize growing potential on patios and balconies.
  • Climbing edibles: Cucumbers, beans, and squash thrive on trellises, saving ground space.

No matter the size of your yard—or even if you only have a balcony—you can garden upward instead of outward.


6. Tech-Enhanced Gardening

Smart technology is making its way into the garden, and next year will see more homeowners adopting tech-savvy solutions.

  • Smart irrigation systems: Sensors that monitor soil moisture and weather patterns save water and reduce guesswork.
  • Plant care apps: From pest ID to fertilization reminders, apps help gardeners track progress.
  • Solar lighting: Affordable, eco-friendly lighting that extends the use of outdoor spaces into the evening.

For busy gardeners, tech tools simplify care while improving efficiency.


7. Naturalistic and “Messy” Aesthetics

The manicured, perfectly trimmed garden is fading in favor of a more relaxed, natural look.

  • Rewilding patches: Letting areas grow freely with native grasses and flowers.
  • Mixed textures: Combining tall perennials, shrubs, and self-seeding annuals for layered interest.
  • Organic curves: Soft pathways, irregular borders, and flowing layouts replace rigid symmetry.

This trend celebrates authenticity—gardens that look like they belong to the landscape rather than imposed upon it.


Final Thoughts

Next year’s garden trends reveal a clear theme: harmony with nature. Whether it’s reducing mowing, harvesting your own food, attracting wildlife, or embracing more sustainable practices, gardeners are redefining what outdoor beauty means.

You don’t need a huge budget or a complete yard overhaul to take part in these trends. Start small—plant a pollinator patch, add a rain barrel, or swap part of your lawn for clover. Over time, these changes build a more resilient, enjoyable, and eco-friendly garden.

As experts suggest, the future of gardening isn’t about control—it’s about collaboration with the natural world. And that’s a trend worth growing.

Should You Try No-Mow Lawns? Here’s What Experts Think

Should You Try No-Mow Lawns? Here’s What Experts Think

The traditional lush, green, perfectly mowed lawn has long been a symbol of suburban pride. But in recent years, more homeowners are rethinking their turf. With rising concerns about water use, pesticide exposure, and biodiversity loss, the no-mow lawn movement has gained momentum. Instead of weekly mowing sessions, these alternative lawns focus on low-maintenance groundcovers, wildflowers, and native grasses that thrive naturally.

But is a no-mow lawn right for you? We asked experts in horticulture, ecology, and landscaping to weigh in. Here’s what you need to know before trading in your mower.


What Exactly Is a No-Mow Lawn?

A no-mow lawn doesn’t necessarily mean you’ll never touch your mower again. Instead, it refers to lawn alternatives that require little to no mowing compared to conventional turfgrass.

Types of no-mow lawns include:

  • Low-growing fescues: Fine fescue blends grow slowly and stay shorter, needing only one or two trims per season.
  • Wildflower meadows: A mix of native wildflowers and grasses that bloom throughout the year, providing beauty and pollinator habitat.
  • Clover or microclover lawns: Durable, soft groundcovers that stay green even in drought and don’t require fertilization.
  • Groundcovers like thyme or sedum: Low, fragrant plants that spread to cover bare soil.

Each type has its benefits and challenges, but they all share one trait: less maintenance and more ecological value.


The Environmental Case for No-Mow Lawns

Traditional lawns may look neat, but they’re not always kind to the environment. According to the EPA, turfgrass covers more acreage in the U.S. than any irrigated crop—and it consumes billions of gallons of water each day.

Experts highlight several ecological benefits of no-mow lawns:

  1. Water conservation – Native grasses and groundcovers typically need far less irrigation than conventional turf.
  2. Pollinator habitat – Clover, wildflowers, and native plants provide nectar and shelter for bees, butterflies, and birds.
  3. Soil health – Deep-rooted alternatives improve soil structure, reduce erosion, and increase carbon storage.
  4. Reduced chemical use – No-mow lawns often thrive without fertilizers or pesticides, protecting local waterways.

As Dr. Emily Hartwell, a landscape ecologist, puts it: “Every square foot of lawn converted into habitat is a win for biodiversity and climate resilience.”


The Practical Benefits

While many homeowners are motivated by sustainability, the everyday perks of a no-mow lawn are equally appealing:

  • Less maintenance: Say goodbye to weekly mowing, edging, and fertilizing.
  • Lower costs: Reduced spending on gas, equipment, water, and chemicals.
  • Year-round interest: Wildflower lawns shift colors with the seasons, unlike turf which can brown in droughts.
  • Pest resistance: Diverse plantings are less vulnerable to diseases and pests than monoculture grass.

For busy families, retirees, or eco-conscious gardeners, these benefits can make a no-mow lawn an attractive option.


Potential Drawbacks to Consider

Of course, no gardening solution is perfect. Experts caution that no-mow lawns come with challenges.

  • Initial installation costs: Seeds, soil prep, and groundcover plugs can be more expensive upfront than laying sod.
  • Establishment period: No-mow lawns often take a year or two to fill in fully, requiring patience.
  • Neighborhood expectations: Some communities have strict lawn appearance rules, and a meadow-style lawn may not fit in.
  • Foot traffic limitations: While clover and thyme tolerate light use, wildflowers and fescues may not handle heavy play areas.

As landscape designer Marcus Liu notes: “No-mow lawns are fantastic in the right setting, but they’re not ideal for soccer games or high-traffic backyards.”


Best Plants for No-Mow Lawns

Experts recommend starting with species suited to your region and soil. Popular choices include:

  • Fine fescue blends: Ideal for cooler climates, shade-tolerant, and slow-growing.
  • Buffalograss: A drought-tolerant option for warmer, dry regions.
  • Dutch white clover: Stays green, fixes nitrogen in soil, and feeds pollinators.
  • Creeping thyme: A fragrant, drought-resistant groundcover that produces purple blooms.
  • Wildflower mixes: Tailored blends of native flowers and grasses for meadow-style lawns.

Consulting a local extension office or native plant society can help you choose plants that thrive without excess care.


How to Transition to a No-Mow Lawn

Switching from traditional turf to a no-mow lawn requires some planning, but it doesn’t have to be overwhelming.

  1. Assess your site: Note sun exposure, soil type, and foot traffic.
  2. Remove existing turf: Use solarization (covering with plastic), smothering with cardboard, or digging out sod.
  3. Amend the soil: Add compost to improve fertility and drainage.
  4. Seed or plant: Sow seeds evenly or plant plugs for faster coverage.
  5. Water sparingly: Provide consistent moisture during establishment, then taper off.
  6. Mow occasionally: Many no-mow lawns benefit from one or two trims per year to prevent woody growth and encourage density.

The key is patience—after the first year, maintenance drops dramatically.


What Experts Recommend

So, should you try a no-mow lawn? The answer depends on your goals.

  • If you value biodiversity, sustainability, and low maintenance: Experts agree that no-mow lawns are a smart choice.
  • If you need a play lawn for kids or pets: Consider a hybrid approach, keeping some turf areas and converting less-used sections to no-mow alternatives.
  • If you live in an HOA community: Check rules first to avoid conflicts.

Dr. Hartwell sums it up: “A no-mow lawn doesn’t have to replace every inch of turf. Even small patches can reduce your environmental footprint and bring back pollinators.”


Final Thoughts

No-mow lawns challenge the idea that a perfect green carpet is the only way to landscape. By embracing native grasses, clover, wildflowers, and other groundcovers, you can reduce maintenance, cut costs, and create a yard that supports the environment.

The movement isn’t about neglect—it’s about rethinking what beauty and function look like in our outdoor spaces. Whether you go all-in or start small, a no-mow lawn can be a rewarding step toward a greener future.

So, before you fuel up your mower this weekend, ask yourself: Could your lawn—and the planet—benefit from a little less mowing?

How to Create a Wildlife-Friendly Yard on a Budget

How to Create a Wildlife-Friendly Yard on a Budget

Imagine stepping outside your door and hearing birdsong, spotting butterflies flitting among flowers, or watching bees hum across your vegetable patch. A wildlife-friendly yard transforms your outdoor space into a sanctuary, not only for you but for the many creatures that help sustain the ecosystem.

But you don’t need to spend a fortune to make your yard welcoming to wildlife. With creativity, resourcefulness, and a few eco-friendly practices, you can build a thriving habitat without straining your budget. Here’s how to do it.


Why a Wildlife-Friendly Yard Matters

Creating space for wildlife isn’t just about aesthetics—it plays a crucial role in the environment.

  • Supports pollinators: Bees, butterflies, and hummingbirds help your flowers and crops thrive.
  • Boosts biodiversity: A mix of plants and habitats attracts different species, balancing your yard’s ecosystem.
  • Provides natural pest control: Birds, frogs, and beneficial insects help keep unwanted pests in check.
  • Reduces stress: Being surrounded by wildlife fosters a deeper connection with nature and improves well-being.

And best of all, many strategies for inviting wildlife actually cost less than traditional landscaping.


1. Start with Native Plants

Native plants are budget-friendly heroes. Because they’re adapted to your region’s soil and climate, they require less water, fertilizer, and maintenance.

  • Choose wisely: Ask local nurseries or extension services for inexpensive native perennials, grasses, and shrubs.
  • Propagate yourself: Save seeds from native flowers or ask neighbors for plant divisions—free additions to your garden!
  • Benefits: Native plants attract local pollinators, birds, and beneficial insects better than most exotic ornamentals.

2. Make Use of Recycled Materials

Creating wildlife features doesn’t mean buying brand-new supplies. Look around your home for items you can repurpose.

  • Logs and branches: Fallen wood makes excellent shelter for insects and small animals.
  • Old containers: Convert buckets, tubs, or barrels into mini water features.
  • Pallets or scrap wood: Build raised garden beds, birdhouses, or pollinator hotels at little to no cost.

Not only does repurposing save money, it also reduces waste.


3. Add a Water Source

Every animal needs water, and even a small feature can make a big impact.

  • DIY birdbath: Use an old bowl or shallow dish on a plant stand or upturned pot.
  • Mini pond: Sink a large container into the ground, add stones, and let rainwater fill it naturally.
  • Keep it safe: Add a few pebbles or branches so bees, butterflies, and small creatures can perch without risk of drowning.

For little cost, you create a magnet for birds, pollinators, and beneficial insects.


4. Build Shelter Spots

Wildlife needs safe places to hide, rest, and raise young.

  • Brush piles: Stack twigs, leaves, and branches in a quiet corner of the yard.
  • Rock piles: Create a lizard- and insect-friendly nook with stones.
  • Nest boxes: Build or repurpose wooden boxes for birds, bats, or even solitary bees.

Shelters don’t have to be fancy—just functional. Even leaving an unmown patch of grass can provide refuge.


5. Plant for Year-Round Food

Wildlife needs nourishment in every season, not just spring.

  • Spring and summer: Flowering plants like coneflowers, milkweed, and clover provide nectar.
  • Fall: Berries from shrubs such as elderberry or serviceberry help migrating birds.
  • Winter: Seed heads left standing (like sunflowers or black-eyed Susans) offer food for overwintering birds.

By planting with the seasons in mind, you ensure a continuous food supply—all while saving money on costly feed.


6. Skip Chemicals

Pesticides, herbicides, and synthetic fertilizers harm more than pests—they damage soil health, poison pollinators, and upset natural balances.

  • Go organic: Use compost, mulch, and natural deterrents like neem oil.
  • Let predators help: Birds, frogs, and ladybugs are nature’s pest control squad.
  • Save money: Homemade compost and mulch are free compared to chemical treatments.

Keeping chemicals out is both budget-friendly and wildlife-friendly.


7. Attract Pollinators with Color and Diversity

Pollinators are drawn to variety.

  • Mix it up: Plant clusters of different colored flowers to catch attention.
  • Stagger blooms: Grow early, mid, and late-season plants so pollinators have food all year.
  • Budget tip: Wildflower seed mixes are an inexpensive way to add diversity.

A pollinator-friendly yard ensures better fruit and vegetable harvests at virtually no extra cost.


8. Use Kitchen Scraps Wisely

OLYMPUS DIGITAL CAMERA

Your kitchen is a goldmine for your garden.

  • Compost: Vegetable peels, coffee grounds, and eggshells turn into nutrient-rich soil.
  • Fruit scraps: Place orange peels in your yard to attract butterflies.
  • Banana peels: Bury near rose bushes for a natural potassium boost.

These simple hacks reduce food waste and provide free nutrition for your plants.


9. Let Part of Your Yard Go “Wild”

Sometimes, the best wildlife-friendly move is to do less.

  • Unmown patches: Leaving a small area of grass unmowed provides shelter for insects.
  • Wild corners: Allow weeds like dandelions or clover to grow—they’re valuable food sources for pollinators.
  • Budget perk: Less mowing means less fuel and lower yard maintenance costs.

A little messiness can create a haven for countless species.


10. Get Your Community Involved

Wildlife thrives when entire neighborhoods participate.

  • Seed swaps: Trade seeds and plant cuttings with friends to expand your garden for free.
  • Community initiatives: Some local organizations offer free trees, shrubs, or native plants.
  • Shared habitats: If neighbors also create wildlife-friendly spaces, the collective impact is much greater.

Working together builds stronger ecosystems—and friendships—without extra expense.


Final Thoughts

You don’t need a big budget to make a big difference. By planting natives, reusing household items, providing water and shelter, and avoiding chemicals, you can transform your yard into a sanctuary for wildlife. Every bird that visits your feeder, every butterfly that lands on your flowers, and every bee buzzing through your vegetables is proof that small changes matter.

Creating a wildlife-friendly yard is about harmony—between people, plants, and animals. And when you use these budget-friendly strategies, you’ll not only save money but also gain the joy of watching your outdoor space come alive with nature.

10 Eco-Friendly Gardening Hacks That Actually Work

10 Eco-Friendly Gardening Hacks That Actually Work

Gardening has always been about more than just growing plants—it’s about connecting with nature, creating beauty, and cultivating sustainability. But in today’s world, where climate change and environmental concerns are front and center, many gardeners are looking for ways to make their outdoor spaces greener in every sense of the word.

The good news? Eco-friendly gardening doesn’t require expensive equipment or complicated methods. In fact, some of the most effective hacks are simple, practical, and proven to work. From conserving water to repurposing kitchen scraps, these 10 eco-friendly gardening hacks will help you reduce waste, protect the planet, and keep your garden thriving naturally.


1. Collect Rainwater for Irrigation

Why use treated tap water when nature provides its own supply? Installing a rain barrel or simple collection system lets you harness free, chemical-free water for your plants.

  • How to do it: Attach a rain barrel to your home’s downspout. Add a spigot at the bottom for easy watering access.
  • Benefits: Reduces water bills, prevents stormwater runoff, and gives plants softer water that’s free of chlorine and fluoride.
  • Extra tip: Cover your barrel with a fine mesh screen to keep out debris and mosquitoes.

2. Compost Kitchen Scraps

Food waste doesn’t belong in landfills—it belongs in your garden. Composting turns banana peels, coffee grounds, and vegetable scraps into nutrient-rich soil.

  • How to do it: Use a compost bin or pile in a shady spot. Balance “greens” (food scraps, grass clippings) with “browns” (dry leaves, shredded cardboard).
  • Benefits: Cuts household waste by up to 30%, enriches soil, and reduces the need for chemical fertilizers.
  • Extra tip: Crushed eggshells add calcium, while coffee grounds help acid-loving plants like blueberries and azaleas.

3. Embrace Mulching

Mulching is one of the simplest yet most powerful eco-friendly gardening techniques.

  • How to do it: Spread organic mulch—such as shredded leaves, bark, or straw—around plants.
  • Benefits: Conserves water by reducing evaporation, suppresses weeds, and improves soil health as it decomposes.
  • Extra tip: Use grass clippings as mulch—but let them dry first to avoid matting.

4. Grow Native Plants

Choosing plants that naturally thrive in your region reduces maintenance and conserves resources.

  • Why it works: Native plants are adapted to local soil, rainfall, and pests, meaning they require less watering, fertilizing, and spraying.
  • Benefits: Supports local pollinators, strengthens biodiversity, and reduces invasive species problems.
  • Extra tip: Check local extension offices or native plant societies for species recommendations.

5. Use Companion Planting

Nature already knows how to create balance—companion planting mimics those systems.

  • How it works: Pair plants that help each other grow. For example:
    • Basil deters pests from tomatoes.
    • Marigolds repel nematodes and aphids.
    • Corn, beans, and squash (the “Three Sisters”) thrive symbiotically.
  • Benefits: Reduces pesticide use, improves yields, and promotes natural pest control.

6. Repurpose Household Waste

Your trash can be your garden’s treasure.

  • Ideas to try:
    • Use old newspapers or cardboard as weed barriers under mulch.
    • Repurpose glass jars as mini greenhouses for seedlings.
    • Turn plastic bottles into drip irrigation systems.
  • Benefits: Saves money, reduces landfill waste, and sparks creativity.

7. Attract Pollinators Naturally

Bees, butterflies, and hummingbirds are your garden’s best allies.

  • How to do it: Plant nectar-rich flowers like lavender, sunflowers, and coneflowers. Include a mix of blooms for spring, summer, and fall.
  • Benefits: Boosts pollination, increases harvests, and supports declining pollinator populations.
  • Extra tip: Avoid chemical pesticides that harm beneficial insects.

8. Make Natural Fertilizers

Skip synthetic fertilizers and feed your plants the natural way.

  • DIY options:
    • Banana peel tea: Soak banana peels in water for a potassium-rich boost.
    • Epsom salt spray: Adds magnesium to help plants grow strong.
    • Weed tea: Soak weeds in a bucket of water for a few weeks, then use as liquid fertilizer.
  • Benefits: Healthier soil, cost savings, and less chemical runoff into waterways.

9. Conserve Water with Smart Techniques

Water is a precious resource, and your garden doesn’t need as much as you think.

  • Strategies to try:
    • Water early in the morning to minimize evaporation.
    • Use soaker hoses or drip irrigation instead of sprinklers.
    • Group plants with similar water needs together.
  • Benefits: Saves water, cuts costs, and prevents plant stress.

10. Create a Wildlife-Friendly Habitat

A truly eco-friendly garden supports more than just plants—it nurtures an ecosystem.

  • How to do it: Add a birdbath, a bee hotel, or a small log pile for beneficial insects. Leave a corner of your yard “wild” to encourage biodiversity.
  • Benefits: Attracts natural pest controllers like birds and ladybugs, reduces reliance on chemicals, and supports local wildlife.
  • Extra tip: Even a small urban garden can become a sanctuary for pollinators and songbirds.

Final Thoughts

Eco-friendly gardening doesn’t mean sacrificing beauty or convenience—it means working with nature instead of against it. By collecting rainwater, composting, planting natives, and using smart, sustainable techniques, you’ll not only create a healthier garden but also contribute to a greener planet.

These 10 hacks are practical, affordable, and proven to work. Start with one or two, and soon your garden will become a thriving, sustainable oasis that benefits you, your neighbors, and the environment alike.

How to Keep Deer From Eating Your Plants Without Fencing

How to Keep Deer From Eating Your Plants Without Fencing

If you’ve ever walked into your garden only to find your beloved plants munched down to stubs, you’re not alone. Deer are graceful creatures, but when it comes to your garden, they can be persistent, destructive, and frustratingly hard to deter. Fencing is the most effective way to keep deer out, but it’s not always practical—especially for large properties, front yards, or areas with HOA restrictions.

The good news is, you can protect your plants without building a fence. With the right combination of natural deterrents, strategic planting, and behavior-changing tactics, you can make your garden far less appealing to hungry deer. This article explores science-backed, humane, and sustainable methods to keep deer away from your plants—no fencing required.


Understanding Deer Behavior

Before we dive into the solutions, it’s important to understand why deer eat your plants:

  • Seasonal hunger: In spring and fall, food can be scarce in the wild. Tender garden plants are an easy target.
  • Habit and memory: Deer return to places they’ve fed before, especially if they weren’t discouraged.
  • Scent and texture: Deer prefer plants that are soft, juicy, and low in strong scents.

Deer are creatures of habit, so your goal is to break their routine by making your garden less appealing and more confusing to them.


1. Use Deer-Repellent Plants as Natural Barriers

One of the easiest ways to deter deer is to surround your prized plants with species that deer tend to avoid due to scent, taste, or texture. These “deer-resistant” plants can act like a natural forcefield around your vulnerable plants.

Examples of Deer-Repellent Plants:

  • Lavender: Strongly scented and woody.
  • Russian Sage: Fuzzy leaves and a pungent odor.
  • Rosemary and Thyme: Aromatic herbs deer dislike.
  • Boxwood: Bitter and unpalatable.
  • Daffodils and Foxglove: Contain toxins that deter deer.

Pro Tip: Create a perimeter ring of these plants around more desirable vegetation. Even if deer pass through your yard, they’re less likely to continue deeper into the garden.


2. Apply Natural and Commercial Deer Repellents

Deer repellents work by using smells or tastes that make your plants unpleasant to eat. Many are eco-friendly and can be made at home or bought from garden centers.

Types of Repellents:

Scent-Based Repellents:

  • Garlic or rotten egg-based sprays
  • Coyote or fox urine (predator scent)
  • Essential oils like peppermint, cinnamon, or eucalyptus

Taste-Based Repellents:

  • Capsaicin (hot pepper spray)
  • Putrescent egg solids
  • Soap bars (Irish Spring) grated and spread near plants

DIY Recipe:

Mix the following and spray every 7–10 days:

  • 1 egg
  • 1 tablespoon dish soap
  • 1 tablespoon garlic powder
  • 1 quart of water

Let sit overnight, strain, and apply using a garden sprayer.

Tip: Change up your repellents regularly—deer can get used to a single scent over time.


3. Motion-Activated Deterrents

Deer are skittish by nature. Sudden movement, noise, or light can scare them off—especially at night or in low-light conditions.

Effective Motion Devices:

  • Motion-activated sprinklers (e.g., Orbit Yard Enforcer): Surprise deer with a harmless spray of water.
  • Ultrasonic repellent devices: Emit high-frequency sounds only deer can hear.
  • Flashing LED lights or strobe lights: Create confusion and make deer uneasy.

Place these deterrents in high-traffic deer areas, especially along known entry paths or near vulnerable plants.

Bonus: These devices often deter raccoons, rabbits, and squirrels, too.


4. Try Scent-Masking Techniques

Deer rely heavily on their sense of smell to identify safe food. You can use this against them by overwhelming the air with strong, confusing scents.

Effective Scent Maskers:

  • Strong-smelling herbs (mint, oregano, chives)
  • Companion planting of garlic or onions around flowers
  • Human scent markers: Place hair clippings, worn socks, or bars of scented soap around your garden.
  • Fabric softener sheets: Tie to stakes to blow in the wind.

Tip: Change positions weekly so deer don’t learn that these scents don’t pose a real threat.


5. Use Decoys and Visual Deterrents

Deer are cautious animals, and unfamiliar sights can keep them away—especially if they appear to move.

Common Visual Deterrents:

  • Scarecrows: Move or dress them differently every few days.
  • Mylar balloons: Reflect light and sway in the wind.
  • Pinwheels or wind chimes: Add both motion and sound.
  • Fake owls or predator statues: Move them weekly to new spots.

Note: Deer are smart. If a decoy never moves or makes noise, they’ll eventually ignore it—so rotate and refresh regularly.


6. Elevate or Isolate High-Value Plants

Deer typically graze at head and shoulder height. You can protect vulnerable plants by raising them out of reach or placing them in less accessible spots.

Strategies:

  • Use raised beds or tall containers for flowers and vegetables.
  • Plant prized shrubs closer to the house, where deer are less likely to venture.
  • Create plant islands surrounded by less appetizing groundcovers.

7. Practice Seasonal Timing and Rotations

Deer feeding habits change with the seasons. Early spring and late fall are when they’re most aggressive due to food scarcity. Adjust your garden plans accordingly.

Timing Strategies:

  • Avoid planting deer-favorite annuals (like tulips, hostas, or roses) early in spring without protection.
  • Delay planting fruit trees or vegetables until natural forage is abundant.
  • Rotate annual plantings to break deer feeding patterns.

8. Mulch with Deer-Repellent Materials

Surrounding your plants with unpleasant-smelling mulch can deter curious deer from stepping too close.

Repellent Mulch Options:

  • Pine needles: Sharp texture.
  • Crushed eggshells: Uncomfortable to walk on.
  • Cedar chips: Strong-smelling and unattractive to deer.

You can also mix in repellent granules (available at garden stores) with mulch for added effectiveness.


9. Combine Tactics for Maximum Effectiveness

The key to long-term success is variety and unpredictability. Deer can adapt quickly to one method, but layering multiple techniques increases your chances.

Example Strategy:

  • Plant lavender and rosemary around the border.
  • Use a motion-activated sprinkler in the middle of the garden.
  • Apply garlic spray weekly.
  • Hang soap bars or wind chimes in trees.
  • Use predator scent along deer trails.

Rotate and refresh your deterrents every 2–3 weeks to prevent deer from becoming desensitized.


Conclusion

Keeping deer out of your garden without a fence may seem challenging, but with a strategic, nature-friendly approach, it’s absolutely possible. By understanding deer behavior and using a combination of scent, sound, sight, and plant choice, you can make your yard an uninviting buffet.

The goal isn’t to harm deer—but to train them to go elsewhere. With a little effort and creativity, you can protect your garden, preserve your hard work, and enjoy a beautiful, deer-free landscape.

9 Weeds That Actually Improve Soil Quality

9 Weeds That Actually Improve Soil Quality

Weeds are usually considered the enemy of a well-tended garden or lawn. Homeowners and farmers spend countless hours pulling, spraying, and battling these unwanted plants. But what if some of those weeds were actually helping your soil—and even your plants?

In reality, many so-called “weeds” are simply wild plants that emerge in disturbed or degraded soils. And while they may look unruly, several of these plants play a valuable role in regenerating and improving soil health. From loosening compacted earth to fixing nitrogen, certain weeds act as nature’s soil doctors, offering free ecosystem services without any fertilizers or machines.

This article explores 9 common weeds that can enhance soil structure, fertility, and biodiversity, proving that not all weeds are bad—and some might even be your garden’s secret allies.


1. Dandelion (Taraxacum officinale)

Soil Benefits:

  • Deep taproot breaks up compacted soil and improves drainage.
  • Pulls up calcium and potassium from deep layers to the surface.
  • Leaves, when decomposed, enrich the topsoil with organic matter.

Bonus:

Dandelions are also bioindicators—their presence often signals poorly aerated or compacted soils.

Garden Tip:

Rather than pulling them all, let a few mature and decompose naturally to boost soil health in poor patches.


2. Red Clover (Trifolium pratense)

Soil Benefits:

  • Fixes atmospheric nitrogen into the soil through its symbiotic relationship with Rhizobium bacteria.
  • Improves fertility for neighboring plants.
  • Excellent green manure when tilled into the soil.

Bonus:

It also reduces soil erosion thanks to its dense root system.

Garden Tip:

Use red clover as a cover crop in garden beds during the off-season.


3. Chickweed (Stellaria media)

Soil Benefits:

  • A fast-growing groundcover that prevents erosion and reduces soil moisture loss.
  • Improves topsoil structure by shielding soil from heavy rain or sun.

Bonus:

Its shallow roots do not compete heavily with vegetables, making it a good companion in early spring gardens.

Garden Tip:

Use chickweed as a living mulch during cooler seasons. Just make sure to manage it before it goes to seed.


4. Comfrey (Symphytum officinale)

Soil Benefits:

  • Has a long taproot that mines nutrients like potassium, phosphorus, and calcium.
  • Leaves can be chopped and used as nutrient-rich mulch or compost activator.

Bonus:

Called a “dynamic accumulator,” comfrey collects nutrients from deep in the soil and makes them available at the surface.

Garden Tip:

Plant comfrey near fruit trees or compost piles. Use chopped comfrey leaves to boost compost microbial activity.


5. White Clover (Trifolium repens)

Soil Benefits:

  • Like red clover, fixes nitrogen in the soil.
  • Excellent living mulch that suppresses other unwanted weeds while improving fertility.

Bonus:

Can tolerate mowing and foot traffic—ideal for low-maintenance lawns.

Garden Tip:

Mix white clover into grass seed for a natural, greener lawn that requires less fertilizer.


6. Plantain (Plantago major and Plantago lanceolata)

Soil Benefits:

  • Grows well in compacted and low-calcium soils, helping to aerate and signal soil health issues.
  • Deep taproots help break hardpan layers, improving drainage.

Bonus:

The leaves break down quickly and add organic matter to poor soils.

Garden Tip:

Allow a few plantain plants to grow in poor areas to rehabilitate compacted zones naturally.


7. Lamb’s Quarters (Chenopodium album)

Soil Benefits:

  • Highly effective at mining nutrients, particularly phosphorus, potassium, and calcium.
  • Helps rebuild nutrient-depleted soils when allowed to grow briefly and then cut before seeding.

Bonus:

Considered a “pioneer plant”, it grows where other plants struggle, preparing the soil for future crops.

Garden Tip:

Let it grow in neglected corners, then chop and drop it before flowering to return nutrients to the soil.


8. Vetch (Vicia spp.)

Soil Benefits:

  • A nitrogen-fixing legume perfect for cover cropping.
  • Suppresses other weeds while improving soil fertility and structure.

Bonus:

The dense roots help hold soil together, reducing erosion on slopes or exposed fields.

Garden Tip:

Use hairy vetch or common vetch in winter cover crops to improve spring planting conditions.


9. Nettles (Urtica dioica)

Soil Benefits:

  • Indicates high-nitrogen and fertile soil—their presence is often a good sign.
  • Excellent material for compost and compost tea, boosting microbial life.

Bonus:

Nettle roots improve soil structure and moisture retention.

Garden Tip:

Harvest young nettles for use in compost activators or liquid fertilizer teas. Wear gloves!


Why These Weeds Improve Soil

While many see weeds as nuisances, in ecological terms, weeds are often “pioneer species”. These are plants that colonize disturbed or degraded land, kick-starting the process of soil regeneration and nutrient cycling.

Here’s how they do it:

Deep Root Systems

Weeds like dandelion and comfrey have taproots that reach deep into subsoil layers, pulling up nutrients and breaking compacted soil.

Nitrogen Fixation

Leguminous weeds (clovers, vetch) fix nitrogen from the air, adding free fertilizer to the soil naturally.

Organic Matter Contribution

When allowed to decompose in place, these plants feed the soil with organic matter, improving structure, microbial life, and water retention.

Bioindicators

Some weeds indicate what’s missing or abundant in the soil (e.g., plantain = compaction, nettles = nitrogen-rich soil), helping gardeners read the land.


How to Manage Beneficial Weeds Without Letting Them Take Over

Yes, these weeds can help your soil—but management is key. Allowing them to seed freely may lead to overgrowth and imbalance.

Here’s how to use them wisely:

“Chop and Drop” Technique

  • Let beneficial weeds grow to about half maturity.
  • Chop them at the base before flowering and leave the material on the soil as mulch.

Use as Green Manure

  • Pull and compost them or till them into the soil to enrich your garden beds naturally.

Prevent Seed Set

  • Never let these weeds flower and seed unless you want them to spread.
  • Be especially careful with lamb’s quarters and dandelions, which seed prolifically.

Conclusion

In the world of gardening and soil science, not all weeds are villains. Many of the plants we label as “unwanted” are actually nature’s way of healing damaged soil—improving structure, replenishing nutrients, and preparing the ground for more desirable vegetation.

By recognizing and managing these beneficial weeds, you can work with nature instead of against it, reducing your need for synthetic fertilizers, tilling, or costly amendments. Whether you’re a farmer restoring depleted fields or a home gardener improving backyard soil, these 9 soil-friendly weeds may be just the partners you didn’t know you needed.

How to Kill Crabgrass Without Damaging Your Lawn

How to Kill Crabgrass Without Damaging Your Lawn

There’s nothing more frustrating for homeowners and garden enthusiasts than putting time, effort, and money into maintaining a lush, green lawn—only to see it invaded by crabgrass. This fast-growing annual weed thrives in thin, dry patches of soil, spreading like wildfire and quickly choking out healthy turf. The worst part? If not dealt with correctly, your attempt to kill crabgrass could damage the very grass you’re trying to protect.

But don’t worry—you don’t have to choose between weed control and lawn health. In this article, we’ll explore safe, effective, and proven methods for killing crabgrass without harming your lawn, so you can enjoy a healthy, weed-free yard all season long.


What is Crabgrass?

Crabgrass is a warm-season annual weed that typically germinates in late spring and thrives throughout the hot summer months. There are several types, but the two most common are:

  • Smooth crabgrass (Digitaria ischaemum)
  • Large crabgrass (Digitaria sanguinalis)

Crabgrass gets its name from its sprawling, crab-like growth pattern. Unlike desirable grasses that grow vertically, crabgrass grows low and spreads outward in a circular fashion, smothering nearby turf.

Crabgrass dies with the first frost, but by then it’s usually dropped thousands of seeds, setting the stage for a bigger infestation the following year.


Why Crabgrass Is a Problem

  • Aggressive growth: It quickly takes over weak or bare patches.
  • Crowds out turfgrass: Competes for water, nutrients, and sunlight.
  • Unsightly appearance: Has a coarse texture and irregular shape that disrupts the smooth look of your lawn.
  • Annual cycle: Returns every year from seeds unless addressed.

The key to controlling crabgrass is understanding its life cycle and attacking it at the right time, using methods that target the weed—not your lawn.


1. Use a Pre-Emergent Herbicide in Early Spring

What It Does:

Pre-emergent herbicides stop crabgrass seeds from germinating, making them one of the most effective and lawn-safe tools in your arsenal.

When to Apply:

  • Apply in early spring, just before soil temperatures reach 55°F (13°C)—the temperature at which crabgrass seeds begin to germinate.
  • This usually coincides with forsythia blooming or when dogwood trees start to bud.

How to Apply:

  • Mow your lawn before application.
  • Apply granular pre-emergent with a broadcast spreader.
  • Water lightly after application to activate the herbicide.
  • Avoid aerating or disturbing the soil afterward, as this can reduce effectiveness.

Best Pre-Emergents for Crabgrass:

  • Prodiamine
  • Dithiopyr
  • Pendimethalin

Important: Pre-emergents will also block desirable grass seed, so don’t use it if you plan to reseed your lawn immediately after.


2. Hand-Pull Small Infestations Early

For small patches of crabgrass or early outbreaks, manual removal is effective and 100% safe for your lawn.

How to Pull Crabgrass Properly:

  • Water the area lightly to soften the soil.
  • Use a weeding tool or garden knife to remove the entire plant, including the root.
  • Dispose of the pulled weed in the trash—not your compost pile, as seeds can survive.

Tip: Early removal (when the plant is small and before it seeds) greatly reduces next year’s population.


3. Use a Post-Emergent Herbicide—Carefully

If crabgrass has already sprouted and grown past the early stages, use a selective post-emergent herbicide that targets crabgrass without killing your turfgrass.

When to Use:

  • Best used early in the crabgrass growing stage (2–4 leaf stage).
  • Use in summer, when the weed is actively growing.

Safe Post-Emergent Options:

  • Quinclorac (safe on most cool-season grasses like fescue, bluegrass, rye)
  • Fenoxaprop (effective for cool-season lawns)
  • Mesotrione (controls both crabgrass and broadleaf weeds)

Application Tips:

  • Apply during dry weather when no rain is forecast for at least 24 hours.
  • Avoid mowing right before or after application—wait 2–3 days.
  • Use a sprayer for targeted control to avoid harming good grass.

Caution: Some post-emergents can damage St. Augustine, Centipede, or Bermuda grass—check the label carefully for grass-type compatibility.


4. Improve Lawn Health to Crowd Out Weeds

Crabgrass loves thin, bare, or undernourished areas of your lawn. One of the most effective long-term solutions is to grow thicker, healthier turf so crabgrass has no room to take hold.

Key Lawn Care Practices:

Mow High

  • Keep grass at 3–4 inches tall.
  • Taller grass shades the soil, making it harder for crabgrass seeds to germinate.

Fertilize Properly

  • Use a balanced slow-release fertilizer in spring and fall.
  • Avoid over-fertilizing in summer, which can stress grass and encourage weeds.

Water Deeply and Infrequently

  • Encourage deep root growth with 1 inch of water per week.
  • Water in the early morning to avoid fungal issues.

Aerate Compacted Soil

  • Aeration allows nutrients, water, and air to reach roots.
  • Helps break up hard soil where crabgrass thrives.

Overseed Thin Areas

  • Fill in bare patches in early fall or spring.
  • Choose high-quality grass seed suited to your climate.

Healthy turf is your best defense—a dense, vigorous lawn naturally prevents crabgrass from establishing.


5. Try Natural Alternatives for Organic Lawns

Unkempt garden yard with crab grass and clover weeds

If you’re maintaining an organic or pesticide-free lawn, there are natural ways to suppress crabgrass—though they may require more persistence.

Natural Solutions:

Corn Gluten Meal

  • A natural pre-emergent that inhibits seed germination.
  • Apply in early spring at a rate of 20 lbs per 1,000 sq. ft.
  • Also adds nitrogen to your soil.

Note: Effectiveness varies and may take 2–3 years for significant control.

Vinegar Spray (Acetic Acid)

  • Mix white vinegar (20% horticultural vinegar) with water and a drop of dish soap.
  • Spray directly on young crabgrass.
  • Be cautious—it kills anything it touches, including grass.

Boiling Water

  • For spot-treating cracks, driveways, or walkways.
  • Not suitable for use within a healthy lawn.

Natural methods work best on young, isolated crabgrass, not widespread infestations.


What NOT to Do

  • Don’t scalping the lawn: Cutting grass too short encourages weed invasion.
  • Don’t apply herbicides in extreme heat: Can stress grass and cause burning.
  • Don’t ignore small patches: One crabgrass plant can produce over 150,000 seeds in one season.

Crabgrass Prevention Calendar

SeasonAction
Early Spring (Mar–Apr)Apply pre-emergent herbicide before soil reaches 55°F
Late Spring (May)Monitor for early crabgrass sprouts; start hand-pulling
Summer (Jun–Aug)Use post-emergents on visible crabgrass; mow high; water deeply
Early Fall (Sep)Overseed thin areas; fertilize lawn
Late Fall (Oct–Nov)Apply final fertilizer application to strengthen roots

Conclusion

Crabgrass may be stubborn, but it’s not unbeatable. The key to controlling it effectively—and without damaging your lawn—is to take a multi-faceted approach:

  • Prevent it with timely pre-emergents.
  • Control it with selective post-emergents.
  • Outcompete it with dense, healthy grass.
  • Treat naturally when possible for long-term sustainability.

By understanding crabgrass’s habits and life cycle, you can confidently protect your lawn from invasion and enjoy a thick, weed-free yard that looks great all year round.

5 Natural Ways to Keep Ants Out of Your Garden Beds

5 Natural Ways to Keep Ants Out of Your Garden Beds

Ants are often considered beneficial insects—after all, they aerate the soil and prey on harmful pests like caterpillars and termites. However, when they take over your garden beds, they can quickly become a nuisance. Ants not only disrupt the soil and farm aphids for their honeydew, but they also build unsightly mounds and may disturb delicate root systems, seedlings, and even beneficial insects like earthworms.

If you’re trying to maintain a healthy, organic garden, chemical ant killers may do more harm than good—damaging soil biology, harming pollinators, or contaminating your crops. Fortunately, nature has provided effective, eco-friendly solutions for keeping ants at bay without compromising your garden’s health.

This article explores five natural and proven methods to deter ants from invading your garden beds, while also promoting a balanced ecosystem.


Why Are Ants in Your Garden in the First Place?

Before you get rid of ants, it’s important to understand why they’re there:

  • Aphids and scale insects: Ants farm these pests for their sweet honeydew. If you have an aphid infestation, ants will likely follow.
  • Dry, sandy soil: Some ant species prefer dry, loose soil that’s easy to tunnel through.
  • Food sources: Rotting fruits, sugary plant sap, or compost piles can attract them.
  • Shelter: Garden beds with dense mulch, leaf litter, or raised structures can offer protection for colonies.

Removing the attraction is the first step in effective ant control.


1. Use Diatomaceous Earth (DE)

What It Is:

Diatomaceous Earth is a natural, powdery substance made from the fossilized remains of microscopic aquatic organisms called diatoms. Though harmless to humans and pets, DE acts like razor-sharp glass to insects with exoskeletons, dehydrating and killing them on contact.

How to Use It:

  • Apply a thin line or dusting of DE around the perimeter of your garden beds or directly on visible ant trails and mounds.
  • Reapply after heavy rain or watering, as moisture reduces its effectiveness.
  • Use food-grade DE—never industrial-grade, which may contain harmful additives.

Why It Works:

  • Cuts through the ants’ exoskeletons, causing them to dry out and die.
  • Non-toxic to people, pets, and pollinators (when applied carefully).

Bonus Tip: Use DE early in the morning or late in the afternoon when beneficial insects like bees are less active.


2. Plant Natural Ant-Repelling Herbs

Why Certain Plants Help:

Some plants contain natural compounds or oils that repel ants due to their strong scents or chemical makeup. Integrating these into your garden creates a living ant barrier.

Top Ant-Repelling Plants:

  • Mint (especially peppermint): Strong scent confuses ant trails.
  • Tansy: Contains camphor compounds ants dislike.
  • Lavender: Its pleasant aroma to humans is a deterrent for ants.
  • Thyme & Rosemary: Contain essential oils that act as natural insecticides.

How to Use Them:

  • Plant these herbs around the borders of your raised beds or garden rows.
  • Create a mixed herb garden as a companion to vegetables prone to aphid infestations.
  • Crush a few leaves and scatter them on ant trails for a more immediate effect.

Note: Mint spreads aggressively—consider planting it in pots or containers to keep it from overtaking other plants.


3. Apply Citrus Peels or Citrus Spray

Why Ants Hate Citrus:

Citrus fruits—like oranges, lemons, and grapefruits—contain d-limonene, a natural compound that is toxic to ants. It disrupts their nervous system and breaks down the waxy coating on their bodies.

How to Use Citrus in the Garden:

Method 1: Citrus Peel Mulch

  • Dry out orange or lemon peels and grind them into a powder.
  • Sprinkle the powder around garden beds and ant entry points.

Method 2: DIY Citrus Spray

  • Boil citrus peels in water for 10–15 minutes.
  • Let the mixture cool and strain into a spray bottle.
  • Spray directly onto ant trails, mounds, and aphid-infested plants.

Why It Works:

  • Overpowers the ants’ scent trails.
  • Natural and biodegradable.
  • Can also help deter aphids, spiders, and fleas.

Caution: Avoid spraying citrus directly onto delicate leaves during full sun exposure, as the oils can cause leaf burn.


4. Use Cinnamon and Clove Powder

Why These Spices Work:

Cinnamon and clove both contain strong-smelling oils (cinnamaldehyde and eugenol) that disrupt ant communication and scent trails. Ants rely heavily on pheromones to navigate, and these spices confuse and repel them.

How to Apply:

  • Sprinkle ground cinnamon or clove powder directly on ant mounds or trails.
  • Create a protective ring around garden beds or raised planters.
  • For larger areas, mix the powder with water and spray as a repellent barrier.

Benefits:

  • Safe for vegetables, herbs, and soil microbes.
  • Adds a pleasant aroma to your garden.
  • Doubles as a deterrent for some fungal growth.

Bonus: You can mix cinnamon powder with Diatomaceous Earth for double the effectiveness.


5. Disrupt Ant Colonies With Boiling Water & Essential Oils

When to Use This Method:

If you’ve identified the location of an ant mound or colony, a direct attack can discourage them from staying. Boiling water is a quick and natural way to destroy nests, especially when combined with essential oils.

Ingredients:

  • Boiling water (1–2 liters)
  • 10–15 drops of peppermint, tea tree, or eucalyptus oil

How to Use:

  1. Boil water and add essential oil.
  2. Slowly pour it directly into the ant nest or mound.
  3. Repeat after a few days if activity continues.

Why It Works:

  • The boiling water kills ants on contact and collapses the structure of the nest.
  • Essential oils add long-term repelling effects.

Warning: Use caution to avoid pouring boiling water near the roots of your plants.


Bonus Tips for Long-Term Ant Control

Even with natural deterrents, prevention is key to keeping ants away for good. Here are a few maintenance strategies:

1. Control Aphid and Scale Populations

Ants protect and “farm” aphids for their honeydew. Eliminate aphids, and the ants will lose interest. Use neem oil, insecticidal soap, or ladybugs to control these pests.

2. Reduce Mulch Thickness

Ants love building colonies under dense mulch. Keep it thin (1–2 inches) and well-ventilated.

3. Keep Garden Beds Clean

  • Remove rotting fruits, vegetables, and fallen leaves.
  • Avoid sugary compost ingredients like overripe fruit near your growing areas.

4. Seal Raised Beds

If ants are entering through gaps or cracks in your raised beds, seal those with weatherproof caulk or copper mesh.


What NOT to Do

  • Avoid boric acid near edible plants – While often recommended, it can contaminate the soil.
  • Don’t use synthetic pesticides – They can kill beneficial insects, harm pollinators, and damage soil ecosystems.
  • Never apply cinnamon oil or vinegar in high doses directly on plants – It can burn foliage or disrupt pH levels.

Conclusion

Ants might be fascinating creatures, but when they start to overrun your garden beds, they become a real problem—especially if they’re protecting aphids or disturbing young roots. Fortunately, you don’t need to resort to chemicals to keep them in check.

Using diatomaceous earth, ant-repelling plants, citrus peels, aromatic spices, and essential oil treatments, you can naturally deter ants and maintain a thriving, healthy garden.

By choosing natural methods, you’re not just protecting your vegetables—you’re protecting your soil, your pollinators, and the balance of nature in your backyard.