4 Best Outdoor Garden Halloween Decoration Ideas

4 Best Outdoor Garden Halloween Decoration Ideas

As the nights grow cooler and the leaves begin to fall, it’s time to give your garden a hauntingly beautiful makeover for Halloween! October’s magic isn’t just for indoor parties — your garden can become the ultimate spooky showpiece that delights trick-or-treaters, impresses neighbors, and creates a fun, festive atmosphere for your family.

Whether you love eerie elegance, classic jack-o’-lanterns, or spine-chilling surprises, decorating your outdoor garden for Halloween is the perfect way to showcase your creativity.

In this article, we’ll explore four of the best outdoor garden Halloween decoration ideas — from ghostly pathways to haunted planters — complete with tips on how to bring each concept to life easily and affordably.

So grab your pumpkins, lights, and imagination — it’s time to transform your garden into a Halloween wonderland!


1. Create a Spooky Garden Pathway

There’s something magical about a garden pathway that leads visitors through flickering lights, rustling leaves, and eerie shadows. A well-decorated walkway sets the tone before anyone even reaches your front door.

How To Create It

Start with your existing garden path — whether it’s stone, gravel, or stepping-stones — and turn it into a haunted trail.

Step 1: Light the Way (Spookily)

Lighting is everything. Use these options for maximum effect:

  • Lanterns and candles: Line your path with LED candles inside mason jars or black lanterns for a gothic glow.
  • Fairy lights: Weave orange and purple string lights through shrubs or along the edges of the path.
  • Solar lights: Replace regular garden solar lights with Halloween-themed ones shaped like skulls, bats, or pumpkins.

Step 2: Add Sound and Movement

Motion-activated props are perfect here. When someone walks by, let them trigger:

  • A howling ghost or cackling witch sound effect.
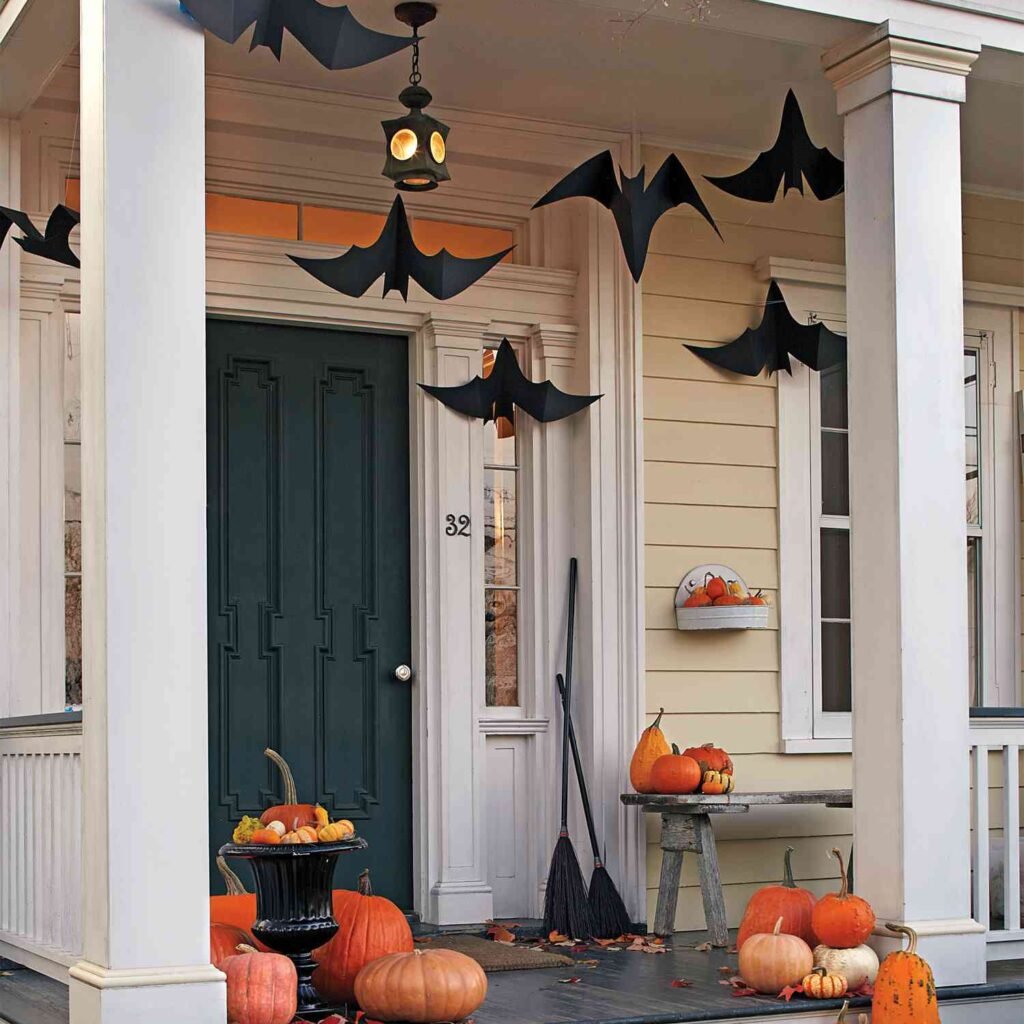
  • A fluttering bat that drops from a tree branch.
  • A small fog machine for swirling mist across the path.

Step 3: Surround with Spooky Details

Decorate the sides of your path with:

  • Skeleton hands emerging from the soil.
  • Tombstone props made from painted styrofoam.
  • Creepy vines or black cloth draped over bushes.

Pro Tip: Scatter a few autumn leaves and artificial spider webs along the path for an authentic eerie touch.

By layering light, sound, and texture, your simple garden walkway becomes a chillingly fun experience for anyone who dares to walk through it.


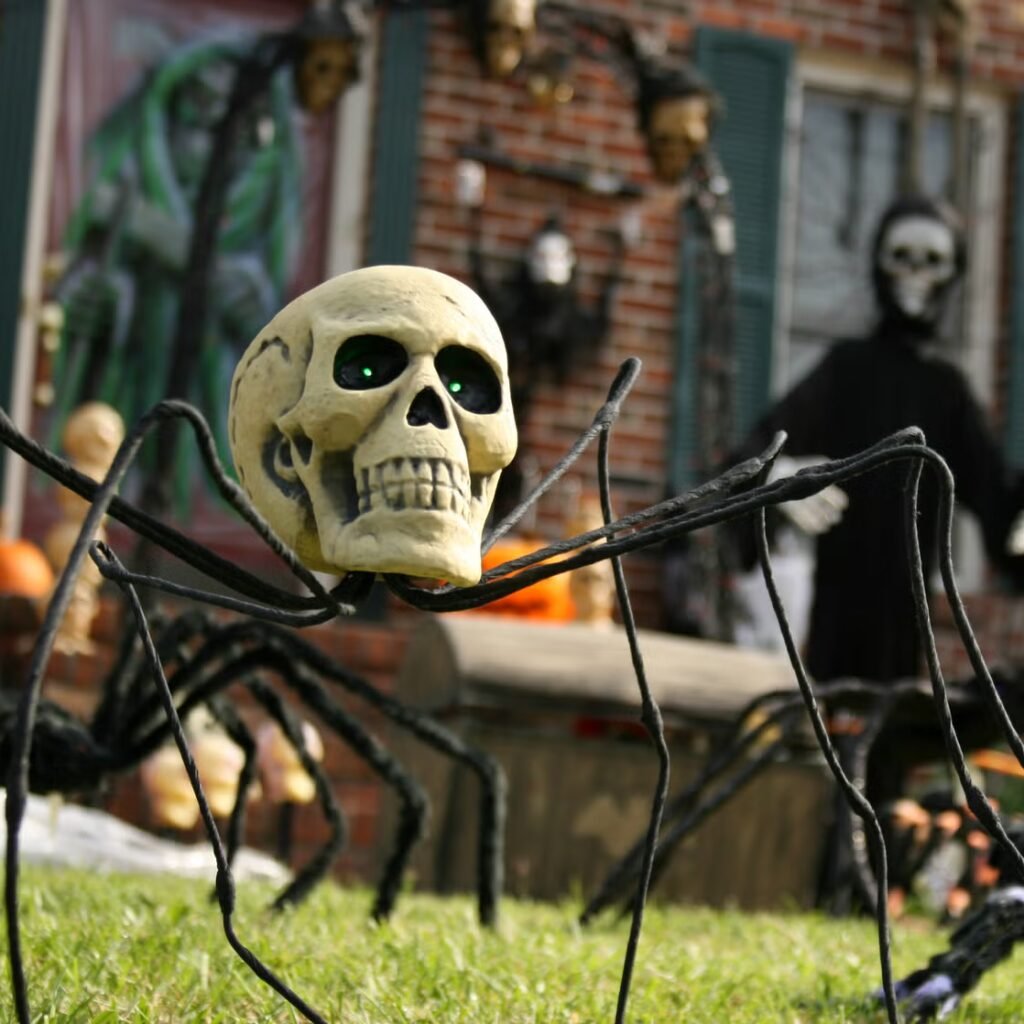
2. Turn Your Garden Into a Haunted Graveyard

What’s Halloween without a graveyard scene? Transforming part of your garden into a spooky cemetery is easier than it looks — and it creates an unforgettable visual impact, especially at night.

What You’ll Need

  • Tombstones (store-bought foam or DIY cardboard ones)
  • Skeletons or bones (plastic versions work great outdoors)
  • Dried moss or straw for an aged look
  • Gray or black spray paint
  • A few eerie lighting effects

How To Build Your Graveyard Scene

Step 1: Set the Scene

Choose a corner of your garden or near your fence for your “graveyard.” Use foam tombstones in varying sizes and tilt some at angles to make it look natural and old.

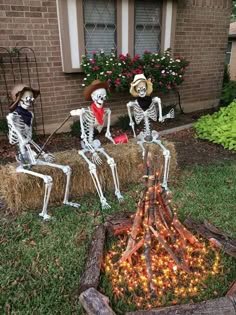
Step 2: Add Creepy Details

  • Scatter plastic bones and skulls around the base of tombstones.
  • Drape Spanish moss or cobwebs over branches for a decayed effect.
  • Stick a few skeleton arms emerging from the ground — instant “zombies rising”!

Step 3: Light It Just Right

Lighting brings the graveyard to life (or death!).

  • Use blue or green spotlights to create a ghostly glow.
  • Hide a fog machine behind tombstones for a misty, haunted look.
  • Add flickering candles in glass jars for a gothic touch.

Step 4: Add Sound Effects

Subtle spooky sounds — distant thunder, owl hoots, or ghostly moans — make your graveyard immersive. You can use a small Bluetooth speaker hidden among plants.

Pro Tip: Paint “funny” or eerie epitaphs on tombstones for a creative touch, like:

  • “Barry D. Alive – He’ll Be Back.”
  • “I Told You I Was Sick.”

Your haunted garden graveyard will become the highlight of your Halloween decor — creepy yet creative.


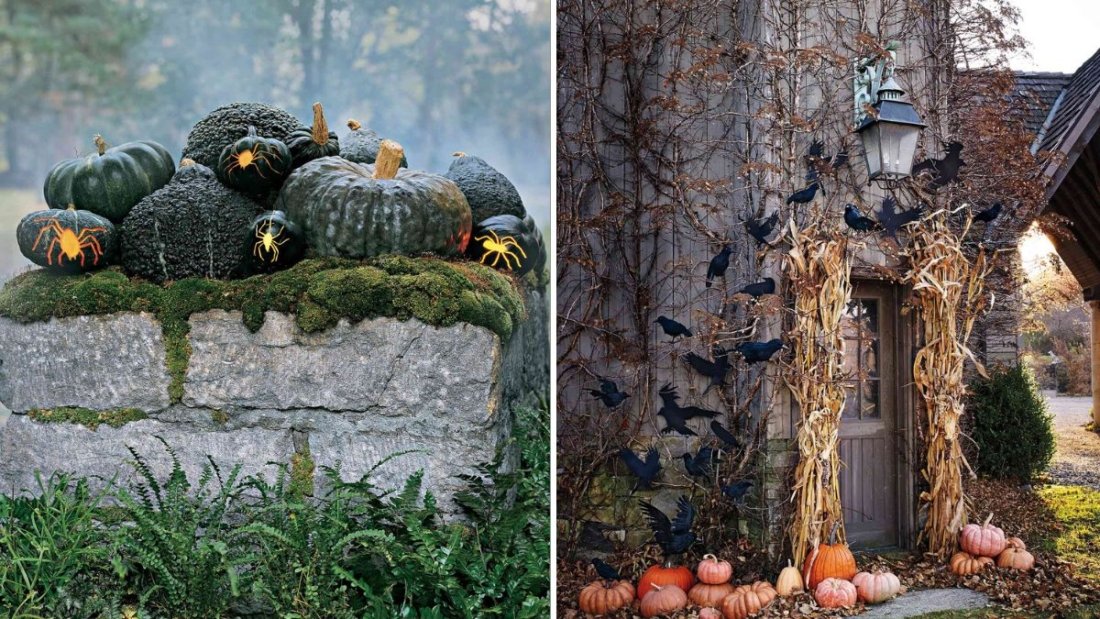
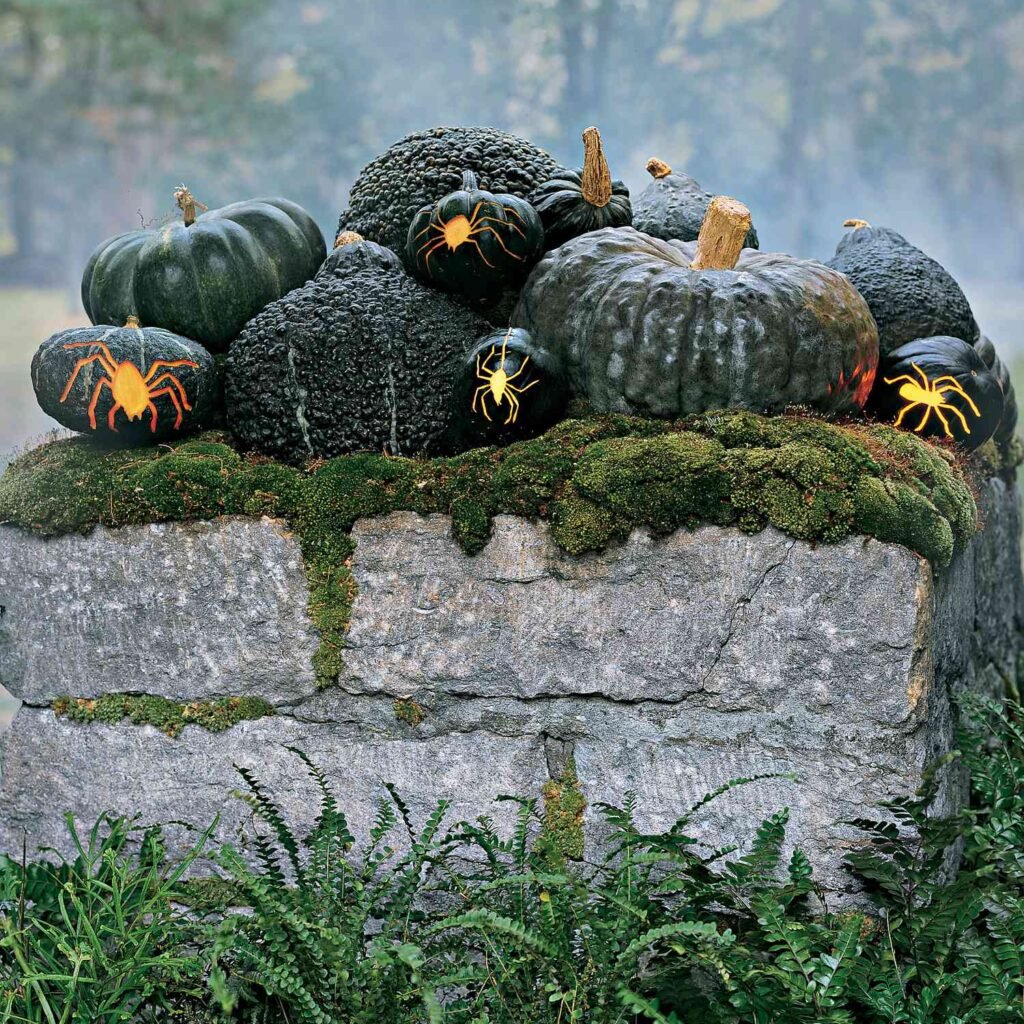
3. Design a Pumpkin Wonderland

Pumpkins are the heart of Halloween. You can go classic with carved jack-o’-lanterns or get creative with painted, stacked, or light-up pumpkins. A pumpkin wonderland transforms your garden into a festive, family-friendly Halloween display that’s more magical than macabre.

How To Create It

Step 1: Choose Your Pumpkins

Mix sizes, colors, and shapes — orange, white (“ghost pumpkins”), striped, and warty varieties add personality.

If you’re short on time, foam or plastic pumpkins work beautifully and last year after year.

Step 2: Carve or Decorate

  • Classic carvings: Go for traditional faces — funny, scary, or elegant.
  • Stencil art: Use pumpkin stencils to carve bats, cats, or witch silhouettes.
  • Painted pumpkins: Use black, gold, or pastel paint for a chic, modern garden look.

Pro Tip: Coat real carved pumpkins with petroleum jelly to keep them from rotting too quickly.

Step 3: Arrange Creatively

Cluster pumpkins at:

  • The base of garden steps
  • Along your front gate
  • Around flower beds or near the porch

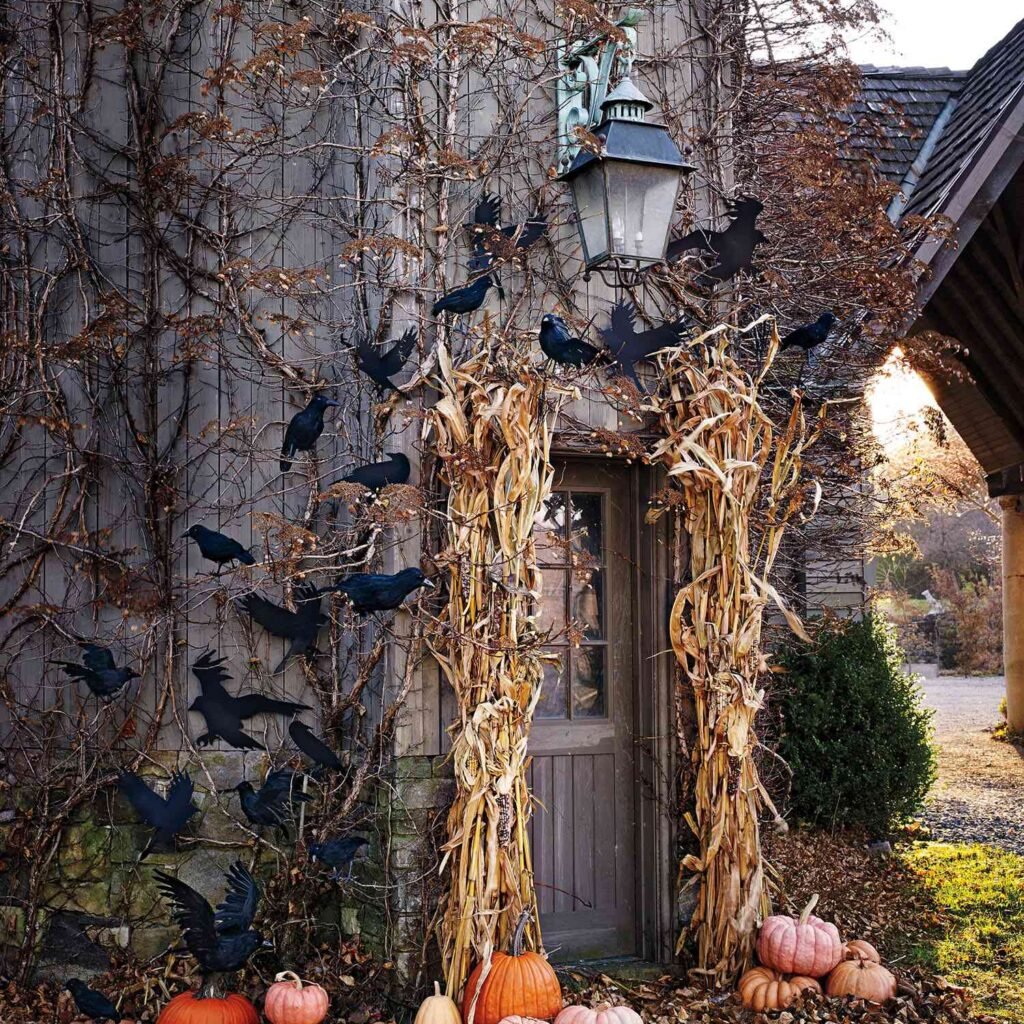
Mix in hay bales, cornstalks, autumn leaves, and mums (chrysanthemums) for seasonal flair.

Step 4: Light It Up

Add LED candles or fairy lights inside your pumpkins. Soft, warm light makes them glow beautifully after sunset.

Bonus Idea: Stack three pumpkins of different sizes (largest on bottom) and paint or carve them to look like a “Pumpkin Snowman.”

Your garden will feel like a whimsical harvest festival, combining Halloween fun with autumn warmth.


4. Add Ghostly Garden Figures and Floating Spirits

Few things are as spine-tingling — and easy to create — as ghosts drifting through your garden. With just a few supplies, you can make ghost decorations that sway in the breeze and glow eerily at night.

What You’ll Need

  • White fabric (old sheets or cheesecloth)
  • Balloons or foam balls for heads
  • String or fishing line
  • Glow sticks or solar lights (optional)

How To Create Floating Ghosts

Step 1: Make the Ghosts

  1. Drape white fabric over a foam ball or balloon.
  2. Tie a string around the “neck” to hold the shape.
  3. Draw spooky faces with a black marker (or leave them blank for an eerie look).

Step 2: Hang Them in Your Garden

Suspend ghosts from tree branches, porch beams, or shepherd’s hooks using clear fishing line — they’ll seem to float midair.

For added drama, vary the heights and let them move naturally in the wind.

Step 3: Add Lighting

Place glow sticks inside the heads or aim solar lights upward from below. The subtle illumination will make your ghosts glow softly in the dark.

Pro Tip: For a creepier twist, use motion-activated lights or fans that make the ghosts “move” when someone walks by.

You can also make ghostly scarecrows for garden beds — drape white fabric over garden stakes or tomato cages to create standing spirits.


Bonus: Mix and Match Themes

The best Halloween gardens combine multiple ideas to create layers of atmosphere. You can:

  • Lead guests down a spooky pathway that ends in your haunted graveyard.
  • Line your pumpkin wonderland with floating ghosts for a fun-but-spooky vibe.
  • Add creepy music or glowing eyes in the bushes for surprise scares.

Don’t be afraid to blend cute and creepy — contrast bright pumpkins with eerie fog, or mix cheerful scarecrows with dark tombstones.


Safety and Sustainability Tips

While decorating, keep these quick reminders in mind:

  • Use flameless LED candles instead of real flames to avoid fire hazards.
  • Protect electrical cords from rain and moisture.
  • Reuse decorations each year or DIY with recycled materials like old sheets, cardboard, and jars.
  • Avoid plastic litter: Make sure nothing can blow away and harm wildlife.

A beautiful garden is even better when it’s safe and eco-friendly.


Final Thoughts: Make This Halloween Unforgettable

Decorating your garden for Halloween is more than just putting up spooky props — it’s about creating an experience. A well-decorated outdoor space draws smiles, laughter, and maybe even a few playful screams.

Whether you choose a mysterious graveyard, a glowing pumpkin wonderland, a ghostly garden, or a spooky path of lights, your garden can become the heart of your Halloween celebration.

So, grab your broomstick, light those lanterns, and let your creativity run wild — because Halloween magic starts right in your own backyard.


The Easiest Perennials For Beginners

The Easiest Perennials For Beginners

If you’ve ever dreamed of having a lush, colorful garden — one that returns year after year without replanting — then perennials are your best friends. Unlike annuals that bloom for a single season, perennials are the comeback stars of the garden world. Plant them once, and they’ll reward you with flowers, foliage, and texture season after season.

But if you’re new to gardening, the world of perennials can feel overwhelming. Which ones are easy to grow? Which will survive your climate? And how do you keep them blooming without hours of care?

The good news is that many perennials are incredibly forgiving, thriving with minimal attention. Whether you have a sunny backyard, a shady corner, or even just a few containers on your patio, there’s a perennial that will thrive for you.

Here’s a detailed guide to the easiest perennials for beginners, plus expert tips to help them flourish — no green thumb required!


What Makes a Perennial “Easy”?

Before diving into the list, let’s clarify what makes a perennial beginner-friendly.

The best easy-care perennials share these qualities:

  • Low maintenance: Minimal pruning, watering, or dividing needed.
  • Pest and disease resistance: They stay healthy without constant attention.
  • Wide adaptability: Tolerate different soils and climates.
  • Reliable bloomers: Consistent flowers or foliage every year.
  • Drought or shade tolerance: Less dependent on perfect conditions.

Think of these plants as your garden’s backbone — sturdy, beautiful, and dependable.


1. Daylilies (Hemerocallis) — The “Plant-and-Forget” Flower

If you want instant gratification and minimal effort, daylilies are unbeatable. These hardy perennials are famous for thriving in almost any condition — full sun, part shade, poor soil, or neglect.

Why beginners love them:

  • Incredibly resilient and adaptable.
  • Bright, trumpet-shaped blooms in a rainbow of colors.
  • Each bloom lasts one day, but the plant produces many buds.
  • Some varieties re-bloom multiple times in a season.

Care tips:

  • Plant in full sun to partial shade.
  • Water regularly the first year; after that, they tolerate drought.
  • Divide every 3–4 years to keep clumps vigorous.

Bonus: Deer-resistant and pest-free!

Bloom time: Early summer to late fall (depending on variety).


2. Black-Eyed Susan (Rudbeckia hirta) — A Ray of Sunshine

The black-eyed Susan is the ultimate “cheerful” flower — a golden-yellow daisy-like bloom with a dark center that brightens any garden. It’s native to North America, which means it’s perfectly adapted to a range of climates.

Why beginners love them:

  • Thrive in poor soil and full sun.
  • Drought-tolerant once established.
  • Long bloom season — late summer through fall.
  • Attracts pollinators like butterflies and bees.

Care tips:

  • Plant in well-drained soil with full sun exposure.
  • Deadhead spent blooms to encourage continuous flowering.
  • Cut back in late fall or leave seed heads for birds.

Bonus: They naturalize easily, meaning they’ll spread and return year after year with little effort.


3. Coneflower (Echinacea) — Tough and Beautiful

Coneflowers are the perfect combination of beauty and toughness. With their vibrant purple, pink, orange, or white petals and raised centers, they’re both garden staples and pollinator magnets.

Why beginners love them:

  • Extremely drought- and heat-tolerant.
  • Low maintenance — they practically grow themselves.
  • Attract butterflies, bees, and birds (who love the seeds).
  • Long-lasting blooms from midsummer to early fall.

Care tips:

  • Plant in full sun and well-drained soil.
  • Avoid overwatering — they prefer it dry.
  • Leave seed heads in winter for birds and natural beauty.

Pro Tip: Try new hybrid varieties like PowWow Wild Berry or Cheyenne Spirit for vibrant color mixes.


4. Hostas — The Shade Garden Champion

If your garden gets more shade than sun, Hostas are the answer. These lush, leafy perennials come in countless sizes and shades — from deep emerald green to silvery blue and creamy variegations.

Why beginners love them:

  • Virtually carefree and long-lived.
  • Thrive in shade, where many flowers won’t grow.
  • Add beautiful texture and contrast to garden beds.
  • Produce delicate lavender or white blooms in summer.

Care tips:

  • Plant in partial to full shade.
  • Keep soil moist and rich in organic matter.
  • Watch for snails or slugs (their only real enemies).

Bonus: Combine with ferns or astilbes for a lush, woodland-style garden.


5. Sedum (Stonecrop) — The Drought-Defying Succulent

If you’re the “forget to water” type of gardener, Sedum is your soulmate. This hardy succulent thrives on neglect and poor soil, yet produces clusters of star-shaped flowers in late summer and fall.

Why beginners love them:

  • Tolerates heat, drought, and rocky soil.
  • Adds texture and color even when not in bloom.
  • Great for borders, rock gardens, or containers.
  • Attracts bees and butterflies.

Care tips:

  • Needs full sun and well-drained soil.
  • Water only during prolonged dry spells.
  • Cut back spent flower heads in spring.

Popular varieties: Autumn Joy (classic pink blooms), Dragon’s Blood (reddish foliage).

Pro Tip: Sedums look especially striking when paired with ornamental grasses.


6. Shasta Daisy (Leucanthemum × superbum) — The Classic Cottage Flower

No flower says “classic garden” like the Shasta Daisy. With their crisp white petals and sunny yellow centers, these flowers bring a cheerful, timeless look to any space.

Why beginners love them:

  • Hardy and easy to grow.
  • Long blooming season — summer to early fall.
  • Excellent cut flowers.
  • Deer- and rabbit-resistant.

Care tips:

  • Plant in full sun with well-drained soil.
  • Deadhead regularly to extend blooming.
  • Divide clumps every 2–3 years to rejuvenate.

Pro Tip: Pair Shasta Daisies with purple coneflowers for a stunning color contrast.


7. Lavender — The Fragrant All-Rounder

For gardeners who want beauty and scent, lavender is unbeatable. Its purple spikes and silvery foliage bring both elegance and aroma to sunny gardens — and it’s famously low maintenance.

Why beginners love them:

  • Drought-tolerant once established.
  • Beautiful fragrance that deters pests and attracts pollinators.
  • Evergreen foliage adds year-round appeal.
  • Great for borders, containers, or dried arrangements.

Care tips:

  • Plant in full sun with sandy, well-drained soil.
  • Avoid overwatering — it prefers dry roots.
  • Prune lightly after flowering to keep it compact.

Bonus: The scent is a natural stress reliever — perfect for garden relaxation.


8. Peonies — The Rewarding Perennial Classic

Few plants make a bigger statement with so little effort as peonies. Their large, ruffled blooms and heavenly scent make them a garden favorite for generations.

Why beginners love them:

  • Exceptionally long-lived — peonies can thrive for decades.
  • Require very little care once established.
  • Huge, fragrant flowers in late spring.
  • Virtually pest-free and deer-resistant.

Care tips:

  • Plant in full sun and well-drained soil.
  • Don’t bury roots too deep (just below the surface).
  • Support heavy blooms with stakes or rings.
  • Avoid moving them — they dislike disturbance.

Pro Tip: Once established, peonies often bloom more abundantly each year.


9. Coreopsis — The Sunshine Perennial

Also known as tickseed, Coreopsis is a long-blooming, sun-loving perennial that practically glows with happiness. It’s perfect for adding bursts of yellow, gold, or pink to your garden.

Why beginners love them:

  • Blooms all summer long.
  • Drought-tolerant and easy to maintain.
  • Thrives in poor soil.
  • Great for pollinators.

Care tips:

  • Plant in full sun with average to dry soil.
  • Deadhead spent blooms for continuous flowering.
  • Cut back after the first bloom flush to encourage rebloom.

Bonus: Perfect for wildflower gardens and low-maintenance borders.


How to Keep Perennials Happy

Even the easiest perennials benefit from a little routine care:

1. Prepare good soil.
Mix compost or organic matter before planting. Healthy soil = happy plants.

2. Water wisely.
Water deeply but infrequently to encourage strong roots.

3. Mulch.
Apply a 2–3 inch layer to conserve moisture and prevent weeds.

4. Deadhead regularly.
Removing spent flowers encourages reblooming and keeps your garden neat.

5. Divide every few years.
This keeps plants healthy and lets you expand your garden for free!


Final Thoughts: A Beginner’s Garden That Lasts

Starting your first garden doesn’t have to be complicated or high-maintenance. The perennials above — from cheerful daylilies to fragrant lavender — will reward your effort with year-after-year color, fragrance, and beauty.

Plant them once, nurture them through their first season, and then sit back and watch your garden transform into a living masterpiece that grows stronger with each passing year.

With these easy-care perennials, you’ll discover that gardening isn’t about perfection — it’s about patience, joy, and the simple magic of watching something thrive.

How To Grow Lilacs For The Sweetest Spring Fragrance

How To Grow Lilacs For The Sweetest Spring Fragrance

There are few garden pleasures as enchanting as the fragrance of blooming lilacs drifting through the air on a spring morning. Their lush clusters of purple, pink, or white blossoms signal the true arrival of spring, filling your garden — and your senses — with timeless charm.

But growing lilacs isn’t just about beauty; it’s about creating a living memory. Many gardeners remember the scent of lilacs from their childhood homes or old family gardens, and planting one today is like planting nostalgia itself.

Whether you’re cultivating a single lilac bush in your backyard or planning a fragrant hedge, this detailed guide will help you grow healthy, long-lasting lilacs that bloom with the sweetest scent every spring.


Why Grow Lilacs?

Lilacs (Syringa vulgaris) are more than ornamental shrubs — they’re symbols of renewal, affection, and grace. Their beauty lies not only in their soft, clustered blooms but in their unmistakable fragrance, which can perfume your entire garden.

Here’s why lilacs deserve a spot in your garden:

  • Fragrance: Among the most fragrant spring blooms in the world.
  • Longevity: Can live and bloom for decades, even generations.
  • Low Maintenance: Once established, lilacs require minimal care.
  • Pollinator Friendly: Attract bees, butterflies, and hummingbirds.
  • Versatile Landscaping: Perfect as a hedge, specimen plant, or backdrop to other spring flowers.

If you love old-fashioned, cottage-style gardens or romantic spring color, lilacs are simply essential.


Step 1: Choosing the Right Lilac Variety

Not all lilacs are the same. Depending on your space, climate, and color preference, you can choose from several beautiful varieties:

1. Common Lilac (Syringa vulgaris)

  • The most traditional and fragrant type.
  • Grows 8–15 feet tall.
  • Blooms in shades of lavender, purple, pink, and white.

2. Dwarf Korean Lilac (Syringa meyeri ‘Palibin’)

  • Compact size (4–6 feet tall), perfect for small gardens or containers.
  • Blooms slightly later than common lilacs.
  • Strong fragrance and excellent disease resistance.

3. Japanese Tree Lilac (Syringa reticulata)

  • Grows like a small tree (up to 20 feet).
  • Creamy white blooms in early summer.
  • Mildly fragrant and very hardy.

4. Miss Kim Lilac (Syringa patula ‘Miss Kim’)

  • A late-blooming, compact variety (6–8 feet).
  • Deep lavender buds open to pale lilac flowers.
  • Known for its strong, spicy-sweet scent.

5. Bloomerang Lilac (Reblooming Variety)

  • Blooms in spring and again in late summer or fall.
  • Compact and ideal for continuous fragrance.

Pro Tip:
If fragrance is your top priority, go for Syringa vulgaris or Miss Kim — both are known for their exceptionally sweet scents.


Step 2: The Ideal Location — Sunlight and Airflow

Lilacs love the sunshine. To get those abundant, fragrant blooms, you’ll need to provide the right conditions.

Light:

  • Full sun is essential — at least 6 hours of direct sunlight per day.
  • Less sun means fewer flowers and weaker fragrance.

Air Circulation:

  • Lilacs dislike humidity and stagnant air, which can cause fungal diseases.
  • Choose an open spot where breezes can move freely.

Soil:

  • Lilacs prefer well-drained, slightly alkaline soil (pH 6.5–7.5).
  • Avoid soggy, clay-heavy spots — these lead to root rot.

Pro Tip: If your soil is acidic, add garden lime once a year to balance pH and promote better blooming.


Step 3: Planting Lilacs

Best time to plant:

  • Fall or early spring, when the ground is workable but not frozen.

How to plant:

  1. Dig a hole twice as wide and as deep as the root ball.
  2. Mix compost or aged manure into the removed soil to enrich it.
  3. Place the lilac shrub so the top of the root ball is level with the soil surface.
  4. Backfill, gently firming the soil to remove air pockets.
  5. Water deeply.
  6. Add a 2–3 inch layer of mulch, keeping it away from the base of the plant.

Spacing:

  • Space lilac bushes 5–10 feet apart depending on the variety.
  • Give them room to grow — they’ll fill out beautifully over time.

Step 4: Watering and Feeding

Lilacs don’t need constant pampering once established, but they do appreciate consistent care during their early years.

Watering:

  • Water deeply once a week during the first growing season.
  • After establishment, they’re drought-tolerant but still benefit from occasional deep watering in dry periods.

Fertilizing:

  • Feed in early spring with a balanced fertilizer (10-10-10).
  • Avoid high-nitrogen fertilizers (like lawn food) — they promote leafy growth instead of blooms.
  • Every 2–3 years, add compost or aged manure around the base.

Pro Tip: Stop fertilizing by mid-summer to let new growth harden before winter.


Step 5: Pruning for More Blooms

Pruning is key to maintaining your lilac’s shape and encouraging heavy flowering. But timing is everything.

When to prune:

  • Right after the blooms fade in late spring.
  • Pruning too late (after midsummer) removes next year’s flower buds.

How to prune:

  1. Remove spent flower clusters to prevent seed formation.
  2. Cut out dead, weak, or crossing branches.
  3. Every 2–3 years, remove one-third of the oldest stems at the base — this rejuvenates the plant.
  4. Thin out dense growth to improve air circulation.

Pro Tip: Older lilacs that have become woody and unproductive can be rejuvenated by cutting them back to 6–8 inches above the ground in late winter. They’ll regrow stronger and bloom again within 2–3 years.


Step 6: Encouraging Sweet Fragrance and Abundant Blooms

A healthy lilac rewards you with not just flowers, but fragrance that carries across the garden.

To get the most scent and color:

  • Ensure full sun — this is the biggest factor.
  • Don’t overfertilize — too much nitrogen weakens bloom quality.
  • Deadhead after flowering to redirect energy to next year’s buds.
  • Prune lightly and regularly to keep the shrub open and productive.

For extra fragrance indoors, cut lilac stems early in the morning and place them in warm water immediately. Crushing the stem ends slightly helps them absorb water better and keeps blooms fresh longer.


Step 7: Winter Care

Lilacs are hardy plants, especially varieties suited to zones 3–8, but they still benefit from a little winter preparation:

  • Mulch the base with straw or bark to insulate roots.
  • Avoid pruning in winter — you’ll remove the next year’s buds.
  • If snow piles up on branches, gently shake it off to prevent breakage.

Pro Tip: In very cold regions, wrap young lilac stems with burlap during their first winter for protection.


Step 8: Dealing with Common Lilac Problems

Even healthy lilacs can encounter a few issues. Fortunately, most are easy to prevent or fix.

1. Powdery Mildew

  • Appears as white film on leaves.
  • Improve air circulation and avoid overhead watering.
  • Use a natural fungicide if needed.

2. Lack of Blooms

  • Usually due to too much shade, overfertilizing, or pruning too late.
  • Move to a sunnier location or adjust care routine.

3. Borers or Aphids

  • Inspect stems regularly.
  • Remove infested wood or spray with insecticidal soap.

4. Yellowing Leaves

  • May indicate poor drainage or low soil pH.
  • Add lime if soil is acidic and ensure good drainage.

Pro Tip: Once mature, lilacs are remarkably resilient and rarely suffer from serious problems.


Companion Planting Ideas

Lilacs blend beautifully with other spring bloomers for a breathtaking seasonal display:

  • Tulips and Daffodils: Brighten the base with color.
  • Peonies: Their bloom time overlaps beautifully.
  • Hostas or Ferns: Great companions for shaded lilac bases.
  • Mock Orange or Spirea: Extend the blooming season into early summer.

Planting a mix ensures your garden remains colorful even after lilac season ends.


Final Thoughts: A Garden Perfumed by Spring

There’s something magical about growing lilacs. They’re a living link to simpler times — an old-fashioned beauty that rewards patience with fragrance and grace.

From the moment those first buds swell in spring to the heady perfume that follows, a lilac bush transforms your garden into a sanctuary of scent and color. And with the right care — sunlight, pruning, and a little love — it will continue to do so for generations.

So this spring, when you breathe in that sweet, nostalgic fragrance, you’ll know you’ve cultivated more than just a shrub — you’ve grown a memory that blooms anew each year.

6 Flowering Shrubs That Add Color Year-Round

6 Flowering Shrubs That Add Color Year-Round

If you’ve ever dreamed of a garden that bursts with color in every season — from spring’s soft pastels to winter’s vibrant berries — the secret lies in flowering shrubs. These hardy, reliable plants bridge the gap between trees and perennials, offering structure, fragrance, and, most importantly, year-round color.

Unlike annuals that fade away after one season, flowering shrubs are the true backbone of any landscape. They provide a continuous cycle of blooms, foliage, and even decorative fruit, ensuring there’s always something beautiful to admire in your garden.

Here’s a detailed guide to six stunning flowering shrubs that thrive in most climates and bring vibrant hues throughout the year.


1. Camellia — Winter’s Elegant Bloom

Color season: Late fall to early spring
Hardiness zones: 7–10

When most of the garden lies dormant, Camellias step into the spotlight. With their glossy evergreen leaves and rose-like blossoms, these shrubs bring elegance and life to winter landscapes.

Camellias come in shades of white, pink, and deep red, and some varieties like Camellia japonica and Camellia sasanqua can even bloom from October through March.

Why it’s perfect for year-round color:

  • Evergreen foliage stays lush all year.
  • Blooms during the coldest months, when few other plants do.

Care tips:

  • Plant in partial shade and well-drained, acidic soil.
  • Water deeply during dry spells, especially in summer.
  • Mulch with pine needles or compost to retain moisture and acidity.

Bonus tip: If you live in a cooler climate, grow camellias in large pots that can be sheltered during hard freezes.


2. Hydrangea — The Summer Showstopper

Color season: Late spring through fall
Hardiness zones: 3–9

Few shrubs command attention like Hydrangeas. With their big, cloud-like blooms in shades of blue, pink, purple, and white, they bring instant charm and romance to gardens.

The best part? Modern varieties like Endless Summer and Pinky Winky offer repeat blooming, extending color from late spring well into autumn.

Why it’s perfect for year-round color:

  • Flowers last for months and even dry beautifully for winter décor.
  • Sturdy stems and full foliage add structure through all seasons.

Care tips:

  • Hydrangeas thrive in morning sun and afternoon shade.
  • Water consistently — they prefer evenly moist soil.
  • Adjust bloom color by changing soil pH (acidic for blue, alkaline for pink).

Winter interest: Even when blooms fade, dried hydrangea heads catch frost beautifully, adding texture and charm.


3. Azalea — The Spring Superstar

Color season: Early to late spring
Hardiness zones: 5–9

A Southern garden favorite, Azaleas burst into life in spring with masses of vibrant blooms in pink, red, orange, purple, and white. Some evergreen varieties, like Encore Azaleas, even rebloom in fall, offering color beyond the usual season.

Why it’s perfect for year-round color:

  • Evergreen types hold their leaves all winter.
  • Re-blooming varieties provide color twice a year.

Care tips:

  • Plant in dappled sunlight or beneath taller trees.
  • Use acidic, well-drained soil rich in organic matter.
  • Mulch around the base to keep roots cool and moist.

Pro Tip: Avoid heavy pruning — trim right after blooming to prevent cutting off next year’s buds.

Garden style match: Azaleas look beautiful in woodland gardens, shaded borders, or alongside camellias for overlapping color seasons.


4. Forsythia — The Harbinger of Spring

Color season: Late winter to early spring
Hardiness zones: 4–9

Few sights are as uplifting as the golden explosion of Forsythia after a long winter. These bright yellow blooms appear before the leaves, signaling that spring has finally arrived.

Forsythia’s arching branches create a fountain-like display, perfect for hedges, borders, or as a focal shrub in the yard.

Why it’s perfect for year-round color:

  • Early blooms brighten up the dull, post-winter garden.
  • Deep green summer foliage and fall yellow tones extend interest.

Care tips:

  • Plant in full sun for maximum flowering.
  • Prune right after flowering — it blooms on old wood.
  • Keep soil moderately moist but well-drained.

Pro Tip: Use Forsythia as a backdrop for tulips and daffodils for a coordinated early-spring display.


5. Rose of Sharon (Hibiscus syriacus) — The Late-Summer Hero

Color season: Mid-summer through early fall
Hardiness zones: 5–9

When other shrubs begin to fade in the heat, Rose of Sharon bursts into life with tropical-looking blooms in shades of lavender, pink, red, and white.

This hardy hibiscus cousin thrives even in hot, dry summers and adds a lush, exotic flair to any landscape.

Why it’s perfect for year-round color:

  • Long blooming period — from July to October.
  • Attractive seed pods add winter texture.
  • Keeps its structure even after leaves fall.

Care tips:

  • Prefers full sun and well-drained soil.
  • Prune in late winter or early spring to shape and encourage new blooms.
  • Water regularly during dry spells, but avoid soggy soil.

Pro Tip: Pair with ornamental grasses or butterfly bushes for a dazzling late-summer color palette.


6. Abelia — The All-Season Performer

Color season: Spring through fall
Hardiness zones: 6–9

If you want a shrub that works hard all year, Abelia is your answer. This semi-evergreen beauty offers delicate, fragrant, bell-shaped flowers from late spring through autumn, along with glossy leaves that often turn bronze or purple in winter.

Modern cultivars like Kaleidoscope Abelia even feature variegated foliage, creating an ever-changing tapestry of color from season to season.

Why it’s perfect for year-round color:

  • Continuous blooms for months.
  • Foliage color shifts beautifully with the seasons.
  • Compact habit makes it perfect for borders and small gardens.

Care tips:

  • Plant in full sun to partial shade.
  • Tolerates drought once established.
  • Lightly prune in late winter to maintain shape.

Pro Tip: Abelia attracts bees, butterflies, and hummingbirds, making it a pollinator paradise.


Bonus Tips for Year-Round Color

To keep your garden vibrant every month of the year, try these design and maintenance strategies:

  1. Mix bloom times: Combine early bloomers like Forsythia with summer stars like Hydrangeas and fall performers like Abelia.
  2. Add evergreens: Even non-flowering evergreens provide structure and color in winter.
  3. Layer heights and textures: Taller shrubs at the back, medium-sized in the middle, and compact varieties in front create visual depth.
  4. Feed and mulch regularly: Balanced fertilizer and organic mulch keep shrubs healthy and blooming.
  5. Deadhead and prune correctly: Removing spent flowers encourages reblooming and tidier growth.

Final Thoughts: A Garden That Never Sleeps

A truly beautiful garden doesn’t rely on just one season — it evolves, delights, and surprises you all year long. By choosing these six flowering shrubs, you’ll enjoy an ever-changing display of color, texture, and fragrance — from the golden promise of Forsythia in early spring to the graceful blooms of Camellia in winter.

Each of these shrubs brings its own rhythm to your landscape, ensuring your garden is never without life or color.

So grab your gloves, plan your planting spots, and start building your year-round floral masterpiece — one shrub at a time.

How To Prune Rose Bushes for Maximum Blooms

How To Prune Rose Bushes for Maximum Blooms

There’s nothing quite like a rose garden in full bloom — the colors, the fragrance, and the timeless beauty of each petal. But behind every gorgeous rosebush is one secret weapon: proper pruning.

Many gardeners shy away from pruning, fearing they’ll make a wrong cut and damage their plants. The truth? Pruning is one of the most powerful tools you have to encourage strong growth, abundant blooms, and long-lasting health.

Whether you’re nurturing a single hybrid tea rose on your balcony or tending to an entire rose garden, this detailed guide will teach you how to prune rose bushes for maximum blooms — step-by-step, with expert techniques for every type of rose.


Why Pruning Is Essential

Roses, like most flowering shrubs, need pruning not just for appearance, but for survival and productivity. Without it, they become tangled, disease-prone, and bloom less each year.

Here’s what pruning actually does:

  • Stimulates new growth: Roses bloom on new wood, so pruning triggers fresh shoots that will bear more flowers.
  • Improves air circulation: Reduces the risk of fungal diseases like black spot and powdery mildew.
  • Shapes the plant: Keeps bushes compact, balanced, and aesthetically pleasing.
  • Removes dead or weak wood: Directs energy toward strong, productive canes.
  • Encourages larger, longer-lasting blooms: More light and airflow = better flowers.

Think of pruning as a rose’s annual “reset” — removing the old to make room for new beauty.


Step 1: Gather the Right Tools

Before you start cutting, make sure you have sharp, clean tools. Dull blades crush stems and make plants vulnerable to infection.

You’ll need:

  • Bypass pruners: For cutting stems up to ½ inch thick.
  • Loppers: For thicker canes or old wood.
  • Pruning saw: For removing very large or woody branches.
  • Gloves: Heavy-duty rose gloves protect against thorns.
  • Disinfectant: To clean your tools between cuts or between bushes (use rubbing alcohol or a 10% bleach solution).

Pro Tip: Always clean tools before and after pruning — diseases spread quickly through shared tools.


Step 2: Know the Right Time to Prune

Timing is everything when it comes to roses. Pruning too early can expose tender growth to frost damage, while pruning too late can cut off new buds before they bloom.

General rule:

  • Prune in late winter or early spring, just as new buds begin to swell but before leaves fully open.

In warm climates: Prune in January or February.
In cooler regions: Wait until March or early April.

Pro Tip: A simple gardener’s trick — prune when forsythia shrubs start blooming in your area. Nature’s timing rarely fails.


Step 3: Identify Your Rose Type

Different roses grow and bloom in different ways. Knowing what kind of rose you have will help you prune correctly for maximum results.

1. Hybrid Tea, Floribunda, and Grandiflora Roses (Modern Roses)

  • These bloom on new growth each year.
  • Need hard pruning to encourage strong new shoots.

2. Climbing Roses

  • Bloom on old wood (canes from the previous year).
  • Should be lightly pruned after flowering, not in early spring.

3. Shrub or Landscape Roses

  • Bloom on both old and new wood.
  • Require moderate pruning to maintain shape and encourage reblooming.

4. Old Garden Roses or Once-Blooming Varieties

  • Bloom only once on last year’s wood.
  • Don’t prune heavily in early spring — wait until after flowering.

Pro Tip: If you’re unsure of your variety, prune conservatively the first season. Observe how and when it blooms to guide future pruning.


Step 4: Start with Cleanup Cuts

Now that your tools are ready and timing is right, it’s time to begin pruning. Start by clearing out all the dead, damaged, and diseased wood — this “cleanup” stage sets the foundation for healthy new growth.

Here’s how:

  1. Remove all dead wood. Dead canes are brown and dry inside, while healthy ones are green or white when cut.
  2. Cut out damaged or crossing branches. These rub together and cause wounds that invite disease.
  3. Open up the center of the bush. Aim for a vase-like shape that allows sunlight and air to reach the middle.

Pro Tip: Always make cuts at a 45° angle, about ¼ inch above an outward-facing bud. This encourages growth outward, not inward, preventing overcrowding.


Step 5: Prune for Shape and Strength

Now that your rose bush is clean and open, it’s time to shape it for optimal bloom production. The amount you cut depends on your rose type and how vigorously it grows.

For Hybrid Tea and Floribunda Roses:

  • Cut the bush back to 12–18 inches tall.
  • Leave 3–5 of the strongest canes.
  • Remove weak or spindly stems at the base.
  • Shorten remaining canes by about one-third to one-half, always cutting to an outward bud.

For Shrub Roses:

  • Remove about one-third of the plant’s overall size.
  • Focus on removing the oldest, least productive stems to make way for new shoots.

For Climbing Roses:

  • Do not remove the main canes.
  • Instead, prune the side shoots (laterals) back to 2–3 buds after they bloom.
  • Tie and train main canes horizontally — this encourages more flowering shoots along their length.

For Miniature Roses:

  • Cut back lightly — about ⅓ of their height.
  • Remove dead and tangled stems to keep them tidy and blooming freely.

Pro Tip: The goal is to balance strength and productivity — too few canes, and you’ll have fewer blooms; too many, and they’ll compete for energy.


Step 6: Clean Up and Seal (If Needed)

After pruning, clean up all debris around your rose bushes. Dead leaves and cuttings can harbor pests and fungal spores.

Clean-up checklist:

  • Remove fallen leaves, twigs, and old mulch.
  • Dispose of diseased material — don’t compost it.
  • If your climate is humid or disease-prone, apply a protective fungicide spray or organic neem oil.

To seal or not to seal?

  • Most modern gardeners skip sealing cuts, as roses heal naturally.
  • In wet or cold climates, a dab of pruning sealant on thick cuts can help prevent rot.

Step 7: Feed and Mulch After Pruning

Pruning invigorates your roses, but it also demands energy. After pruning, it’s the perfect time to give your plants a nutrient boost.

Feeding routine:

  • Apply a balanced rose fertilizer (like 10-10-10) around the base.
  • Scratch it lightly into the soil and water thoroughly.
  • Organic options: compost, fish emulsion, or aged manure.

Mulching:

  • Add a 2–3 inch layer of organic mulch (wood chips, shredded leaves, or straw) to retain moisture and prevent weeds.
  • Keep mulch a few inches away from the base to prevent rot.

Pro Tip: Roses are heavy feeders. Continue fertilizing every 4–6 weeks through the blooming season for continuous flowers.


Step 8: Summer and Deadheading Pruning

Pruning doesn’t stop in spring! Throughout summer, regular maintenance pruning (or deadheading) keeps blooms coming.

Deadheading tips:

  • Cut spent flowers just above the first five-leaflet leaf below the bloom.
  • This encourages new growth and more blooms.
  • In late summer, stop deadheading to allow rose hips (fruit) to form — this signals the plant to slow down for winter.

Light summer pruning can also help control shape and remove weak shoots.


Step 9: Light Winter Pruning

In cold climates, prune lightly before winter to prevent wind damage. Cut back long, unruly canes to about half their height and tie them loosely to supports.

Then, cover the base with soil, mulch, or straw to protect roots from freezing temperatures.

Pro Tip: Save hard pruning for spring. Winter pruning is just about protection and control, not heavy cutting.


Troubleshooting: Common Rose Pruning Mistakes

Even experienced gardeners make these common mistakes:

Cutting too close to buds: Can damage them and cause dieback.
Always leave about ¼ inch above the bud.

Leaving stubs or ragged cuts: They invite disease.
Use sharp tools for clean cuts at a 45° angle.

Over-pruning: Removes too much growth and delays blooms.
Don’t cut more than half of the healthy wood unless rejuvenating an old, neglected plant.

Ignoring tool hygiene: Spreads fungal infections between bushes.

Disinfect tools regularly during pruning sessions.


Final Thoughts: Pruning Is the Secret to Perfect Roses

Pruning might seem intimidating at first, but once you understand the logic behind each cut, it becomes one of the most satisfying parts of rose care.

Each snip you make is an investment in your rose’s future — guiding its growth, boosting its health, and unlocking its full blooming potential.

So grab your gloves, sharpen those pruners, and get ready to transform your rose bushes into a show-stopping display of color and fragrance.

Because with the right pruning, your roses won’t just survive — they’ll burst into the best bloom of their lives.


Why Your Fig Tree Isn’t Producing Fruit

Why Your Fig Tree Isn’t Producing Fruit

Few things are more disappointing for a gardener than seeing a lush, leafy fig tree—without a single fig in sight. You’ve watered, pruned, and cared for it faithfully, but year after year, the branches stay bare while your hopes for a sweet summer harvest fade away.

Don’t worry — you’re not alone. Fig trees are wonderfully rewarding, but they can also be a little mysterious. When they refuse to fruit, it’s usually their way of signaling that something in their environment isn’t quite right. The good news? Once you understand the reason, it’s often simple to fix.

Here’s an in-depth guide to why your fig tree isn’t producing fruit — and exactly how to get it thriving and fruiting again.


1. Your Tree Is Too Young

One of the most common (and most overlooked) reasons a fig tree won’t produce fruit is simply its age.

Fig trees, like many fruit-bearing plants, need to mature before they can devote energy to reproduction. During their early years, all their effort goes into growing roots, branches, and leaves.

Typical fruiting timeline:

  • Potted fig trees: May begin producing small crops in 2–3 years.
  • Ground-planted fig trees: Usually take 3–5 years to bear a significant harvest.

What to do:
Be patient! While waiting, continue to provide good light, regular watering, and balanced feeding. Avoid over-pruning young trees — they need their leaves to photosynthesize and grow strong.

Pro Tip: Some varieties (like ‘Celeste’ or ‘Brown Turkey’) tend to fruit earlier than others. If you’re starting from scratch, these are great beginner-friendly choices.


2. Not Enough Sunlight

Figs are sun-loving trees, and lack of sunlight is one of the biggest culprits behind poor fruiting. Without at least 6–8 hours of direct sunlight per day, your tree simply won’t have enough energy to produce and ripen fruit.

Signs of low sunlight:

  • Lots of large, dark green leaves but no fruit.
  • Leggy, stretched-out growth.
  • Small or absent new buds.

What to do:

  • Move your potted fig to the sunniest spot available (a south- or west-facing area is best).
  • If it’s an indoor plant, consider using a full-spectrum grow light for 10–12 hours daily.
  • For in-ground trees, prune surrounding plants or branches that may be shading it.

Pro Tip: Figs in cooler climates especially benefit from being planted against a south-facing wall, which reflects warmth and extends sunlight exposure.


3. Irregular Watering Habits

Figs love consistency. Too much or too little water—especially during fruiting season—can cause stress that halts fruit production or causes baby figs to drop prematurely.

Ideal watering routine:

  • Keep the soil evenly moist, not soggy.
  • Water deeply once the top 2 inches of soil feel dry.
  • Avoid letting the tree dry out completely between waterings, especially in hot weather.

Signs of water stress:

  • Dropping leaves or figs before ripening.
  • Yellowing leaves.
  • Cracked fruit (from sudden heavy watering after a dry spell).

What to do:

  • Establish a consistent watering schedule based on your climate.
  • Mulch around the base (but keep mulch a few inches away from the trunk) to retain moisture.
  • Ensure pots and planting sites drain well to prevent root rot.

4. Overfertilizing or Using the Wrong Fertilizer

It’s tempting to feed your fig tree in hopes of encouraging fruit, but too much fertilizer—especially nitrogen—can do more harm than good.

What happens:
Nitrogen promotes leaf and branch growth at the expense of flowers and fruit. The result? A beautiful, bushy fig tree with no figs.

What to do:

  • Use a balanced fertilizer like 10-10-10 or one specifically formulated for fruit trees.
  • Stop fertilizing by mid-summer to allow the tree to focus on fruiting rather than new growth.
  • If your soil is naturally rich, skip fertilizer altogether and top-dress with compost once a year instead.

Pro Tip: If your tree looks lush but produces no fruit, skip the fertilizer for an entire season and observe. You may find that moderation restores fruiting.


5. Pruning Mistakes

Pruning is essential to fig tree health, but improper timing or over-pruning can remove the very branches where fruit would have formed.

Understanding fig fruiting:

  • Most fig varieties produce on new growth (branches that form in the current year).
  • Others, like ‘Celeste,’ can produce a breba crop on old wood (previous year’s branches).

What to do:

  • Prune in late winter or early spring before new growth starts.
  • Focus on removing only dead, diseased, or overcrowded branches.
  • Avoid heavy pruning in early summer, as this removes young shoots that could bear fruit later in the season.

Pro Tip: Learn whether your variety fruits on new or old wood — it’s key to pruning correctly.


6. Temperature and Climate Issues

Fig trees are subtropical by nature, meaning they love warm weather but dislike frost and extreme cold. If temperatures drop below 25°F (-4°C), your fig may suffer damage that delays or stops fruiting for the season.

Cold damage signs:

  • Blackened or shriveled branch tips.
  • No new growth in spring.
  • Leaf regrowth without figs.

What to do:

  • In cold climates, grow figs in containers that can be moved indoors during winter.
  • For in-ground trees, insulate with burlap, mulch, or frost cloth.
  • Don’t prune dead-looking branches until late spring — they may still sprout new growth.

Pro Tip: Consistent warmth in early spring and summer helps fruit set and ripen faster.


7. Lack of Pollination (for Certain Fig Types)

Not all figs need pollination to bear fruit — most common fig varieties (like ‘Brown Turkey’ and ‘Celeste’) are self-pollinating. However, some caprifig varieties require pollination from the fig wasp — and without it, they won’t produce edible figs.

If your tree produces lots of tiny, hard, green figs that never ripen, it could be one of these varieties.

What to do:

  • Confirm the variety of your fig tree. If it’s a caprifig, consider replacing it with a self-fertile type suited to your climate.
  • For self-fertile figs, hand-pollination isn’t necessary, but good airflow and proper watering help flowers and fruit set naturally.

8. Stress or Shock

Figs are sensitive to changes in environment or care routines. Transplanting, moving pots, or a sudden change in light or temperature can cause your tree to drop fruit buds or stop producing temporarily.

What to do:

  • After transplanting, give the tree a few weeks to adjust before fertilizing or pruning.
  • Avoid relocating potted figs once buds start to form.
  • Maintain consistent watering and temperature conditions.

Pro Tip: Once the fig stabilizes, fruit production usually resumes the following season.


9. Pests or Disease

Pests like aphids, scale insects, or root-knot nematodes can weaken your fig tree, limiting its ability to fruit. Fungal infections, such as rust or leaf spot, can also interfere with healthy leaf growth — which means less energy for fruit.

Common pests and issues:

  • Aphids: Cause curling leaves and sticky residue.
  • Scale insects: Appear as small, brown bumps on stems.
  • Fig rust: Causes yellow or brown spots on leaves.
  • Root rot: Caused by overwatering and poor drainage.

What to do:

  • Spray neem oil or insecticidal soap for pests.
  • Remove heavily infected leaves to improve airflow.
  • Ensure the soil drains well and avoid waterlogging.

Pro Tip: A healthy fig tree with good airflow and balanced care rarely suffers serious pest damage. Prevention is key.


10. Variety or Environmental Mismatch

Finally, not every fig variety performs well in every environment. Some figs thrive in dry Mediterranean climates, while others need humidity and warmth.

What to do:

  • Research your variety’s ideal growing zone.
  • If your region’s conditions don’t match, consider growing the fig in a pot and moving it to controlled conditions (greenhouse, sunny windowsill, or sheltered patio).
  • Choose climate-appropriate types like:
    • ‘Brown Turkey’ – Very hardy and reliable.
    • ‘Chicago Hardy’ – Excellent for cooler climates.
    • ‘Kadota’ – Prefers dry, warm weather.

Tips to Encourage Fruiting

If your fig tree is healthy but still reluctant to fruit, try these expert-approved tricks:

  1. Moderate water stress: Slightly reducing water in late summer can encourage fruit ripening.
  2. Pinch back new growth: In early summer, pinch off the tips of young shoots to redirect energy into fruiting rather than leafy growth.
  3. Check for root restriction: Figs fruit best when slightly root-bound — avoid planting in overly large pots.
  4. Add phosphorus: Supplement with bone meal or low-nitrogen fertilizer to support flowering and fruit set.

Final Thoughts: Patience Brings Sweet Rewards

A fig tree’s journey from leaf to fruit can be slow, but it’s worth every moment of care and observation. Whether it’s adjusting sunlight, rethinking fertilizer, or simply waiting for maturity, most fruiting problems have easy fixes.

Remember — once your fig tree settles into the right balance of light, warmth, and nourishment, it will reward you with the sweetest, juiciest harvests year after year.

Because in gardening, as in life, patience truly does bear fruit.

The Best Flowers To Plant Near Your Vegetable Garden

The Best Flowers To Plant Near Your Vegetable Garden

A thriving vegetable garden isn’t just about leafy greens, juicy tomatoes, or sweet carrots. Surrounding your crops with the right flowers can boost growth, deter pests, attract pollinators, and add bursts of color that make your garden a joy to spend time in. Companion planting with flowers is a proven strategy that combines beauty and function—helping your vegetables flourish naturally.

Here’s a guide to the best flowers to plant near your vegetable garden, why they help, and how to maximize their benefits.


1. Marigolds — The Garden Guardian

Why they work:
Marigolds are famous for their ability to repel pests, especially nematodes and certain insects that attack tomatoes, peppers, and beans. Their strong scent confuses pests while attracting beneficial insects like hoverflies, ladybugs, and bees.

Best pairings:

  • Tomatoes
  • Peppers
  • Beans
  • Cucumbers

Planting tips:

  • Space marigolds around the perimeter of your vegetable beds.
  • Choose French marigolds (Tagetes patula) for smaller spaces and African marigolds (Tagetes erecta) for taller borders.
  • Deadhead spent blooms to encourage continuous flowering and maximum pest protection.

2. Nasturtiums — The Edible Trap Crop

Why they work:
Nasturtiums act as a trap crop, attracting aphids, whiteflies, and other pests away from your vegetables. Their bright, edible flowers also draw pollinators like bees, improving vegetable yield.

Best pairings:

  • Tomatoes
  • Cabbage
  • Radishes
  • Cucumbers

Planting tips:

  • Plant along vegetable edges or interspersed within crops.
  • Nasturtiums grow well in poor soil and require minimal care.
  • Their trailing varieties can be used as ground cover to suppress weeds.

3. Sunflowers — Pollinator Magnets and Natural Supports

Why they work:
Sunflowers attract bees and other pollinators, which are essential for fruiting vegetables like tomatoes, squash, and beans. Tall sunflower varieties can also provide natural support for climbing plants such as pole beans.

Best pairings:

  • Pole beans
  • Cucumbers
  • Squash

Planting tips:

  • Plant sunflowers on the south side of your garden so they don’t shade other vegetables.
  • Choose sturdy, disease-resistant varieties if you plan to use them as support.
  • Space adequately to allow airflow and prevent fungal issues.

4. Calendula — The Continuous Bloomer

Why they work:
Calendula, or pot marigold, attracts beneficial insects such as lacewings, parasitic wasps, and bees. These insects prey on common garden pests, providing natural pest control. Calendula also produces edible petals and flowers almost all season long.

Best pairings:

  • Lettuce
  • Carrots
  • Tomatoes
  • Brassicas

Planting tips:

  • Sow seeds directly in the garden or start indoors for early blooms.
  • Deadhead regularly to encourage continuous flowering.
  • Calendula thrives in full sun but tolerates partial shade.

5. Borage — The Mineral Booster

Why they work:
Borage flowers are rich in nectar, attracting bees that improve pollination rates for tomatoes, squash, and cucumbers. Borage also adds minerals to the soil—especially potassium—which benefits nearby vegetables.

Best pairings:

  • Tomatoes
  • Squash
  • Strawberries

Planting tips:

  • Sow seeds directly in the soil after the last frost.
  • Borage grows quickly and can self-seed; remove excess seedlings to prevent overcrowding.
  • Use as a companion border or interplant with vegetables.

6. Lavender — The Fragrant Pest Deterrent

Why they work:
Lavender’s strong scent repels moths, flies, and other unwanted pests, while attracting pollinators like bees and butterflies. Its woody stems also provide structure and visual interest near vegetable beds.

Best pairings:

  • Cabbage family crops (broccoli, kale, cauliflower)
  • Tomatoes
  • Peppers

Planting tips:

  • Lavender prefers full sun and well-drained soil.
  • Prune lightly after flowering to maintain shape.
  • Plant along the edges of vegetable beds for best pest-repellent effect.

7. Zinnias — Pollinator Powerhouses

Why they work:
Zinnias bloom in vibrant colors, attracting bees, butterflies, and hummingbirds, which help pollinate vegetables. They are drought-tolerant and bloom all season long, providing a constant food source for beneficial insects.

Best pairings:

  • Tomatoes
  • Peppers
  • Squash

Planting tips:

  • Choose single-flowered varieties for easy pollinator access.
  • Plant in clusters or along the garden edge for visual appeal and maximum pollinator visits.
  • Deadhead regularly to extend blooming season.

8. Sun-Loving Herbs With Flowers

Many flowering herbs are excellent companions for vegetables:

  • Basil: Repels mosquitoes and flies; attracts bees. Great with tomatoes.
  • Chives: Flowers attract pollinators and deter aphids. Works well with carrots and tomatoes.
  • Thyme: Flowers attract bees and predatory insects, plus it can act as ground cover to suppress weeds.

Plant herbs near vegetables for both culinary and pollination benefits.


9. How Flower Placement Improves Vegetable Health

  • Pollination: Flowers attract bees, butterflies, and other pollinators that increase fruit set in vegetables like tomatoes, cucumbers, and peppers.
  • Pest control: Many flowers lure predatory insects or confuse pests that attack vegetables.
  • Biodiversity: A diverse garden ecosystem reduces the likelihood of pest outbreaks and disease.
  • Soil health: Deep-rooted flowers like borage can help break up compacted soil and recycle nutrients.

Pro tip: Plant flowers in clusters rather than randomly to make it easier for beneficial insects to find them.


10. Seasonal Flower Planning

For year-round benefits, consider planting flowers in staggered succession:

  • Spring: Calendula, nasturtium, and borage for early pollinators.
  • Summer: Marigolds, sunflowers, zinnias, and lavender to support peak vegetable growth.
  • Fall: Late-blooming asters or cosmos to extend pollinator activity.

Rotating flowers with vegetables ensures constant blooms and continual pest protection throughout the growing season.


Final Thoughts

Planting flowers near your vegetable garden isn’t just decorative—it’s a strategic way to boost yield, improve soil health, attract pollinators, and reduce pests naturally. From marigolds that guard against insects to sunflowers that provide support and attract bees, these companion flowers create a vibrant, productive ecosystem.

By thoughtfully integrating blooms into your vegetable garden, you’ll enjoy not only healthier crops but also a more beautiful and dynamic garden space buzzing with life.

A colorful, thriving vegetable garden is just a few flowers away.

How To Grow Sunflowers That Don’t Fall Over

How To Grow Sunflowers That Don’t Fall Over

There’s something magical about a row of tall, golden sunflowers standing proudly under the summer sky. They turn their sunny faces toward the light, bringing warmth, color, and joy to any garden. But if you’ve ever grown them before, you might know the frustration of watching those cheerful blooms topple over just when they’re at their most beautiful.

Whether they’re leaning under the weight of their giant heads or collapsing after a summer storm, floppy sunflowers are one of the most common garden woes. Luckily, with a little know-how, you can grow sturdy, upright sunflowers that stay tall and strong all season long.

Here’s a detailed guide on how to grow sunflowers that don’t fall over—from the moment you sow the seeds to the day you harvest the blooms.


1. Choose the Right Variety

Not all sunflowers are created equal. Some are bred to tower over ten feet tall with heavy heads that naturally droop, while others are compact and more stable. If you’re tired of sunflowers that flop, your first step is choosing the right variety.

Best sturdy sunflower varieties:

  • ‘Autumn Beauty’ – Multi-branching with medium-sized heads and strong stems.
  • ‘Lemon Queen’ – Grows 5–7 feet tall with graceful, upright blooms.
  • ‘Sunrich Orange’ – Known for its thick stems and florist-quality blooms.
  • ‘Teddy Bear’ – A compact dwarf variety (2–3 feet) perfect for containers.
  • ‘Soraya’ – The first sunflower to win the All-America Selections award; excellent branching and stem strength.

Pro tip: Avoid ultra-tall “giant” varieties like ‘Mammoth Russian’ if your garden is windy or your soil is loose. Taller plants with massive flower heads are naturally more top-heavy.


2. Pick the Perfect Location

Sunflowers live up to their name—they need at least 6–8 hours of full sun daily to grow strong. But light isn’t the only factor that affects stability.

Here’s what your planting site should offer:

  • Shelter from strong winds: A fence, hedge, or building nearby can reduce wind damage without blocking sunlight.
  • Well-draining soil: Avoid spots that stay soggy after rain. Wet soil weakens roots and makes plants more likely to topple.
  • Loamy or sandy texture: Heavy clay soil can restrict root growth. If that’s your only option, amend it with compost or organic matter to loosen it up.

Tip: Sunflowers align themselves toward the sun during their early growth stages. Plant them so that when they lean slightly eastward, they won’t shade out other plants in your garden.


3. Start With Deep, Strong Roots

The secret to sunflowers that don’t fall over starts underground. Strong roots anchor tall stems, and healthy soil gives those roots room to spread.

How to plant for strong roots:

  • Sow seeds directly in the ground rather than starting them in pots. Sunflowers dislike transplanting because it disturbs their deep taproots.
  • Plant seeds 1 inch deep and 6–12 inches apart (depending on the variety).
  • Thin seedlings once they’re about 6 inches tall, keeping the strongest one in each spot. Crowded plants grow tall and spindly, making them more likely to fall.
  • Loosen soil at least 12 inches deep before planting to encourage the taproot to grow straight down.

Pro tip: Add a light layer of compost or aged manure to the soil before planting for a nutrient-rich start.


4. Strengthen the Stems Naturally

Sunflowers that grow too fast often develop thin, weak stems that can’t support their heavy heads later. To prevent this, encourage steady, balanced growth rather than rapid stretching.

Here’s how:

  • Provide consistent sunlight. Shaded plants stretch toward the light and become top-heavy.
  • Avoid over-fertilizing. Too much nitrogen causes lush leaf growth but weak stems.
  • Use compost instead of chemical fertilizer. It releases nutrients slowly, encouraging sturdy development.
  • Space plants properly. Give tall varieties 18–24 inches between each plant. Crowded conditions make them compete for light, leading to thin, weak stalks.

Bonus tip: A gentle breeze helps strengthen sunflower stems naturally. If your garden is sheltered, you can occasionally brush your hand gently along young plants to simulate wind and promote sturdier growth.


5. Support Tall Varieties Early

If you’re growing giant sunflowers or live in a windy area, staking is essential. The best time to add support is when the plants are still small—before they start to lean.

How to stake sunflowers:

  1. Drive a sturdy bamboo stake or wooden pole 6–12 inches into the soil, about 2 inches away from the stem.
  2. As the plant grows, loosely tie it to the stake using soft twine or garden tape. Avoid tight knots that can damage the stem.
  3. Add additional ties every 12 inches as the plant gets taller.
  4. For multiple sunflowers in a row, use garden netting or a horizontal trellis as support.

Pro tip: Drive the stake deeply enough (at least 1 foot into the soil) so it won’t pull out in a storm.


6. Water Deeply—But Not Too Often

Water plays a huge role in sunflower stability. Shallow watering encourages shallow roots, which can’t anchor tall plants.

How to water for strong roots:

  • Water deeply once or twice a week rather than frequent light sprinklings.
  • Let the soil dry slightly between waterings.
  • Direct water to the base of the plant, not the leaves.
  • During hot, dry spells, give your sunflowers a thorough soak—about 1 to 1.5 inches of water per week.

Warning: Avoid overwatering. Constantly wet soil softens the ground, making it easier for plants to topple over after heavy rain or wind.


7. Feed for Strength, Not Height

Fertilizer can be a double-edged sword for sunflowers. Too much can make them grow tall and fast—but also weak and floppy.

Fertilizer tips:

  • Use a balanced or low-nitrogen fertilizer (something like 5-10-10).
  • Apply once when the plant is about 12 inches tall, and again before flowering.
  • Always water after fertilizing to prevent root burn.

If your sunflowers are growing in nutrient-rich soil, you might not need additional fertilizer at all. Remember: the goal is sturdy growth, not maximum height.


8. Protect Against Wind and Rain

Even the strongest sunflower can struggle after a violent summer storm. Heavy rain softens the soil, and wind puts pressure on tall stems and top-heavy blooms.

Here’s how to protect your plants from the elements:

  • Mulch around the base with straw or wood chips to help the soil retain structure and prevent erosion.
  • Stake tall plants before storms if you haven’t already.
  • Plant in rows rather than isolated singles. Groups of sunflowers help support each other.
  • After storms, gently straighten any leaning plants and re-tie them to stakes if needed.

Tip: Avoid watering right before a storm—wet soil increases the risk of root instability.


9. Prune and Deadhead for Balance

Deadheading (removing spent blooms) doesn’t just keep your sunflowers looking neat—it can also help prevent toppling. When large, drying flower heads get heavy, they can pull the entire stem down.

What to do:

  • As flowers fade, cut them off just below the bloom.
  • Leave some heads to mature if you plan to harvest seeds.
  • For branching varieties, pruning spent flowers encourages more side blooms, distributing weight evenly.

10. Harvest at the Right Time

If you’re growing sunflowers for seeds, timing your harvest correctly is key to preventing bent or broken stems.

As seed heads mature, they become heavy, especially when filled with ripening seeds or after rain.

How to harvest without collapse:

  • Once the flower head turns yellow and begins to droop, it’s ready for harvest.
  • Cut the head off with 12–18 inches of stem attached.
  • Hang it upside down in a dry, airy place to finish drying.

This prevents the plant from collapsing under the weight of its own seeds while ensuring you still get a perfect harvest.


.


Common Mistakes That Cause Sunflowers to Fall Over

Avoid these pitfalls if you want strong, upright blooms:
Planting in soft, wet soil.
Overcrowding seedlings (they stretch for light).
Over-fertilizing with nitrogen-rich food.
Forgetting to stake tall varieties early.
Watering too often or too shallowly.

Each of these weakens root or stem structure, leaving plants vulnerable when the wind blows or flower heads get heavy.


Final Thoughts

Growing sunflowers that don’t fall over isn’t about luck—it’s about balance. Strong roots, sturdy stems, proper spacing, and mindful watering all work together to keep your plants upright and thriving.

The best part? Once you master these steps, you’ll have sunflowers that not only stand tall but stand out—bright, healthy, and full of life from the first bud to the last golden bloom.

So this season, choose wisely, plant deeply, water thoughtfully, and give your sunflowers a little support along the way. In return, they’ll reward you with a garden that radiates sunshine—without a single fallen flower.


Why Your Zinnias Are Turning Brown (And How To Fix It)

Why Your Zinnias Are Turning Brown (And How To Fix It)

Zinnias are among the most joyful flowers in any garden—bold, bright, and bursting with life. Their rainbow hues make them a favorite for gardeners who want instant color all summer long. So when those once-lively blooms and lush green leaves suddenly turn brown, it’s easy to feel discouraged.

But here’s the good news: browning zinnias don’t mean your garden is doomed. In most cases, the problem is completely fixable once you know what’s causing it. Whether it’s a watering mistake, a pest problem, or a natural part of the plant’s life cycle, you can revive your zinnias and get them blooming beautifully again.

Let’s take a deep dive into why your zinnias are turning brown—and exactly what you can do to bring them back to life.


1. Natural Aging and Dead Blooms

Sometimes, browning is simply part of your zinnias’ normal growth cycle. Each bloom only lasts a few weeks before fading and drying out. As petals age, they naturally turn from bright color to brown and papery.

If only the flower heads are browning while the rest of the plant looks healthy, there’s no disease or pest issue—your plant is just moving through its blooming rhythm.

What to do:

  • Regularly deadhead your zinnias (remove the spent blooms).
  • Snip the flower stem just above a new leaf set or bud to encourage new blooms.
  • Deadheading keeps your zinnias looking tidy and prompts them to produce fresh flowers throughout the season.

Tip: Deadheading once a week can keep your zinnias blooming from early summer until the first frost.


2. Overwatering (Or Poor Drainage)

Zinnias love sun and warmth, but they hate “wet feet.” When their roots sit in soggy soil, they can’t get the oxygen they need, leading to root rot and brown, wilted leaves.

You’ll know overwatering is the problem if:

  • The leaves turn brown starting from the bottom up.
  • The soil feels consistently damp or muddy.
  • The plant looks limp despite regular watering.

What’s happening:
Too much water suffocates the roots and encourages fungal diseases that attack the base of the plant.

What to do:

  • Check your soil: Zinnias prefer light, well-draining soil. If it’s heavy clay, mix in compost or sand to improve drainage.
  • Water deeply but infrequently: Let the top inch of soil dry before watering again.
  • Water early in the morning: This gives moisture time to soak in and the leaves time to dry before nightfall.
  • Avoid overhead watering: Wet foliage encourages fungal diseases—always water at the base.

Quick fix: If your zinnias are in containers, make sure pots have drainage holes. Repot soggy plants into fresh, dry soil to give them a second chance.


3. Underwatering or Heat Stress

On the flip side, not giving your zinnias enough water—especially in the heat of summer—can also cause browning. When plants become dehydrated, they prioritize survival over beauty, leading to crispy leaves and faded flowers.

Signs of underwatering:

  • Brown, brittle leaves (often starting at the edges).
  • Drooping during the hottest part of the day.
  • Dry, cracked soil.
  • Faded or prematurely wilted blooms.

What to do:

  • Water deeply 2–3 times per week, depending on your climate.
  • Mulch around the base of your plants to retain soil moisture.
  • Water early morning or evening to minimize evaporation.

Pro tip: Zinnias are drought-tolerant once established, but young plants need consistent moisture to build strong roots.


4. Fungal Diseases (A Common Culprit)

If your zinnias are turning brown in irregular spots or developing powdery coatings, a fungal disease may be to blame. Zinnias are beautiful—but they’re also prone to several common fungal issues, especially in humid or overcrowded conditions.

Let’s look at the top three culprits:

A. Alternaria Leaf Spot

  • Symptoms: Small, brown circular spots with dark edges on leaves.
  • Leaves may yellow, curl, and eventually drop.
  • Caused by high humidity and water splashing from soil to leaves.

Solution:

  • Remove and discard affected leaves (don’t compost them).
  • Water at the base and avoid wetting foliage.
  • Improve air circulation by spacing plants at least 12 inches apart.
  • Apply an organic fungicide like neem oil or copper spray weekly until symptoms subside.

B. Powdery Mildew

  • Symptoms: White or gray powdery coating on leaves that eventually turn brown.
  • Often occurs in late summer when days are hot and nights are cool.

Solution:

  • Increase airflow around plants.
  • Water early in the day and avoid overhead watering.
  • Apply a baking soda spray (1 tablespoon baking soda + 1 teaspoon liquid soap in 1 gallon of water) once a week to slow its spread.

C. Bacterial Leaf Spot

  • Symptoms: Brown or black spots surrounded by yellow halos.
  • Often spread by contaminated water or tools.

Solution:

  • Remove infected foliage.
  • Disinfect garden tools with rubbing alcohol after use.
  • Avoid touching plants when leaves are wet.
  • Rotate where you plant zinnias each year to prevent reinfection.

5. Pest Damage

Tiny insects can cause big problems for zinnias. Pests like aphids, spider mites, and thrips feed on plant juices, leaving behind damaged tissue that quickly turns brown or yellow.

Aphids:

  • Look for clusters of tiny green, white, or black insects on new growth or buds.
  • They leave behind a sticky residue called “honeydew,” which attracts ants.

Spider Mites:

  • Thrive in hot, dry weather.
  • Cause fine webbing on leaves and tiny yellow or brown speckles.

Thrips:

  • Extremely small and hard to see, but their feeding can make petals look discolored or streaked.

What to do:

  • Spray plants with a strong stream of water to dislodge pests.
  • Apply neem oil or insecticidal soap every few days until the pests are gone.
  • Encourage beneficial insects like ladybugs and lacewings to keep pest populations in check naturally.

6. Too Little Sunlight

Zinnias are true sun-lovers. Without at least six hours of direct sunlight each day, they become leggy, weak, and prone to browning leaves and sparse blooms.

Signs of too little sun:

  • Pale or dull-colored flowers.
  • Weak stems.
  • Leaves turning brown or yellow from stress.

Fix:
If your zinnias are in partial shade, consider relocating them to a sunnier spot. In containers, simply move the pots to a brighter location. In garden beds, trim back nearby plants that may be shading them.


7. Nutrient Imbalance

While zinnias aren’t heavy feeders, they still need the right balance of nutrients to stay vibrant. Too much or too little fertilizer can cause brown edges or discoloration.

Too much nitrogen:

  • Encourages leafy growth but fewer flowers.
  • Can cause leaf tip burn and weak stems.

Too little potassium or phosphorus:

  • Leads to dull blooms and leaf browning.

What to do:

  • Feed zinnias every 4–6 weeks with a balanced fertilizer (10-10-10) or a bloom booster (low in nitrogen, high in phosphorus).
  • Water well after feeding to prevent fertilizer burn.
  • Add compost or organic matter at the start of the season to maintain soil health naturally.

8. Old Age and End of Season

If your zinnias have been blooming beautifully all summer and are now fading in late fall, browning may simply mean they’re at the end of their life cycle. Zinnias are annuals, which means they live for one growing season only.

As temperatures drop or days shorten, it’s natural for flowers and leaves to turn brown and dry out.

What to do:

  • Allow a few blooms to dry completely for seed saving.
  • Cut back old plants and compost them once they’ve fully dried.
  • Plan to replant fresh zinnias next spring for another season of color.

Quick Recap: How To Keep Zinnias From Turning Brown

Here’s your go-to checklist for vibrant, healthy zinnias all season:

Deadhead regularly to encourage new blooms.
Water deeply but sparingly—avoid soggy soil.
Give full sun (6–8 hours daily).
Ensure good air circulation to prevent fungal disease.
Use neem oil or insecticidal soap for pest control.
Feed moderately with a balanced fertilizer.
Clean up fallen leaves to prevent disease spread.

By following these simple steps, you can prevent most causes of browning and enjoy a constant show of color in your garden.


Final Thoughts

When your zinnias start turning brown, it’s your garden’s way of sending you a message. It might be asking for less water, more sun, or just a little pruning love. The key is to observe closely and act quickly—most zinnia problems are easy to fix once identified.

With a bit of care and consistency, your zinnias will bounce back, producing wave after wave of bright, cheerful blooms. Remember: every brown petal or spotted leaf is just part of learning how to grow stronger, healthier plants.

So grab your watering can, pruning shears, and a keen eye, and give your zinnias the attention they deserve. Soon, your garden will be glowing again with the radiant colors that only zinnias can deliver.

How To Deadhead Marigolds For Endless Blooms

How To Deadhead Marigolds For Endless Blooms

There’s a reason marigolds are a staple in gardens around the world. Their cheerful orange, yellow, and golden blooms bring instant warmth and brightness to any outdoor space. They’re hardy, low-maintenance, and bloom for months—if you know one secret: deadheading.

If your once-bushy marigold plants are starting to look tired, with more brown heads than blossoms, don’t worry. With a few quick snips and a bit of care, you can keep them blooming beautifully from spring to frost. Here’s everything you need to know about how to deadhead marigolds properly for endless blooms, plus a few insider tips to make the most of this garden favorite.


Why Deadheading Marigolds Matters

To understand why deadheading works, it helps to know what your marigold is trying to do. Like all flowering plants, marigolds bloom with one goal in mind—to produce seeds. Once a flower fades and begins forming seeds, the plant channels its energy into seed production rather than creating new blossoms.

That’s where deadheading comes in. By removing the spent flowers before seeds form, you’re telling the plant, “You’re not done yet—keep blooming!” The result? More buds, more flowers, and a longer, more vibrant blooming season.

In short:
Deadheading prevents seed formation.
It redirects energy into new flower growth.
It keeps your plants tidy and healthy-looking.
And it extends the flowering period for weeks or even months.


The Best Time To Deadhead Marigolds

Marigolds bloom continuously through summer and early fall, so you’ll be deadheading regularly. The perfect time to remove a spent bloom is when the petals are starting to fade, dry, or turn brown, and the center of the flower looks shriveled.

If you wait until the flower head is completely dry and papery, the plant has already started to form seeds, which slows down further blooming. So, the key is timing—catch the flower as it’s fading, not after it’s gone completely to seed.

In most gardens, you’ll need to deadhead once or twice a week during peak blooming months.


How To Deadhead Marigolds — Step-by-Step

Deadheading marigolds is simple, satisfying, and only takes a few minutes. You don’t need fancy tools—just your hands or a small pair of garden scissors. Here’s how to do it correctly:

Step 1: Identify Spent Blooms

Look for flowers that are:

  • Brown or wilted around the edges
  • Losing their bright color
  • Dry or crunchy to the touch
  • Hanging lower than fresh blossoms

These are your targets for removal.

Step 2: Locate the New Growth Below the Spent Bloom

Follow the flower stem down until you find the first set of healthy green leaves or a new bud starting to form. That’s where you’ll make your cut or pinch.

If you cut too high—just below the dead bloom—you’ll leave behind a stub that can rot or block new growth. Cutting at the base of the spent flower encourages branching and more blossoms.

Step 3: Pinch or Snip Off the Dead Flower

  • For small marigolds (like French or signet marigolds), use your fingers. Simply pinch the dead bloom between your thumb and forefinger and pull gently.
  • For larger marigolds (like African or giant marigolds), use clean garden scissors or pruning shears to make a neat cut above a leaf node or bud.

Step 4: Clean Up Fallen Petals

After deadheading, check for petals or dried flower bits that have fallen into the plant’s center. These can trap moisture and encourage mold or fungal growth, especially in humid climates.

Gently shake or brush off debris to keep the foliage clean and airy.

Step 5: Repeat Regularly

Make deadheading part of your garden routine. A quick five-minute check every few days is enough to keep marigolds in full bloom.


The “Shear and Shape” Method (For Overgrown Marigolds)

If your marigold plants have gotten leggy or you’ve fallen behind on deadheading, don’t worry—there’s a fast fix.

Instead of picking individual blooms, use the shear-and-shape method:

  1. Take a pair of sharp garden shears.
  2. Trim back the top third of the plant, including faded blooms and long stems.
  3. Water deeply afterward.
  4. Optionally, give the plant a light dose of balanced fertilizer (like 10-10-10).

Within a week or two, you’ll see fresh, green shoots and new buds forming. This rejuvenation pruning encourages bushier growth and another flush of vibrant flowers.


Best Conditions for Continuous Bloom

Even with regular deadheading, marigolds need the right growing conditions to keep producing flowers. Here’s how to help them thrive:

1. Give Them Plenty of Sunlight

Marigolds are sun worshippers. They need at least 6–8 hours of direct sunlight daily to produce abundant blooms. In partial shade, they’ll still grow, but flowering will slow down.

2. Water Wisely

These plants prefer soil that’s moist but well-drained. Overwatering can lead to root rot and fewer flowers. Water at the base of the plant early in the morning and avoid wetting the leaves.

A good rule of thumb: water when the top inch of soil feels dry.

3. Fertilize Sparingly

Marigolds don’t need heavy feeding. Too much fertilizer—especially nitrogen—encourages leafy growth instead of flowers.
Use a balanced or low-nitrogen fertilizer once every 4–6 weeks during the growing season.

4. Remove Diseased or Damaged Growth

Along with deadheading, check for yellowing leaves or pest damage. Trim off unhealthy parts to improve airflow and prevent fungal problems.

5. Mulch and Maintain

A thin layer of organic mulch around the base helps retain moisture and suppress weeds without crowding the stems.


The Benefits of Regular Deadheading

It’s amazing what a little pruning can do. When you keep up with deadheading, you’ll notice:

More blooms — Marigolds can double their flower output.
Fuller plants — Pinching encourages branching, creating a lush, bushy shape.
Brighter color — Fresh flowers appear more vibrant when old ones are removed.
Longer bloom time — Many marigold varieties will keep producing until the first frost.
Healthier plants — Removing decaying flowers prevents mold and disease.

In short, consistent deadheading is the secret to marigolds that never seem to stop blooming.


Common Mistakes To Avoid

Even though deadheading is simple, a few missteps can reduce your plant’s performance. Avoid these common errors:

  1. Cutting too close to the new bud. Always leave a little stem above the new growth to prevent damage.
  2. Leaving stubs behind. These can rot and attract pests. Cut cleanly just above a leaf node.
  3. Overfertilizing after pruning. A little fertilizer goes a long way—too much encourages leaves, not flowers.
  4. Neglecting during wet weather. Faded blooms can trap moisture and cause fungal spots if not removed promptly.
  5. Forgetting to clean your tools. Always use sharp, sanitized scissors to prevent spreading disease.

Pro Tip: Save Seeds While You Deadhead

If you’d like to grow marigolds again next year, you can turn deadheading into seed-saving time.

Here’s how:

  • Let a few flowers fully dry on the plant until they’re brown and papery.
  • Snip off the dried head and open it over a tray or paper towel.
  • Inside, you’ll find long, slender black-and-white seeds.
  • Store them in a cool, dry place in a labeled paper envelope until next spring.

This way, you’ll have a never-ending supply of marigold seeds—and more reason to keep your plants blooming all season.


A Blooming Cycle That Never Ends

Once you get into the rhythm of deadheading, you’ll notice your marigolds quickly respond with fresh buds. Every time you remove an old flower, two new side shoots often emerge below the cut—each producing its own bloom.

Over time, your marigold plants become fuller, denser, and more productive. It’s a self-rewarding process that keeps your garden looking bright and cheerful from early summer to frost.


Final Thoughts

Deadheading marigolds isn’t just a garden chore—it’s an act of encouragement. Each snip tells your plant to keep growing, keep blooming, and keep brightening your space.

Whether you’re growing petite French marigolds, towering African marigolds, or delicate signet marigolds, the principle is the same: remove the old to make way for the new.

With just a few minutes of care each week, your marigolds will reward you with an endless display of vibrant color, filling your garden with golden sunshine right up until the first frost.

So grab your scissors, head to the garden, and start snipping—because the secret to endless marigold blooms lies right at your fingertips.