How to Fertilize Your Plants Naturally

How to Fertilize Your Plants Naturally

Healthy, vibrant plants start with proper nutrition, and while chemical fertilizers are widely used, natural fertilizers offer a safer, eco-friendly alternative. By using organic materials, you can nourish your plants, improve soil health, and reduce environmental impact. Fertilizing naturally also promotes strong roots, abundant blooms, and robust fruit and vegetable yields.

This guide will show you how to fertilize your plants naturally, including types of organic fertilizers, application methods, timing, and tips for optimal results.


Why Natural Fertilizers Matter

Natural fertilizers provide essential nutrients while enhancing soil structure and microbial activity. Unlike synthetic fertilizers, they:

  1. Feed the Soil: Organic matter improves soil fertility, texture, and water retention.
  2. Support Beneficial Microorganisms: Microbes in healthy soil break down organic matter and make nutrients available to plants.
  3. Reduce Pollution: Chemical fertilizers can leach into waterways, causing environmental damage.
  4. Promote Long-Term Plant Health: Plants absorb nutrients gradually, reducing the risk of nutrient burn or over-fertilization.

Key Nutrients Plants Need:

  • Nitrogen (N): Promotes leafy growth
  • Phosphorus (P): Supports root development and flowering
  • Potassium (K): Strengthens overall plant health and disease resistance

Step 1: Understand Your Plants’ Needs

Before applying any fertilizer, identify the specific nutritional needs of your plants:

  • Leafy Vegetables: High nitrogen requirements for lush foliage (lettuce, spinach, kale).
  • Flowering Plants: Higher phosphorus needs for blooms (roses, hibiscus).
  • Fruiting Plants: Balanced nutrients with slightly more potassium for fruit development (tomatoes, peppers).
  • Houseplants: Varies by species; generally balanced NPK with organic amendments works well.

Tip: Conduct a soil test to determine nutrient deficiencies and avoid unnecessary applications.


Step 2: Choose the Right Natural Fertilizers

Several natural materials can serve as fertilizers, each with unique benefits:
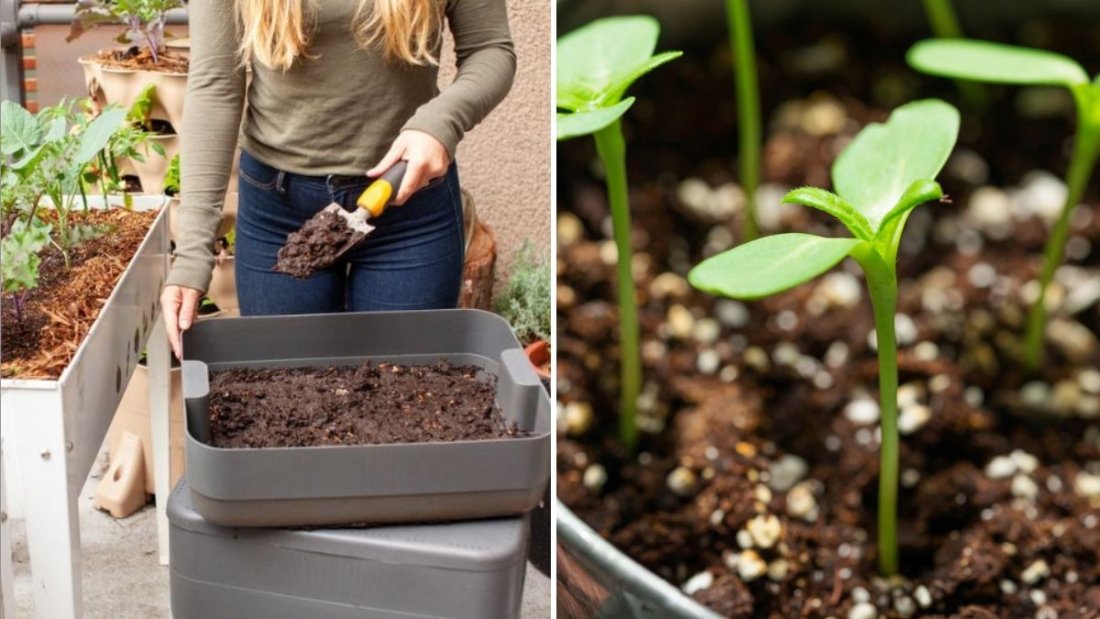
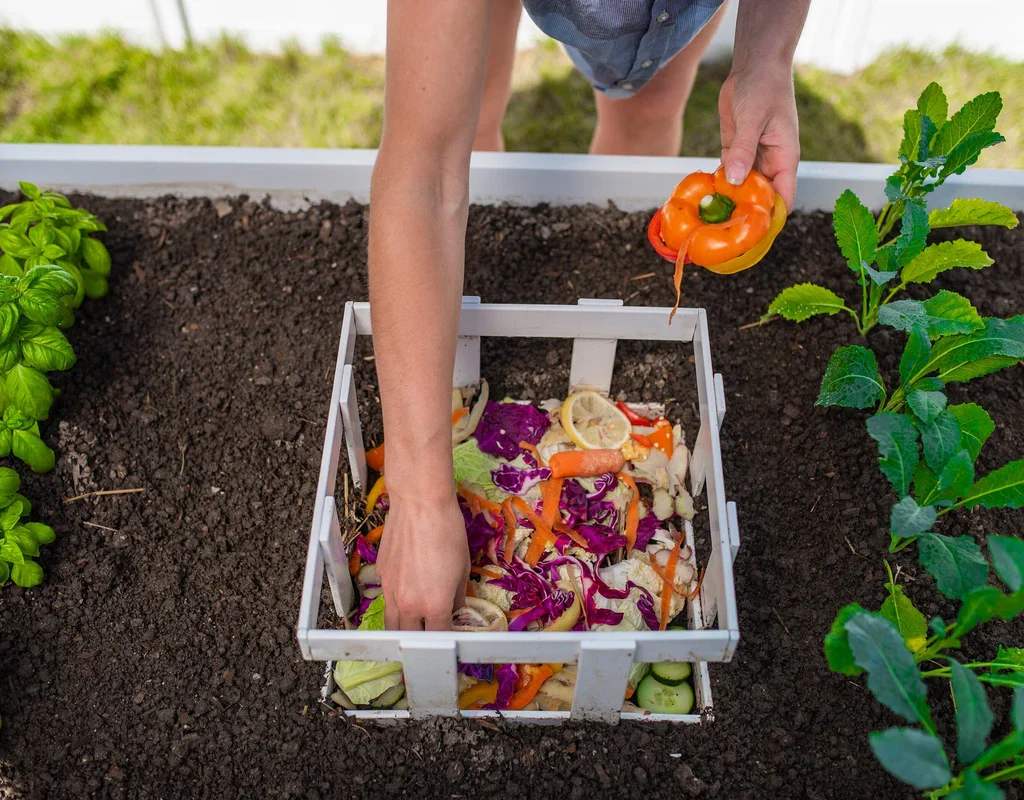
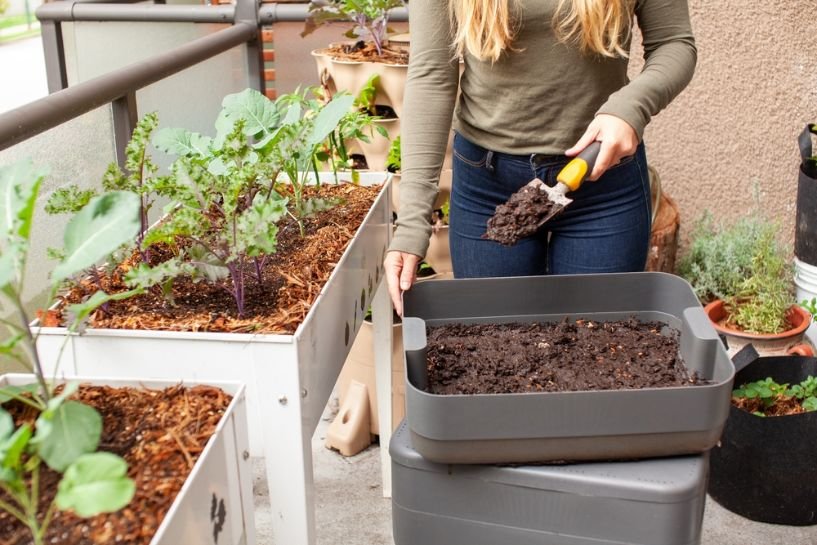
1. Compost

  • Made from decomposed kitchen scraps, garden clippings, and yard waste.
  • Rich in nutrients and beneficial microbes.
  • Improves soil structure and moisture retention.

Application: Spread 1–2 inches of compost around plants or mix into soil before planting.

2. Vermicompost (Worm Castings)

  • Produced by earthworms digesting organic matter.
  • High in nitrogen, phosphorus, and potassium.
  • Enhances microbial activity in soil.

Application: Mix into potting soil or top-dress around plants.

3. Manure

  • Animal manure (cow, horse, chicken) is nutrient-rich.
  • Must be well-aged or composted to prevent burning plants.

Application: Apply 1–2 inches of composted manure around garden beds. Avoid direct contact with roots of young plants.

4. Fish Emulsion

  • Liquid fertilizer made from processed fish.
  • High in nitrogen, ideal for leafy growth.
  • Quickly absorbed by plants.

Application: Dilute according to package instructions and water at the base of plants.

5. Bone Meal

  • Ground animal bones, rich in phosphorus.
  • Encourages strong root growth and flowering.

Application: Mix into soil near the root zone before planting or during transplanting.
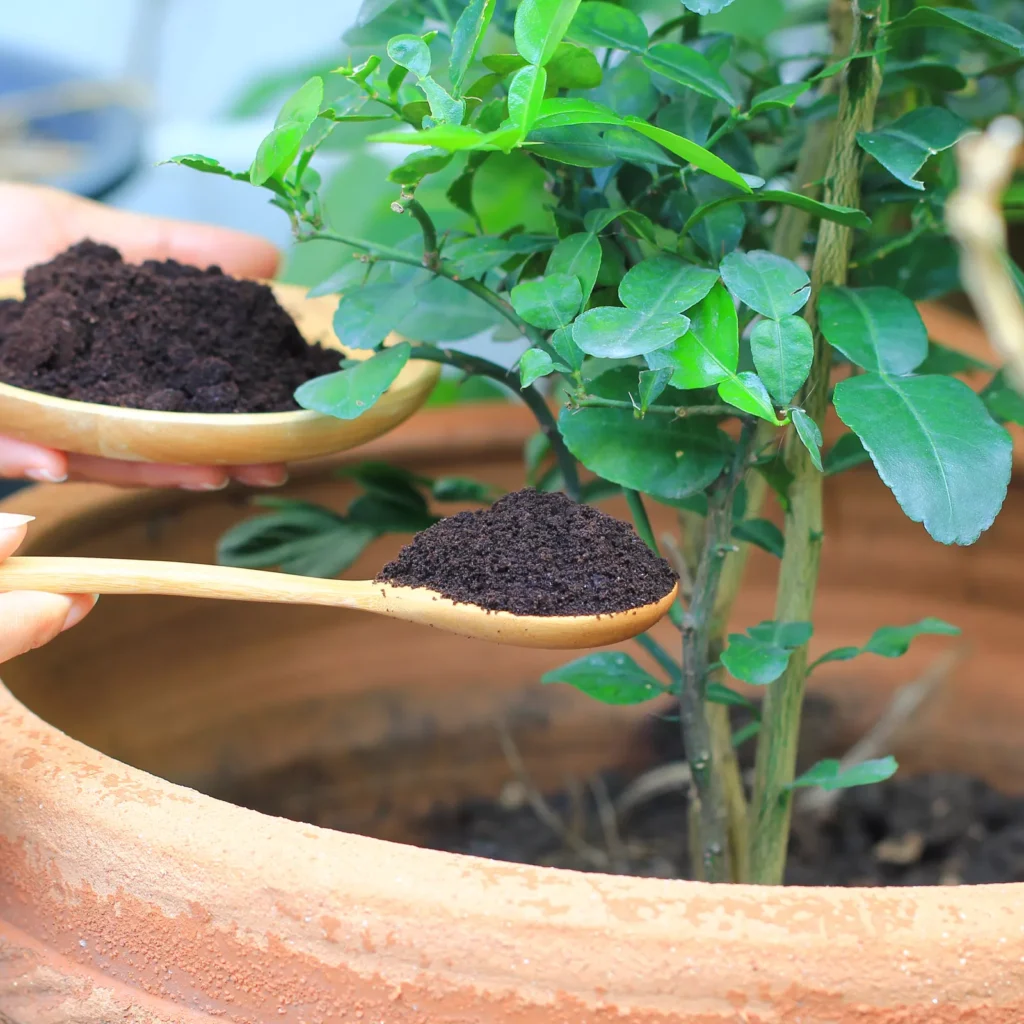
6. Coffee Grounds

  • Provides nitrogen and organic matter.
  • Slightly acidic, beneficial for acid-loving plants like azaleas and blueberries.

Application: Sprinkle around plants or mix into compost.

7. Eggshells

  • Source of calcium, essential for cell wall structure.
  • Helps prevent blossom end rot in tomatoes and peppers.

Application: Crush eggshells and mix into soil or compost.

8. Seaweed or Kelp**

  • Contains micronutrients, growth hormones, and trace minerals.
  • Improves stress tolerance and overall plant vigor.

Application: Use as a tea (soak in water) or sprinkle dried powder into soil.


Step 3: Apply Fertilizers Correctly

Proper application ensures nutrients are available when plants need them most.

Top-Dressing

  • Spread organic material (compost, manure, worm castings) on the soil surface.
  • Water in to help nutrients penetrate the root zone.

Soil Incorporation

  • Mix fertilizers into the soil before planting.
  • Ensures even nutrient distribution and encourages deep root growth.

Liquid Fertilization

  • Use liquid fertilizers like fish emulsion or seaweed tea.
  • Apply directly to the soil around the base of plants or as a foliar spray for fast absorption.

Tips:

  • Avoid over-application; too much fertilizer can burn plants or create nutrient imbalances.
  • Water thoroughly after applying granular fertilizers to help nutrients reach roots.

Step 4: Timing Your Fertilization

Timing is critical to maximize nutrient uptake:

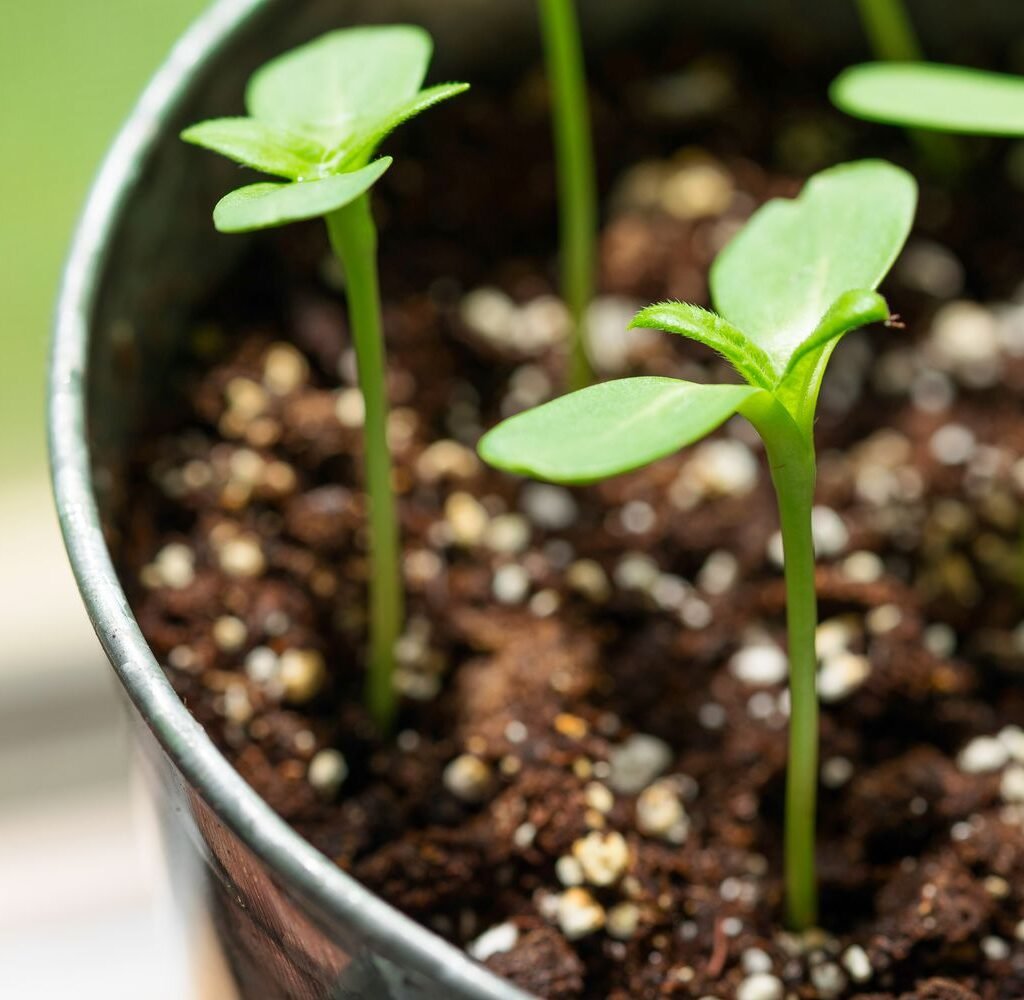
  • Seedlings and Young Plants: Use mild, balanced fertilizers to support root development.
  • Vegetative Growth Stage: High-nitrogen fertilizers encourage leafy growth.
  • Flowering Stage: Apply phosphorus-rich fertilizers to promote blooms.
  • Fruiting Stage: Potassium-rich fertilizers enhance fruit development and ripening.

Tip: Follow a regular schedule but adjust according to plant needs, soil quality, and weather conditions.


Step 5: Monitor Plant Health

Regular observation ensures your plants receive adequate nutrition:

  • Nitrogen Deficiency: Yellowing leaves and stunted growth.
  • Phosphorus Deficiency: Dark green or purplish leaves; poor flowering.
  • Potassium Deficiency: Brown leaf edges, weak stems, reduced fruit quality.

Tip: Adjust your fertilization routine based on visual symptoms and soil tests.


Step 6: Combine Fertilizers for Best Results

Using a combination of natural fertilizers can provide balanced nutrition:

  • Mix compost and worm castings for overall soil health.
  • Add bone meal or rock phosphate for flowering and fruiting plants.
  • Use coffee grounds and eggshells to boost nitrogen and calcium levels.

Tip: Layering organic fertilizers helps provide both immediate and long-term nutrient availability.


Step 7: Safety and Sustainability Considerations

  • Use composted manure to reduce the risk of pathogens.
  • Avoid excessive application of nitrogen-rich materials; they can leach into water sources.
  • Rotate crops and vary fertilizer types to maintain soil health and prevent nutrient depletion.
  • Store organic fertilizers in a cool, dry place to maintain their effectiveness.

Benefits of Natural Fertilization

  1. Environmental-Friendly: Reduces chemical runoff and pollution.
  2. Soil Improvement: Enhances soil structure, water retention, and microbial activity.
  3. Cost-Effective: Utilizes kitchen scraps and garden waste.
  4. Safe for Children and Pets: Non-toxic compared to synthetic fertilizers.
  5. Sustainable: Encourages recycling of organic matter and closed-loop gardening.

Quick Tips for Natural Fertilization Success

  • Rotate fertilizers for balanced nutrition.
  • Mulch after applying fertilizers to reduce nutrient loss and retain moisture.
  • Use natural fertilizers gradually for a slow, steady nutrient release.
  • Keep a gardening journal to track plant responses and fertilization schedules.
  • Consider companion planting to naturally boost soil fertility.

Conclusion

Fertilizing your plants naturally is a safe, effective, and eco-friendly way to promote healthy growth, vibrant flowers, and abundant fruits and vegetables. By understanding plant needs, choosing appropriate fertilizers, applying them correctly, and monitoring plant health, you can create a thriving garden without relying on chemical products.

From compost and worm castings to bone meal, coffee grounds, and seaweed, the options are abundant and easily accessible. Integrating these natural methods into your gardening routine enhances soil fertility, plant resilience, and sustainability.

With patience, observation, and proper technique, you can nourish your garden naturally, ensuring a productive, beautiful, and environmentally responsible outdoor space year-round.

How I Grew Papaya at Home from a Ripe Fruit: A Complete Step-by-Step Guide for Beginners

How I Grew Papaya at Home from a Ripe Fruit: A Complete Step-by-Step Guide for Beginners

Have you ever eaten a sweet, juicy papaya and wondered if you could grow one just like it at home? The good news is — you absolutely can! All it takes is a single ripe papaya, a few seeds, and a bit of patience.

Inspired by the viral YouTube video “How I Grew Papaya at Home from a Ripe Fruit,” many home gardeners have discovered just how easy and rewarding it is to grow papaya trees in their backyards, balconies, or even large pots.

In this guide, we’ll walk you through the entire process step-by-step — from extracting seeds to harvesting your very own papayas. You don’t need fancy tools or professional experience; this method works beautifully for beginners and small-space gardeners alike.

Let’s turn that leftover papaya from your kitchen into a thriving fruit-bearing plant!


Why Grow Papaya at Home?

Papaya (Carica papaya) is a tropical fruit known for its sweet flavor, vibrant color, and countless health benefits. It’s rich in vitamin C, enzymes, and antioxidants — perfect for digestion and immunity.

But beyond nutrition, growing papaya at home offers several advantages:

Fast-growing: Papaya plants can produce fruit within 8–10 months of planting.
Low maintenance: They thrive with minimal care in sunny spots.
Compact and productive: Even one tree can yield dozens of fruits annually.
Beautiful addition: Its lush green leaves and tall trunk add a tropical vibe to your garden.

And the best part? You can start your papaya journey with seeds from a fruit you already have at home.


Step 1: Choosing the Right Ripe Papaya

The process begins with the right fruit. Choose a fully ripe, healthy papaya that’s soft to touch and has a deep orange-yellow color.

Tips for selecting the perfect papaya:

  • Avoid overripe or bruised ones.
  • Choose from a local or hybrid variety that grows well in your region.
  • For container growing, smaller or “dwarf papaya” types work best.

Once you’ve eaten your delicious papaya, save those precious seeds — they’re the foundation of your new tree.


Step 2: Collecting and Cleaning the Seeds

Papaya seeds are small, round, and black with a jelly-like coating. This outer layer prevents germination, so it’s important to remove it before planting.

Here’s how to prepare the seeds:

  1. Scoop out the seeds from the ripe papaya.
  2. Place them in a bowl of water and rub gently with your fingers to remove the gelatinous covering.
  3. Rinse thoroughly 2–3 times.
  4. Spread the clean seeds on a paper towel and dry them in shade for 2–3 days.

Avoid drying under direct sunlight — it can damage seed viability.

You can store these dried seeds in a paper envelope for up to 6 months or plant them immediately for best results.


Step 3: Germinating Papaya Seeds

Before planting, it’s helpful to pre-germinate the seeds to ensure faster sprouting.

Easy germination method:

  1. Take 10–15 dried seeds and wrap them in a damp paper towel or cotton cloth.
  2. Place the wrapped seeds in a zip-lock bag or airtight container.
  3. Keep them in a warm, dark place (around 25–30°C).
  4. Check after 7–10 days — small white sprouts will start to appear.

This method ensures you only plant the seeds that are actually viable, saving time and space.


Step 4: Preparing the Soil and Container

Papayas prefer light, well-draining soil rich in organic matter. Heavy clay soil can cause waterlogging, leading to root rot.

Best soil mix recipe:

  • 40% garden soil
  • 30% compost or well-rotted cow dung
  • 20% sand or perlite (for aeration)
  • 10% coco peat (for moisture retention)

Mix these well and fill a large container or grow bag.

Container requirements:

  • Minimum 20–25 liters capacity
  • Depth: At least 18–24 inches
  • Drainage holes: Essential to prevent excess moisture buildup

If you have ground space, you can plant directly in soil — just ensure it’s a sunny, open spot.


Step 5: Planting the Sprouted Seeds

Once your seeds have sprouted, it’s time to plant them.

Planting steps:

  1. Make small holes about ½ inch deep in the soil.
  2. Place one sprouted seed per hole (you can plant 3–4 per container to start).
  3. Cover lightly with soil and water gently.

Keep the soil moist but not soggy. Germination typically takes 2–3 weeks, and you’ll see small seedlings emerging.

When they grow 6–8 inches tall, select the healthiest and most vigorous seedling and carefully remove the others.


Step 6: Ideal Sunlight and Temperature

Papayas are sun-loving tropical plants that need plenty of light to thrive.

Sunlight: At least 6–8 hours of direct sunlight daily.
Temperature: Ideal range is 25–35°C.

Keep your container or garden bed in a warm, open area. During cooler months, move the pot indoors near a sunny window or use a transparent cover to trap warmth.


Step 7: Watering and Moisture Management

Papayas love moisture but dislike waterlogging.

Watering tips:

  • Water every 2–3 days or when the topsoil feels dry.
  • Ensure good drainage in containers.
  • Avoid splashing water on leaves — it can invite fungal infections.
  • During hot summers, increase frequency slightly.

Mulching the surface with straw or dry leaves helps retain soil moisture naturally.


Step 8: Fertilizing for Healthy Growth

Papayas grow rapidly and need regular feeding to stay healthy.

Fertilizer schedule:

  • At planting: Mix compost and bone meal into the soil.
  • After 1 month: Add organic compost or vermicompost.
  • During flowering and fruiting: Feed every 15–20 days with liquid compost tea or banana peel fertilizer.

Tip: Avoid too much nitrogen; it encourages leafy growth but delays fruiting. Instead, focus on potassium and phosphorus for flower and fruit development.


Step 9: Transplanting (If Necessary)

If you started your papaya in a small pot or seed tray, transplant it once it reaches 8–10 inches in height.

Transplanting steps:

  1. Choose a new pot (at least 25 liters capacity).
  2. Fill with fresh, nutrient-rich soil mix.
  3. Carefully remove the plant without damaging roots.
  4. Replant it at the same depth as before and water thoroughly.

Papayas do not like root disturbance, so handle them gently during transplanting.


Step 10: Pollination — Ensuring Fruit Formation

Papayas can have male, female, or bisexual flowers.

  • Male plants: Only produce pollen.
  • Female plants: Need pollen to produce fruit.
  • Bisexual plants: Contain both organs and can self-pollinate.

If you grow from seeds, you may get a mix. To ensure fruiting, it’s best to grow at least 3 plants together and later keep only the ones that bear female or bisexual flowers.

Hand-pollination tip:
If natural pollination is low, gently transfer pollen from male to female flowers using a soft brush in the morning.


Step 11: Common Problems and Natural Solutions

Even healthy papaya plants can face challenges.

1. Yellow Leaves:

  • Usually caused by overwatering or poor drainage.
  • Solution: Improve drainage, reduce watering, and add compost.

2. Fungal Infections:

  • Appear as white powdery spots or leaf wilting.
  • Solution: Spray neem oil (1 tbsp per liter of water) every 10 days.

3. Pests (aphids, mealybugs):

  • Spray with neem oil or soapy water solution.
  • Keep plants well-ventilated.

4. No Fruits:

  • Often due to absence of male flowers or pollination failure.
  • Solution: Ensure male-female flower ratio or hand-pollinate.

Step 12: When and How to Harvest Papayas

Within 8–10 months, your papaya tree will start to bear fruits.

Signs your papaya is ready to harvest:

  • The skin color changes from dark green to yellow-orange.
  • The fruit feels slightly soft to touch.
  • A sweet aroma develops near the stem area.

Use a sharp knife to cut the fruit with a short stem attached. Handle gently to avoid bruising.

After harvesting, allow the fruit to ripen fully at room temperature for 2–3 days before enjoying its sweet flavor.


Step 13: Growing Papayas Year-Round

Papayas can be grown in any season if you provide the right environment:

Summer: Perfect for natural sunlight and quick growth.
Monsoon: Protect roots from excess rainwater.
Winter: Use plastic covers or move pots indoors.

For a continuous harvest, plant new seeds every 4–6 months. Papaya plants remain productive for 2–3 years before gradually declining.


Step 14: Benefits of Homegrown Papayas

Homegrown papayas are fresher, cleaner, and far more flavorful than store-bought ones.

Top benefits:
No pesticides or chemicals.
Zero waste — reuse seeds and compost.
Beautiful greenery in your space.
Continuous supply of nutritious fruit.
Sense of achievement and relaxation from gardening.

Plus, papaya leaves and seeds can be used for natural remedies, composting, and skincare.


Step 15: Final Tips for Success

Grow at least 3–4 plants to ensure pollination.
Keep consistent moisture but never waterlog.
Ensure full sun exposure daily.
Add organic fertilizer regularly.
Prune lower leaves to maintain airflow.

With these steps, your small seed will soon become a tall, fruit-bearing beauty — rewarding you with fresh, sweet papayas straight from your home garden!


Conclusion: Your Own Papaya Paradise

Growing papaya from a ripe fruit is one of the most satisfying home gardening experiences. It’s fast, easy, and requires minimal effort — yet gives you abundant, delicious results.

By following the method from “How I Grew Papaya at Home from a Ripe Fruit,” you’ll not only enjoy organic, homegrown papayas but also experience the joy of turning kitchen waste into life.

So next time you enjoy a ripe papaya, don’t throw those seeds away — plant them! In a few months, you could be harvesting your very own tropical fruit, right from your balcony or backyard.

Your garden, your fruit, your reward — nature’s sweetest gift to your home.

How to Grow Melons in Plastic Containers Easily: A Beginner’s Guide to High-Yield Home Gardening

How to Grow Melons in Plastic Containers Easily: A Beginner’s Guide to High-Yield Home Gardening

Imagine cutting open a juicy, sweet melon that you grew yourself — right from your balcony or backyard. No farmland, no complicated setup — just a simple plastic container, a few seeds, and the right method.

That’s the promise of the viral YouTube video “How to Grow Melons Easily with High Productivity in Plastic Containers for Beginners.” It shows how anyone — even total beginners — can grow delicious, high-yield melons in limited space, using nothing more than creativity and care.

Melons are often thought of as field crops, but with the right approach, they thrive beautifully in containers. Whether it’s muskmelon, cantaloupe, or small watermelons, you can enjoy your own harvest without a garden.

This 1200-word blog post will walk you through everything you need to know — from choosing the best melon varieties for containers to achieving maximum productivity with minimal effort. Let’s get started!


Why Grow Melons in Containers?

Growing melons in containers is becoming increasingly popular — and for good reason.

Space-saving: Perfect for balconies, patios, or rooftops.
Control over soil & nutrients: You decide the quality — no pests or diseases from garden soil.
Mobility: You can move containers for better sunlight or rain protection.
High yield in small space: With proper care, you can grow 2–3 melons per plant — or more!

Container-grown melons are cleaner, fresher, and chemical-free — a delicious reward for your effort.


Step 1: Choosing the Right Melon Variety

Not all melons are suited for container growing. Choose compact, fast-growing varieties that don’t need excessive root space.

Best melon varieties for container gardening:
Cantaloupe (Muskmelon): Sweet aroma, moderate size, and adaptable.
Mini Watermelons (Sugar Baby, Bush Sugar Baby): Small fruit, high productivity.
Honeydew: Thrives in warm, sunny areas; smooth rind, sweet flesh.
Golden Melon: Compact and great for beginners.

If you’re starting for the first time, go with Cantaloupe or Sugar Baby watermelon — they’re reliable and forgiving.


Step 2: Choosing the Right Container

Melons need enough root space to spread and develop fruits properly.

Ideal container features:

  • Depth: Minimum 15–18 inches (38–45 cm)
  • Width: At least 20 inches (50 cm) wide
  • Drainage holes: Must-have to prevent root rot
  • Material: Plastic, clay, or grow bags — plastic holds moisture best

You can even reuse old paint buckets, tubs, or plastic crates. Just make sure you drill drainage holes at the bottom.

Pro Tip: Place a saucer or tray underneath to collect excess water and prevent mess.


Step 3: Preparing the Ideal Soil Mix

Healthy soil = healthy melons. The goal is well-draining yet nutrient-rich soil that supports both foliage and fruit growth.

Best soil mix recipe:

  • 40% garden soil or topsoil
  • 30% compost or cow dung manure
  • 20% coco peat or peat moss
  • 10% sand or perlite (for aeration)

Mix well and fill your container, leaving 2 inches of space from the top.

Optional boost: Add a handful of bone meal or neem cake for extra calcium and pest protection.


Step 4: Seed Selection and Germination

You can use store-bought seeds or extract them from a ripe, organic melon.

To germinate seeds:

  1. Soak the seeds in warm water for 8–10 hours.
  2. Wrap them in a damp paper towel or cloth and keep them in a warm place (25–30°C).
  3. In 3–5 days, you’ll notice small white roots emerging — perfect for planting.

This pre-sprouting step increases germination rate and saves time.


Step 5: Planting Melon Seeds in Containers

Once sprouted, it’s time to plant!

Steps:

  1. Make small holes about 1 inch deep in the soil.
  2. Place one sprouted seed per hole (2–3 seeds per pot).
  3. Cover gently with soil and water lightly.

Once seedlings grow to 3–4 inches tall, thin them — keep only the healthiest plant and remove the weaker ones. This ensures maximum productivity.


Step 6: Providing Sunlight and Temperature

Melons are sun-loving plants that thrive in warm climates.

Light and temperature requirements:
Sunlight: 6–8 hours of direct sun daily.
Temperature: Ideal range is 25°C–35°C (77°F–95°F).

If you live in a cooler area, use a clear plastic cover or greenhouse setup to trap heat. Indoors, place the container near a south-facing window or use grow lights.


Step 7: Watering Melon Plants Properly

Melons need consistent moisture — but not soggy soil. Overwatering can cause root rot and split fruits.

Watering tips:

  • Keep the soil moist but not waterlogged.
  • Water deeply 2–3 times per week, depending on weather.
  • Use mulch (dry leaves, straw, or coco husk) on top of the soil to retain moisture.
  • Reduce watering once fruits start to mature — this increases sweetness.

Remember: uneven watering = cracked or bland melons.


Step 8: Supporting the Vines — Trellis or Ground

Melons naturally sprawl, so you can let them trail over the ground or train them upward for space efficiency.

Trellis setup benefits:

  • Keeps fruits off the soil (prevents rotting).
  • Improves air circulation and reduces pests.
  • Saves space and looks neat.

Use bamboo sticks, wire mesh, or plastic netting to create a simple trellis. As fruits grow, support them using cloth or net slings to prevent breaking from weight.


Step 9: Fertilizing for Maximum Productivity

Melons are heavy feeders — they need balanced nutrition throughout their growth.

Fertilizing schedule:

  • At planting: Mix compost and bone meal in soil.
  • After 3 weeks: Add liquid compost tea or seaweed fertilizer.
  • During flowering: Use potassium-rich fertilizer (banana peel fertilizer or wood ash).
  • During fruiting: Feed once every 10 days with organic fertilizer.

Avoid too much nitrogen — it makes plants leafy but reduces fruit yield.


Step 10: Pollination — Key to Fruit Formation

Melons produce male and female flowers separately, so pollination is crucial. In open spaces, bees do the job naturally, but in balconies or indoors, you may need to hand-pollinate.

How to hand-pollinate:

  1. Identify male flowers (thin stems) and female flowers (tiny bulge behind petals).
  2. Use a small brush or cotton swab.
  3. Gently transfer pollen from male to female flower.

Within a few days, the small bulge behind the female flower will start to grow — your first melon!


Step 11: Managing Pests and Diseases Naturally

Common issues include aphids, whiteflies, and powdery mildew.

Organic prevention tips:

  • Spray neem oil (1 tbsp per liter of water) every 10 days.
  • Avoid wetting leaves when watering.
  • Ensure good airflow around plants.
  • Remove yellowing leaves regularly.

Healthy soil and sunlight go a long way in preventing most diseases naturally.


Step 12: Watching Growth and Fruit Development

Once pollination succeeds, you’ll see melons forming within 7–10 days.

During this stage:

  • Avoid moving pots too much.
  • Support growing fruits with cloth nets if grown vertically.
  • Keep soil moist but not wet.
  • Trim excess vines to direct nutrients to developing melons.

Within 40–60 days (depending on variety), your melons will start reaching maturity.


Step 13: Harvesting Melons — The Sweet Reward

Knowing when to harvest melons is key to getting the perfect taste.

Signs of ripeness:

  • The fruit changes color (becomes more golden or deep green).
  • The stem begins to crack or detach slightly.
  • Sweet aroma near the stem area.
  • When tapped, it sounds hollow.

Use scissors to cut the fruit — avoid pulling. Let it rest in shade for 1–2 days before enjoying its full sweetness.

One healthy plant can yield 2–4 medium-sized melons, even in containers.


Step 14: Growing Melons All Year Round

You can enjoy melons in every season with the right strategy:

Summer: Perfect for natural sunlight — rapid growth.
Monsoon: Protect plants from heavy rain; ensure drainage.
Winter: Grow indoors or under a transparent plastic cover.

For continuous harvests, sow new seeds every 2 months.


Step 15: Benefits of Homegrown Melons

Homegrown melons are fresher, safer, and more satisfying than store-bought ones.

Benefits include:
100% organic: No chemical fertilizers or pesticides.
Water-efficient: Containers use less water than ground farming.
Eco-friendly: Recycle plastic containers for sustainable gardening.
Perfect for beginners: Simple, low-maintenance process.
Cost-saving: Grow more, spend less!

And of course, the flavor — homegrown melons are sweeter and more aromatic, thanks to fresh ripening on the vine.


Step 16: Final Tips for Beginners

  • Rotate containers between crops to maintain soil health.
  • Keep your melons warm — they dislike cold weather.
  • Always check drainage before watering.
  • Talk to your plants! Monitoring daily helps you catch issues early.

Once you see your first ripe melon, you’ll understand why so many beginners fall in love with this process.


Conclusion: Your Balcony Can Be a Mini Melon Farm

You don’t need a big garden or fancy equipment — just a container, good soil, sunlight, and patience.

Following the method from “How to Grow Melons Easily with High Productivity in Plastic Containers for Beginners,” you can grow sweet, juicy melons all year long, even in small spaces.

From seed to harvest, this journey is not just about food — it’s about the joy of nurturing life. Watching vines grow, flowers bloom, and fruits form under your care is one of gardening’s greatest pleasures.

So grab a few seeds, a container, and start today — your homegrown melon harvest is just weeks away!

How to Grow Peanuts at Home Without a Garden: Easy Home Gardening Tips for a Big Harvest

How to Grow Peanuts at Home Without a Garden: Easy Home Gardening Tips for a Big Harvest

When people think of peanuts, they often imagine large farm fields stretching to the horizon. But what if you could grow your own basket of fresh, crunchy peanuts — right from your balcony, backyard, or even your apartment balcony?

The viral YouTube video “[Home Gardening] Tips for Growing Peanuts at Home — Harvest a Whole Basket Without a Garden!” proves that it’s absolutely possible. With a few simple tricks, you can grow healthy, organic peanuts in containers — no big yard or farmland needed.

Peanuts (also called groundnuts) are one of the most rewarding crops to grow at home. They’re rich in protein, easy to care for, and surprisingly resilient. Plus, watching the unique process of how they grow — from a yellow flower that buries itself into the soil to form peanuts underground — is fascinating and fun for gardeners of all ages.

In this 1200-word guide, you’ll learn everything you need to know to grow peanuts at home successfully — from choosing seeds and soil to harvesting a basket full of nuts.


Step 1: Understanding How Peanuts Grow

Before we get our hands dirty, let’s understand what makes peanuts unique.

Unlike most plants that bear fruits or seeds above the ground, peanuts grow underground. The plant produces small yellow flowers that, after pollination, send pegs (called “gynophores”) into the soil. These pegs develop into peanut pods beneath the surface.

This means peanuts need loose, well-draining soil and space to spread horizontally — even when growing in containers.

Peanut plants belong to the legume family, which means they can fix nitrogen in the soil, improving soil fertility naturally. That’s great news for home gardeners who want a sustainable, organic setup.


Step 2: Choosing the Right Peanut Variety

There are several peanut varieties, but not all are ideal for container or home growing. Choose compact, early-maturing varieties that thrive in pots.

Recommended peanut types for home gardening:

  • Virginia Peanuts: Large pods, mild flavor, suitable for warm climates.
  • Spanish Peanuts: Small plants, high yield — great for containers.
  • Valencia Peanuts: Sweet flavor, quick growth cycle (about 90 days).
  • Runner Peanuts: Excellent for spreading growth, but needs more space.

If you’re growing peanuts for the first time, Spanish or Valencia peanuts are your best choice — they grow fast, adapt well to pots, and produce abundantly.


Step 3: Preparing the Seeds (Peanuts)

You can use raw, unroasted peanuts — but make sure they’re in-shell and untreated (no salt or preservatives).

Steps to prepare seeds:

  1. Remove the shells gently, keeping the thin, papery skin intact.
  2. Soak the peanuts in water overnight (8–10 hours).
  3. Drain and dry them for a few hours before planting.

This soaking step helps soften the seed coat and speeds up germination.


Step 4: Choosing the Right Container

Peanut plants need room for roots and pods to grow underground.

Ideal container features:

  • Depth: At least 12–15 inches (30–40 cm).
  • Width: 18–20 inches for spreading branches.
  • Drainage: Several holes to prevent waterlogging.

You can use plastic tubs, grow bags, buckets, or wooden boxes. If you have limited space, consider vertical stacking or railing planters for multiple batches.


Step 5: Preparing the Perfect Soil Mix

Peanuts need light, sandy, and loose soil for easy root penetration and pod formation.

Ideal soil mix:

  • 40% garden soil or topsoil
  • 40% compost or cow manure
  • 20% coarse sand or coco peat

Mix well and fill your container, leaving 2 inches from the top.

Pro Tip: Avoid clay soil — it holds too much moisture and makes it hard for peanuts to develop properly.


Step 6: Planting Peanut Seeds

Now it’s time to sow!

Steps to plant:

  1. Place 2–3 seeds per container, spacing them 4–6 inches apart.
  2. Bury each seed about 2 inches deep.
  3. Cover lightly with soil and water gently.

Place the container in a sunny location — peanuts love warmth and full light.


Step 7: Sunlight and Temperature Requirements

Peanuts thrive in warm weather. They need 6–8 hours of direct sunlight every day.

Ideal growing conditions:

  • Temperature: 22°C–32°C (72°F–90°F)
  • Humidity: Moderate to low
  • Light: Full sun

If you’re growing indoors, position the container near a south-facing window or use LED grow lights for consistent exposure.


Step 8: Watering Properly

Peanuts like consistent moisture — but they don’t like soggy soil.

Watering tips:

  • Keep soil slightly moist, not wet.
  • Water every 2–3 days in hot weather.
  • Avoid overwatering, especially once flowering begins.
  • Reduce watering near harvest time to let pods mature.

Too much water can rot developing peanuts underground, so aim for balance.


Step 9: Flowering and Peg Formation

About 30–40 days after planting, your peanut plants will start blooming with small yellow flowers.

This is where the magic begins:

  • The flowers will self-pollinate.
  • After pollination, the flower stem (peg) bends down into the soil.
  • The peg burrows into the soil and starts forming peanut pods underground.

To support this stage, keep soil loose and soft — gently till the top layer around the plants after flowering.


Step 10: Fertilizing and Feeding Naturally

Peanuts fix their own nitrogen, so they don’t need much fertilizer. But they benefit from a few organic boosts.

Every 3–4 weeks:

  • Add a handful of compost or vermicompost around the base.
  • Mix wood ash or banana peel powder to provide potassium.
  • Avoid nitrogen-rich fertilizers (they encourage leafy growth, not pods).

A balanced, organic feeding routine will ensure healthy plants and a rich harvest.


Step 11: Managing Pests and Common Problems

Peanut plants are generally hardy, but they can attract a few pests.

Common pests:

  • Aphids
  • Whiteflies
  • Leaf miners

Natural control tips:

  • Spray neem oil (1 tbsp per liter of water) every two weeks.
  • Remove yellowing or damaged leaves.
  • Maintain good airflow by not overcrowding plants.

If ants appear, sprinkle turmeric powder or coffee grounds around the soil — it deters them naturally.


Step 12: Growth Stages and Care

Peanuts take around 100–120 days to mature. During this period:

  • Keep the soil loose for easy peg penetration.
  • Trim excess branches if plants become too bushy.
  • Watch for yellowing leaves — it’s a sign of maturity approaching.

You’ll notice the plant’s leaves start to dry as pods ripen underground.


Step 13: Harvesting Peanuts — The Fun Part!

Harvesting peanuts is one of the most satisfying parts of home gardening.

How to harvest:

  1. Stop watering 7–10 days before harvest.
  2. Loosen the soil gently using your hands or a garden fork.
  3. Pull out the entire plant by the base.
  4. Shake off the soil — you’ll see bunches of peanuts clinging to the roots!

Lay the plants out in a warm, dry place for a week to cure. Once the pods are dry, remove them from the roots and store them in a cool, dry area.

You’ll be amazed — even from a few pots, you can harvest a full basket of homegrown peanuts!


Step 14: Growing Peanuts Year-Round

You can grow peanuts all year in warm climates or indoors with grow lights.

For continuous harvests:

  • Sow new seeds every 3 months.
  • Reuse the same container after mixing in fresh compost.
  • Rotate with leafy greens or herbs to maintain soil fertility.

In colder climates, start seeds indoors and move them outdoors once temperatures rise.


Step 15: Using and Storing Homegrown Peanuts

Fresh peanuts can be used in countless delicious ways:

  • Boiled peanuts: Soft and flavorful snack.
  • Roasted peanuts: Crunchy, aromatic treat.
  • Peanut butter: Homemade, preservative-free goodness.
  • Cooking: Add to curries, salads, and stir-fries for protein and texture.

To store them:

  • Keep unshelled peanuts in a dry, airy container.
  • Avoid plastic bags — moisture causes mold.
  • For long-term use, roast and store in airtight jars.

Step 16: Benefits of Growing Peanuts at Home

Growing peanuts at home offers far more than just food — it’s a sustainable, rewarding experience.

Top benefits:
Fresh and organic: No chemicals, no preservatives.
Soil-friendly: Peanuts improve soil health naturally.
Low maintenance: Requires minimal care and water.
Space-saving: Perfect for balconies or small yards.
Economical: Saves money and reduces grocery waste.
Nutrient-rich: High in protein, fiber, and healthy fats.

Plus, homegrown peanuts taste better — richer, nuttier, and fresher than anything from the store!


Conclusion: Harvest a Basket of Peanuts Without a Garden

With the right approach, you don’t need a farm to enjoy a basket full of peanuts — just a sunny corner, a few containers, and a bit of patience.

The “[Home Gardening] Tips for Growing Peanuts at Home — Harvest a Whole Basket Without a Garden!” method shows that anyone can grow peanuts, even in small urban spaces. Watching those yellow flowers transform into buried treasures beneath the soil is one of the most rewarding gardening experiences ever.

So grab a handful of raw peanuts, prepare your pot, and start your peanut garden today. Soon, you’ll be pulling up your very own harvest — fresh, crunchy, and proudly homegrown.

How to Grow Carrots at Home Easily: Enjoy Fresh, Clean Carrots Every Season

How to Grow Carrots at Home Easily: Enjoy Fresh, Clean Carrots Every Season

There’s something magical about pulling a fresh, vibrant orange carrot straight out of the soil — crisp, sweet, and spotless. Imagine having that experience not just once a year, but in every season, right in your own home.

The viral YouTube video “How to Grow Carrots at Home Very Simple, Every Season Has Clean Carrots to Eat” shows just how easy and rewarding it is to grow carrots without needing a big garden or expensive tools. With the right container, soil mix, and care, anyone — even beginners — can enjoy a steady supply of homegrown carrots that are cleaner, tastier, and healthier than store-bought ones.

This detailed 1200-word guide will walk you through everything you need to know: from choosing the best carrot variety and preparing soil to harvesting perfect carrots year-round. Let’s get your carrot garden started!


Why Grow Carrots at Home?

Carrots are among the easiest and most rewarding vegetables to grow at home. They don’t need much space and thrive well in pots, grow bags, or containers.

Here’s why growing your own carrots is worth it:

No Chemicals: You control what goes into your soil — no pesticides or additives.
Fresh Anytime: Harvest crunchy carrots whenever you want.
Clean and Hygienic: Homegrown carrots are free from mud, insects, and residue.
Perfect for Small Spaces: Even apartment balconies or windowsills can host a mini carrot garden.
Year-Round Possibility: With the right setup, you can grow carrots in all seasons.

Home gardening not only saves money but also gives the satisfaction of growing your own healthy food.


Step 1: Choosing the Right Carrot Variety

Not all carrot types are ideal for container or home gardening. Choose short and medium-root varieties that grow well in limited soil depth.

Best carrot varieties for home growing:

  • Nantes: Sweet flavor, uniform size, and easy to grow.
  • Chantenay: Short and thick roots, great for containers.
  • Mini or Baby Carrots: Perfect for shallow pots or boxes.
  • Imperator: Long, slender roots for deeper containers.

If you’re just starting out, Nantes or Chantenay varieties are highly recommended — they’re forgiving and yield consistently.


Step 2: Choosing the Right Container

Carrots grow underground, so container depth is key.

Ideal container features:

  • Depth: At least 12 inches (30 cm) deep for medium carrots.
  • Width: 12–18 inches wide for multiple plants.
  • Drainage holes: Essential to prevent waterlogging.

You can use plastic pots, grow bags, old buckets, or even recycled bottles — just make sure the depth suits your chosen variety.

If you’re short on space, try vertical gardening with stacked containers or hanging pots.


Step 3: Preparing the Perfect Soil Mix

Carrots need loose, well-draining, and nutrient-rich soil. Hard or compacted soil leads to crooked or stunted carrots.

Recommended soil mix:

  • 40% garden soil or topsoil
  • 40% compost or well-rotted cow manure
  • 20% sand or coco peat

This mix ensures proper aeration for root growth and moisture retention.

Pro Tip: Avoid fresh manure or excess nitrogen fertilizer — it causes carrots to fork or split.


Step 4: Sowing the Seeds

Carrot seeds are tiny, so handle them carefully.

Steps to sow:

  1. Fill the container with prepared soil, leaving 1–2 inches at the top.
  2. Sprinkle seeds evenly across the surface — spacing about 1 inch apart.
  3. Cover lightly with a thin layer (¼ inch) of fine soil or compost.
  4. Mist gently with water using a spray bottle.
  5. Cover the pot with a damp cloth or plastic sheet until seeds germinate (usually 7–10 days).

Keep the soil consistently moist during this stage — never let it dry out.


Step 5: Providing Sunlight and Ideal Temperature

Carrots love cool to moderate temperatures and plenty of light.

  • Sunlight: 5–6 hours of direct sunlight daily.
  • Temperature: 15°C–25°C (59°F–77°F) for best growth.

In hot climates, place containers where they get morning sun and afternoon shade. If you’re growing indoors, position them near a south-facing window or use LED grow lights.


Step 6: Watering Properly

Carrots need regular, gentle watering. Uneven watering can lead to cracked or deformed roots.

Tips for watering:

  • Keep soil evenly moist, not soggy.
  • Water lightly every morning or every alternate day.
  • Avoid flooding — too much water suffocates the roots.
  • In hot weather, mist the top layer to prevent drying.

You’ll know you’re watering right when the soil feels moist about 1 inch deep.


Step 7: Thinning and Spacing

Once seedlings are about 2–3 inches tall, thin them to avoid overcrowding.

  • Keep one healthy plant every 2 inches (5 cm).
  • Gently pull out the extras — use them in salads as baby greens!

Proper spacing ensures each carrot has enough room to grow straight and plump.


Step 8: Feeding Your Carrots Naturally

Carrots are light feeders, but a small nutrient boost helps them thrive.

Feed your plants every 15 days with:

  • Organic liquid fertilizer: Mix 2 tablespoons of seaweed extract or compost tea in 1 liter of water.
  • Homemade mix: Blend banana peel powder, eggshell powder, and a pinch of Epsom salt for added calcium and potassium.

Avoid high nitrogen fertilizers (like urea) as they promote leafy tops instead of healthy roots.


Step 9: Managing Pests and Diseases Naturally

Homegrown carrots are less prone to pests, but it’s good to stay alert.

Common pests:

  • Aphids (tiny insects on leaves)
  • Carrot flies (larvae that attack roots)

Prevention tips:

  • Rotate your containers — don’t plant carrots in the same soil repeatedly.
  • Spray neem oil (1 tbsp per liter of water) every two weeks.
  • Keep the garden area clean and remove yellowing leaves.

Healthy soil and proper drainage naturally deter most issues.


Step 10: Seasonal Growing Tips — Grow Carrots Year-Round

One of the most exciting parts of the “Every Season Has Clean Carrots to Eat” method is growing continuously.

Here’s how to adjust for each season:

Spring: Ideal for sowing — carrots grow quickly and evenly.
Summer: Use shade nets and water more frequently to keep soil cool.
Monsoon: Ensure good drainage and cover pots during heavy rain.
Winter: Perfect weather — roots become sweeter due to cool temperatures.

By staggering your plantings every 3–4 weeks, you’ll have fresh carrots ready for harvest throughout the year!


Step 11: Checking Growth and Care Routine

During growth, keep an eye on your plants:

  • Healthy carrot leaves are bright green and upright.
  • If leaves yellow, check for overwatering or lack of nutrients.
  • Loosen the topsoil occasionally to promote air flow.

When carrot tops start pushing slightly above the soil, it’s a sign they’re nearing maturity.


Step 12: Harvesting Your Carrots

Depending on variety, carrots are ready to harvest 70–90 days after sowing.

How to harvest:

  1. Water the soil lightly to soften it.
  2. Hold the leaves near the base and pull gently.
  3. If soil is hard, use a small fork to loosen it first.
  4. Brush off soil and rinse the carrots clean.

You’ll notice how clean, smooth, and fresh homegrown carrots look — no dirt clinging to them like store-bought ones!


Step 13: Replanting for the Next Harvest

After harvesting, you can reuse your soil and start again easily.

  1. Remove leftover roots and mix in some fresh compost.
  2. Add a bit of sand for aeration.
  3. Sow new seeds right away.

This cycle ensures you’ll have carrots every month with minimal effort.


Step 14: Bonus — Growing Carrots in Water (No Soil Method)

If you want to experiment, you can regrow carrot tops in water.

How to do it:

  1. Cut the top 1 inch of a carrot (with the green stem base).
  2. Place it in a shallow dish with water, ensuring the base is submerged.
  3. Change the water every 2–3 days.
  4. Within a week, new leaves and tiny roots will appear!

While this method won’t grow full carrots, you can use the greens in salads and soups.


Step 15: Storing and Using Homegrown Carrots

After harvesting, here’s how to keep them fresh:

  • Remove the leafy tops (they draw moisture from roots).
  • Store carrots in a perforated bag in the fridge.
  • You can also blanch and freeze them for long-term storage.

Use your clean homegrown carrots for:

  • Salads, soups, and stews
  • Juices and smoothies
  • Stir-fries and healthy snacks

Step 16: Benefits of Growing Carrots at Home

Homegrown carrots aren’t just delicious — they’re incredibly healthy and eco-friendly too.

Benefits include:

  • High in Vitamin A and antioxidants.
  • Boosts eye health and immunity.
  • No exposure to chemicals or wax coatings.
  • Encourages sustainable living and reduces waste.
  • A relaxing hobby that brings joy to daily life.

When you bite into a crisp, sweet carrot you’ve grown yourself, it’s not just food — it’s an accomplishment.


Conclusion: Simple Steps to a Year-Round Carrot Garden

Growing carrots at home doesn’t require a big garden, fancy tools, or expert skills. Just a container, the right soil, and a little patience — and you’ll have clean, organic carrots growing in every season.

The method shared in “How to Grow Carrots at Home Very Simple, Every Season Has Clean Carrots to Eat” is proof that nature rewards simplicity. Once you see those green tops and pull out your first perfect carrot, you’ll be hooked.

So, roll up your sleeves, grab a handful of seeds, and start your home carrot garden today. Fresh, crisp, chemical-free carrots are just a few weeks away — and they’ll taste better than any you’ve ever bought!


Housewives’ Dream Cabbage Garden: How to Grow Fresh Cabbage in Plastic Bottles at Home

Housewives’ Dream Cabbage Garden: How to Grow Fresh Cabbage in Plastic Bottles at Home

Imagine stepping out to your balcony or kitchen window and harvesting crisp, green cabbage heads — all grown in recycled plastic bottles. It’s not only possible, but also incredibly easy. The viral YouTube video “Housewives’ Dream Cabbage Garden: Growing Cabbage in Plastic Bottles” has shown how ordinary plastic waste can be transformed into a mini vegetable garden that produces fresh, organic cabbage right at home.

This method is perfect for those who dream of gardening but lack space or soil. Whether you live in a high-rise apartment or a small home, you can grow cabbage vertically using nothing more than plastic bottles, water, and sunlight.

In this complete 1200-word guide, we’ll explore the secrets behind growing cabbage in bottles — from choosing the right seeds and creating the perfect setup to caring for plants until harvest. Let’s turn your household recycling into a housewives’ dream garden!


Why Cabbage Is Perfect for Bottle Gardening

Cabbage is one of the easiest and most rewarding vegetables to grow in containers. It’s a cool-season crop that thrives in well-drained environments and moderate sunlight — making it ideal for balconies, windowsills, and small gardens.

By growing cabbage in plastic bottles, you can:
Save space through vertical gardening.
Reuse waste bottles sustainably.
Avoid soil-borne pests and diseases.
Control watering and nutrition precisely.
Harvest clean, chemical-free cabbage anytime.

This method is both eco-friendly and economical — perfect for housewives, beginners, and city gardeners alike.


Step 1: Choosing the Right Cabbage Variety

Before starting, select a variety of cabbage that fits your space and climate.

Best varieties for bottle growing include:

  • Golden Acre: Compact and matures early (65–70 days).
  • Red Express: Vibrant purple color and small heads.
  • Copenhagen Market: Classic green variety with firm heads.
  • Savoy Cabbage: Beautiful crinkled leaves and soft texture.

Choose compact or dwarf varieties since they adapt better to small containers.


Step 2: Collecting and Preparing Plastic Bottles

You can grow cabbage using 1- to 2-liter plastic bottles — the kind used for soft drinks or water.

How to prepare the bottles:

  1. Clean thoroughly to remove any residue or labels.
  2. Cut the bottle horizontally — either halfway or near the bottom third.
    • Use the bottom half for planting.
    • You can also keep the top half inverted to act as a mini greenhouse cover.
  3. Drill or poke drainage holes at the bottom using a heated nail or knife.
  4. Add a layer of small stones or gravel for extra drainage.

For vertical setups, you can hang bottles on a balcony wall, fence, or railing using twine or metal hooks.


Step 3: Preparing the Potting Mix

Since we’re not using soil from the ground, it’s important to create a light, fertile potting mix that supports root growth.

Ideal potting mix (per bottle):

  • 40% garden soil or compost.
  • 30% coco peat or peat moss (for moisture retention).
  • 20% sand or perlite (for drainage).
  • 10% organic manure or vermicompost (for nutrients).

Mix thoroughly and fill each bottle up to 3–4 inches below the rim. This space allows water to soak in without overflowing.


Step 4: Sowing the Seeds

You can either sow cabbage seeds directly in the bottles or start them in a seed tray and transplant later.

For direct sowing:

  1. Sow 3–4 seeds per bottle.
  2. Cover lightly with a thin layer of coco peat or compost.
  3. Mist the surface gently to moisten it.
  4. Keep in a semi-shaded area until germination.

For transplanting:

  1. Grow seeds separately in a tray or small pots until seedlings have 4–5 true leaves (about 3–4 weeks).
  2. Transplant one healthy seedling per bottle.
  3. Press gently and water well after transplanting.

Step 5: Proper Light and Temperature

Cabbage loves cool, bright conditions.

  • Place bottles in a sunny area that receives 4–6 hours of direct sunlight daily.
  • In extremely hot weather, provide partial shade using a cloth or net.
  • Maintain temperatures between 15°C and 25°C (59°F–77°F).

If you’re growing indoors, place bottles near a south-facing window or use LED grow lights for 10–12 hours a day.


Step 6: Watering the Right Way

One of the biggest advantages of bottle gardening is controlled watering. Cabbage needs consistent moisture, but waterlogging can harm its roots.

Watering tips:

  • Water gently when the top inch of soil feels dry.
  • Avoid pouring too much — instead, mist slowly until evenly moist.
  • In hot weather, water daily; in cooler months, every 2–3 days is enough.
  • Add a small saucer or drip tray under each bottle to collect excess water.

Pro tip: Use a spray bottle or narrow-spout watering can to prevent soil displacement.


Step 7: Feeding Your Cabbage Plants

Cabbage is a heavy feeder, meaning it needs regular nutrition for healthy leaf and head formation.

Feed your plants every 10–14 days with:

  • Organic liquid fertilizer: Mix 2 tablespoons of compost tea or seaweed extract in 1 liter of water.
  • Homemade fertilizer: Combine banana peel powder, eggshell powder, and a pinch of Epsom salt in water for calcium and potassium boost.
  • Hydroponic nutrient solution (optional): For those who prefer scientific precision, a mild NPK solution (10:5:5) works wonders.

Avoid over-fertilizing, as this can burn the roots or lead to leafy overgrowth without proper heads.


Step 8: Supporting Growth and Preventing Pests

Cabbage grown in bottles faces fewer pests than soil gardens, but you should still stay vigilant.

Common pests: Aphids, caterpillars, and whiteflies.
Natural pest remedies:

  • Spray a neem oil solution (1 tbsp per liter of water) once a week.
  • Use garlic or chili spray to deter insects naturally.
  • Encourage beneficial insects like ladybugs if growing outdoors.

You can also place a fine mesh or net over young plants to protect them from butterflies that lay eggs.


Step 9: Mulching and Moisture Retention

To keep your mini cabbage garden thriving, retain moisture with mulching.

Add a thin layer of dry leaves, rice husk, or straw on top of the soil in each bottle. This prevents evaporation, keeps roots cool, and reduces weed growth.

If you’re using transparent bottles, wrap them with brown paper or cloth to block sunlight from heating the roots.


Step 10: Monitoring Growth

Within 2–3 weeks of transplanting, your cabbage plants will develop sturdy outer leaves.

Growth timeline:

  • Weeks 1–3: Seed germination and early growth.
  • Weeks 4–6: Leaf expansion — add nutrients every 10 days.
  • Weeks 7–10: Cabbage head formation — reduce nitrogen slightly to encourage compact heads.
  • Weeks 10–12: Ready for harvest!

Keep an eye on leaf color — healthy cabbage leaves are bright green and crisp. Yellowing or curling may indicate nutrient imbalance or excessive heat.


Step 11: Harvesting Cabbage from Plastic Bottles

Your cabbage is ready to harvest when the head feels firm and tight when pressed gently.

To harvest:

  1. Cut the cabbage head at the base using a sharp knife.
  2. Leave the outer leaves and roots in place — sometimes, small secondary heads may grow back.
  3. Rinse thoroughly and store in the refrigerator.

Each bottle can yield a medium-sized cabbage head (500–700g) — fresh, organic, and homegrown!


Step 12: Recycling and Replanting

After harvesting, don’t throw away the setup — simply refresh and reuse.

  1. Remove the old root system and top 2 inches of used soil.
  2. Refill with fresh compost and coco peat mix.
  3. Plant a new seedling immediately for continuous production.

This cycle allows you to grow cabbage year-round, ensuring a steady supply for your kitchen without needing a large garden.


Step 13: Creative Display Ideas for Your Bottle Cabbage Garden

Make your cabbage garden not only functional but also decorative!

Vertical Wall Garden: Attach bottles to a wooden frame or metal rack.
Hanging Garden: Suspend bottles using ropes or macramé hangers.
Window Garden: Line them up on a sunny windowsill for easy access.
Balcony Railing Setup: Tie bottles securely along railings for space efficiency.

The lush green cabbages will give your home a fresh, natural look while adding beauty to your space.


Step 14: Benefits of Growing Cabbage in Plastic Bottles

This sustainable gardening technique offers numerous benefits:

  • Eco-Friendly: Reuses waste bottles and reduces plastic pollution.
  • Budget-Friendly: No need for expensive pots or soil beds.
  • Space-Saving: Ideal for small homes and balconies.
  • Healthier Produce: No pesticides or chemicals.
  • Therapeutic Hobby: Gardening relieves stress and boosts happiness.

It’s truly a “housewives’ dream” because it combines sustainability, creativity, and nutrition — all from your home.


Conclusion: Your Dream Cabbage Garden Awaits

Growing cabbage in plastic bottles is proof that you don’t need a backyard or fancy equipment to create a lush, productive garden. With just a few recycled bottles, some soil mix, and care, you can harvest fresh, crunchy cabbages right from your balcony or window.

The “Housewives’ Dream Cabbage Garden” idea is more than a viral trend — it’s a lifestyle shift toward sustainability, self-sufficiency, and smarter gardening.

So, don’t throw away those bottles — transform them into your very own mini cabbage farm. Once you taste the freshness of homegrown cabbage, you’ll never look at store-bought vegetables the same way again.

5 DIY Halloween Garden Projects for a Spooky Look

5 DIY Halloween Garden Projects for a Spooky Look

Halloween is the perfect opportunity to transform your garden into a hauntingly beautiful outdoor space. With a little creativity, some basic materials, and a few hours of effort, you can craft a garden that impresses trick-or-treaters, friends, and neighbors alike. From eerie lighting to creepy props, DIY projects allow you to customize your haunted garden while keeping costs low and creativity high.

In this article, we’ll explore five DIY Halloween garden projects that will bring a spooky, fun, and festive look to your yard. Each idea is practical, budget-friendly, and designed to make your garden the highlight of the Halloween season.


1. DIY Pumpkin Lanterns

Jack-o’-lanterns are a Halloween staple, and making your own pumpkin lanterns is an easy way to add both light and spookiness to your garden.

Materials Needed:

  • Small or medium-sized pumpkins
  • Carving tools (or a serrated knife)
  • LED tea lights or fairy lights
  • Marker pen for design
  • Optional: Acrylic paints for painted designs

How to Make Them:

  1. Choose Your Pumpkins: Pick firm pumpkins with smooth surfaces for easier carving.
  2. Design Faces: Draw faces or spooky patterns with a marker pen. You can do classic scary faces, ghostly smiles, or intricate patterns for a more artistic look.
  3. Carve Carefully: Cut out the top and hollow out the pumpkin. Then carve your design.
  4. Add Lights: Place an LED tea light or small fairy lights inside the pumpkin. LED lights are safer than real candles and last longer.
  5. Placement: Arrange them along garden pathways, steps, or near flower beds for a festive glow.

Pro Tip: Mix carved pumpkins with painted ones to add color variety and protect pumpkins from spoiling too quickly.


2. Haunted Garden Signs

A DIY haunted garden sign is an easy project that instantly adds creepy charm and direction to your Halloween yard.

Materials Needed:

  • Wooden stakes or planks
  • Black or dark brown paint
  • White paint or chalk marker
  • Optional decorations: spiders, cobwebs, glitter

How to Make Them:

  1. Prepare the Wood: Cut wooden planks to the desired size and shape (arrow-shaped planks work well).
  2. Paint a Base: Use black, dark brown, or gray as the background color.
  3. Add Halloween Messages: Write phrases like “Enter if You Dare,” “Graveyard,” or “Beware of Ghosts” using white paint or a chalk marker.
  4. Decorate: Glue small plastic spiders, bats, or cobwebs for added effect.
  5. Install: Push stakes into the ground along garden paths or near the entrance.

Creative Twist: Use old wood or distressed planks for a weathered, haunted look. The rustic finish adds authenticity to your Halloween garden.


3. Floating Ghosts

Floating ghosts are a classic and simple DIY Halloween decoration that adds movement and eeriness to your garden.

Materials Needed:

  • White sheets, fabric, or cheesecloth
  • Balloons or foam balls for heads
  • String, twine, or fishing line
  • Marker for faces (optional)
  • Optional: Glow sticks or LED lights for illumination

How to Make Them:

  1. Create the Head: Inflate a balloon or use a foam ball and cover it with white fabric. Tie the fabric under the head to form the ghost body.
  2. Draw Faces: Use a marker to add spooky or funny faces.
  3. Hang the Ghosts: Attach string or fishing line to the top and hang from tree branches, pergolas, or garden hooks.
  4. Add Lighting: Place small LED lights inside the fabric or near the ghosts for a glowing, ethereal effect.

Extra Tip: Vary the height of the ghosts for a natural floating effect, and let the wind give them a gentle, ghostly sway.


4. DIY Cobweb Garden

Adding cobwebs is one of the simplest ways to make your garden look haunted, and making your own DIY cobwebs is fun and affordable.

Materials Needed:

  • White yarn, string, or cotton batting
  • Scissors
  • Optional: Plastic spiders or small insect props

How to Make Them:

  1. Stretch the Yarn: Use yarn or string to create a basic web structure between shrubs, trees, or garden stakes.
  2. Add Webbing: Pull and stretch additional string across the main structure in a random pattern to mimic a spider web.
  3. Decorate: Place small plastic spiders or bugs on the web.
  4. Placement: Hang the cobwebs in trees, around garden lights, or near plants to make it look naturally spooky.

Creative Twist: Add a thin layer of glitter to the yarn to give your cobwebs a subtle shimmer under garden lights. It creates an otherworldly glow at night.


5. Potion Bottles and Witchy Decor

For a truly mystical and spooky garden corner, create a witch’s potion display. It’s perfect for a Halloween-themed centerpiece or focal point.

Materials Needed:

  • Small glass bottles or jars
  • Food coloring or water with glitter
  • Labels: “Potion of Fear,” “Witch’s Brew,” etc.
  • Optional: Cobwebs, small cauldrons, or skulls for added effect

How to Make Them:

  1. Fill Bottles: Fill jars with colored water or mix in glitter for a magical look.
  2. Add Labels: Print or handwrite labels with fun or creepy names.
  3. Display: Arrange the bottles on a table, shelf, or garden bench. Add moss or stones for texture.
  4. Lighting: Place small LED candles behind or underneath jars for a glowing potion effect.

Creative Twist: Add miniature skeleton hands or black feathers around the potion display to enhance the spooky theme.


Bonus Tips for a Safe and Stunning DIY Halloween Garden

  1. Use LED Lights: Candles and open flames can damage plants and pose a fire hazard. LED lights are safe and long-lasting.
  2. Balance Spooky and Whimsical: Mix scary elements with playful touches for a family-friendly display.
  3. Keep Plants Healthy: Avoid placing heavy props directly on delicate plants or blocking sunlight.
  4. Use Durable Materials: Weatherproof your decorations, especially if they’re outside. Plastic, foam, and treated wood hold up better than paper or untreated items.
  5. Layer Effects: Combine lighting, props, and plants for a visually dynamic garden. Layers create depth and make your haunted garden feel immersive.

Creative Ideas to Combine Projects

  • Halloween Pathway: Line your garden path with DIY pumpkin lanterns and hang floating ghosts from nearby trees.
  • Witch’s Corner: Create a potion display next to a cluster of cobweb-covered shrubs and miniature witch hats for a mystical look.
  • Haunted Tree: Attach floating ghosts, spiders, and cobwebs to a single tree or vertical plant wall for a dramatic focal point.

Extra Tip: Play ambient Halloween sounds, like crows, howling wolves, or spooky music, to tie the visual effects together. Sound instantly elevates the haunted atmosphere.


Final Thoughts

With these five DIY Halloween garden projects, your outdoor space can become a spooky, enchanting destination for the season. From glowing pumpkins and floating ghosts to cobwebs and witchy potion bottles, these projects are budget-friendly, creative, and customizable.

The best part? These DIY decorations allow you to mix your love of gardening with seasonal fun, turning your backyard into a playful, haunted wonderland. With a little imagination and effort, your garden can be the highlight of Halloween, delighting guests of all ages and creating memories that last long after the candy is gone.

3 Halloween Decor Ideas for Your Vertical Succulent Wall

3 Halloween Decor Ideas for Your Vertical Succulent Wall

Halloween isn’t just about pumpkin patches and haunted houses — it’s also the perfect time to get creative with your indoor and outdoor vertical succulent walls. These lush, living walls are a favorite among gardeners and interior decorators alike, and with the right touches, they can easily transform into spooky, festive masterpieces for the Halloween season.

Succulents naturally bring texture, color, and depth to a space, and their versatility makes them perfect for holiday decorating. In this article, we’ll explore three Halloween décor ideas specifically designed for vertical succulent walls, complete with step-by-step tips, creative inspiration, and ways to keep your plants healthy while adding festive flair.


1. Spooky Miniature Pumpkin Display

Pumpkins are the quintessential Halloween decoration, and when combined with the vertical structure of a succulent wall, they create an eye-catching, seasonal focal point.

How to Create a Pumpkin Succulent Feature:

Step 1: Choose Your Pumpkins

  • Miniature Pumpkins: Select small, lightweight pumpkins that won’t overpower the wall.
  • Variety in Color: Mix traditional orange pumpkins with white “ghost pumpkins” and striped varieties for visual interest.
  • Alternative: Use faux pumpkins for a longer-lasting display, especially if you want to prevent damage to your succulents.

Step 2: Placement on the Wall

  • Use small shelves, sturdy hooks, or mounted trays to hold the pumpkins securely.
  • Place pumpkins among clusters of succulents, letting greenery peek around the edges for a natural look.
  • Stagger the heights and positions for a dynamic, layered effect.

Step 3: Add Lighting

  • Tiny LED lights or fairy lights wrapped around the pumpkins and succulents create a soft, eerie glow at night.
  • Avoid harsh lights, which can scorch succulents; warm, low-intensity lights are ideal.

Creative Tip: Carve tiny faces or designs on miniature pumpkins. Their proximity to the succulents gives a “peek-a-boo” effect, making the wall whimsical and spooky.


2. Creepy Crawlies Among the Succulents

Nothing says Halloween like a few harmless creepy crawlies. Adding small, realistic insects or spiders to your vertical succulent wall can transform it into a hauntingly detailed centerpiece.

How to Add Creepy Crawlies:

Step 1: Choose Your Decorations

  • Plastic Spiders: Vary sizes for a natural look. Place them in crevices between succulents.
  • Fake Insects: Beetles, ants, or centipedes add subtle eeriness.
  • Glow-in-the-Dark Stickers: Stick them on pots or the backing of the wall to make them visible at night.

Step 2: Placement Tips

  • Cluster a few spiders crawling along trails of succulents.
  • Attach small creepy crawlies to thin wires, letting them dangle among the plants for movement.
  • Avoid overcrowding — a few well-placed insects are more visually effective than filling the wall entirely.

Step 3: Combine With Plants

  • Use succulents with rich textures, like Echeveria rosettes or Haworthia spikes, to enhance the “nesting” look for your spiders.
  • Plants with darker foliage, such as purple or burgundy succulents, naturally amplify the spooky vibe.

Creative Tip: Mix in faux cobwebs between the succulents for an extra Halloween touch. This creates a haunted, abandoned-garden effect without harming the plants.


3. Gothic and Witchy Accents

Vertical succulent walls aren’t just for nature lovers — they can become mini witchy landscapes with the right gothic-inspired decorations.

How to Add Gothic Charm:

Step 1: Miniature Witch Hats and Brooms

  • Place tiny, decorative witch hats on top of larger succulents for a whimsical effect.
  • Attach miniature brooms using thin wires so they appear as if leaning naturally against the plants.

Step 2: Gothic Props

  • Mini Cauldrons: Hang small cauldrons or pots from the succulent wall frame. Fill them with moss, pebbles, or tiny orange fairy lights.
  • Skulls and Bones: Lightweight, artificial skulls can be nestled among the plants. Choose neutral colors that contrast with green foliage.

Step 3: Create a Mystical Atmosphere

  • Use purple or orange LED string lights around the edges of the succulent wall.
  • Add small decorative fog or dry ice in planters at the base of the wall for a mystical effect.
  • Use dark pebbles or moss to line planters and pathways within the wall for an old, haunted look.

Pro Tip: For an elegant twist, use metallic accents like gold-painted leaves or miniature silver cauldrons. These can create a gothic yet sophisticated Halloween theme that still highlights your succulents.


Maintaining Your Succulent Wall During Halloween

Decorating a vertical succulent wall for Halloween is fun, but you also want to keep your plants healthy. Here are some key tips:

  1. Avoid Water Damage:
    • Be careful with water-based props or fog machines. Succulents need well-drained soil to prevent rot.
  2. Limit Heavy Props:
    • Mini pumpkins, skulls, and cauldrons should be lightweight and securely attached. Overweight items can damage plants or the wall structure.
  3. Lighting Safety:
    • Use LED lights instead of candles to prevent heat damage to plants.
    • Avoid string lights that get too hot or touch succulent leaves directly.
  4. Check Sunlight:
    • Make sure decorations don’t block necessary sunlight. Succulents still need light to thrive even during seasonal décor changes.
  5. Seasonal Rotation:
    • Remove Halloween decorations after the season. Store them properly for reuse, ensuring your succulent wall remains healthy and attractive year-round.

Creative Display Ideas

Here are a few creative ways to combine the three main ideas for maximum Halloween impact:

  • Haunted Harvest Wall: Combine miniature pumpkins, LED lights, and creeping spider props for a fun, harvest-themed spooky wall.
  • Witch’s Garden: Use gothic accents like cauldrons and tiny witch hats with dark foliage succulents. Add glow-in-the-dark insects for a magical, eerie feel.
  • Nighttime Glow Wall: Focus on lighting by arranging small pumpkins, LED string lights, and ghostly accents to make your succulent wall the focal point of your garden at night.

Extra Tip: Mix textures and colors in succulents — purple, red, and gray-toned varieties naturally complement Halloween décor.


Final Thoughts: Make Your Vertical Succulent Wall a Halloween Showstopper

A vertical succulent wall offers a unique canvas for Halloween decorations, blending living plants with festive creativity. By combining mini pumpkins, creepy crawlies, and gothic accents, you can design a display that is playful, spooky, and elegant.

Remember to prioritize plant health while decorating and to experiment with layering textures, colors, and props for maximum visual impact. Whether your style leans whimsical, gothic, or classic Halloween, these three ideas can transform your vertical succulent wall into a living celebration of the season.

This Halloween, let your garden wall tell a story of mystery and enchantment — a perfect blend of natural beauty and seasonal spookiness.

6 Ways to Create a Haunted Garden This Halloween

6 Ways to Create a Haunted Garden This Halloween

Halloween isn’t just about costumes, candy, and jack-o’-lanterns — it’s an entire atmosphere of spooky delight. While front porches often get the spotlight, your garden is the perfect canvas for crafting a haunting outdoor experience. With the right mix of plants, props, and lighting, you can turn your backyard into a chilling wonderland that impresses trick-or-treaters and thrills visitors.

In this guide, we’ll explore six creative ways to create a haunted garden this Halloween, complete with tips, tricks, and design ideas to bring your spooky vision to life. Whether you prefer eerie elegance or playful scares, these strategies will transform your garden into a Halloween masterpiece.


1. Transform Your Entrance Into a Portal of Mystery

The first step to a haunted garden is creating an entrance that immediately sets the mood. Think of it as a gateway to another realm, where guests feel the thrill of the unknown.

How to Do It:

  • Spooky Archway: Use twisted branches, dried vines, or black-painted sticks to form an arch over your garden gate. Add hanging cobwebs or tattered fabric to give it an abandoned look.
  • Dim Lighting: Line the entryway with flickering LED lanterns or orange string lights. Avoid bright white lights — dim, warm tones enhance the eerie ambiance.
  • Sound Effects: Install a motion-activated speaker that plays creaking doors, ghostly whispers, or distant howls. This subtle audio cue heightens anticipation as guests enter.

Pro Tip: Scatter autumn leaves or artificial fog around the entrance to create a mysterious, mystical vibe.


2. Create a Haunted Pathway

A garden path can be transformed into a spine-tingling journey that guides visitors through your haunted landscape.

Steps to a Ghostly Walkway:

  • Line with Lights: Place lanterns, glowing pumpkins, or solar-powered LED lights along the path. Use colored lighting like green, purple, or orange for a supernatural effect.
  • Add Motion and Sound: Motion-activated props — like crows, skeletons, or hanging bats — can startle visitors as they move down the path.
  • Use Fog: Small fog machines or dry ice effects create a misty path, perfect for a haunted garden feel.

Extra Touch: Scatter fake leaves, small branches, or gravel for sound effects that crunch or crackle underfoot. This sensory layer adds to the immersive experience.


3. Incorporate Spooky Plants and Foliage

Your garden itself can be a major part of the haunted aesthetic. Certain plants naturally give a chilling vibe due to their colors, shapes, or textures.

Recommended Spooky Plants:

  • Black Mondo Grass: Dark, glossy leaves that resemble shadows.
  • Bloodleaf (Iresine herbstii): Vivid red foliage evokes a dramatic, haunting atmosphere.
  • Ghost Plant (Graptopetalum): Silvery succulents that glow subtly under moonlight.
  • Bat Flower (Tacca chantrieri): Flowers shaped like bats, perfect for dramatic focal points.

Design Tip: Group these plants with pumpkins, skull-shaped planters, or cobweb-covered branches for a layered and immersive haunted look.


4. Build a Mini Graveyard

No haunted garden is complete without a graveyard. A small corner or section of your garden can become a chilling cemetery scene that delights and surprises.

How to Set It Up:

  • Tombstones: Use foam, cardboard, or wood to create tombstones. Paint them gray, crack the edges, and tilt them at different angles for a realistic effect.
  • Skeletons and Bones: Scatter plastic skeleton parts or position them as if emerging from the ground.
  • Moss and Twigs: Add dried moss or twigs around tombstones for an aged, abandoned feel.
  • Lighting: Soft LED candles or lanterns placed around the tombstones cast eerie shadows and highlight the scene.

Creative Touch: Personalize tombstones with humorous or eerie epitaphs such as “R.I.P. Here Lies Pumpkin Pete” or “I Told You I Was Sick.”


5. Introduce Ghosts and Hanging Spirits

Floating ghosts are a classic Halloween element that can be adapted for a garden setting with surprisingly simple materials.

DIY Floating Ghosts:

  • Materials Needed: White fabric or old sheets, foam balls or balloons for heads, string or fishing line, and optional glow sticks or LED lights.
  • Assembly: Drape the fabric over the foam ball to form a ghost’s head. Draw a simple face or leave it blank for an eerie effect.
  • Placement: Hang from tree branches, porch eaves, or shepherd’s hooks. Vary heights for a natural, floating appearance.
  • Lighting: Place a glow stick or small solar light inside the head for an ethereal glow at night.

Extra Effect: Hang lightweight chimes or small wind spinners to add gentle movement and create a sense of life in your floating spirits.


6. Add Finishing Touches: Sound, Scents, and Props

The final step in creating a haunted garden is layering sound, scent, and props to engage multiple senses.

Sound:

  • Play subtle spooky sounds like distant thunder, owl calls, wind howls, or ghostly whispers.
  • Hide Bluetooth speakers in bushes or behind planters for a more immersive effect.

Scent:

  • Use candles, incense, or essential oils with musky, earthy aromas like patchouli, cedarwood, or sandalwood to give your garden a mysterious fragrance.

Props:

  • Pumpkin displays: Carve or paint pumpkins, or stack them to create a focal point.
  • Skeletons: Place skeletons in humorous or creepy positions, like gardening or peeking from bushes.
  • Vintage Décor: Repurpose old lanterns, watering cans, or wooden crates — paint them black or gray for a haunted look.

Pro Tip: Balance spooky and charming elements to create a Halloween garden that’s mysterious, fun, and inviting rather than overwhelmingly scary.


Bonus Tips for a Successful Haunted Garden

  1. Use Layers: Combine plants, lighting, props, and sound in layers to create depth and mystery.
  2. Weatherproof Decorations: Use durable materials and secure props to prevent wind or rain from spoiling your display.
  3. Staggered Lighting: Use dim lights and shadows strategically; don’t over-illuminate — the unknown is scarier than bright lights.
  4. Eco-Friendly Props: Reuse pumpkins, sheets, and containers, and avoid plastics that can damage the environment.
  5. Path Safety: Ensure pathways are safe for walking, even in dim light, while maintaining the spooky vibe.

Final Thoughts

A haunted garden is more than just a collection of decorations — it’s a fully immersive experience. With creative use of plants, eerie lighting, ghostly props, and sound, your garden can become a magical, spooky escape for the Halloween season.

From transforming your entrance into a mystical portal to creating a chilling graveyard or floating spirits, these six strategies give you everything you need to craft a haunted garden that delights visitors and celebrates the eerie elegance of autumn.

So, grab your lanterns, hang your ghosts, and let your garden come alive with Halloween magic. Whether spooky, playful, or a little bit of both, your haunted garden will be the highlight of the season — a space where imagination, creativity, and a touch of fear meet under the moonlit sky.


7 Spooky Plants to Complete Your Halloween Garden

7 Spooky Plants to Complete Your Halloween Garden

As October drifts in and the air grows crisp, gardens begin to take on a mysterious charm — shadows stretch longer, leaves rustle like whispers, and the scent of damp earth fills the night. It’s the perfect time to embrace the spooky season and let your garden join in on the Halloween fun!

While fake cobwebs, glowing pumpkins, and skeleton props create instant chills, the true magic of a Halloween garden lies in its living elements — the plants themselves. With their unusual colors, ghostly shapes, and eerie names, certain plants can bring haunting beauty and spine-tingling atmosphere to your outdoor space.

Whether you want a gothic-inspired garden or a whimsical witch’s herb patch, these seven spooky plants will give your garden a Halloween twist that’s both eerie and enchanting.


1. Black Mondo Grass (Ophiopogon planiscapus ‘Nigrescens’)

If there’s one plant that sets the tone for a haunting garden, it’s Black Mondo Grass. With its inky-black, ribbon-like leaves, this plant looks like something out of a dark fairy tale.

Why It’s Spooky

Black Mondo Grass’s dramatic color makes it seem almost unnatural — a living shadow among your greenery. It’s the perfect plant to create contrast in your Halloween display, especially when paired with bright orange pumpkins or pale white flowers.

How To Grow It

  • Sunlight: Partial shade to full sun.
  • Soil: Well-draining and slightly acidic.
  • Water: Moderate moisture; don’t let it dry out completely.
  • Care Tip: Mulch with dark compost to enhance its eerie color.

Plant it along pathways or around tombstone props for a sleek, gothic effect. It’s low-maintenance, evergreen, and perfect for year-round dark elegance.


2. Bat Flower (Tacca chantrieri)

Nothing says Halloween like a flower that looks like a bat in flight! The Bat Flower is one of nature’s most otherworldly creations — with its deep purple petals and long whisker-like tendrils, it’s a showstopper for any spooky garden.

Why It’s Spooky

Its dramatic shape resembles a bat spreading its wings, and its moody blackish-purple blooms make it look almost supernatural. In dim lighting, it appears to hover like a dark spirit among the leaves.

How To Grow It

  • Sunlight: Indirect light or partial shade.
  • Soil: Moist, well-draining, rich in organic matter.
  • Water: Keep soil consistently damp, but not soggy.
  • Care Tip: Loves humidity — mist regularly or grow in a shaded corner.

This tropical plant thrives in warm climates, but if you’re in a cooler area, you can grow it in containers and bring it indoors when temperatures drop.

Bonus Idea: Place a small spotlight beneath the Bat Flower for a dramatic night-time glow — it’ll look like something straight out of a haunted forest!


3. Devil’s Backbone (Euphorbia tithymaloides)

This bizarrely shaped plant earns its chilling name from its zigzagging stems that resemble a spine — hence, Devil’s Backbone. Its unusual structure and vibrant red-tipped leaves make it a perfect conversation piece for your Halloween display.

Why It’s Spooky

The name alone sets the tone, but its twisted, almost skeletal growth pattern makes it look like it belongs in a witch’s greenhouse. In some cultures, it’s even believed to ward off evil spirits!

How To Grow It

  • Sunlight: Prefers bright, indirect sunlight.
  • Soil: Well-draining potting mix (cactus mix works well).
  • Water: Allow soil to dry between watering.
  • Care Tip: Handle with care — its milky sap can be irritating to skin.

Plant it in quirky skull-shaped pots or alongside dark succulents for an extra creepy aesthetic. Indoors or outdoors, this plant gives major Halloween energy all year long.


4. Dracula Orchid (Dracula simia)

For those who adore gothic elegance, few plants rival the Dracula Orchid, also known as the “Monkey Orchid.” Its eerie, bat-like flowers — complete with fang-like patterns — are hauntingly beautiful.

Why It’s Spooky

This orchid’s name and appearance make it a Halloween superstar. The flower’s shape and dark markings resemble a tiny vampire face — it’s as if Count Dracula himself were hiding in your garden.

How To Grow It

  • Sunlight: Indirect, filtered light.
  • Soil: Moist, well-aerated orchid mix.
  • Water: Keep evenly moist; never let it dry out.
  • Care Tip: Prefers cool, humid environments — perfect for shaded patios or terrariums.

Pro Tip: Pair Dracula Orchids with mossy stones and a misting system to create a mysterious, foggy “vampire corner” in your garden.


5. Ghost Plant (Graptopetalum paraguayense)

Ethereal and otherworldly, the Ghost Plant is a pale, silvery succulent that looks like it was kissed by moonlight. Its ghostly glow and spiral rosettes make it ideal for a Halloween-themed garden display.

Why It’s Spooky

The plant’s powdery, frosted appearance gives it a spectral quality — especially under the moonlight. When mixed with darker plants, it creates a ghostly contrast that’s both haunting and beautiful.

How To Grow It

  • Sunlight: Full sun to partial shade.
  • Soil: Sandy, well-draining cactus mix.
  • Water: Water deeply but infrequently; let soil dry completely between watering.
  • Care Tip: Too much shade can cause it to lose its silvery hue.

Halloween Idea: Plant Ghost Plants in black containers, surrounded by dark gravel or black mondo grass, to enhance their pale, haunting look.

They’re easy to care for, drought-tolerant, and stunning — a subtle nod to the supernatural without needing fake cobwebs.


6. Bloodleaf (Iresine herbstii)

If your Halloween aesthetic leans toward bold and dramatic, Bloodleaf is the plant for you. Its crimson-red foliage looks like it’s glowing under moonlight — or dripping with something far more sinister.

Why It’s Spooky

The name “Bloodleaf” says it all. Its vivid red veins and leaves create an intense, gothic contrast that’s perfect for Halloween displays. It’s as if your garden itself has come alive with dark energy.

How To Grow It

  • Sunlight: Full sun for the deepest color.
  • Soil: Fertile, well-drained soil.
  • Water: Keep consistently moist, but avoid soggy soil.
  • Care Tip: Pinch tips regularly to keep it bushy and vibrant.

Bonus Idea: Combine Bloodleaf with black plants like Black Mondo Grass or dark purple basil for a strikingly sinister display.


7. Witch Hazel (Hamamelis virginiana)

Finally, no Halloween garden is complete without Witch Hazel, the plant whose name alone evokes spells, potions, and midnight rituals. Its golden, spidery blooms appear in late autumn — just when most other plants have faded away.

Why It’s Spooky

Its twisted branches and fragrant yellow flowers look like a spell has just been cast. Historically, Witch Hazel has been used in folk medicine and witchcraft rituals, adding mystical allure to your Halloween setup.

How To Grow It

  • Sunlight: Full sun to partial shade.
  • Soil: Moist but well-draining soil.
  • Water: Regular watering, especially during dry spells.
  • Care Tip: Prune lightly after flowering to maintain its shape.

Pro Tip: Place Witch Hazel near your entryway or pathway to let its sweet fragrance and wild-looking flowers greet Halloween visitors.


Bonus: Designing Your Spooky Garden

Here’s how to tie all your eerie plants together for maximum Halloween charm:

  1. Create Contrast: Mix light and dark foliage — Ghost Plant beside Black Mondo Grass or Bloodleaf near pale pumpkins.
  2. Use Gothic Accents: Add wrought iron fences, lanterns, or gravestone decorations among plants.
  3. Layer Lighting: Use soft amber or purple lights to highlight textures and shadows.
  4. Add Movement: Hang ghostly fabrics or wind chimes among your plants for an atmospheric effect.
  5. Incorporate Scent: Witch Hazel and night-blooming jasmine add an enchanting, mysterious aroma.

Your garden will become a living Halloween display — one that continues to evolve long after the trick-or-treaters have gone home.


Final Thoughts: Nature’s Dark Side Can Be Beautiful

Halloween isn’t just about spooky props — it’s about atmosphere, mystery, and a touch of the unexpected. By choosing plants with dramatic forms, eerie names, and ghostly colors, you can create a garden that celebrates the magic of the season naturally.

From the black shimmer of Mondo Grass to the haunting blooms of Dracula Orchid, these seven spooky plants turn your garden into a living work of Halloween art.

So this October, light the lanterns, scatter some pumpkins, and let your garden come alive with the spirit of the season — dark, enchanting, and irresistibly spooky.