The Best Flowers To Plant Near Your Vegetable Garden

The Best Flowers To Plant Near Your Vegetable Garden

A thriving vegetable garden isn’t just about leafy greens, juicy tomatoes, or sweet carrots. Surrounding your crops with the right flowers can boost growth, deter pests, attract pollinators, and add bursts of color that make your garden a joy to spend time in. Companion planting with flowers is a proven strategy that combines beauty and function—helping your vegetables flourish naturally.

Here’s a guide to the best flowers to plant near your vegetable garden, why they help, and how to maximize their benefits.


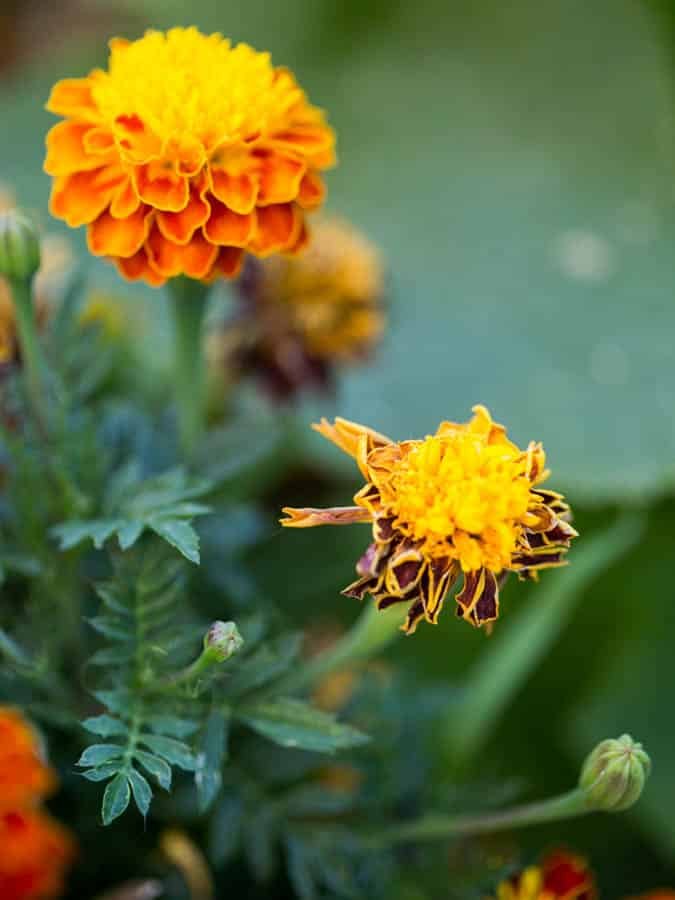
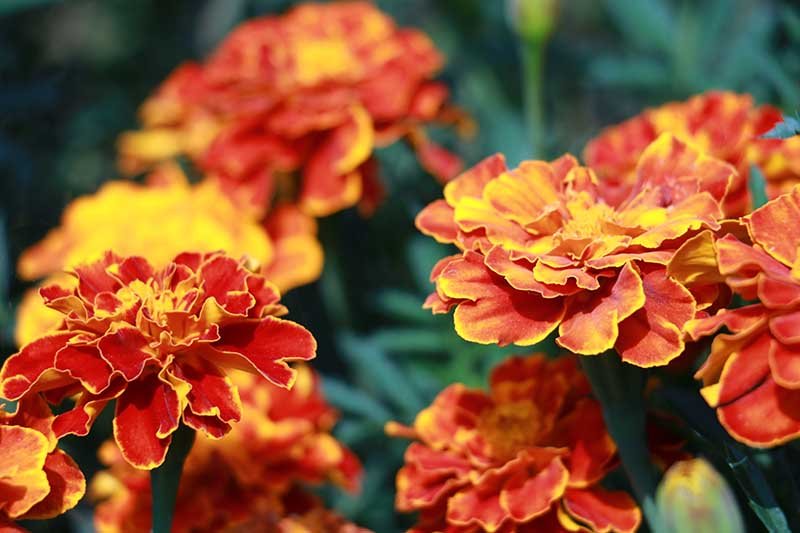
1. Marigolds — The Garden Guardian

Why they work:
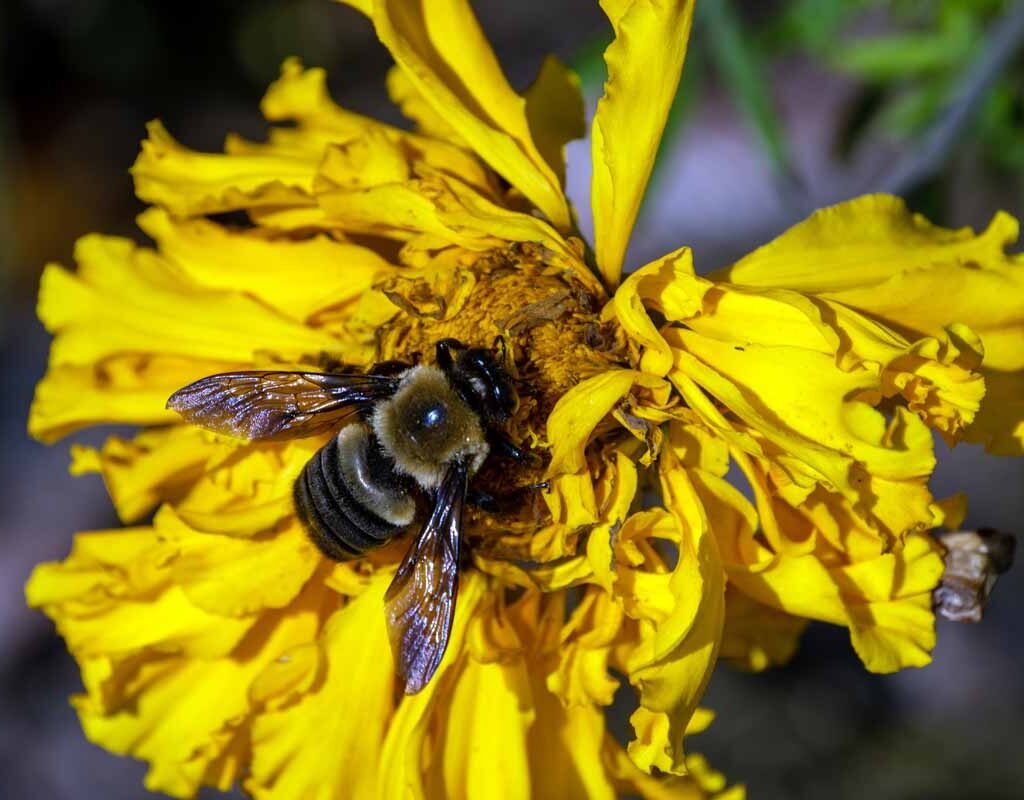
Marigolds are famous for their ability to repel pests, especially nematodes and certain insects that attack tomatoes, peppers, and beans. Their strong scent confuses pests while attracting beneficial insects like hoverflies, ladybugs, and bees.

Best pairings:

  • Tomatoes
  • Peppers
  • Beans
  • Cucumbers

Planting tips:

  • Space marigolds around the perimeter of your vegetable beds.
  • Choose French marigolds (Tagetes patula) for smaller spaces and African marigolds (Tagetes erecta) for taller borders.
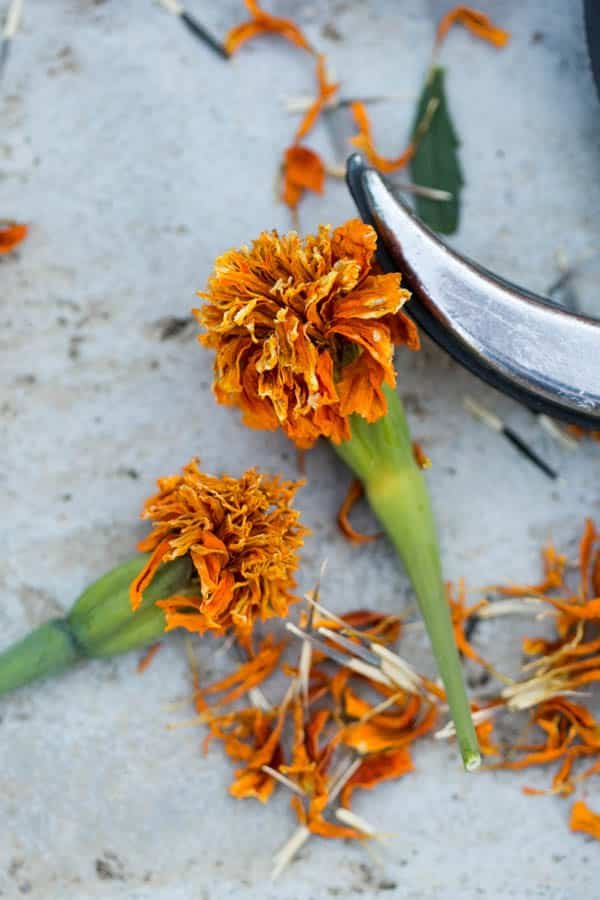
  • Deadhead spent blooms to encourage continuous flowering and maximum pest protection.

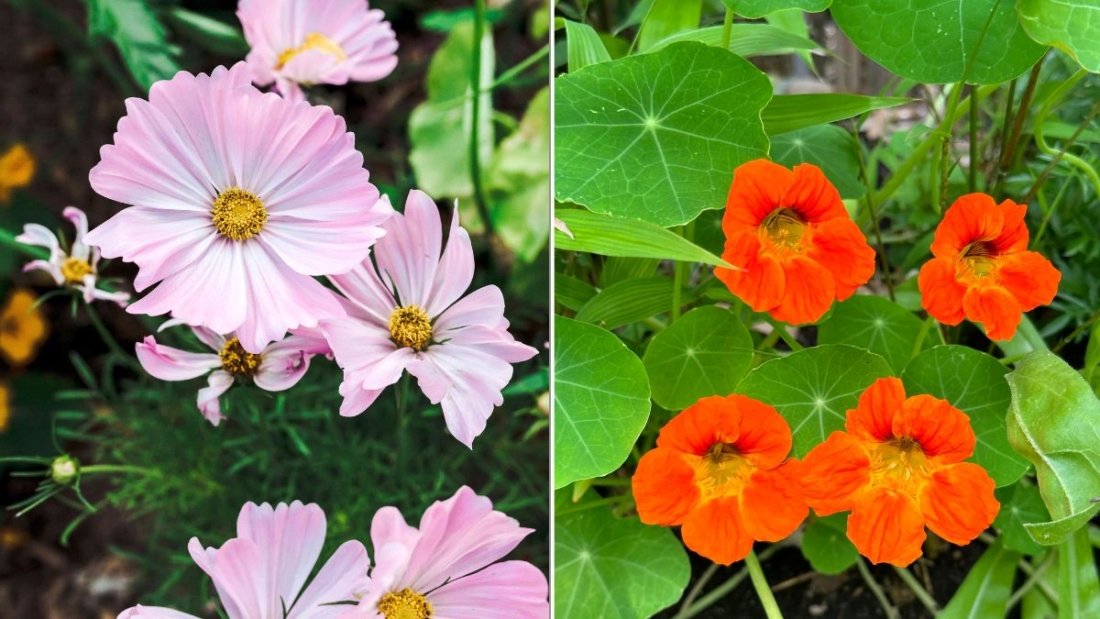
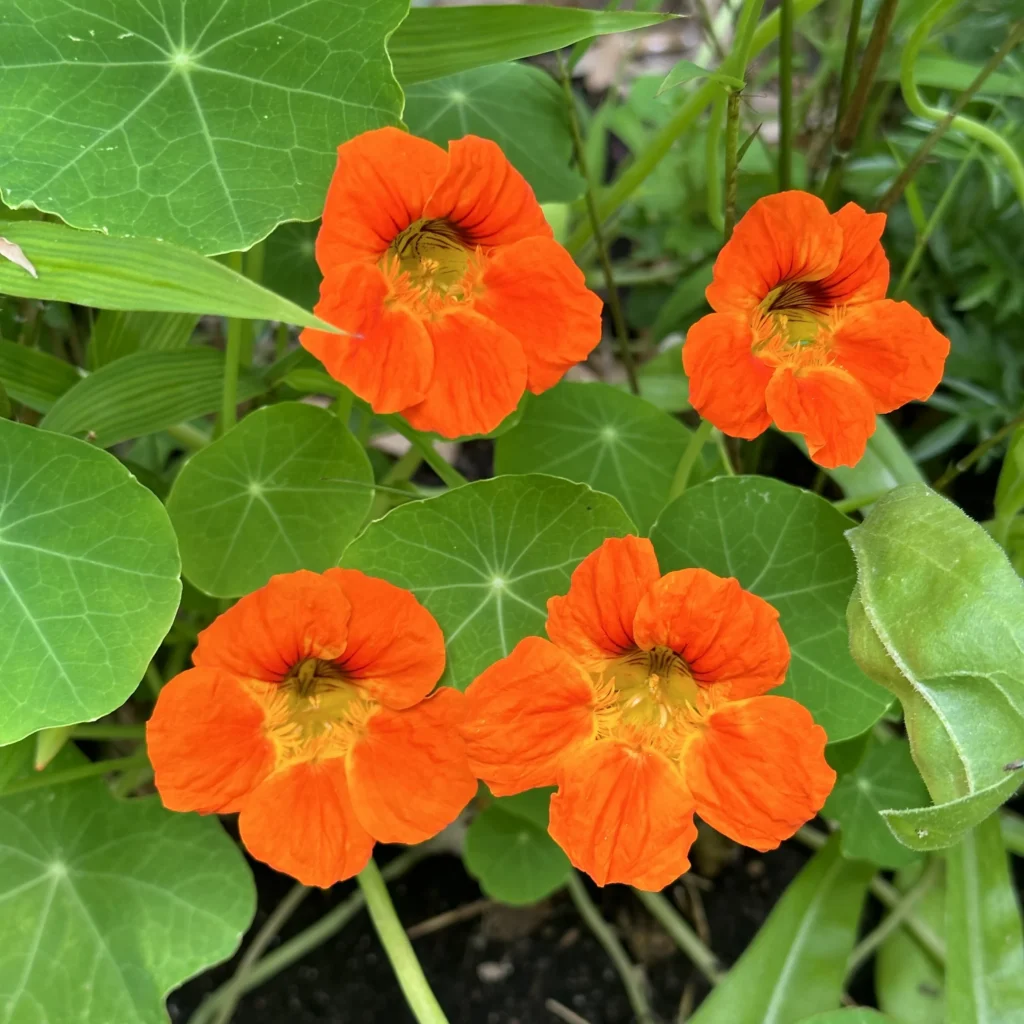
2. Nasturtiums — The Edible Trap Crop

Why they work:
Nasturtiums act as a trap crop, attracting aphids, whiteflies, and other pests away from your vegetables. Their bright, edible flowers also draw pollinators like bees, improving vegetable yield.

Best pairings:

  • Tomatoes
  • Cabbage
  • Radishes
  • Cucumbers

Planting tips:

  • Plant along vegetable edges or interspersed within crops.
  • Nasturtiums grow well in poor soil and require minimal care.
  • Their trailing varieties can be used as ground cover to suppress weeds.

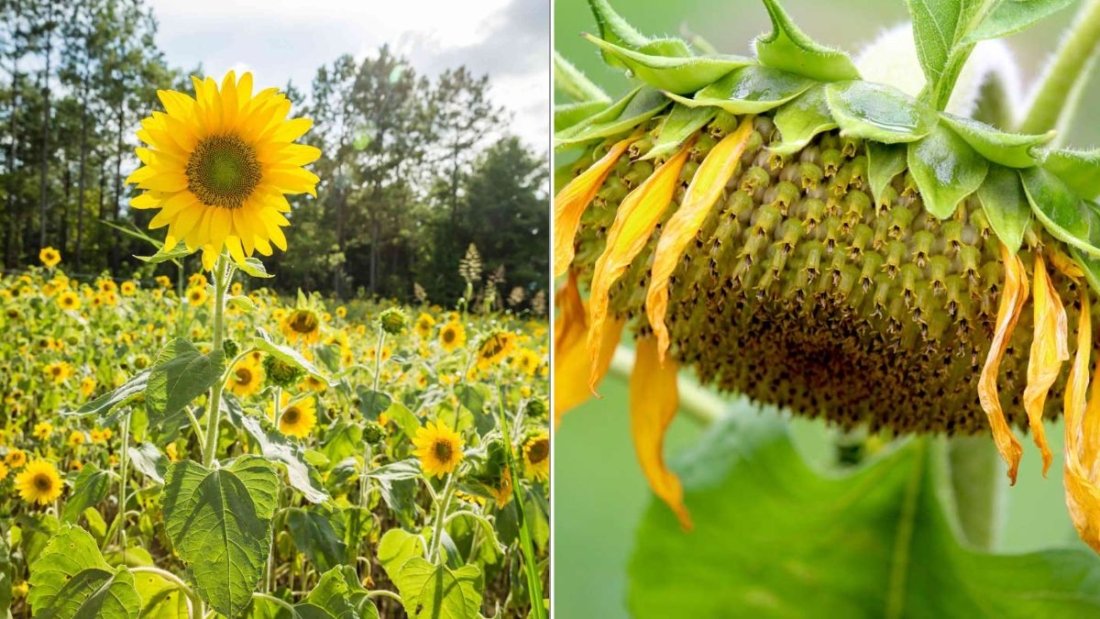
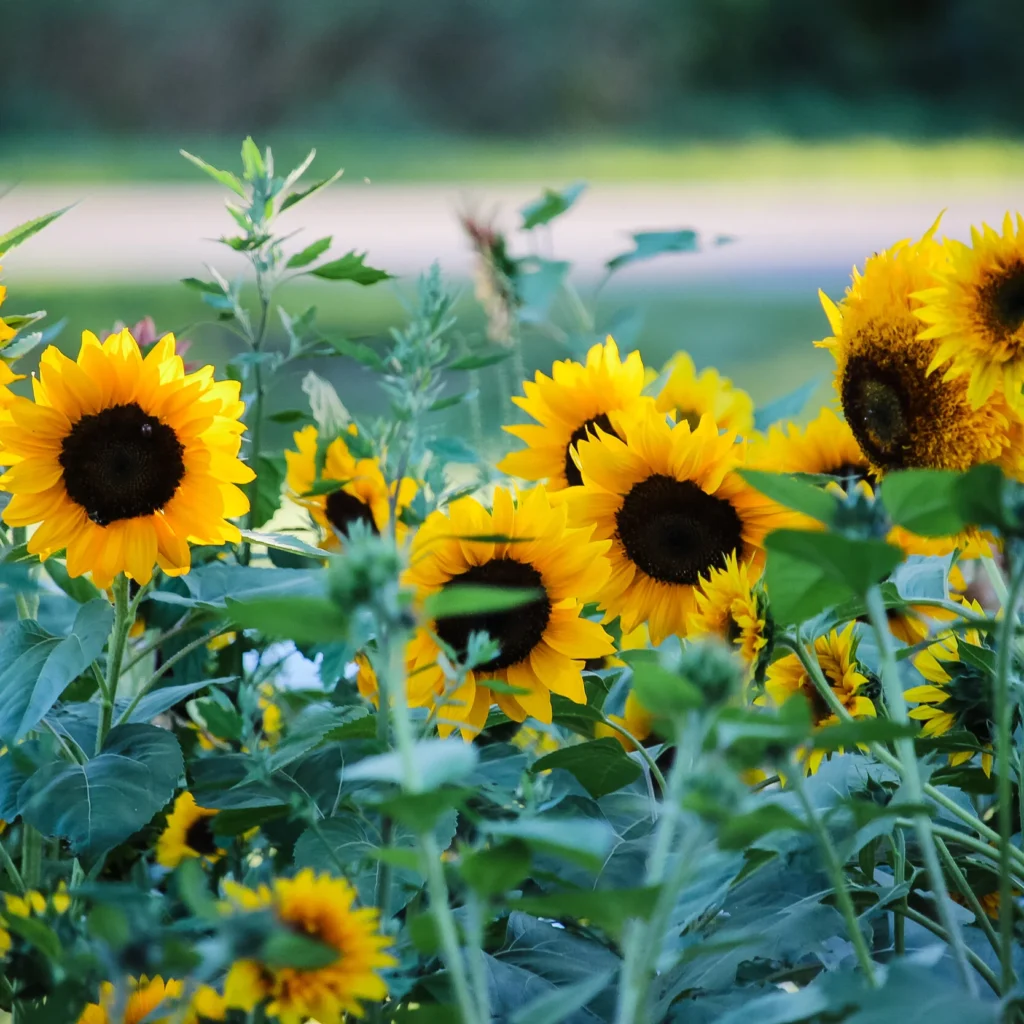
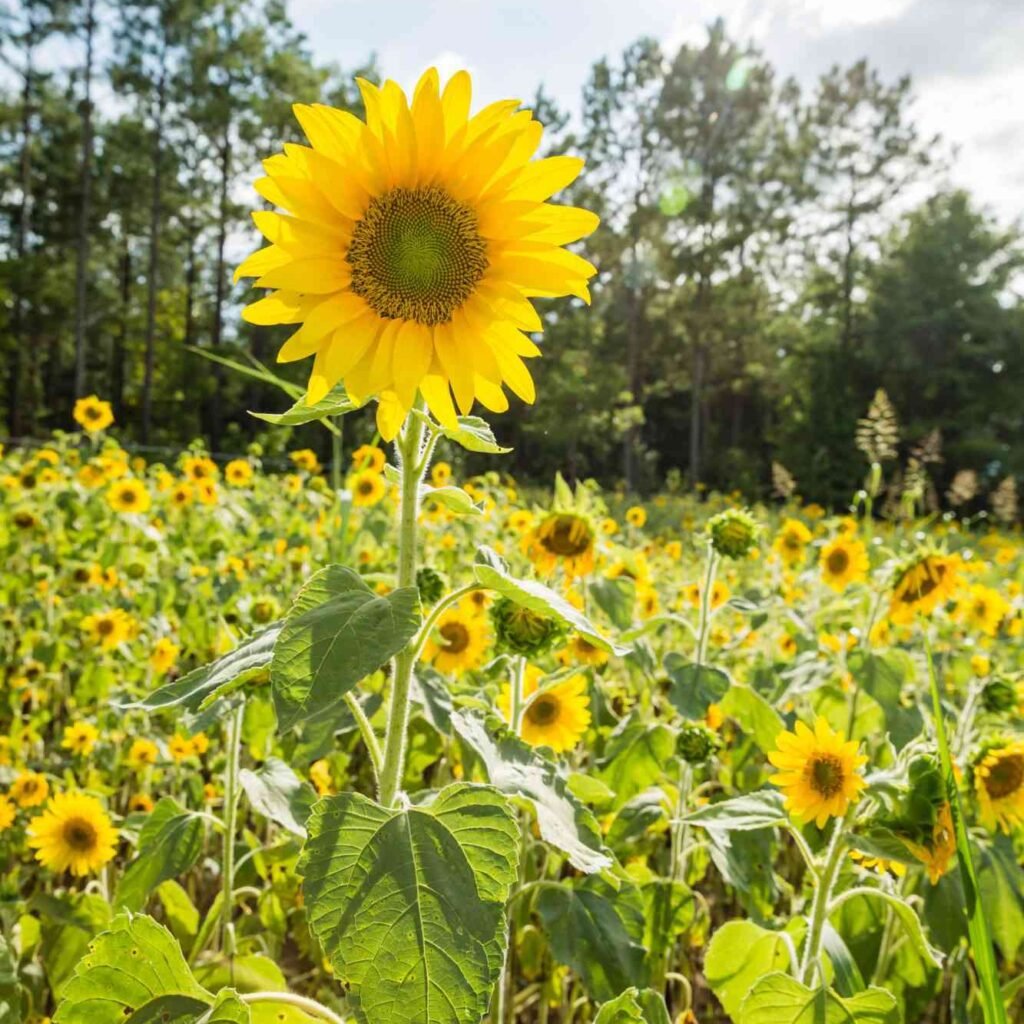
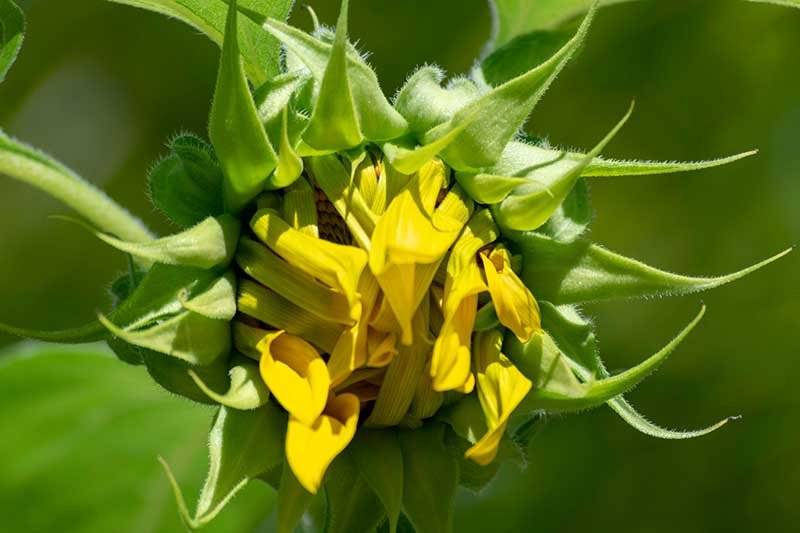
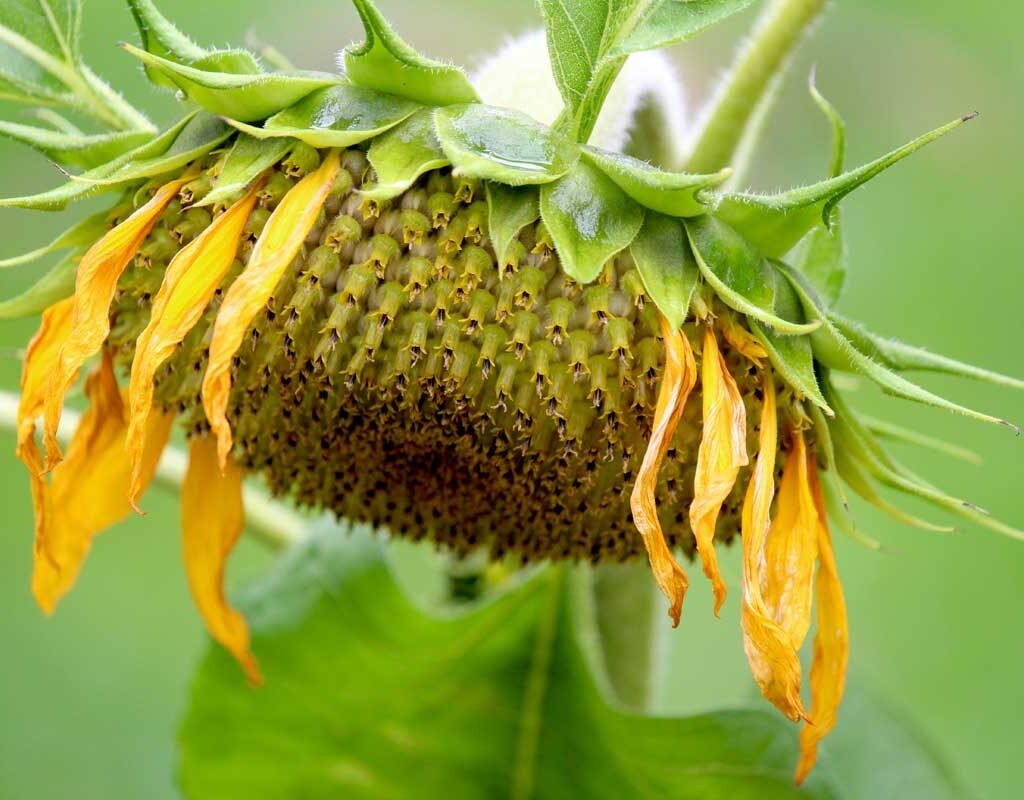
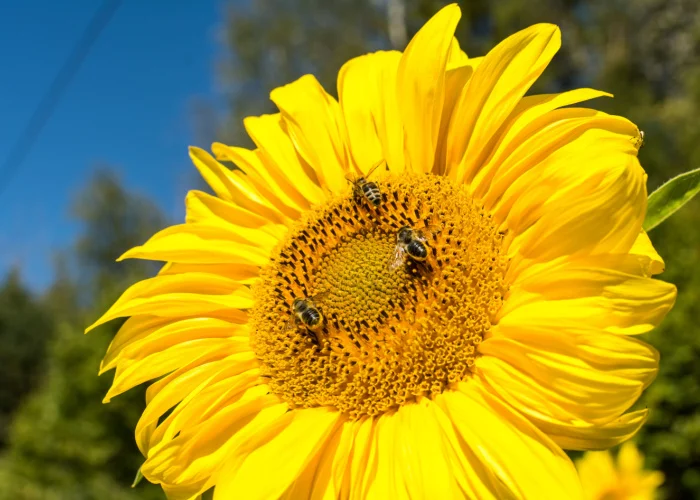
3. Sunflowers — Pollinator Magnets and Natural Supports

Why they work:
Sunflowers attract bees and other pollinators, which are essential for fruiting vegetables like tomatoes, squash, and beans. Tall sunflower varieties can also provide natural support for climbing plants such as pole beans.

Best pairings:

  • Pole beans
  • Cucumbers
  • Squash

Planting tips:

  • Plant sunflowers on the south side of your garden so they don’t shade other vegetables.
  • Choose sturdy, disease-resistant varieties if you plan to use them as support.
  • Space adequately to allow airflow and prevent fungal issues.

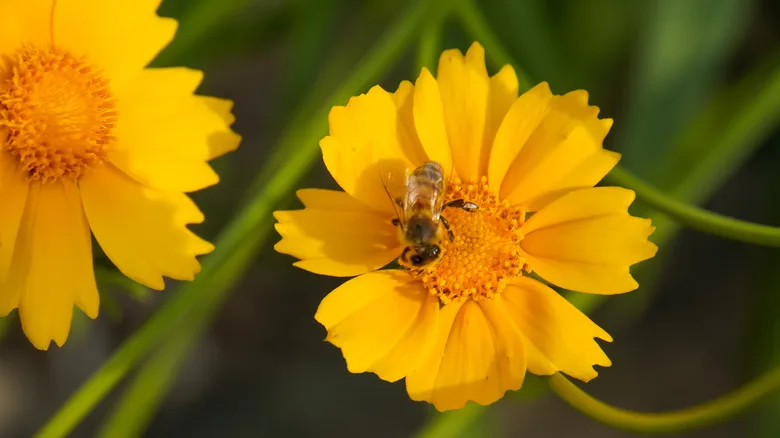
4. Calendula — The Continuous Bloomer

Why they work:
Calendula, or pot marigold, attracts beneficial insects such as lacewings, parasitic wasps, and bees. These insects prey on common garden pests, providing natural pest control. Calendula also produces edible petals and flowers almost all season long.

Best pairings:

  • Lettuce
  • Carrots
  • Tomatoes
  • Brassicas

Planting tips:

  • Sow seeds directly in the garden or start indoors for early blooms.
  • Deadhead regularly to encourage continuous flowering.
  • Calendula thrives in full sun but tolerates partial shade.

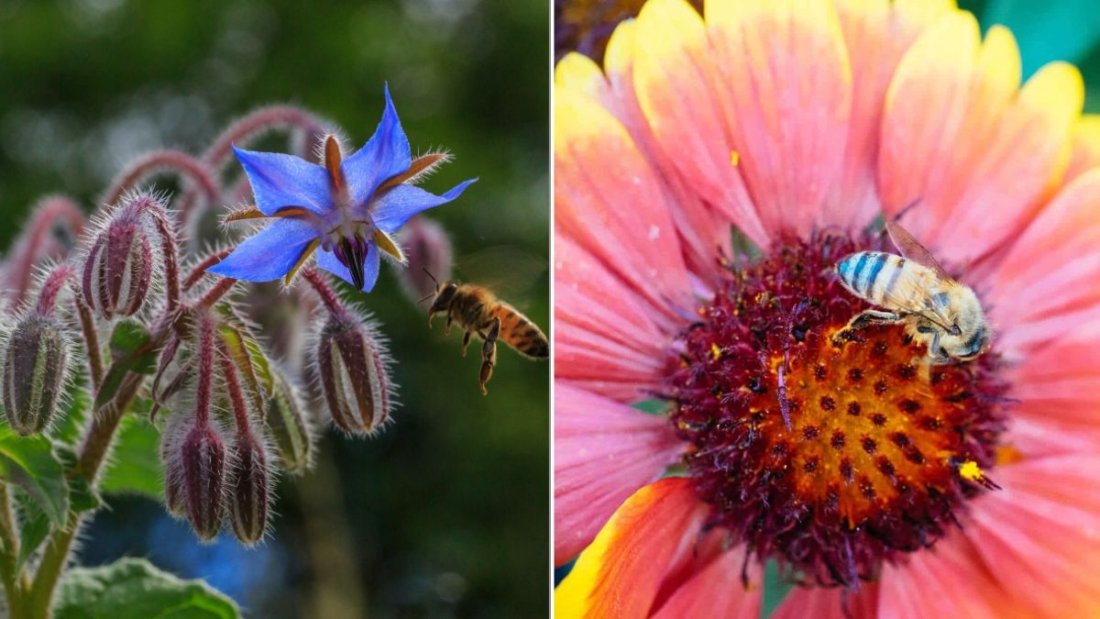
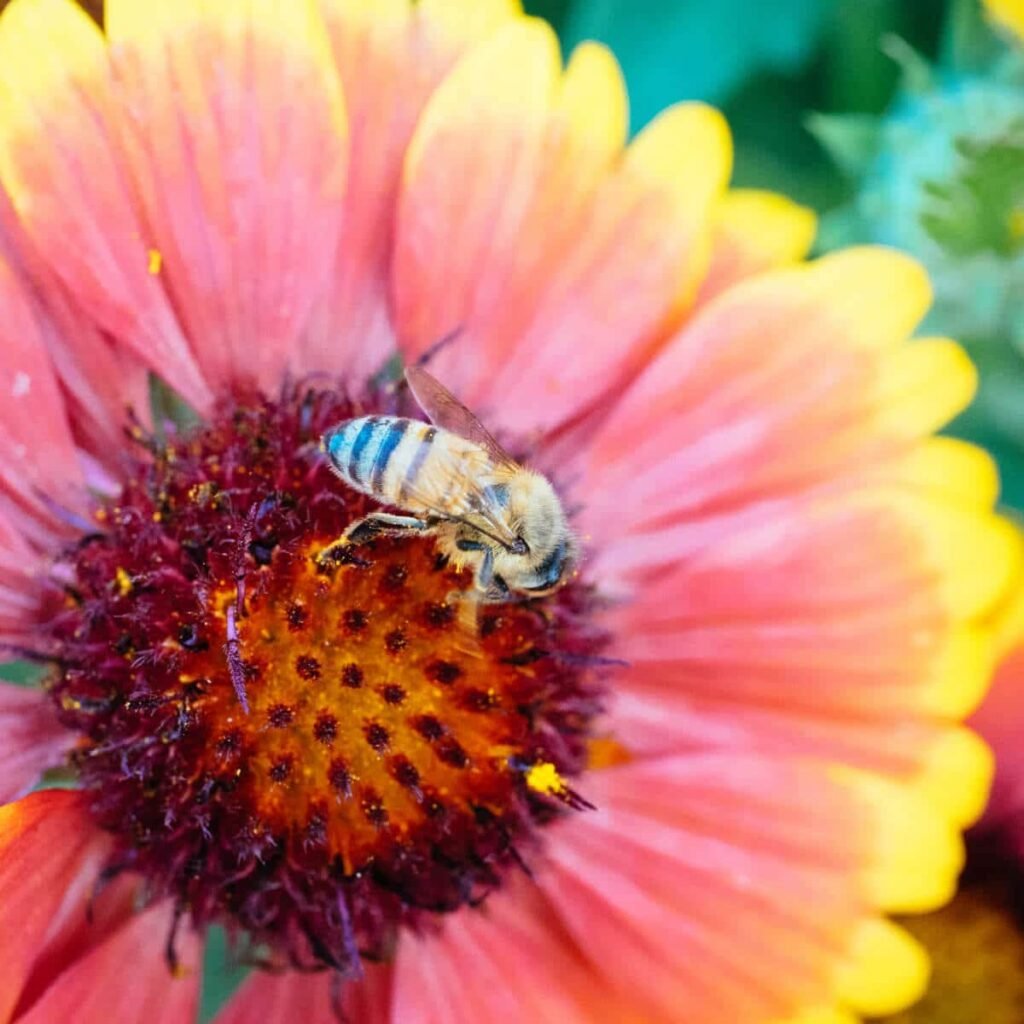
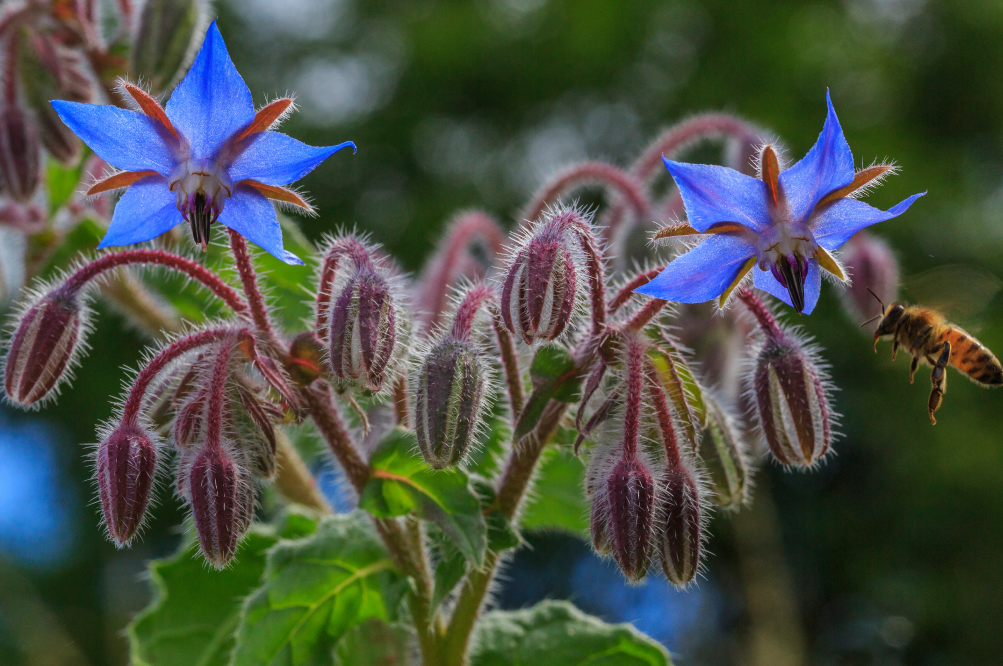
5. Borage — The Mineral Booster

Why they work:
Borage flowers are rich in nectar, attracting bees that improve pollination rates for tomatoes, squash, and cucumbers. Borage also adds minerals to the soil—especially potassium—which benefits nearby vegetables.

Best pairings:

  • Tomatoes
  • Squash
  • Strawberries

Planting tips:

  • Sow seeds directly in the soil after the last frost.
  • Borage grows quickly and can self-seed; remove excess seedlings to prevent overcrowding.
  • Use as a companion border or interplant with vegetables.

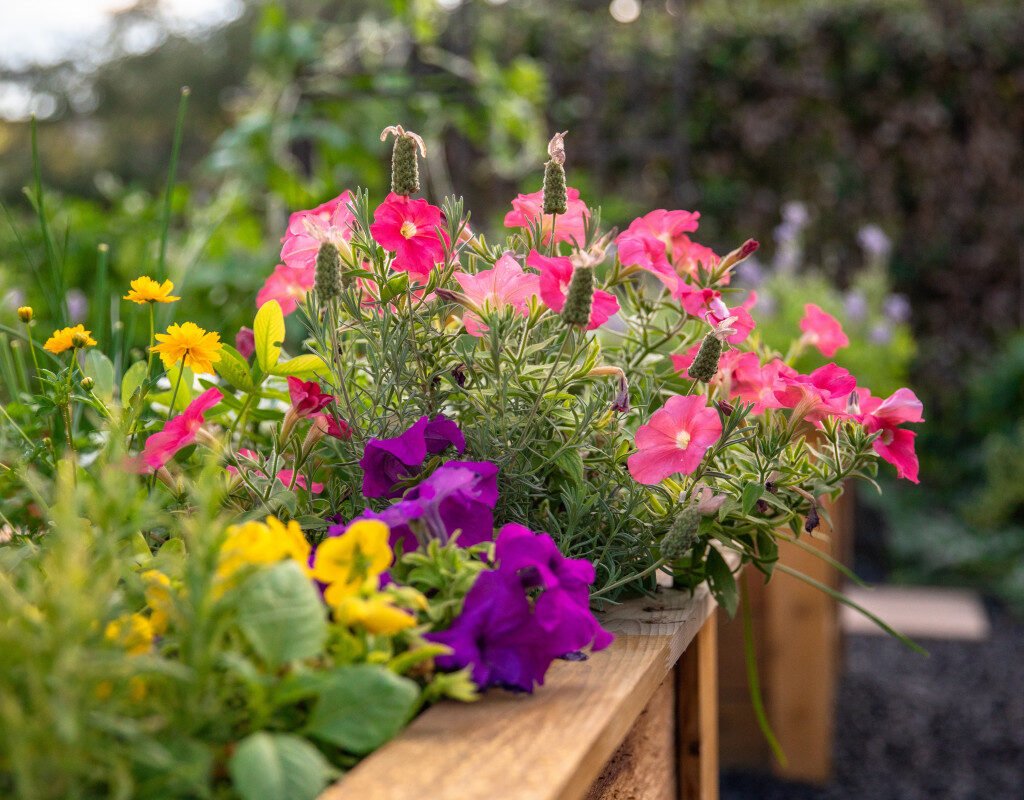
6. Lavender — The Fragrant Pest Deterrent

Why they work:
Lavender’s strong scent repels moths, flies, and other unwanted pests, while attracting pollinators like bees and butterflies. Its woody stems also provide structure and visual interest near vegetable beds.

Best pairings:

  • Cabbage family crops (broccoli, kale, cauliflower)
  • Tomatoes
  • Peppers

Planting tips:

  • Lavender prefers full sun and well-drained soil.
  • Prune lightly after flowering to maintain shape.
  • Plant along the edges of vegetable beds for best pest-repellent effect.

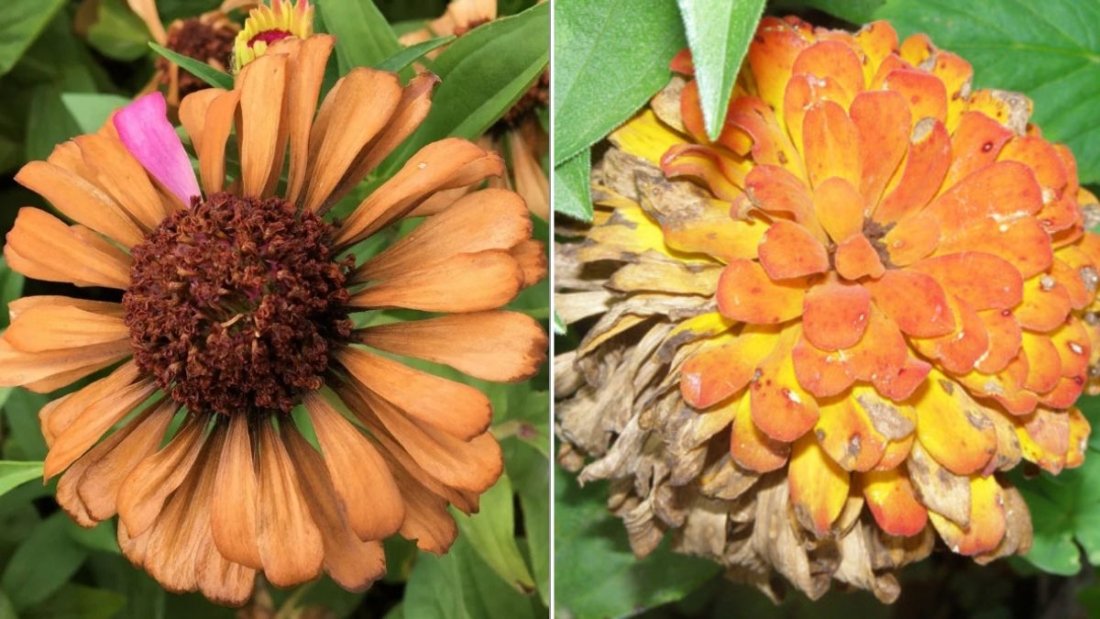
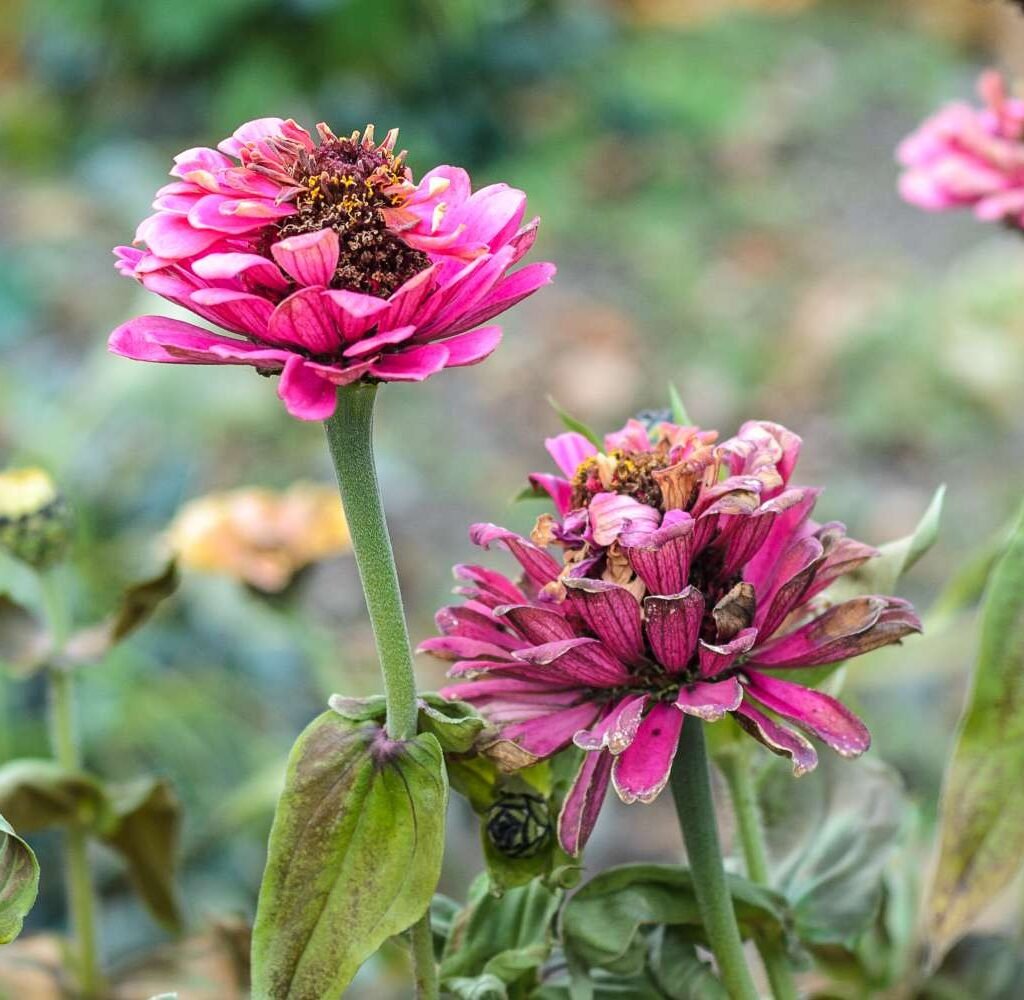
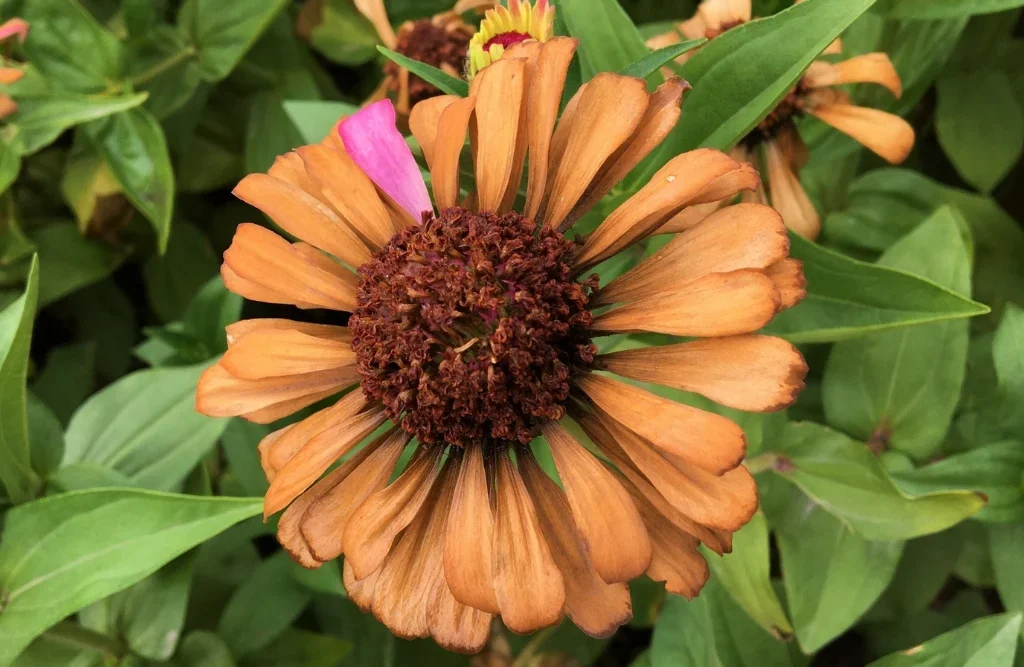
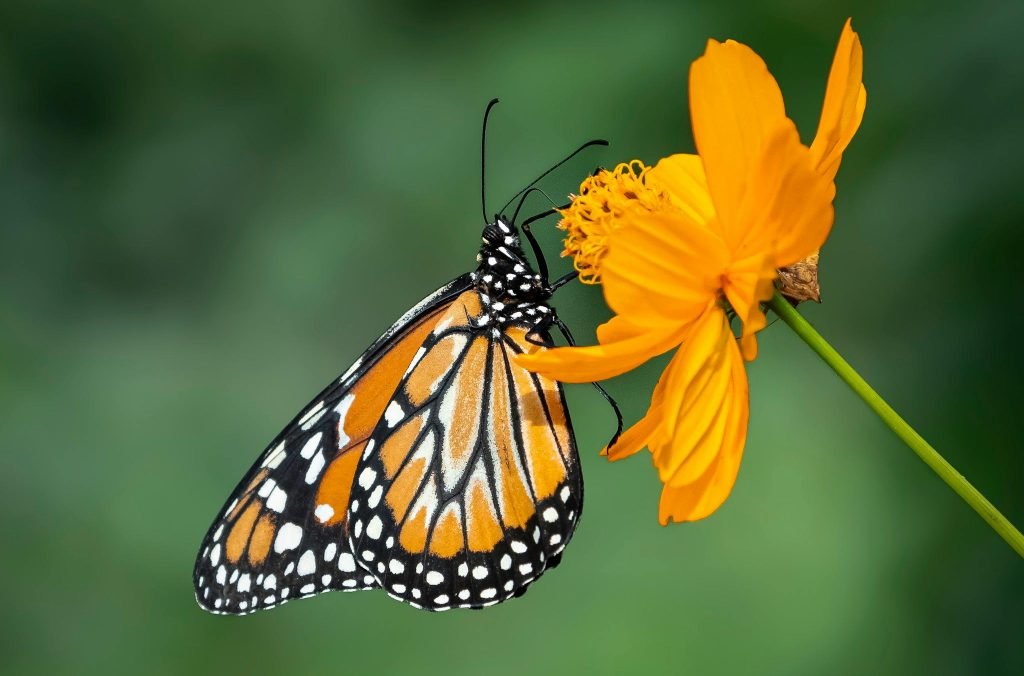
7. Zinnias — Pollinator Powerhouses

Why they work:
Zinnias bloom in vibrant colors, attracting bees, butterflies, and hummingbirds, which help pollinate vegetables. They are drought-tolerant and bloom all season long, providing a constant food source for beneficial insects.

Best pairings:

  • Tomatoes
  • Peppers
  • Squash

Planting tips:

  • Choose single-flowered varieties for easy pollinator access.
  • Plant in clusters or along the garden edge for visual appeal and maximum pollinator visits.
  • Deadhead regularly to extend blooming season.

8. Sun-Loving Herbs With Flowers

Many flowering herbs are excellent companions for vegetables:

  • Basil: Repels mosquitoes and flies; attracts bees. Great with tomatoes.
  • Chives: Flowers attract pollinators and deter aphids. Works well with carrots and tomatoes.
  • Thyme: Flowers attract bees and predatory insects, plus it can act as ground cover to suppress weeds.

Plant herbs near vegetables for both culinary and pollination benefits.


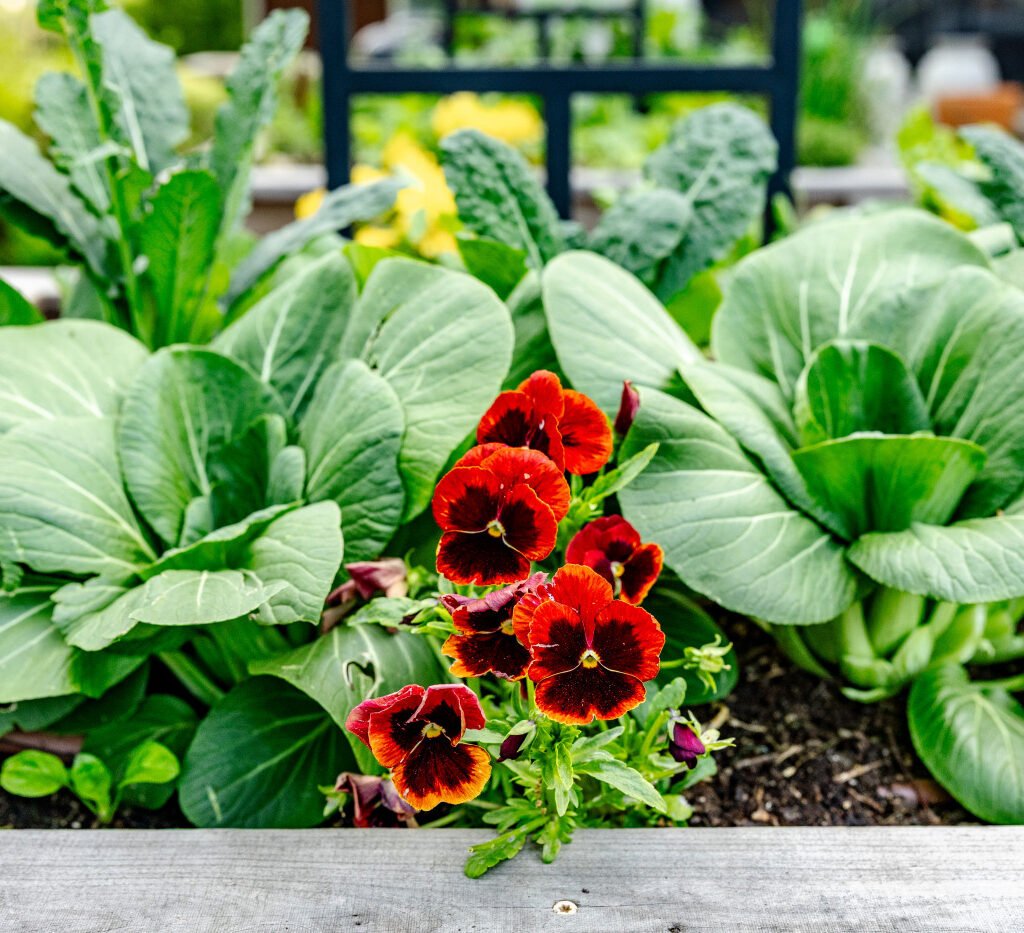
9. How Flower Placement Improves Vegetable Health

  • Pollination: Flowers attract bees, butterflies, and other pollinators that increase fruit set in vegetables like tomatoes, cucumbers, and peppers.
  • Pest control: Many flowers lure predatory insects or confuse pests that attack vegetables.
  • Biodiversity: A diverse garden ecosystem reduces the likelihood of pest outbreaks and disease.
  • Soil health: Deep-rooted flowers like borage can help break up compacted soil and recycle nutrients.

Pro tip: Plant flowers in clusters rather than randomly to make it easier for beneficial insects to find them.


10. Seasonal Flower Planning

For year-round benefits, consider planting flowers in staggered succession:

  • Spring: Calendula, nasturtium, and borage for early pollinators.
  • Summer: Marigolds, sunflowers, zinnias, and lavender to support peak vegetable growth.
  • Fall: Late-blooming asters or cosmos to extend pollinator activity.

Rotating flowers with vegetables ensures constant blooms and continual pest protection throughout the growing season.


Final Thoughts

Planting flowers near your vegetable garden isn’t just decorative—it’s a strategic way to boost yield, improve soil health, attract pollinators, and reduce pests naturally. From marigolds that guard against insects to sunflowers that provide support and attract bees, these companion flowers create a vibrant, productive ecosystem.

By thoughtfully integrating blooms into your vegetable garden, you’ll enjoy not only healthier crops but also a more beautiful and dynamic garden space buzzing with life.

A colorful, thriving vegetable garden is just a few flowers away.

How To Grow Sunflowers That Don’t Fall Over

How To Grow Sunflowers That Don’t Fall Over

There’s something magical about a row of tall, golden sunflowers standing proudly under the summer sky. They turn their sunny faces toward the light, bringing warmth, color, and joy to any garden. But if you’ve ever grown them before, you might know the frustration of watching those cheerful blooms topple over just when they’re at their most beautiful.

Whether they’re leaning under the weight of their giant heads or collapsing after a summer storm, floppy sunflowers are one of the most common garden woes. Luckily, with a little know-how, you can grow sturdy, upright sunflowers that stay tall and strong all season long.

Here’s a detailed guide on how to grow sunflowers that don’t fall over—from the moment you sow the seeds to the day you harvest the blooms.


1. Choose the Right Variety

Not all sunflowers are created equal. Some are bred to tower over ten feet tall with heavy heads that naturally droop, while others are compact and more stable. If you’re tired of sunflowers that flop, your first step is choosing the right variety.

Best sturdy sunflower varieties:

  • ‘Autumn Beauty’ – Multi-branching with medium-sized heads and strong stems.
  • ‘Lemon Queen’ – Grows 5–7 feet tall with graceful, upright blooms.
  • ‘Sunrich Orange’ – Known for its thick stems and florist-quality blooms.
  • ‘Teddy Bear’ – A compact dwarf variety (2–3 feet) perfect for containers.
  • ‘Soraya’ – The first sunflower to win the All-America Selections award; excellent branching and stem strength.

Pro tip: Avoid ultra-tall “giant” varieties like ‘Mammoth Russian’ if your garden is windy or your soil is loose. Taller plants with massive flower heads are naturally more top-heavy.


2. Pick the Perfect Location

Sunflowers live up to their name—they need at least 6–8 hours of full sun daily to grow strong. But light isn’t the only factor that affects stability.

Here’s what your planting site should offer:

  • Shelter from strong winds: A fence, hedge, or building nearby can reduce wind damage without blocking sunlight.
  • Well-draining soil: Avoid spots that stay soggy after rain. Wet soil weakens roots and makes plants more likely to topple.
  • Loamy or sandy texture: Heavy clay soil can restrict root growth. If that’s your only option, amend it with compost or organic matter to loosen it up.

Tip: Sunflowers align themselves toward the sun during their early growth stages. Plant them so that when they lean slightly eastward, they won’t shade out other plants in your garden.


3. Start With Deep, Strong Roots

The secret to sunflowers that don’t fall over starts underground. Strong roots anchor tall stems, and healthy soil gives those roots room to spread.

How to plant for strong roots:

  • Sow seeds directly in the ground rather than starting them in pots. Sunflowers dislike transplanting because it disturbs their deep taproots.
  • Plant seeds 1 inch deep and 6–12 inches apart (depending on the variety).
  • Thin seedlings once they’re about 6 inches tall, keeping the strongest one in each spot. Crowded plants grow tall and spindly, making them more likely to fall.
  • Loosen soil at least 12 inches deep before planting to encourage the taproot to grow straight down.

Pro tip: Add a light layer of compost or aged manure to the soil before planting for a nutrient-rich start.


4. Strengthen the Stems Naturally

Sunflowers that grow too fast often develop thin, weak stems that can’t support their heavy heads later. To prevent this, encourage steady, balanced growth rather than rapid stretching.

Here’s how:

  • Provide consistent sunlight. Shaded plants stretch toward the light and become top-heavy.
  • Avoid over-fertilizing. Too much nitrogen causes lush leaf growth but weak stems.
  • Use compost instead of chemical fertilizer. It releases nutrients slowly, encouraging sturdy development.
  • Space plants properly. Give tall varieties 18–24 inches between each plant. Crowded conditions make them compete for light, leading to thin, weak stalks.

Bonus tip: A gentle breeze helps strengthen sunflower stems naturally. If your garden is sheltered, you can occasionally brush your hand gently along young plants to simulate wind and promote sturdier growth.


5. Support Tall Varieties Early

If you’re growing giant sunflowers or live in a windy area, staking is essential. The best time to add support is when the plants are still small—before they start to lean.

How to stake sunflowers:

  1. Drive a sturdy bamboo stake or wooden pole 6–12 inches into the soil, about 2 inches away from the stem.
  2. As the plant grows, loosely tie it to the stake using soft twine or garden tape. Avoid tight knots that can damage the stem.
  3. Add additional ties every 12 inches as the plant gets taller.
  4. For multiple sunflowers in a row, use garden netting or a horizontal trellis as support.

Pro tip: Drive the stake deeply enough (at least 1 foot into the soil) so it won’t pull out in a storm.


6. Water Deeply—But Not Too Often

Water plays a huge role in sunflower stability. Shallow watering encourages shallow roots, which can’t anchor tall plants.

How to water for strong roots:

  • Water deeply once or twice a week rather than frequent light sprinklings.
  • Let the soil dry slightly between waterings.
  • Direct water to the base of the plant, not the leaves.
  • During hot, dry spells, give your sunflowers a thorough soak—about 1 to 1.5 inches of water per week.

Warning: Avoid overwatering. Constantly wet soil softens the ground, making it easier for plants to topple over after heavy rain or wind.


7. Feed for Strength, Not Height

Fertilizer can be a double-edged sword for sunflowers. Too much can make them grow tall and fast—but also weak and floppy.

Fertilizer tips:

  • Use a balanced or low-nitrogen fertilizer (something like 5-10-10).
  • Apply once when the plant is about 12 inches tall, and again before flowering.
  • Always water after fertilizing to prevent root burn.

If your sunflowers are growing in nutrient-rich soil, you might not need additional fertilizer at all. Remember: the goal is sturdy growth, not maximum height.


8. Protect Against Wind and Rain

Even the strongest sunflower can struggle after a violent summer storm. Heavy rain softens the soil, and wind puts pressure on tall stems and top-heavy blooms.

Here’s how to protect your plants from the elements:

  • Mulch around the base with straw or wood chips to help the soil retain structure and prevent erosion.
  • Stake tall plants before storms if you haven’t already.
  • Plant in rows rather than isolated singles. Groups of sunflowers help support each other.
  • After storms, gently straighten any leaning plants and re-tie them to stakes if needed.

Tip: Avoid watering right before a storm—wet soil increases the risk of root instability.


9. Prune and Deadhead for Balance

Deadheading (removing spent blooms) doesn’t just keep your sunflowers looking neat—it can also help prevent toppling. When large, drying flower heads get heavy, they can pull the entire stem down.

What to do:

  • As flowers fade, cut them off just below the bloom.
  • Leave some heads to mature if you plan to harvest seeds.
  • For branching varieties, pruning spent flowers encourages more side blooms, distributing weight evenly.

10. Harvest at the Right Time

If you’re growing sunflowers for seeds, timing your harvest correctly is key to preventing bent or broken stems.

As seed heads mature, they become heavy, especially when filled with ripening seeds or after rain.

How to harvest without collapse:

  • Once the flower head turns yellow and begins to droop, it’s ready for harvest.
  • Cut the head off with 12–18 inches of stem attached.
  • Hang it upside down in a dry, airy place to finish drying.

This prevents the plant from collapsing under the weight of its own seeds while ensuring you still get a perfect harvest.


.


Common Mistakes That Cause Sunflowers to Fall Over

Avoid these pitfalls if you want strong, upright blooms:
Planting in soft, wet soil.
Overcrowding seedlings (they stretch for light).
Over-fertilizing with nitrogen-rich food.
Forgetting to stake tall varieties early.
Watering too often or too shallowly.

Each of these weakens root or stem structure, leaving plants vulnerable when the wind blows or flower heads get heavy.


Final Thoughts

Growing sunflowers that don’t fall over isn’t about luck—it’s about balance. Strong roots, sturdy stems, proper spacing, and mindful watering all work together to keep your plants upright and thriving.

The best part? Once you master these steps, you’ll have sunflowers that not only stand tall but stand out—bright, healthy, and full of life from the first bud to the last golden bloom.

So this season, choose wisely, plant deeply, water thoughtfully, and give your sunflowers a little support along the way. In return, they’ll reward you with a garden that radiates sunshine—without a single fallen flower.


Why Your Zinnias Are Turning Brown (And How To Fix It)

Why Your Zinnias Are Turning Brown (And How To Fix It)

Zinnias are among the most joyful flowers in any garden—bold, bright, and bursting with life. Their rainbow hues make them a favorite for gardeners who want instant color all summer long. So when those once-lively blooms and lush green leaves suddenly turn brown, it’s easy to feel discouraged.

But here’s the good news: browning zinnias don’t mean your garden is doomed. In most cases, the problem is completely fixable once you know what’s causing it. Whether it’s a watering mistake, a pest problem, or a natural part of the plant’s life cycle, you can revive your zinnias and get them blooming beautifully again.

Let’s take a deep dive into why your zinnias are turning brown—and exactly what you can do to bring them back to life.


1. Natural Aging and Dead Blooms

Sometimes, browning is simply part of your zinnias’ normal growth cycle. Each bloom only lasts a few weeks before fading and drying out. As petals age, they naturally turn from bright color to brown and papery.

If only the flower heads are browning while the rest of the plant looks healthy, there’s no disease or pest issue—your plant is just moving through its blooming rhythm.

What to do:

  • Regularly deadhead your zinnias (remove the spent blooms).
  • Snip the flower stem just above a new leaf set or bud to encourage new blooms.
  • Deadheading keeps your zinnias looking tidy and prompts them to produce fresh flowers throughout the season.

Tip: Deadheading once a week can keep your zinnias blooming from early summer until the first frost.


2. Overwatering (Or Poor Drainage)

Zinnias love sun and warmth, but they hate “wet feet.” When their roots sit in soggy soil, they can’t get the oxygen they need, leading to root rot and brown, wilted leaves.

You’ll know overwatering is the problem if:

  • The leaves turn brown starting from the bottom up.
  • The soil feels consistently damp or muddy.
  • The plant looks limp despite regular watering.

What’s happening:
Too much water suffocates the roots and encourages fungal diseases that attack the base of the plant.

What to do:

  • Check your soil: Zinnias prefer light, well-draining soil. If it’s heavy clay, mix in compost or sand to improve drainage.
  • Water deeply but infrequently: Let the top inch of soil dry before watering again.
  • Water early in the morning: This gives moisture time to soak in and the leaves time to dry before nightfall.
  • Avoid overhead watering: Wet foliage encourages fungal diseases—always water at the base.

Quick fix: If your zinnias are in containers, make sure pots have drainage holes. Repot soggy plants into fresh, dry soil to give them a second chance.


3. Underwatering or Heat Stress

On the flip side, not giving your zinnias enough water—especially in the heat of summer—can also cause browning. When plants become dehydrated, they prioritize survival over beauty, leading to crispy leaves and faded flowers.

Signs of underwatering:

  • Brown, brittle leaves (often starting at the edges).
  • Drooping during the hottest part of the day.
  • Dry, cracked soil.
  • Faded or prematurely wilted blooms.

What to do:

  • Water deeply 2–3 times per week, depending on your climate.
  • Mulch around the base of your plants to retain soil moisture.
  • Water early morning or evening to minimize evaporation.

Pro tip: Zinnias are drought-tolerant once established, but young plants need consistent moisture to build strong roots.


4. Fungal Diseases (A Common Culprit)

If your zinnias are turning brown in irregular spots or developing powdery coatings, a fungal disease may be to blame. Zinnias are beautiful—but they’re also prone to several common fungal issues, especially in humid or overcrowded conditions.

Let’s look at the top three culprits:

A. Alternaria Leaf Spot

  • Symptoms: Small, brown circular spots with dark edges on leaves.
  • Leaves may yellow, curl, and eventually drop.
  • Caused by high humidity and water splashing from soil to leaves.

Solution:

  • Remove and discard affected leaves (don’t compost them).
  • Water at the base and avoid wetting foliage.
  • Improve air circulation by spacing plants at least 12 inches apart.
  • Apply an organic fungicide like neem oil or copper spray weekly until symptoms subside.

B. Powdery Mildew

  • Symptoms: White or gray powdery coating on leaves that eventually turn brown.
  • Often occurs in late summer when days are hot and nights are cool.

Solution:

  • Increase airflow around plants.
  • Water early in the day and avoid overhead watering.
  • Apply a baking soda spray (1 tablespoon baking soda + 1 teaspoon liquid soap in 1 gallon of water) once a week to slow its spread.

C. Bacterial Leaf Spot

  • Symptoms: Brown or black spots surrounded by yellow halos.
  • Often spread by contaminated water or tools.

Solution:

  • Remove infected foliage.
  • Disinfect garden tools with rubbing alcohol after use.
  • Avoid touching plants when leaves are wet.
  • Rotate where you plant zinnias each year to prevent reinfection.

5. Pest Damage

Tiny insects can cause big problems for zinnias. Pests like aphids, spider mites, and thrips feed on plant juices, leaving behind damaged tissue that quickly turns brown or yellow.

Aphids:

  • Look for clusters of tiny green, white, or black insects on new growth or buds.
  • They leave behind a sticky residue called “honeydew,” which attracts ants.

Spider Mites:

  • Thrive in hot, dry weather.
  • Cause fine webbing on leaves and tiny yellow or brown speckles.

Thrips:

  • Extremely small and hard to see, but their feeding can make petals look discolored or streaked.

What to do:

  • Spray plants with a strong stream of water to dislodge pests.
  • Apply neem oil or insecticidal soap every few days until the pests are gone.
  • Encourage beneficial insects like ladybugs and lacewings to keep pest populations in check naturally.

6. Too Little Sunlight

Zinnias are true sun-lovers. Without at least six hours of direct sunlight each day, they become leggy, weak, and prone to browning leaves and sparse blooms.

Signs of too little sun:

  • Pale or dull-colored flowers.
  • Weak stems.
  • Leaves turning brown or yellow from stress.

Fix:
If your zinnias are in partial shade, consider relocating them to a sunnier spot. In containers, simply move the pots to a brighter location. In garden beds, trim back nearby plants that may be shading them.


7. Nutrient Imbalance

While zinnias aren’t heavy feeders, they still need the right balance of nutrients to stay vibrant. Too much or too little fertilizer can cause brown edges or discoloration.

Too much nitrogen:

  • Encourages leafy growth but fewer flowers.
  • Can cause leaf tip burn and weak stems.

Too little potassium or phosphorus:

  • Leads to dull blooms and leaf browning.

What to do:

  • Feed zinnias every 4–6 weeks with a balanced fertilizer (10-10-10) or a bloom booster (low in nitrogen, high in phosphorus).
  • Water well after feeding to prevent fertilizer burn.
  • Add compost or organic matter at the start of the season to maintain soil health naturally.

8. Old Age and End of Season

If your zinnias have been blooming beautifully all summer and are now fading in late fall, browning may simply mean they’re at the end of their life cycle. Zinnias are annuals, which means they live for one growing season only.

As temperatures drop or days shorten, it’s natural for flowers and leaves to turn brown and dry out.

What to do:

  • Allow a few blooms to dry completely for seed saving.
  • Cut back old plants and compost them once they’ve fully dried.
  • Plan to replant fresh zinnias next spring for another season of color.

Quick Recap: How To Keep Zinnias From Turning Brown

Here’s your go-to checklist for vibrant, healthy zinnias all season:

Deadhead regularly to encourage new blooms.
Water deeply but sparingly—avoid soggy soil.
Give full sun (6–8 hours daily).
Ensure good air circulation to prevent fungal disease.
Use neem oil or insecticidal soap for pest control.
Feed moderately with a balanced fertilizer.
Clean up fallen leaves to prevent disease spread.

By following these simple steps, you can prevent most causes of browning and enjoy a constant show of color in your garden.


Final Thoughts

When your zinnias start turning brown, it’s your garden’s way of sending you a message. It might be asking for less water, more sun, or just a little pruning love. The key is to observe closely and act quickly—most zinnia problems are easy to fix once identified.

With a bit of care and consistency, your zinnias will bounce back, producing wave after wave of bright, cheerful blooms. Remember: every brown petal or spotted leaf is just part of learning how to grow stronger, healthier plants.

So grab your watering can, pruning shears, and a keen eye, and give your zinnias the attention they deserve. Soon, your garden will be glowing again with the radiant colors that only zinnias can deliver.

How To Deadhead Marigolds For Endless Blooms

How To Deadhead Marigolds For Endless Blooms

There’s a reason marigolds are a staple in gardens around the world. Their cheerful orange, yellow, and golden blooms bring instant warmth and brightness to any outdoor space. They’re hardy, low-maintenance, and bloom for months—if you know one secret: deadheading.

If your once-bushy marigold plants are starting to look tired, with more brown heads than blossoms, don’t worry. With a few quick snips and a bit of care, you can keep them blooming beautifully from spring to frost. Here’s everything you need to know about how to deadhead marigolds properly for endless blooms, plus a few insider tips to make the most of this garden favorite.


Why Deadheading Marigolds Matters

To understand why deadheading works, it helps to know what your marigold is trying to do. Like all flowering plants, marigolds bloom with one goal in mind—to produce seeds. Once a flower fades and begins forming seeds, the plant channels its energy into seed production rather than creating new blossoms.

That’s where deadheading comes in. By removing the spent flowers before seeds form, you’re telling the plant, “You’re not done yet—keep blooming!” The result? More buds, more flowers, and a longer, more vibrant blooming season.

In short:
Deadheading prevents seed formation.
It redirects energy into new flower growth.
It keeps your plants tidy and healthy-looking.
And it extends the flowering period for weeks or even months.


The Best Time To Deadhead Marigolds

Marigolds bloom continuously through summer and early fall, so you’ll be deadheading regularly. The perfect time to remove a spent bloom is when the petals are starting to fade, dry, or turn brown, and the center of the flower looks shriveled.

If you wait until the flower head is completely dry and papery, the plant has already started to form seeds, which slows down further blooming. So, the key is timing—catch the flower as it’s fading, not after it’s gone completely to seed.

In most gardens, you’ll need to deadhead once or twice a week during peak blooming months.


How To Deadhead Marigolds — Step-by-Step

Deadheading marigolds is simple, satisfying, and only takes a few minutes. You don’t need fancy tools—just your hands or a small pair of garden scissors. Here’s how to do it correctly:

Step 1: Identify Spent Blooms

Look for flowers that are:

  • Brown or wilted around the edges
  • Losing their bright color
  • Dry or crunchy to the touch
  • Hanging lower than fresh blossoms

These are your targets for removal.

Step 2: Locate the New Growth Below the Spent Bloom

Follow the flower stem down until you find the first set of healthy green leaves or a new bud starting to form. That’s where you’ll make your cut or pinch.

If you cut too high—just below the dead bloom—you’ll leave behind a stub that can rot or block new growth. Cutting at the base of the spent flower encourages branching and more blossoms.

Step 3: Pinch or Snip Off the Dead Flower

  • For small marigolds (like French or signet marigolds), use your fingers. Simply pinch the dead bloom between your thumb and forefinger and pull gently.
  • For larger marigolds (like African or giant marigolds), use clean garden scissors or pruning shears to make a neat cut above a leaf node or bud.

Step 4: Clean Up Fallen Petals

After deadheading, check for petals or dried flower bits that have fallen into the plant’s center. These can trap moisture and encourage mold or fungal growth, especially in humid climates.

Gently shake or brush off debris to keep the foliage clean and airy.

Step 5: Repeat Regularly

Make deadheading part of your garden routine. A quick five-minute check every few days is enough to keep marigolds in full bloom.


The “Shear and Shape” Method (For Overgrown Marigolds)

If your marigold plants have gotten leggy or you’ve fallen behind on deadheading, don’t worry—there’s a fast fix.

Instead of picking individual blooms, use the shear-and-shape method:

  1. Take a pair of sharp garden shears.
  2. Trim back the top third of the plant, including faded blooms and long stems.
  3. Water deeply afterward.
  4. Optionally, give the plant a light dose of balanced fertilizer (like 10-10-10).

Within a week or two, you’ll see fresh, green shoots and new buds forming. This rejuvenation pruning encourages bushier growth and another flush of vibrant flowers.


Best Conditions for Continuous Bloom

Even with regular deadheading, marigolds need the right growing conditions to keep producing flowers. Here’s how to help them thrive:

1. Give Them Plenty of Sunlight

Marigolds are sun worshippers. They need at least 6–8 hours of direct sunlight daily to produce abundant blooms. In partial shade, they’ll still grow, but flowering will slow down.

2. Water Wisely

These plants prefer soil that’s moist but well-drained. Overwatering can lead to root rot and fewer flowers. Water at the base of the plant early in the morning and avoid wetting the leaves.

A good rule of thumb: water when the top inch of soil feels dry.

3. Fertilize Sparingly

Marigolds don’t need heavy feeding. Too much fertilizer—especially nitrogen—encourages leafy growth instead of flowers.
Use a balanced or low-nitrogen fertilizer once every 4–6 weeks during the growing season.

4. Remove Diseased or Damaged Growth

Along with deadheading, check for yellowing leaves or pest damage. Trim off unhealthy parts to improve airflow and prevent fungal problems.

5. Mulch and Maintain

A thin layer of organic mulch around the base helps retain moisture and suppress weeds without crowding the stems.


The Benefits of Regular Deadheading

It’s amazing what a little pruning can do. When you keep up with deadheading, you’ll notice:

More blooms — Marigolds can double their flower output.
Fuller plants — Pinching encourages branching, creating a lush, bushy shape.
Brighter color — Fresh flowers appear more vibrant when old ones are removed.
Longer bloom time — Many marigold varieties will keep producing until the first frost.
Healthier plants — Removing decaying flowers prevents mold and disease.

In short, consistent deadheading is the secret to marigolds that never seem to stop blooming.


Common Mistakes To Avoid

Even though deadheading is simple, a few missteps can reduce your plant’s performance. Avoid these common errors:

  1. Cutting too close to the new bud. Always leave a little stem above the new growth to prevent damage.
  2. Leaving stubs behind. These can rot and attract pests. Cut cleanly just above a leaf node.
  3. Overfertilizing after pruning. A little fertilizer goes a long way—too much encourages leaves, not flowers.
  4. Neglecting during wet weather. Faded blooms can trap moisture and cause fungal spots if not removed promptly.
  5. Forgetting to clean your tools. Always use sharp, sanitized scissors to prevent spreading disease.

Pro Tip: Save Seeds While You Deadhead

If you’d like to grow marigolds again next year, you can turn deadheading into seed-saving time.

Here’s how:

  • Let a few flowers fully dry on the plant until they’re brown and papery.
  • Snip off the dried head and open it over a tray or paper towel.
  • Inside, you’ll find long, slender black-and-white seeds.
  • Store them in a cool, dry place in a labeled paper envelope until next spring.

This way, you’ll have a never-ending supply of marigold seeds—and more reason to keep your plants blooming all season.


A Blooming Cycle That Never Ends

Once you get into the rhythm of deadheading, you’ll notice your marigolds quickly respond with fresh buds. Every time you remove an old flower, two new side shoots often emerge below the cut—each producing its own bloom.

Over time, your marigold plants become fuller, denser, and more productive. It’s a self-rewarding process that keeps your garden looking bright and cheerful from early summer to frost.


Final Thoughts

Deadheading marigolds isn’t just a garden chore—it’s an act of encouragement. Each snip tells your plant to keep growing, keep blooming, and keep brightening your space.

Whether you’re growing petite French marigolds, towering African marigolds, or delicate signet marigolds, the principle is the same: remove the old to make way for the new.

With just a few minutes of care each week, your marigolds will reward you with an endless display of vibrant color, filling your garden with golden sunshine right up until the first frost.

So grab your scissors, head to the garden, and start snipping—because the secret to endless marigold blooms lies right at your fingertips.

6 Annual Flowers That Attract Bees To Your Garden

6 Annual Flowers That Attract Bees To Your Garden

Bees are the unsung heroes of every thriving garden. These tiny pollinators are responsible for helping our fruits, vegetables, and flowers flourish. Yet, as bee populations face global decline, gardeners everywhere can make a big difference by creating pollinator-friendly spaces. The simplest way to do that? Plant annual flowers that attract bees naturally.

Unlike perennials that return every year, annuals bloom fast, bright, and long—making them irresistible to bees searching for nectar and pollen. They’re easy to grow, often low-maintenance, and perfect for adding bursts of color to borders, containers, or even small balcony gardens.

Here’s a guide to six stunning annual flowers that bees can’t resist, along with practical growing tips to help your garden buzz with life all season long.


1. Zinnias — The Colorful Bee Magnet

Why bees love them:
Zinnias are a pollinator’s paradise. Their bold, open blooms come in every color imaginable—crimson, coral, yellow, pink, and even green—and are loaded with nectar. Their flat flowerheads make it easy for bees to land and gather pollen, while the bright petals act as natural “landing signals.”

Bloom season: Mid-summer to frost

Best for: Honeybees, bumblebees, and solitary bees

Growing tips:

  • Zinnias thrive in full sun and well-draining soil.
  • Sow seeds directly in the garden after the last frost.
  • Avoid overwatering—keep soil slightly moist.
  • Regular deadheading (removing spent flowers) keeps blooms coming for months.
  • Choose single or semi-double varieties like ‘Benary’s Giant’ or ‘Profusion Series’—they provide easier access to nectar than tightly packed double blooms.

Bonus: Zinnias also attract butterflies and hummingbirds, so you’ll have a garden filled with movement and color all summer long.


2. Cosmos — The Graceful Pollinator Favorite

Why bees love them:
Cosmos are elegant, daisy-like flowers that sway gently in the breeze and offer a constant supply of pollen. Bees are particularly drawn to the simple, open centers of cosmos blooms, which allow for effortless feeding.

Bloom season: Early summer through fall

Best for: Honeybees and native bees

Growing tips:

  • Cosmos thrive in poor to average soil—too much fertilizer will reduce blooms.
  • They love full sun and need minimal watering once established.
  • Sow seeds directly in the soil after frost; they germinate quickly.
  • Pinch off the growing tips when plants are young to encourage bushier growth.
  • Deadhead regularly for non-stop flowering.

Bonus: Cosmos self-seed easily, so you’ll often find them returning year after year—an effortless way to keep bees visiting your garden.


3. Sunflowers — The Classic Bee Buffet

Why bees love them:
There’s a reason the sunflower is practically a symbol of summer—it’s not only beautiful but also a bee superfood. Each sunflower head is made up of hundreds of tiny florets filled with pollen and nectar. Bees love to crawl across the face of the flower, collecting food while helping it pollinate.

Bloom season: Summer to early fall

Best for: Bumblebees, honeybees, and solitary bees

Growing tips:

  • Plant sunflower seeds directly in the ground after frost danger has passed.
  • Choose open-pollinated varieties like ‘Lemon Queen’ or ‘Autumn Beauty’.
  • Provide full sun and space plants at least 12 inches apart.
  • Water regularly, especially during dry spells, but avoid waterlogging.
  • For continuous blooms, sow new seeds every few weeks.

Bonus: Once the bees have had their fill, you can harvest sunflower seeds for yourself or let birds enjoy them in late summer.


4. Calendula — The Bright, Bee-Friendly Bloomer

Why bees love them:
Also called pot marigold, calendula’s sunny orange and yellow flowers are a bee’s delight. The open shape makes it easy for bees to collect pollen, and the flowers keep blooming from early spring until frost, providing a long nectar season.

Bloom season: Spring through fall

Best for: Honeybees, leafcutter bees, and hoverflies

Growing tips:

  • Prefers cool weather and can tolerate partial shade.
  • Sow seeds directly in the garden or in containers in early spring.
  • Keep the soil moist but not soggy.
  • Regularly deadhead to promote new blooms.
  • Avoid planting in overly rich soil—calendula blooms best when slightly stressed.

Bonus: Calendula petals are edible and have soothing properties. You can use them in teas, balms, or salads while your bees enjoy the nectar.


5. Borage — The Star of the Bee Garden

Why bees love them:
Few flowers attract bees quite like borage, also known as starflower. Its striking blue blooms are rich in nectar that replenishes quickly after being visited—meaning bees can return again and again throughout the day. Borage flowers even hang slightly downward, perfectly positioned for bees to access.

Bloom season: Late spring through fall

Best for: Honeybees and bumblebees

Growing tips:

  • Plant in full sun with well-draining soil.
  • Sow seeds directly into the soil after the last frost.
  • Water regularly until established, then let it thrive with minimal care.
  • Borage can self-seed freely—if you don’t want it spreading, harvest flowers before they drop seed.

Bonus: The leaves and flowers are edible with a light cucumber flavor, making them a refreshing garnish for summer dishes or drinks.


6. Sweet Alyssum — The Fragrant Bee Carpet

Why bees love them:
Sweet alyssum is a low-growing annual with clusters of tiny white, pink, or purple flowers that release a sugary fragrance bees adore. It provides both nectar and pollen while blooming for months on end, especially in cooler climates.

Bloom season: Early spring to late fall

Best for: Small native bees and hoverflies

Growing tips:

  • Grow in full sun to partial shade.
  • Excellent for edging garden beds, pathways, or containers.
  • Water regularly but avoid soggy conditions.
  • Trim lightly after the first bloom cycle to encourage more flowers.
  • For continuous blooms, re-seed mid-season or plant successively.

Bonus: Sweet alyssum attracts other beneficial insects, such as ladybugs and lacewings, which feed on garden pests like aphids—helping you maintain a naturally balanced ecosystem.


Creating a Bee Haven: Garden Tips for Success

Planting bee-friendly flowers is just the start. To truly welcome pollinators and keep them healthy, follow these simple but powerful tips:

1. Plant in Clusters

Bees are more efficient when they can collect nectar from multiple blooms in a single area. Instead of scattering individual plants, grow your annuals in clusters of three or more of each variety.

2. Avoid Pesticides

Even natural or “bee-safe” pesticides can harm pollinators if used incorrectly. Instead, rely on natural pest deterrents like neem oil, garlic spray, or companion planting. If you must spray, do so in the evening, when bees are least active.

3. Provide a Water Source

Bees need water to regulate hive temperature and dilute honey. Offer a shallow dish filled with pebbles and water—the stones give them a safe place to land.

4. Ensure Continuous Blooming

Mix early-, mid-, and late-season annuals so your garden provides nectar throughout the growing season. Bees rely on consistent food sources, especially in late summer.

5. Choose Single Blooms Over Doubles

While double flowers look fuller, they often have so many petals that bees can’t access the nectar. Always opt for single-flowered varieties when planting for pollinators.

6. Add Some Native Annuals

Native plants are adapted to your region’s climate and attract native bee species that thrive locally. Check with your local nursery for native annuals that complement your garden.


Why Bees Matter More Than Ever

Bees are responsible for pollinating about one-third of all the food we eat, including many fruits, vegetables, and nuts. Beyond that, they maintain biodiversity by helping wildflowers reproduce. Yet, due to habitat loss, pesticide use, and climate change, global bee populations are declining at alarming rates.

By planting just a few pots or flowerbeds filled with bee-attracting annuals, you’re doing more than beautifying your space—you’re supporting pollinator survival and helping nature maintain its delicate balance.


Final Thoughts

A bee-friendly garden doesn’t have to be complicated or high-maintenance. With six annual flowers—zinnias, cosmos, sunflowers, calendula, borage, and sweet alyssum—you can turn even a small patch of soil or balcony planter into a vibrant pollinator haven.

These blooms not only reward you with color and fragrance but also invite the gentle hum of bees working happily among the petals—a sound that signals your garden is alive and thriving.

So grab a handful of seeds, find a sunny spot, and let nature take care of the rest. Because when the bees are buzzing, your entire garden blossoms in harmony.


How To Ripen Green Pears After Picking

How To Ripen Green Pears After Picking

There’s something so satisfying about harvesting your own pears—whether from a backyard tree, a local orchard, or even a farmers’ market haul. But if you’ve ever bitten into a green, rock-hard pear, you know how disappointing it can be. Unlike many fruits, pears don’t ripen well on the tree. Instead, they’re meant to mature off the branch—a unique process that can leave many gardeners and home cooks wondering how to properly ripen them once picked.

Fortunately, with the right approach, you can turn those firm, green pears into perfectly sweet, juicy fruit. This guide explains why pears behave this way, when to harvest them, and how to ripen them at home for the best flavor and texture.


Why Pears Don’t Ripen on the Tree

Unlike apples or peaches, pears ripen best after they’re harvested. This is because of a natural plant hormone called ethylene, which triggers the ripening process. When pears remain on the tree until fully ripe, they often turn mealy or gritty in texture before achieving peak sweetness.

By picking them when they’re mature—but still firm—you allow them to ripen evenly off the tree, avoiding that unpleasant graininess. The process mimics nature’s timing while giving you more control over the fruit’s quality.

In short:

  • On the tree: Pears develop starch and size.
  • Off the tree: Starch converts to sugar, and the fruit softens beautifully.

Step 1: Know When to Pick Your Pears

The first step in ripening success is knowing when to harvest. Picking too early means the pears may never ripen; picking too late can result in mushy fruit.

Signs your pears are ready to harvest:

  1. Color shift: Most green varieties (like Bartlett or D’Anjou) lighten slightly in color. Yellow varieties (like Bosc) develop a more golden tone.
  2. Tilt test: Gently lift a pear to a horizontal position—if it detaches easily from the branch with a small twist, it’s mature.
  3. Firmness: The fruit should feel hard but not rock solid.
  4. Seeds: If you cut one open, mature seeds should be brown, not white.

Tip: Always handle pears carefully when harvesting—they bruise easily, and damaged fruit won’t ripen evenly.


Step 2: Sorting and Storing Freshly Picked Pears

Once harvested, sort your pears to separate any bruised or blemished ones. Damaged pears release more ethylene gas, which can cause others to over-ripen or spoil prematurely.

For short-term storage:

  • Keep pears in a cool, dark place (like a pantry or cellar) at 30–40°F (around 0–4°C).
  • Arrange them in a single layer, not stacked, to prevent pressure bruising.

For long-term storage:

  • You can refrigerate mature but unripe pears for up to 3–4 weeks.
  • Move them to room temperature when you’re ready to start the ripening process.

Step 3: Ripening Pears at Room Temperature

The simplest and most effective way to ripen pears is to let them sit at room temperature until they soften naturally.

Here’s how:

  1. Place unripe pears in a single layer on the counter or in a shallow bowl.
  2. Keep them out of direct sunlight but in a warm (65–75°F / 18–24°C) environment.
  3. Check daily by pressing gently near the stem—when the fruit yields slightly to pressure, it’s ripe.

Most varieties take 4–7 days to ripen this way, though cooler temperatures can slow things down.

Pro tip: Line your bowl with paper towels to absorb any moisture and prevent mold.


Step 4: Speeding Up the Ripening Process

If you can’t wait a week to enjoy your pears, you can easily accelerate the process with natural ethylene producers.

Method 1: Paper Bag Trick

  • Place 3–5 pears in a brown paper bag and fold the top loosely.
  • Add one ripe banana or apple—both release ethylene gas, which speeds ripening.
  • Store at room temperature and check daily.

Method 2: Cloth Wrap Method

  • Wrap pears in a breathable cotton towel or napkin and leave them in a warm spot (like on top of the fridge).
  • The enclosed space traps ethylene gas, encouraging faster ripening.

Method 3: Warm Room Method

  • Move pears to the warmest room in your house (but away from direct heat).
  • Warmer temperatures accelerate ripening, though this can sometimes cause uneven softening—so check often.

Typically, these methods shorten ripening time to 2–3 days.


Step 5: Slowing Down Ripening Once Perfect

Once your pears are perfectly soft and fragrant, it’s important to pause the ripening process before they go overripe.

To do this:

  • Transfer ripe pears to the refrigerator immediately.
  • They’ll stay fresh for 5–7 more days.

For the best texture and sweetness, bring them back to room temperature for about an hour before eating.

Tip: Avoid freezing whole pears. If you want to preserve them longer, consider making pear sauce, jam, or poached pears instead.


Step 6: Understanding Different Pear Varieties

Not all pears ripen at the same rate. Knowing the characteristics of your variety helps you predict and control ripening more effectively.

Common Varieties and Their Ripening Notes:

VarietyTypeRipening Time (after picking)Flavor & Texture
BartlettSummer4–7 daysSweet, juicy, classic pear flavor
BoscWinter10–14 daysFirm, spicy-sweet, ideal for baking
D’AnjouWinter7–10 daysMild, dense flesh
ComiceLate season5–8 daysVery sweet, tender, best for fresh eating
Asian PearTree-ripenedUsually ripens on treeCrisp like an apple, mild sweetness

Winter pears (like Bosc or D’Anjou) need a longer indoor ripening period, while summer pears (like Bartlett) mature faster.


Step 7: Using Ripe Pears in the Kitchen

Once your pears are perfectly ripe, the possibilities are endless. Their natural sweetness and silky texture make them perfect for both savory and sweet dishes.

Delicious ways to enjoy ripe pears:

  • Slice over oatmeal, yogurt, or cereal.
  • Pair with blue cheese and walnuts in a salad.
  • Roast with honey and cinnamon for a simple dessert.
  • Poach in red wine or spiced syrup for a showstopping treat.
  • Blend into smoothies or bake into muffins and tarts.

And if your pears ripen all at once, don’t worry—make pear compote or jam to enjoy their flavor year-round.


Step 8: Common Ripening Mistakes to Avoid

Even experienced gardeners can make small errors when ripening pears. Here’s what to watch for:

  1. Leaving pears on the tree too long: This leads to gritty, overripe fruit.
  2. Storing in airtight containers: Pears need airflow; sealed containers trap moisture and cause mold.
  3. Placing in direct sunlight: This can overheat and shrivel the fruit instead of ripening it evenly.
  4. Ignoring daily checks: Pears can go from perfect to overripe in less than 24 hours once they start softening.

Rule of thumb: “Cool to store, warm to ripen.”


Final Thoughts

Ripening pears after picking might seem tricky at first, but once you understand how they work, it becomes second nature. The key lies in timing—harvesting at the right maturity stage, ripening at room temperature, and storing cool once they’re ready.

With just a little patience and a few tricks, you can enjoy perfectly ripe, buttery-sweet pears every time—whether they’re homegrown or store-bought.

So next time you find yourself staring at a basket of firm green pears, don’t worry. Give them a little warmth, a little time, and they’ll reward you with the delicate flavor and texture that makes pears one of autumn’s most elegant fruits.

The Best Companion Plants For Apple Trees: Boost Growth, Repel Pests, and Improve Your Harvest Naturally

The Best Companion Plants For Apple Trees: Boost Growth, Repel Pests, and Improve Your Harvest Naturally

If you’ve ever dreamed of harvesting baskets of crisp, juicy apples from your backyard, you already know that healthy soil, sunshine, and pruning play key roles. But there’s another, often-overlooked secret to thriving apple trees — companion planting.

Companion planting is the art of growing certain plants together for mutual benefit. The right companions can attract pollinators, repel pests, enrich the soil, and even improve fruit flavor. For apple trees, which face common challenges like aphids, codling moths, and fungal diseases, companion plants can make a world of difference.

Whether you’re tending an orchard or a single tree in your garden, here’s a complete guide to the best companion plants for apple trees — and how to use them to create a lush, self-sustaining ecosystem.


Why Companion Planting Works for Apple Trees

Apple trees don’t grow in isolation in nature — they thrive in diverse ecosystems where plants, insects, and soil microbes work together. Companion planting recreates that natural balance right in your garden.

Here’s how it helps:

  1. Pest Control: Certain herbs and flowers naturally repel apple-loving pests like aphids, codling moths, and apple maggots.
  2. Pollination Boost: Flowers attract bees and beneficial insects, improving fruit set.
  3. Soil Health: Nitrogen-fixing plants and ground covers keep the soil rich, aerated, and moist.
  4. Disease Prevention: Aromatic herbs help reduce fungal spores and mildew around apple roots.
  5. Weed Suppression: Ground covers outcompete weeds and maintain consistent soil moisture.

In short: Companion planting reduces your need for pesticides and fertilizers while creating a more balanced, beautiful orchard.


The Best Companion Plants for Apple Trees

Here’s a curated list of top-performing companion plants that help apple trees grow stronger, resist disease, and yield more fruit.


1. Comfrey – The Soil Enricher

Comfrey is often called the “power plant” of permaculture — and for good reason. Its deep roots pull up nutrients like potassium, calcium, and magnesium from the subsoil, making them available to apple roots when its leaves decompose.

Benefits:

  • Builds soil fertility and improves structure.
  • Provides excellent mulch when chopped and dropped around the base of the apple tree.
  • Attracts pollinators with its purple-blue flowers.

How to Plant:

  • Plant comfrey about 2–3 feet away from the apple tree trunk.
  • Cut leaves 3–4 times a year to use as mulch or compost material.

Tip: Use the sterile variety ‘Bocking 14’, which doesn’t spread aggressively.


2. Marigolds – The Pest Repellent

Marigolds are among the best-known companion plants for any garden — and apple trees love them too.

Benefits:

  • Repel nematodes, aphids, and whiteflies.
  • Their strong scent confuses pests like apple maggots and codling moths.
  • Bright blooms attract bees and butterflies.

How to Plant:

  • Scatter marigolds in clusters around the apple tree’s drip line (the area under the edge of the canopy).
  • Replant annually for continuous protection.

Pro Tip: Pair marigolds with herbs like basil or dill for an even stronger pest barrier.


3. Chives – The Fungal Fighter

Chives are a must-have around apple trees. Their onion-like scent deters many pests, while their antimicrobial compounds help prevent fungal diseases such as apple scab and powdery mildew.

Benefits:

  • Repels aphids, borers, and mites.
  • Naturally inhibits fungal spores on nearby plants.
  • Attracts pollinators when in bloom.

How to Plant:

  • Plant clumps of chives around the tree base, leaving a few inches between plants.
  • Divide and replant every 2–3 years for best growth.

Bonus: Chive flowers are edible and make lovely garden garnishes.


4. Garlic and Onions – Natural Pest Barriers

Alliums (the family that includes garlic, onions, and leeks) are among the most effective natural pest repellents.

Benefits:

  • Repel aphids, mites, borers, and deer.
  • Help prevent fungal infections.
  • Easy to grow in the partial shade of apple trees.

How to Plant:

  • Plant garlic bulbs in fall, about 6 inches apart, around the tree base.
  • Harvest in summer, then replant for year-round protection.

Pro Tip: Use garlic chives for a low-maintenance perennial alternative.


5. Dandelions – The Pollinator Magnet

Though often considered a weed, dandelions play a surprising role in a healthy orchard ecosystem.

Benefits:

  • Their long taproots pull up calcium and potassium for shallow-rooted trees.
  • Early spring blooms attract bees just when apple blossoms begin to open.
  • Help maintain soil aeration.

How to Plant:

  • Allow a few dandelions to grow naturally under your tree — no special planting needed.
  • Mow or pull excess plants if they start spreading too widely.

Tip: Don’t remove all dandelions from your lawn — they’re vital for early-season pollinators.


6. Clover – The Nitrogen Fixer

Clover is one of the best living mulches for apple trees. It’s low-growing, drought-tolerant, and improves soil fertility.

Benefits:

  • Fixes nitrogen in the soil, providing natural fertilizer.
  • Reduces weeds and conserves moisture.
  • Attracts bees and beneficial insects.

How to Plant:

  • Sow white or red clover seed in spring or fall beneath your apple tree.
  • Mow occasionally to keep it tidy and stimulate new growth.

Pro Tip: Clover also helps prevent erosion and compaction around tree roots.


7. Nasturtiums – The Aphid Trap

Nasturtiums are not only beautiful — they’re a brilliant form of pest management.

Benefits:

  • Act as a trap crop, luring aphids and whiteflies away from apple leaves.
  • Attract beneficial insects like ladybugs and lacewings that feed on pests.
  • Their bright flowers add color and are edible too!

How to Plant:

  • Plant nasturtiums in small clusters 3–4 feet from the tree base.
  • Let them trail naturally or climb low supports.

Bonus: Nasturtium leaves and flowers have a peppery flavor and make great additions to salads.


8. Lemon Balm and Mint – The Insect Repellers

Both lemon balm and mint are aromatic herbs that confuse and repel insect pests.

Benefits:

  • Repel codling moths, aphids, and ants.
  • Attract pollinators with their small, nectar-rich flowers.
  • Release essential oils that deter mosquitoes and fruit flies.

How to Plant:

  • Plant in containers near your apple trees to prevent aggressive spreading.
  • Cut back regularly to encourage new growth and prevent overcrowding.

Pro Tip: Crushed mint leaves also deter rodents that might nibble on young bark.


9. Calendula (Pot Marigold) – The Pollinator Powerhouse

Calendula’s bright yellow-orange flowers are more than ornamental — they help keep apple trees productive and healthy.

Benefits:

  • Attract bees and hoverflies for pollination.
  • Repel aphids and beetles.
  • Improve soil health through dense root systems.

How to Plant:

  • Sow calendula seeds around the tree base in early spring.
  • Deadhead spent blooms to encourage continuous flowering.

Fun Fact: Calendula petals are edible and can be used as a natural dye or garnish.


10. Yarrow – The Beneficial Insect Haven

Yarrow is a powerhouse perennial that enhances biodiversity around your apple trees.

Benefits:

  • Attracts ladybugs, lacewings, and parasitic wasps that prey on aphids and caterpillars.
  • Strengthens nearby plants through chemical signaling (allelopathy).
  • Improves soil structure with deep, fibrous roots.

How to Plant:

  • Plant yarrow at the edge of your orchard or garden bed, about 3 feet from the trunk.
  • Divide clumps every few years to control spread.

Pro Tip: Choose white or yellow yarrow for best insect attraction.


Bonus Companions for Apple Trees

Companion PlantBenefitNotes
BorageAttracts bees, improves fruit flavorRe-seeds easily each year
ThymeGround cover, repels worms and beetlesPlant along borders
ChamomileBoosts tree immunityGreat for underplanting
TansyRepels ants and mothsKeep controlled—can spread
Fennel (in containers)Attracts hoverfliesKeep away from direct root zone

Plants to Avoid Near Apple Trees

Not all plants make good neighbors. Some compete for nutrients or release compounds that can stunt apple tree growth.

Avoid planting:

  • Potatoes, tomatoes, peppers, or eggplants (members of the nightshade family – can spread blight).
  • Walnuts (release juglone, which is toxic to apple trees).
  • Brassicas (like cabbage and broccoli – can attract root maggots).

Tip: Always leave 2–3 feet of open space around the trunk to prevent root competition.


How to Design a Companion Planting Guild Around Your Apple Tree

A “fruit tree guild” is a layered, self-sustaining planting system that mimics a forest.

Example Apple Tree Guild:

  • Center: Apple tree
  • Inner Circle: Garlic, chives, and comfrey (nutrient cycling & disease control)
  • Middle Circle: Clover or nasturtiums (ground cover & nitrogen fixing)
  • Outer Circle: Marigolds, calendula, and yarrow (pollinator support)

This layered design provides nutrients, pest control, and pollination year-round — all without chemical fertilizers or sprays.


Final Thoughts

Companion planting around your apple tree is one of the simplest, most natural ways to boost productivity, protect against pests, and create a thriving garden ecosystem.

Instead of relying on pesticides or synthetic fertilizers, you’ll have a living system that supports your tree — from the roots to the blossoms.

With the right mix of herbs, flowers, and ground covers, your apple tree will grow stronger, produce more fruit, and stay healthier season after season.

So grab your gloves, gather your seeds, and start designing your apple tree companion garden today — because a happy tree is never alone.

How To Start A Fig Tree From Cuttings: A Complete Step-By-Step Guide For Beginners

How To Start A Fig Tree From Cuttings: A Complete Step-By-Step Guide For Beginners

Fig trees (Ficus carica) are among the most rewarding fruit trees you can grow. Their large, hand-shaped leaves, sweet honey-flavored fruit, and easy-going nature make them a favorite of gardeners everywhere. But here’s a little secret: you don’t need to buy an expensive fig tree from a nursery.

With just one healthy branch and a little patience, you can start your own fig tree from cuttings — and it’s easier than you might think.

This guide walks you through everything you need to know about growing fig trees from cuttings — from choosing the right branch to rooting, transplanting, and caring for your new plant. Whether you’re a seasoned gardener or a beginner, you’ll be amazed at how simple and satisfying this process can be.


Why Grow Fig Trees From Cuttings?

Starting fig trees from cuttings has several benefits:

  1. It’s Free (or Nearly Free): You can propagate dozens of new trees from one parent plant.
  2. True to Type: Cuttings produce an exact genetic clone of the parent tree, so you’ll get the same delicious fruit.
  3. Fast Results: Fig cuttings can root in as little as 4–6 weeks and may bear fruit within 1–2 years.
  4. Fun & Rewarding: Watching roots and leaves emerge from a stick is truly magical for gardeners of all skill levels.

Step 1: Choose the Right Time for Taking Fig Cuttings

The best time to take fig cuttings depends on your local climate and whether you’re propagating indoors or outdoors.

  • Late Winter to Early Spring (Dormant Season): Ideal for hardwood cuttings. The plant is resting, which reduces stress and increases rooting success.
  • Late Spring to Early Summer: You can also root softwood or semi-hardwood cuttings taken from actively growing branches, but they’ll require more humidity and care.

Pro Tip: If you’re a beginner, start with hardwood cuttings in late winter—they’re more forgiving and root easily with minimal equipment.


Step 2: Select a Healthy Parent Fig Tree

The success of your new fig tree depends heavily on the health of the parent.

Choose a parent tree that:

  • Produces sweet, high-quality fruit.
  • Has no signs of disease, rot, or pest damage.
  • Is mature (at least 2–3 years old).

Avoid taking cuttings from weak, diseased, or overly young plants.


Step 3: Take the Cuttings

You’ll need a sharp pair of pruning shears or a clean knife.

How to take fig cuttings:

  1. Select a branch that’s ½ to ¾ inch thick (about pencil width).
  2. Cut sections that are 6 to 10 inches long with 3–5 nodes (the little bumps where leaves or roots can grow).
  3. Make the bottom cut just below a node and the top cut about ½ inch above a node.
  4. Remove any leaves from the lower half of the cutting.

If you’re not planting them right away, wrap the cuttings in a damp paper towel, seal them in a plastic bag, and store them in the refrigerator for up to two weeks.

Optional: Dip the bottom end of each cutting into rooting hormone powder to boost root development.


Step 4: Prepare the Planting Medium

Fig cuttings root best in a moist, well-draining medium that provides both air and stability.

Good options include:

  • 1 part perlite + 1 part peat moss
  • 1 part coarse sand + 1 part compost
  • Pre-mixed seed-starting soil

Avoid heavy garden soil—it can suffocate the roots or lead to rot.

Tip: If you plan to root cuttings indoors, use individual pots or plastic cups with drainage holes for easy transplanting later.


Step 5: Plant and Water the Cuttings

  1. Fill your container with the prepared soil mix.
  2. Insert the cutting 2–3 inches deep, making sure at least one or two nodes are buried under the soil.
  3. Firm the soil gently around the cutting to hold it upright.
  4. Water thoroughly until moisture drains from the bottom.

If planting multiple cuttings, space them at least 2 inches apart in a tray or pot.


Step 6: Create the Ideal Rooting Environment

Cuttings root best in warm, humid conditions.

If Rooting Indoors:

  • Place the pots in a bright, indirect light (like a sunny windowsill).
  • Maintain temperatures between 70–80°F (21–27°C).
  • Cover the cuttings with a clear plastic dome or bag to retain humidity.

Important: Vent the plastic daily for a few minutes to prevent mold growth.

If Rooting Outdoors:

  • Choose a shaded, sheltered location to prevent the cuttings from drying out.
  • Cover with a plastic bottle or mini greenhouse structure to maintain moisture.

Keep the soil consistently moist but not soggy. Roots typically start forming in 4–6 weeks.


Step 7: Check for Root Development

After about a month, gently tug on the cutting. If you feel resistance, roots are forming!

To confirm:

  • Carefully remove one cutting and check for white, fibrous roots emerging from the buried nodes.

Once the roots are at least 1–2 inches long, your fig cuttings are ready to transplant into larger pots.


Step 8: Transplant Your Rooted Fig Cuttings

Transplant rooted cuttings into 6- to 8-inch pots filled with a nutrient-rich potting mix.

Transplanting steps:

  1. Handle gently to avoid damaging the roots.
  2. Plant each cutting at the same depth it was rooting.
  3. Water thoroughly.
  4. Place the pots in bright, indirect sunlight for the first week, then move to full sun as they adjust.

As your fig trees grow taller and stronger, they can be transplanted into:

  • Larger containers (15–20 gallons) for patio gardening, or
  • Directly into the ground, if you live in a warm climate.

Tip: Figs are hardy in USDA zones 7–11, but you can grow them indoors or in containers even in cooler areas.


Step 9: Caring for Young Fig Trees

After transplanting, fig trees grow quickly with the right care.

Light:

Figs love full sun (at least 6–8 hours daily). If growing indoors, place near a south-facing window or use grow lights.

Water:

Keep the soil evenly moist but not waterlogged. Let the top inch of soil dry before watering again.

Fertilizer:

Feed every 4–6 weeks during the growing season with a balanced fertilizer (10-10-10) or compost tea. Avoid overfertilizing, which can produce leafy growth at the expense of fruit.

Pruning:

Pinch back the growing tip after 4–5 leaves appear. This encourages branching and a stronger, bushier shape.

Pests:

Watch for aphids, scale, and spider mites. A quick spray of neem oil or insecticidal soap usually keeps them under control.


Step 10: Overwintering Your Fig Trees

If you live in a region where winters drop below freezing, your young fig trees will need protection.

Two simple options:

  1. Bring Indoors: Move container-grown figs indoors before frost. Place them in a cool, bright area (like a basement window). Water lightly every few weeks to keep roots alive.
  2. Outdoor Protection: If planted in the ground, wrap the trunk with burlap and mulch heavily around the base.

Figs naturally go dormant in winter, so don’t worry if they lose their leaves — they’ll regrow once spring arrives.


When Will Your New Fig Tree Bear Fruit?

Patience pays off! Most fig trees started from cuttings will begin producing fruit within 1–2 years, sometimes even sooner if rooted early in the season.

For best results:

  • Keep the plant in full sun.
  • Don’t let it dry out during the growing season.
  • Repot every 2–3 years to refresh the soil and encourage healthy growth.

Bonus Tip: Once your fig tree is mature, you can repeat the process and propagate even more trees — they make thoughtful gifts for friends and family!


Common Problems (and Easy Fixes)

ProblemLikely CauseQuick Fix
Cuttings turn black or mushyOverwatering or poor drainageLet soil dry slightly, ensure drainage holes
No roots after 8 weeksLow temperature or dry airIncrease warmth/humidity, mist regularly
Yellow leavesNutrient deficiencyApply balanced fertilizer
Mold on soil surfacePoor ventilationRemove cover briefly each day, reduce watering

Final Thoughts

Starting a fig tree from cuttings isn’t just an affordable way to expand your garden—it’s a satisfying experience that connects you directly with the cycle of growth. With a few simple materials, patience, and regular care, you can transform a small branch into a thriving tree that provides shade, beauty, and delicious fruit for years to come.

Whether you’re growing your fig indoors on a sunny windowsill or outdoors in a pot, each leaf and branch is proof of your green thumb at work.

So go ahead — find a healthy fig tree, grab your pruning shears, and start growing your own. Before you know it, you’ll be harvesting sweet, sun-ripened figs straight from your very own tree.

8 Fruit Trees You Can Grow In Containers: Harvest Fresh Fruit Right From Your Patio

8 Fruit Trees You Can Grow In Containers: Harvest Fresh Fruit Right From Your Patio

Imagine stepping onto your balcony, patio, or sunny porch and plucking a ripe orange, a handful of cherries, or a juicy peach—all from trees growing right in containers. It sounds like something only a warm-climate gardener could enjoy, but with the right care, you can grow fruit trees in pots almost anywhere.

Container-grown fruit trees are compact, beautiful, and surprisingly productive. Whether you have a small urban space or want to keep your garden mobile, growing fruit trees in containers offers a flexible, rewarding way to enjoy homegrown fruit all year long.

Here’s a guide to 8 fruit trees that thrive in containers, plus detailed tips to help them flourish.


Why Grow Fruit Trees in Containers?

Before we jump into the best varieties, let’s look at the benefits of container gardening for fruit trees:

  1. Space Efficiency: Perfect for balconies, patios, or small gardens.
  2. Mobility: You can move trees indoors during winter or into the sun as needed.
  3. Pest and Disease Control: Easier to monitor and treat issues in confined soil.
  4. Controlled Growth: Dwarf and semi-dwarf varieties stay compact and manageable.
  5. Decorative Appeal: Fruit trees add greenery, fragrance, and color to any space.

With just a few large pots, good soil, and regular care, you can create your very own mini orchard in containers.


1. Lemon Tree (Citrus limon)

Few things say “tropical” like a lemon tree. Compact and fragrant, lemon trees are perfect for container gardening.

Best Varieties for Pots:

  • ‘Improved Meyer’ Lemon – Naturally small, sweet, and highly productive.
  • ‘Ponderosa’ Lemon – Grows larger fruit but still manageable indoors.

Container Requirements:

  • Minimum 18–24 inches wide, with excellent drainage.
  • Use a well-draining potting mix designed for citrus or cacti.

Sunlight & Care:

  • Needs 8–10 hours of sunlight daily—a sunny south-facing window or grow light works well.
  • Water when the top inch of soil feels dry.
  • Fertilize monthly with a citrus-specific fertilizer.

Pro Tip: Move your lemon tree outdoors in warm months for more blooms and pollination, then bring it back inside when temperatures drop below 55°F (13°C).


2. Orange Tree (Citrus sinensis)

Orange trees in containers bring cheerful color and fragrance to your space.

Best Varieties for Containers:

  • ‘Calamondin’ Orange – Compact, cold-tolerant, and ornamental.
  • ‘Trovita’ or ‘Washington Navel’ – Great for indoor growth under strong light.

Container & Soil:

  • A 20-inch pot with drainage holes.
  • Use loamy, acidic soil rich in organic matter.

Sun & Water:

  • Needs at least 6–8 hours of direct sunlight.
  • Keep soil evenly moist but not soggy.
  • Mist leaves occasionally to boost humidity indoors.

Fertilizing:
Feed every 4–6 weeks during the growing season with a citrus fertilizer high in nitrogen and magnesium.


3. Peach Tree (Prunus persica)

Yes, you can grow sweet, juicy peaches in pots! Dwarf peach varieties are bred for container life and can produce a surprising number of fruits.

Best Varieties for Containers:

  • ‘Bonanza’ – Dwarf variety reaching only 4–6 feet tall.
  • ‘Golden Glory’ – Compact and perfect for patios.

Container & Soil:

  • A deep 20–24-inch container with drainage.
  • Use nutrient-rich potting soil with compost mixed in.

Sun & Pruning:

  • Needs full sun (6–8 hours daily).
  • Prune annually in late winter to maintain shape and encourage fruiting wood.

Watering:

  • Water deeply when the top 2 inches of soil dry out.
  • Avoid letting roots sit in water.

Tip: Peaches grown in pots often ripen faster due to the warmth absorbed by the container—perfect for short growing seasons!


4. Cherry Tree (Prunus avium / Prunus cerasus)

Cherries are not only delicious but stunning when in bloom. Dwarf cherry trees adapt beautifully to container growing with proper pruning.

Best Varieties for Pots:

  • ‘Stella’ – Self-pollinating sweet cherry.
  • ‘Carmine Jewel’ – Compact tart cherry ideal for small spaces.

Container & Soil:

  • A large pot (at least 24 inches deep) for root spread.
  • Use loamy soil with good drainage.

Sun & Care:

  • Requires 6+ hours of sunlight daily.
  • Water regularly, keeping soil slightly moist.

Fertilizer:
Feed every 2–3 months with a balanced (10-10-10) slow-release fertilizer.

Pro Tip: Place two compatible cherry varieties nearby if yours is not self-pollinating. This ensures heavy fruiting even in containers.


5. Apple Tree (Malus domestica)

Even apples can be grown successfully in pots with dwarf rootstocks. Compact apple trees offer classic beauty and crisp, sweet fruit.

Best Varieties for Containers:

  • ‘Honeycrisp’ – Sweet and aromatic.
  • ‘Gala’ or ‘Golden Delicious’ – Productive and hardy in containers.
  • Rootstock: Choose M27 or M9 dwarfing rootstock for compact growth.

Container & Soil:

  • A 24-inch-wide, deep container.
  • Use rich, well-draining loam with compost.

Sunlight:

  • Needs full sun—8 hours minimum daily.

Pruning & Pollination:

  • Prune in winter to maintain shape.
  • Most apples need cross-pollination, so grow two compatible varieties or choose a self-pollinating one like ‘Golden Delicious’.

6. Fig Tree (Ficus carica)

Figs are among the easiest fruit trees to grow in containers. They thrive in pots, adapt well to pruning, and bear sweet, rich fruit even with minimal care.

Best Varieties for Pots:

  • ‘Brown Turkey’ – Hardy and self-fertile.
  • ‘Celeste’ – Compact with excellent flavor.

Container & Soil:

  • Minimum 16–20-inch pot with drainage holes.
  • Use loamy, compost-enriched soil.

Sun & Water:

  • Figs need full sun (8+ hours).
  • Water when the soil dries out 1 inch below the surface.

Winter Care:

  • Bring indoors or to a cool garage during freezing temperatures.

Pro Tip: Figs produce best when slightly root-bound—don’t upsize pots too often.


7. Dwarf Mulberry Tree (Morus nigra)

Mulberries are fast-growing, productive trees that adapt surprisingly well to containers. They produce sweet, blackberry-like fruit and offer a tropical look.

Best Varieties for Containers:

  • ‘Dwarf Everbearing’ – Compact, prolific, and produces multiple crops per year.

Container & Soil:

  • A 16–20-inch container with drainage.
  • Use neutral, rich potting mix.

Sun & Care:

  • Requires 6–8 hours of sunlight daily.
  • Water regularly; mulberries dislike drought stress.

Bonus:

  • Fruits continuously through summer.
  • Self-pollinating, so you only need one plant.

Fun fact: The leaves of mulberries are also the favorite food of silkworms—so your plant has history and beauty!


8. Pomegranate Tree (Punica granatum)

Pomegranates add exotic flair to any patio garden. Their glossy leaves, vibrant flowers, and ruby-red fruit make them a showstopper in pots.

Best Varieties for Containers:

  • ‘Nana’ – True dwarf variety (3–4 feet tall).
  • ‘Wonderful’ – Slightly larger but produces big, juicy fruits.

Container & Soil:

  • Use a large 18–22-inch pot.
  • Soil should be well-draining and slightly sandy.

Sun & Water:

  • Loves full sun (8+ hours).
  • Water deeply, allowing the soil to dry out between waterings.

Pruning:

  • Prune annually in late winter to shape and remove weak branches.

Tip: Pomegranates can flower and fruit even indoors near a bright window—perfect for adding a Mediterranean vibe to your home.


Bonus Tips for Growing Fruit Trees in Containers

  1. Choose the Right Pot:
    • Terracotta or plastic pots both work, but make sure they have drainage holes.
    • Larger pots retain moisture better and allow root expansion.
  2. Use Quality Soil:
    • Always use potting mix, not garden soil.
    • Add compost or slow-release fertilizer for nutrients.
  3. Fertilize Regularly:
    • Container-grown trees lose nutrients faster.
    • Use organic fertilizers every 4–6 weeks during growing season.
  4. Prune Annually:
    • Keeps trees compact and encourages more flowers and fruit.
  5. Pollination Help:
    • Move trees outdoors during flowering or hand-pollinate using a small brush if kept indoors.
  6. Winter Care:
    • Move non-hardy species (like citrus or figs) indoors when temperatures drop below 50°F (10°C).
  7. Repot Every 2–3 Years:
    • Refresh soil and prune roots slightly to maintain size and health.

Creating a Mini Orchard

Mixing different container fruit trees can create a vibrant, edible paradise. Try grouping:

  • Lemon, fig, and pomegranate for a Mediterranean feel.
  • Peach, cherry, and apple for a traditional orchard look.
  • Mulberry and citrus for a lush tropical corner.

Add some herbs or flowers around the pots for pollinator attraction and extra beauty.


Final Thoughts

Growing fruit trees in containers is one of the most rewarding ways to bring nature, color, and flavor into small spaces. Whether you dream of sipping lemonade under your lemon tree or snacking on homegrown peaches from your balcony, container fruit trees make it all possible.

Start small—choose one or two dwarf varieties, provide sun, good soil, and a bit of patience. Soon, you’ll have a thriving patio orchard that’s as beautiful as it is productive.

Because no matter how big or small your garden is, the sweetest fruit is always the one you grow yourself.


When And How To Prune Raspberry Bushes For Better Yields

When And How To Prune Raspberry Bushes For Better Yields

Raspberries are one of the most rewarding berries to grow at home—sweet, tangy, and bursting with flavor. But if you’ve ever wondered why your harvests seem smaller each year or why your raspberry patch looks more tangled than thriving, the answer is likely simple: it’s time to prune.

Pruning raspberry bushes isn’t just about tidying up your garden; it’s about ensuring healthier plants, larger berries, and more abundant harvests. With the right technique and timing, your raspberries will reward you with plump, juicy fruit season after season.

Here’s your complete, easy-to-follow guide on when and how to prune raspberry bushes for better yields.


Why Pruning Is Essential For Raspberry Plants

Raspberry plants are naturally vigorous. They send up new canes (stems) each year, and without proper management, they quickly form dense thickets.

Here’s what happens if you don’t prune:

  • Old, unproductive canes steal nutrients from new growth.
  • Crowded canes block sunlight and air circulation.
  • Poor airflow increases the risk of diseases like cane blight and powdery mildew.
  • Smaller, less flavorful berries develop due to competition.

Regular pruning keeps your raspberry patch healthy and productive. It encourages strong new canes that produce abundant fruit and makes harvesting easier and cleaner.


Understanding Raspberry Growth: Summer-Bearing vs. Ever-Bearing

Before you grab your pruning shears, it’s important to identify which type of raspberries you have—because pruning times differ dramatically.

1. Summer-Bearing Raspberries

  • Produce fruit once per year, typically in early to mid-summer.
  • Berries grow on second-year canes called floricanes.
  • First-year canes (primocanes) grow vegetatively, then fruit the following year.

Example varieties: ‘Latham’, ‘Boyne’, ‘Willamette’, and ‘Killarney’.

2. Ever-Bearing (Fall-Bearing) Raspberries

  • Also known as primocane-bearing varieties.
  • Produce fruit twice per year—a small crop in early summer and a main crop in late summer to fall.
  • Fruit grows directly on the current year’s canes.

Example varieties: ‘Heritage’, ‘Caroline’, ‘Autumn Bliss’, and ‘Anne’.


Step 1: Gather the Right Tools

Good pruning starts with the right gear:

  • Sharp pruning shears or loppers (clean cuts prevent disease).
  • Gardening gloves (raspberry canes are thorny).
  • Disinfectant (wipe blades with alcohol between cuts).

Step 2: Know the Right Time to Prune

Timing is crucial. Prune too early, and you may remove canes that will fruit soon. Prune too late, and you’ll miss the chance to shape growth for next season.


For Summer-Bearing Raspberries:

1. After Harvest (Mid to Late Summer):

  • As soon as fruiting is over, remove all canes that produced berries.
  • These are old, woody, and will never bear again.
  • Cut them at ground level—don’t leave stubs.

2. Late Winter or Early Spring:

  • Before new growth begins, thin out the remaining canes.
  • Keep the sturdier, younger first-year canes (primocanes) that will bear this season.
  • Aim for 4–6 canes per foot of row.

This two-step process rejuvenates your patch and encourages strong fruiting canes for the next year.


For Ever-Bearing Raspberries:

You have two options depending on whether you want one large harvest or two smaller ones:

Option 1: One Large Fall Harvest (Simplest Method)

  • In late winter or early spring, cut all canes down to the ground.
  • New canes will sprout in spring and produce a single, heavy crop in late summer or fall.
  • This method keeps things tidy and disease-free.

Option 2: Two Harvests (More Involved)

  • After the fall harvest, cut back only the portion of each cane that fruited (top third).
  • These same canes will produce again on the lower sections in early summer next year.
  • After the summer harvest, remove those canes completely to make room for new growth.

Tip: Many home gardeners prefer the one-harvest method—it’s easier and still yields plenty of fruit.


Step 3: How To Prune Effectively

Now that you know when to prune, let’s look at how to do it right.

1. Remove Old, Dead, or Diseased Canes

Cut them at soil level. These canes are brown, woody, and brittle. Removing them prevents disease and opens space for new canes.

2. Thin the Patch

Overcrowding is the biggest cause of reduced yield. Aim for a spacing of:

  • 6 inches between canes within rows.
  • 2–3 feet between rows.

Keep only the strongest, healthiest canes—usually the thickest and greenest.

3. Trim the Tops (Optional)

In early spring, you can trim the top 6 inches of healthy canes to encourage branching.
More side branches = more fruiting tips.

4. Train Canes on a Trellis or Wires

Raspberry canes benefit from gentle support:

  • Use stakes, wires, or a T-trellis system to keep canes upright.
  • Tie canes loosely with garden twine or clips.

Proper support prevents bending, improves airflow, and makes picking easier.

Bonus: A well-trained raspberry patch looks neat, organized, and far more productive.


Step 4: Mulch and Maintain After Pruning

After pruning, your plants will redirect energy toward new growth. Help them recover with proper care.

1. Apply Compost or Fertilizer

  • Add a 2-inch layer of compost or use a balanced fertilizer (10-10-10) in early spring.
  • This boosts soil nutrients and promotes vigorous cane growth.

2. Mulch the Base

  • Spread straw, pine needles, or wood chips around the base to retain moisture and suppress weeds.
  • Keep mulch an inch away from the stems to prevent rot.

3. Water Deeply but Infrequently

  • Raspberries prefer moist but not soggy soil.
  • Water deeply once or twice a week during dry spells.

4. Watch for Suckers

  • Raspberries spread by underground shoots. Remove excess suckers that appear outside your planting area to prevent overcrowding.

Step 5: Yearly Raspberry Pruning Calendar

Here’s a quick summary to keep your pruning schedule simple:

SeasonSummer-Bearing RaspberriesEver-Bearing Raspberries
Late Summer (Post-Harvest)Remove spent canes completelyOptional: Remove fruited tops
Late Winter/Early SpringThin out weak canes, keep strongestCut all canes to ground (for one crop)
During Growing SeasonLight trimming for shapeRemove dead/diseased canes anytime

Following this schedule ensures your plants stay vigorous, manageable, and productive year after year.


Step 6: Pruning for Health and Disease Prevention

Beyond yield, pruning keeps your raspberry patch disease-free.

Common issues prevented by pruning:

  • Cane Blight: Fungal infection spread by crowded, damp conditions.
  • Anthracnose: Gray spots and weak stems caused by poor airflow.
  • Botrytis (Gray Mold): Affects ripening fruit when humidity is high.

Regular pruning improves air circulation and sunlight exposure—two natural disease fighters.


Step 7: Extra Tips for Maximum Yield

  1. Keep Rows Narrow: Rows no wider than 18 inches make harvesting and maintenance easier.
  2. Rotate Mulch Each Year: Fresh mulch keeps weeds down and improves soil texture.
  3. Feed Mid-Season: Apply a light dose of fertilizer in mid-summer after pruning to boost next year’s cane growth.
  4. Train New Canes: Tie new canes as they grow to prevent damage from wind.
  5. Be Patient: The best yields come when your plants reach their second or third year of growth and are properly managed.

Step 8: Rejuvenating an Overgrown Raspberry Patch

If you’ve inherited an old or neglected patch, don’t worry—it can be revived.

Here’s how:

  1. In late winter, cut all canes to the ground.
  2. In spring, allow new canes to emerge.
  3. When they reach 12–18 inches, thin out weaker shoots, leaving 4–6 strong canes per clump.
  4. Fertilize, mulch, and water regularly.

By next season, your raspberry bed will be healthy and fruiting again.


Final Thoughts

Pruning raspberries may sound intimidating at first, but it’s one of the simplest and most rewarding garden tasks once you understand your plant’s growth cycle. Think of it as a yearly reset—removing what’s old to make space for what’s new.

When done correctly and at the right time, pruning gives your plants everything they need to produce larger, sweeter, and more plentiful berries. It keeps your patch neat, healthy, and bursting with fruit year after year.

So, grab your gloves and shears, step into the garden, and give those canes a trim. A few careful cuts today will lead to baskets of juicy raspberries tomorrow—and the satisfaction of knowing you grew them to perfection.