5 DIY Halloween Garden Projects for a Spooky Look

5 DIY Halloween Garden Projects for a Spooky Look

Halloween is the perfect opportunity to transform your garden into a hauntingly beautiful outdoor space. With a little creativity, some basic materials, and a few hours of effort, you can craft a garden that impresses trick-or-treaters, friends, and neighbors alike. From eerie lighting to creepy props, DIY projects allow you to customize your haunted garden while keeping costs low and creativity high.

In this article, we’ll explore five DIY Halloween garden projects that will bring a spooky, fun, and festive look to your yard. Each idea is practical, budget-friendly, and designed to make your garden the highlight of the Halloween season.


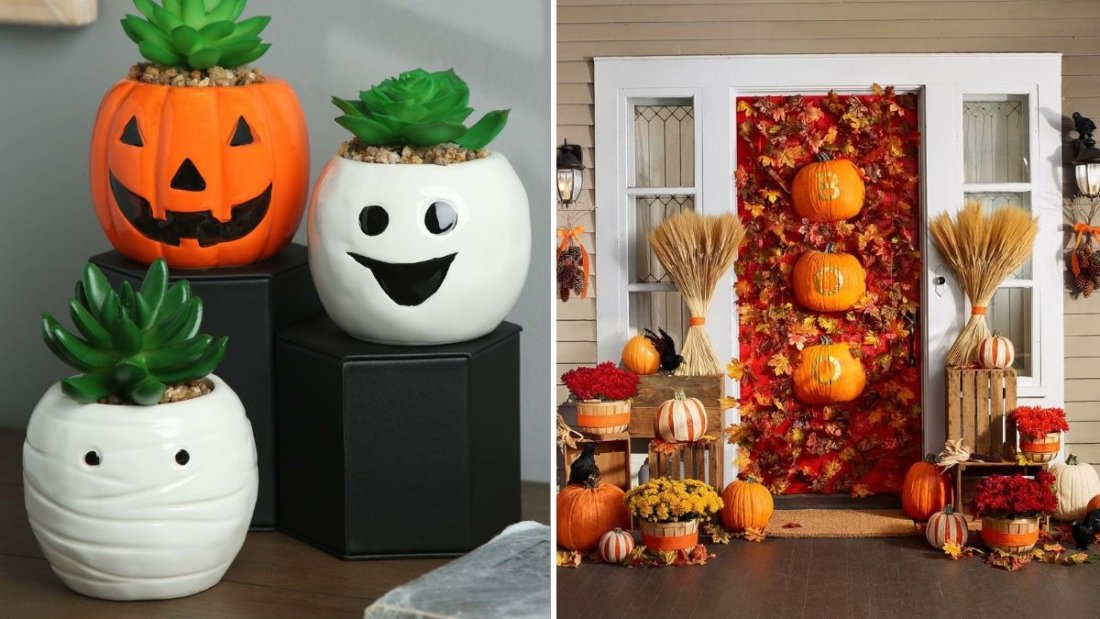
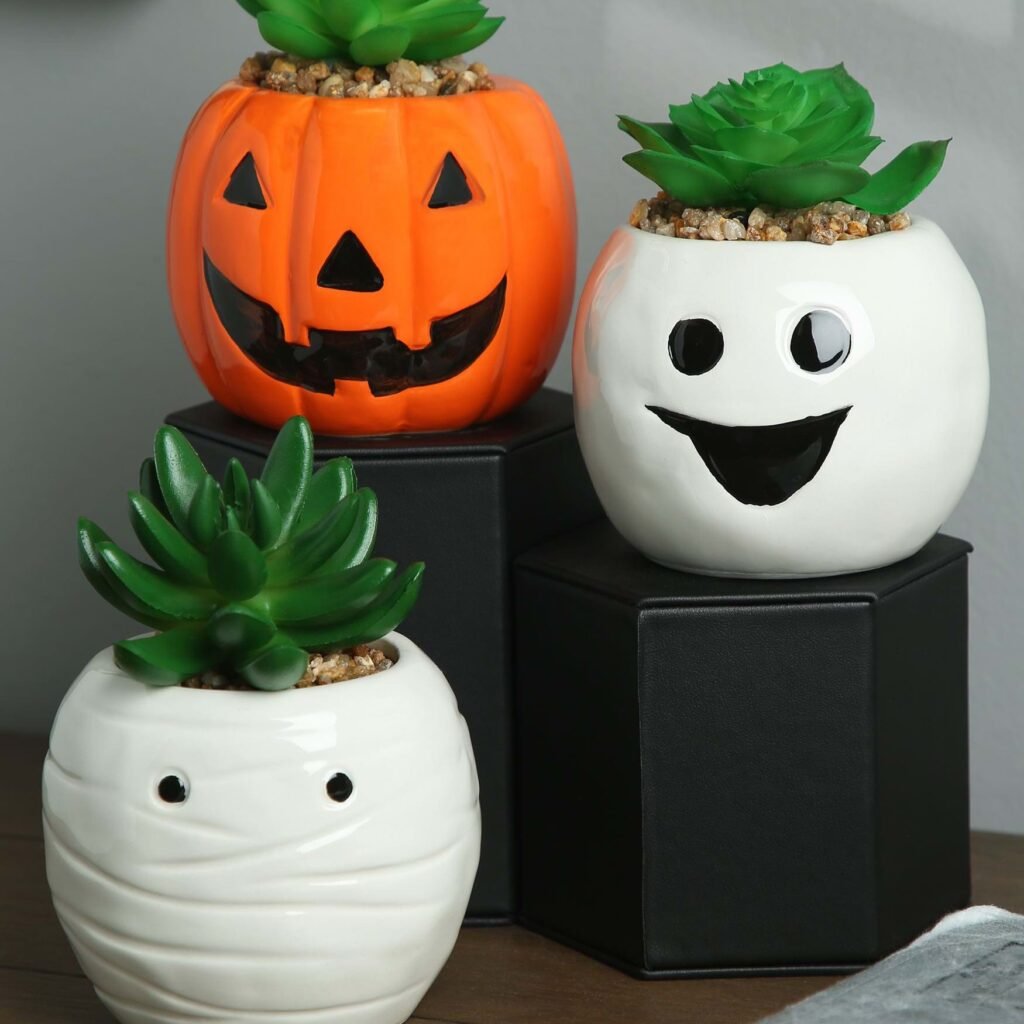
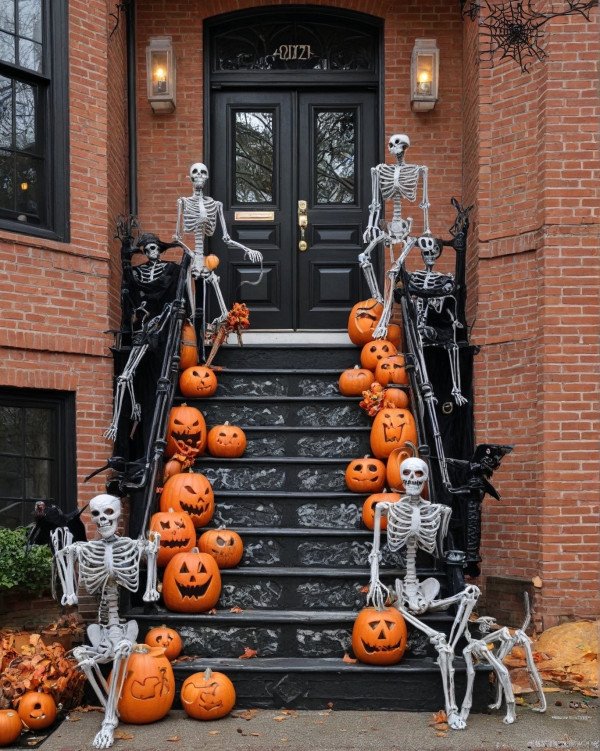
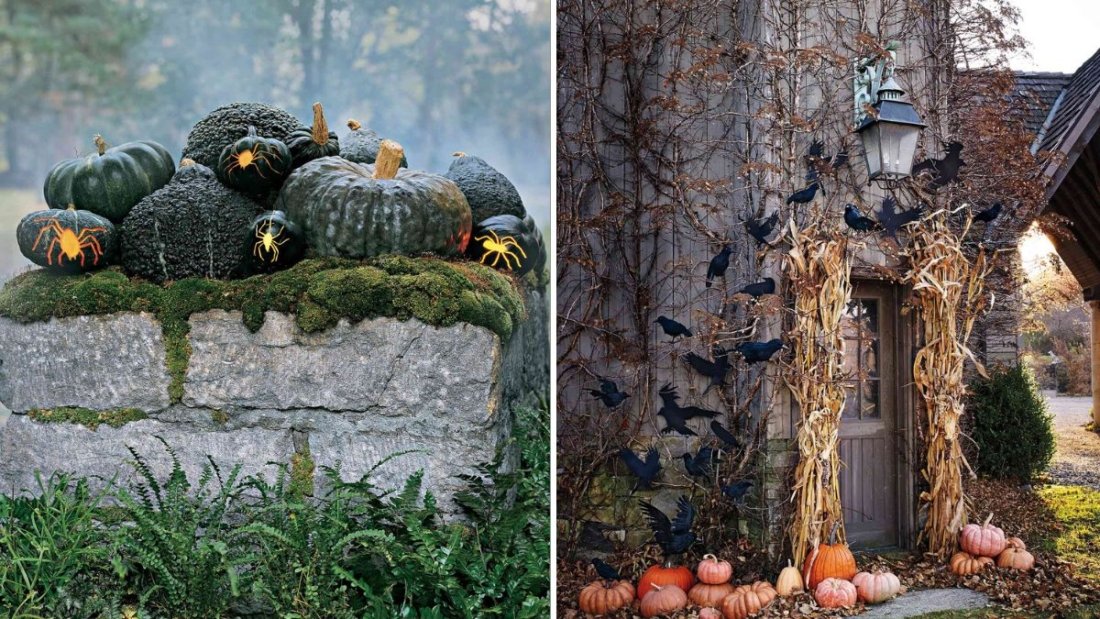
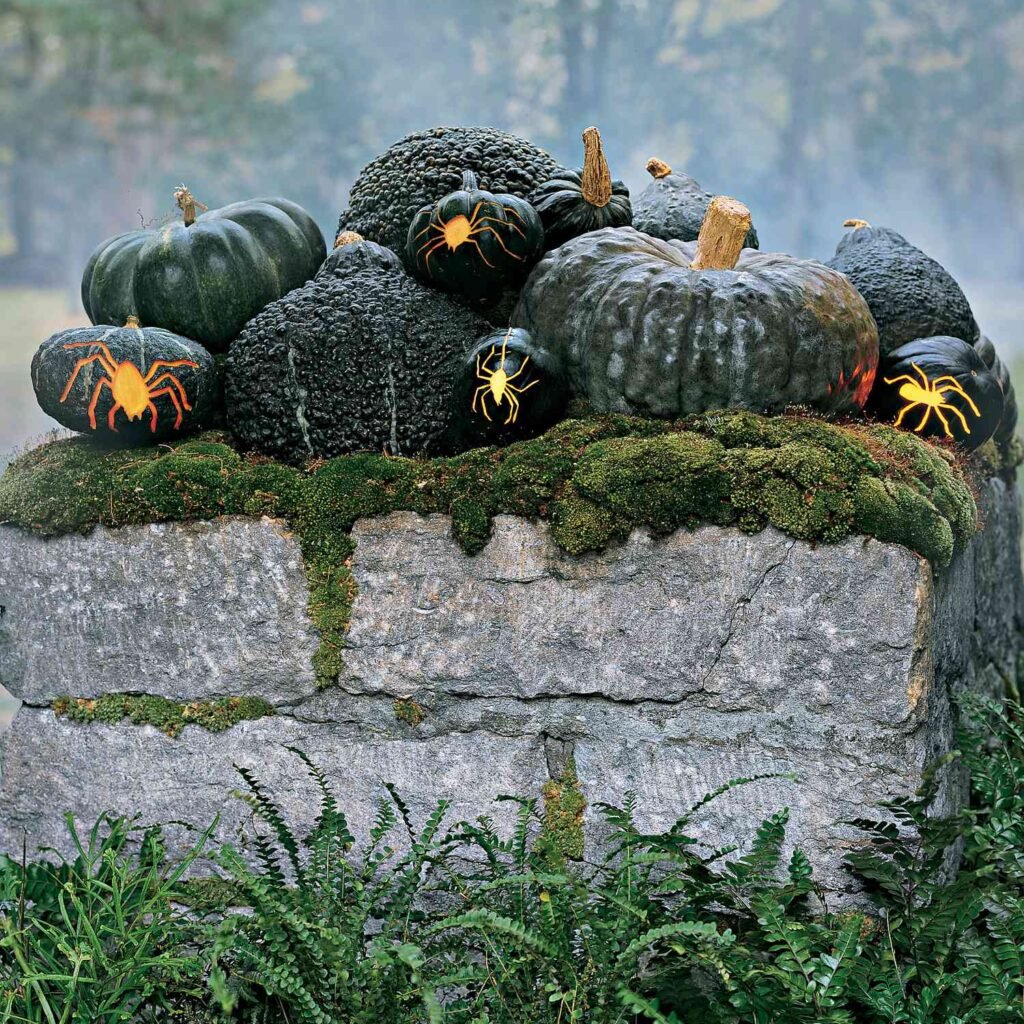
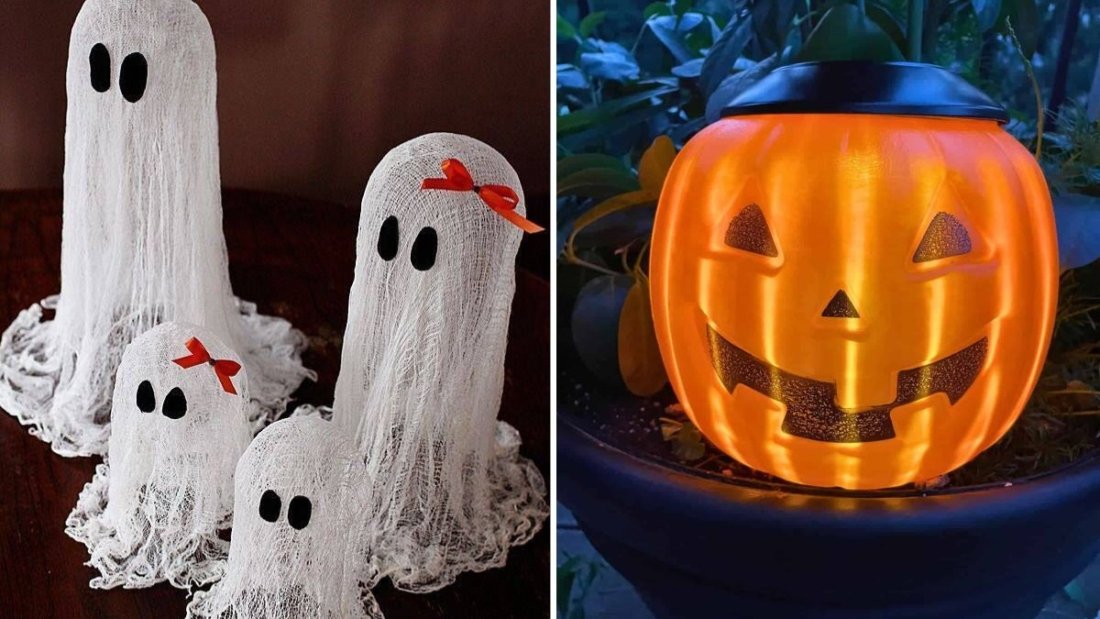
1. DIY Pumpkin Lanterns

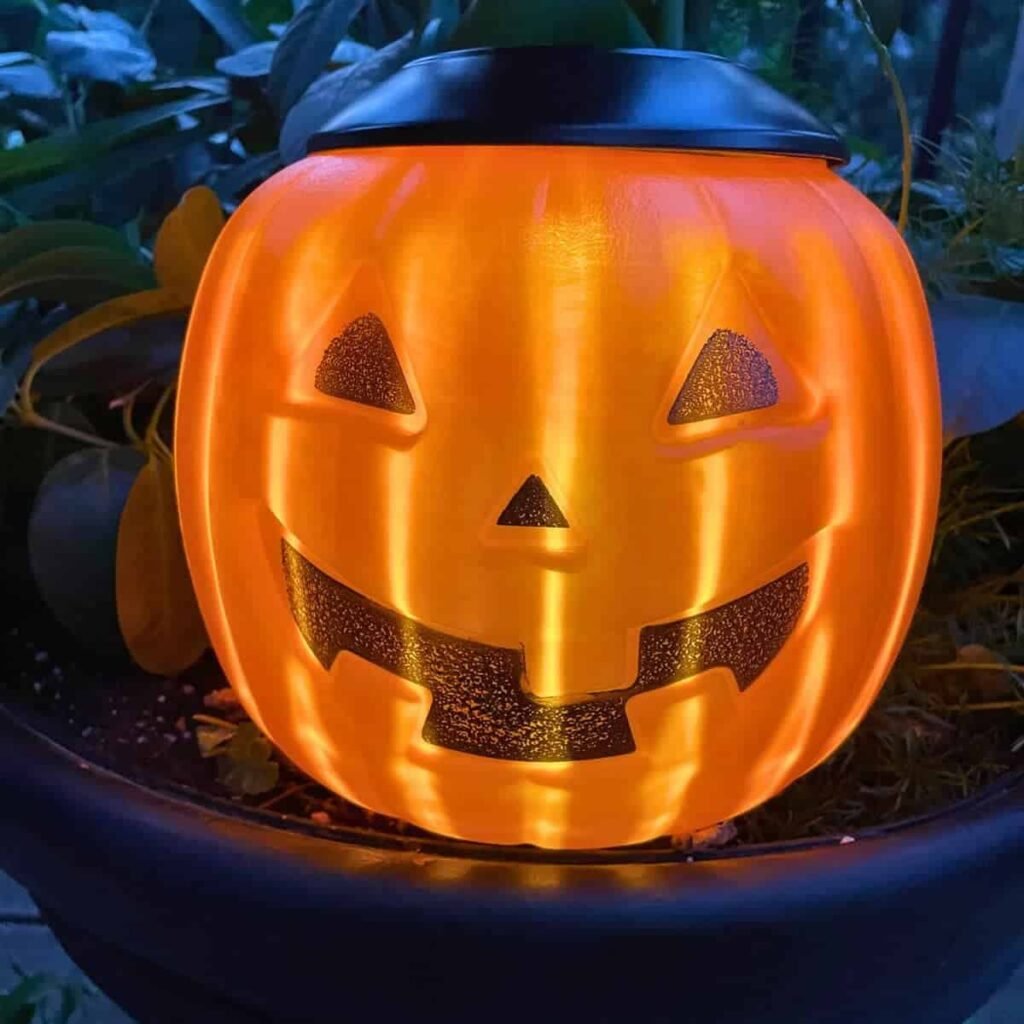
Jack-o’-lanterns are a Halloween staple, and making your own pumpkin lanterns is an easy way to add both light and spookiness to your garden.

Materials Needed:

  • Small or medium-sized pumpkins
  • Carving tools (or a serrated knife)
  • LED tea lights or fairy lights
  • Marker pen for design
  • Optional: Acrylic paints for painted designs

How to Make Them:

  1. Choose Your Pumpkins: Pick firm pumpkins with smooth surfaces for easier carving.
  2. Design Faces: Draw faces or spooky patterns with a marker pen. You can do classic scary faces, ghostly smiles, or intricate patterns for a more artistic look.
  3. Carve Carefully: Cut out the top and hollow out the pumpkin. Then carve your design.
  4. Add Lights: Place an LED tea light or small fairy lights inside the pumpkin. LED lights are safer than real candles and last longer.
  5. Placement: Arrange them along garden pathways, steps, or near flower beds for a festive glow.

Pro Tip: Mix carved pumpkins with painted ones to add color variety and protect pumpkins from spoiling too quickly.


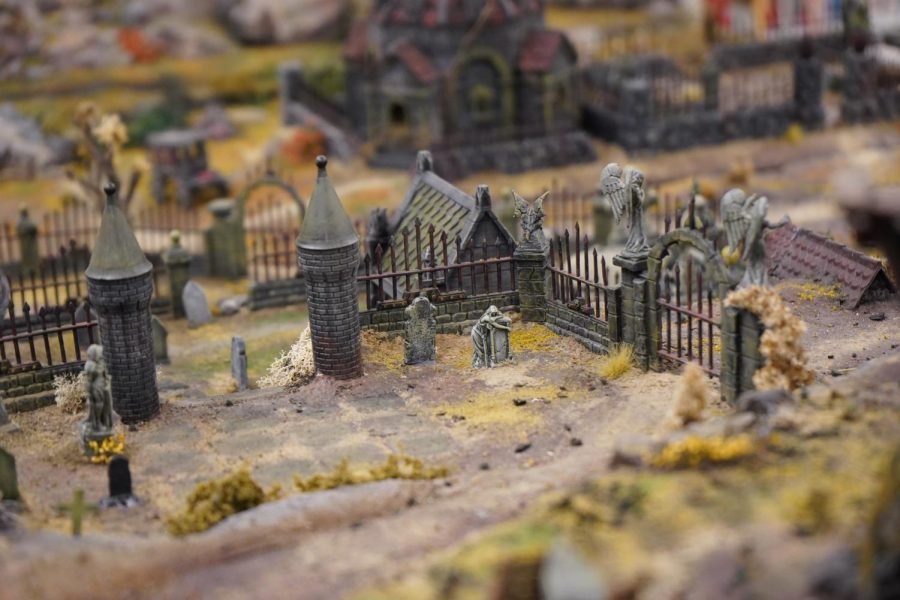
2. Haunted Garden Signs

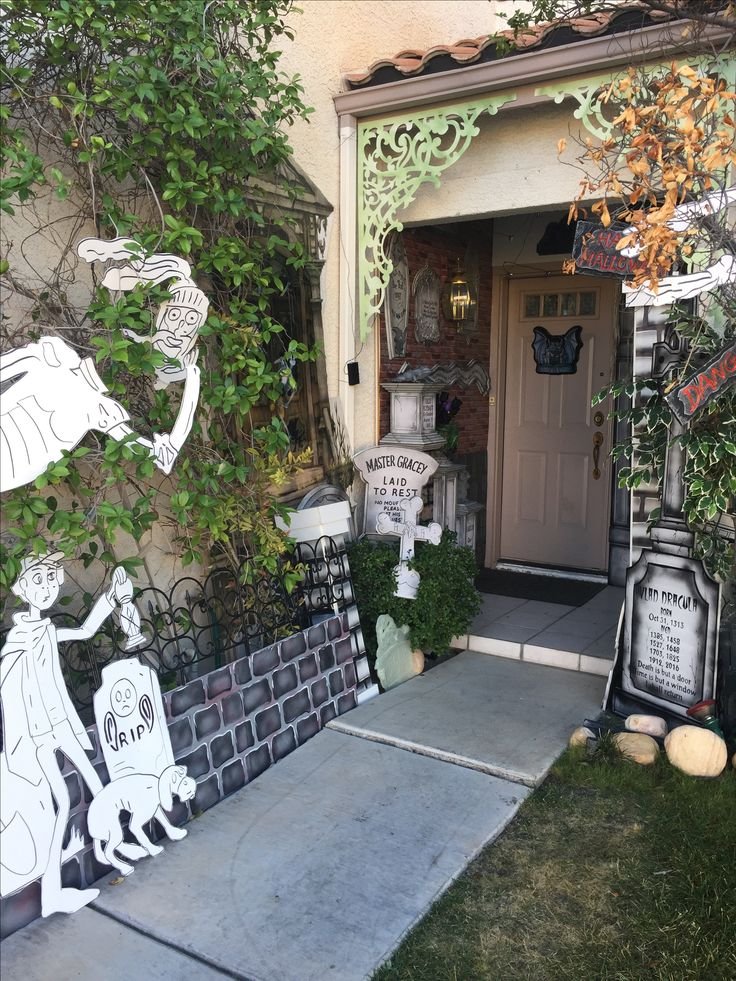
A DIY haunted garden sign is an easy project that instantly adds creepy charm and direction to your Halloween yard.

Materials Needed:

  • Wooden stakes or planks
  • Black or dark brown paint
  • White paint or chalk marker
  • Optional decorations: spiders, cobwebs, glitter

How to Make Them:

  1. Prepare the Wood: Cut wooden planks to the desired size and shape (arrow-shaped planks work well).
  2. Paint a Base: Use black, dark brown, or gray as the background color.
  3. Add Halloween Messages: Write phrases like “Enter if You Dare,” “Graveyard,” or “Beware of Ghosts” using white paint or a chalk marker.
  4. Decorate: Glue small plastic spiders, bats, or cobwebs for added effect.
  5. Install: Push stakes into the ground along garden paths or near the entrance.

Creative Twist: Use old wood or distressed planks for a weathered, haunted look. The rustic finish adds authenticity to your Halloween garden.
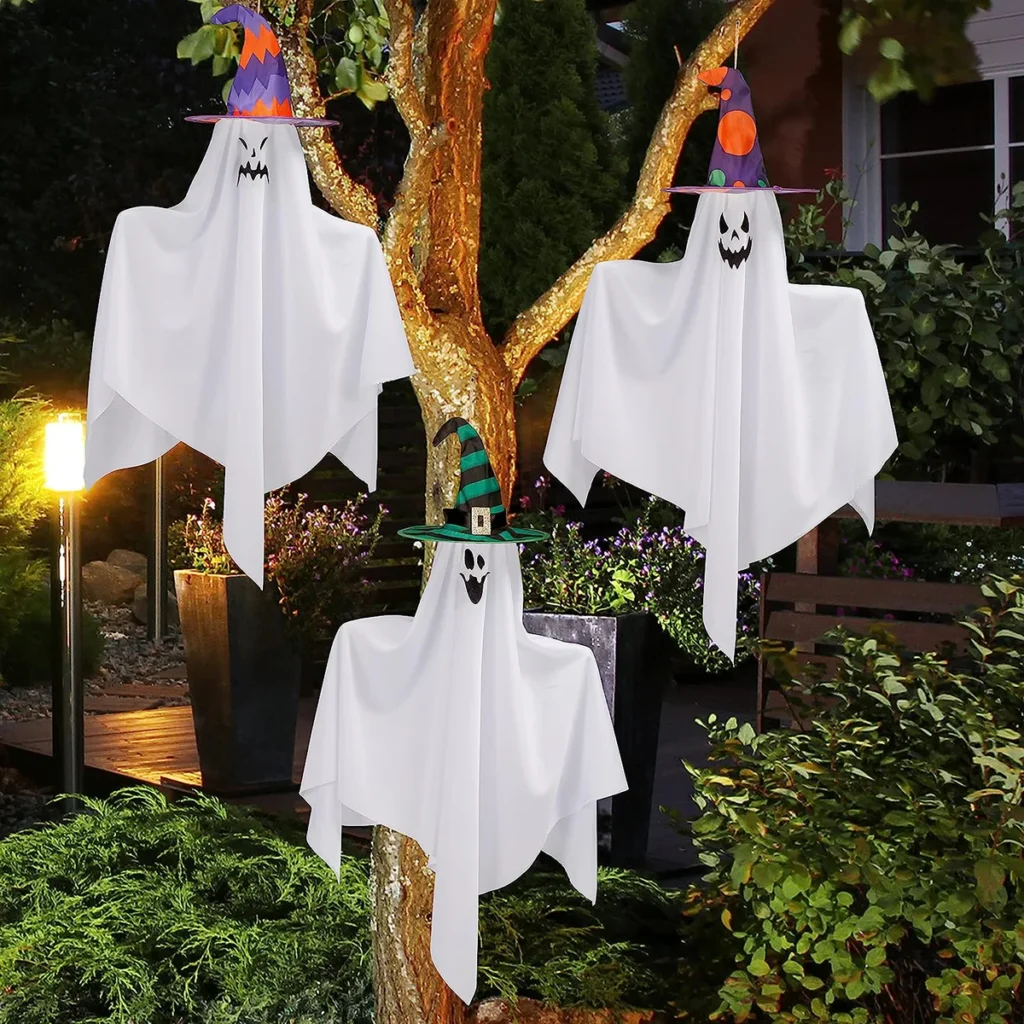

3. Floating Ghosts

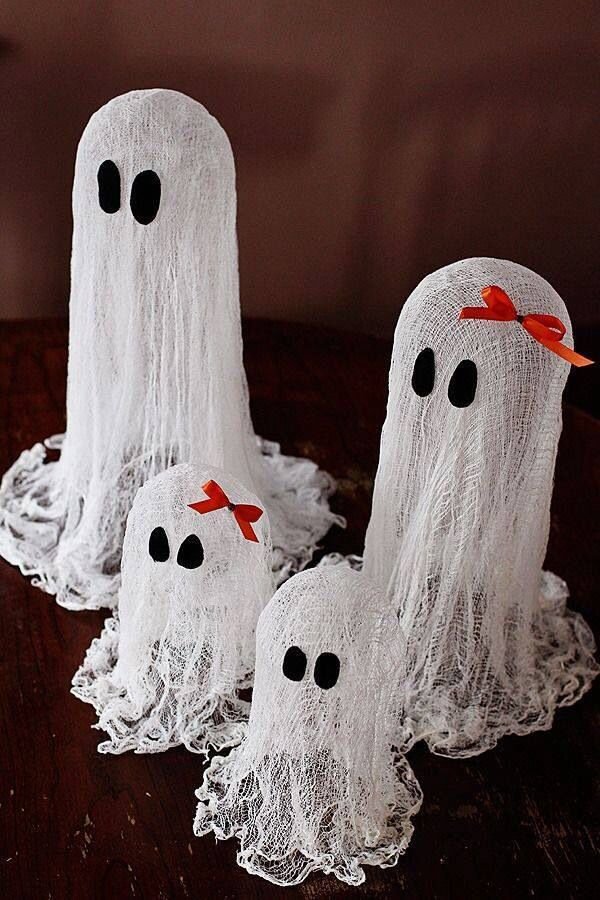
Floating ghosts are a classic and simple DIY Halloween decoration that adds movement and eeriness to your garden.

Materials Needed:

  • White sheets, fabric, or cheesecloth
  • Balloons or foam balls for heads
  • String, twine, or fishing line
  • Marker for faces (optional)
  • Optional: Glow sticks or LED lights for illumination

How to Make Them:

  1. Create the Head: Inflate a balloon or use a foam ball and cover it with white fabric. Tie the fabric under the head to form the ghost body.
  2. Draw Faces: Use a marker to add spooky or funny faces.
  3. Hang the Ghosts: Attach string or fishing line to the top and hang from tree branches, pergolas, or garden hooks.
  4. Add Lighting: Place small LED lights inside the fabric or near the ghosts for a glowing, ethereal effect.

Extra Tip: Vary the height of the ghosts for a natural floating effect, and let the wind give them a gentle, ghostly sway.


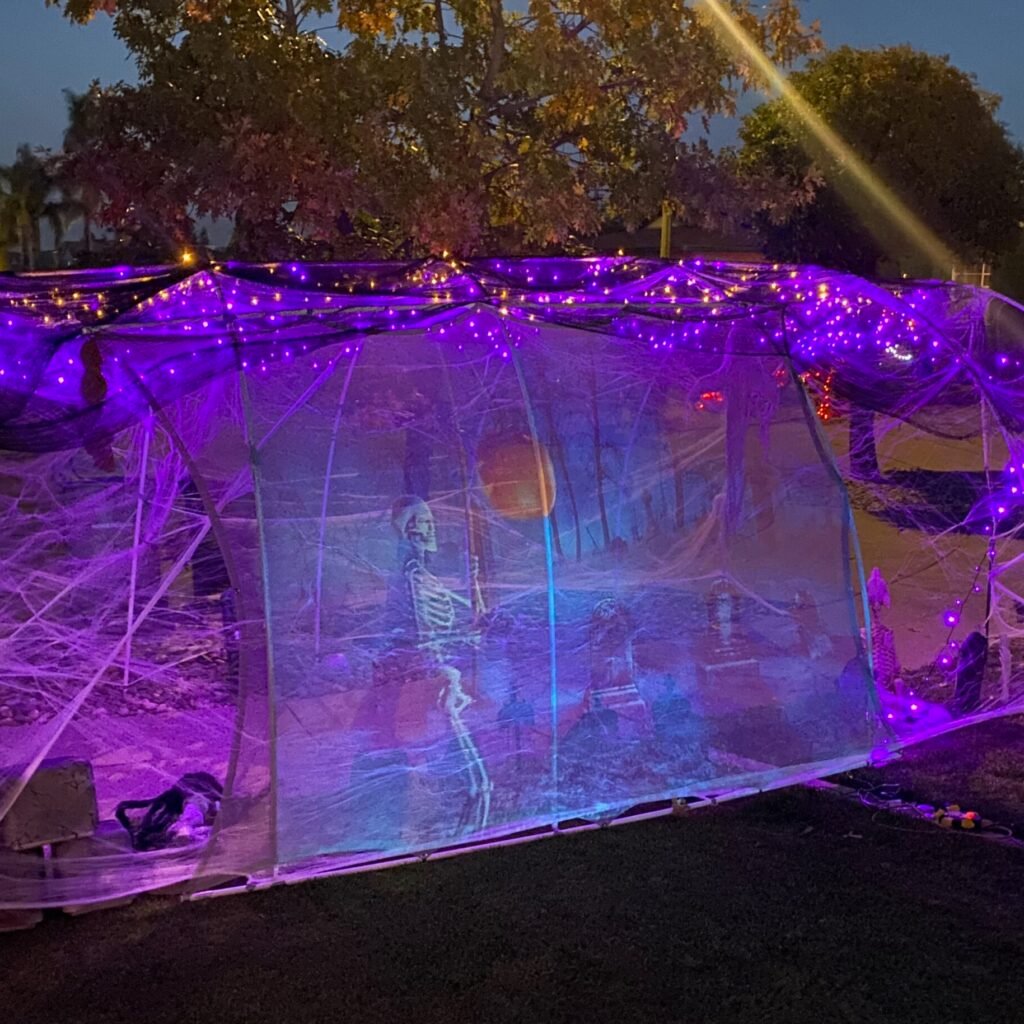
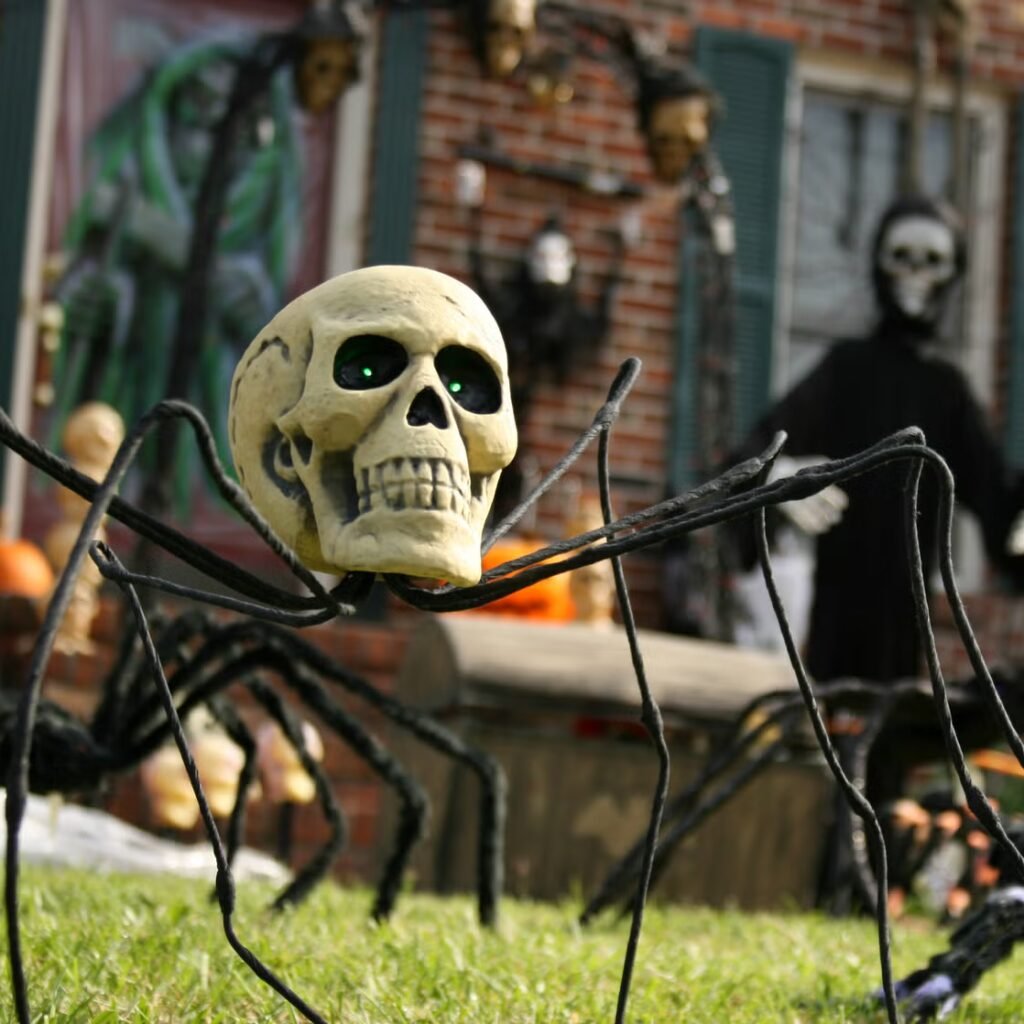
4. DIY Cobweb Garden

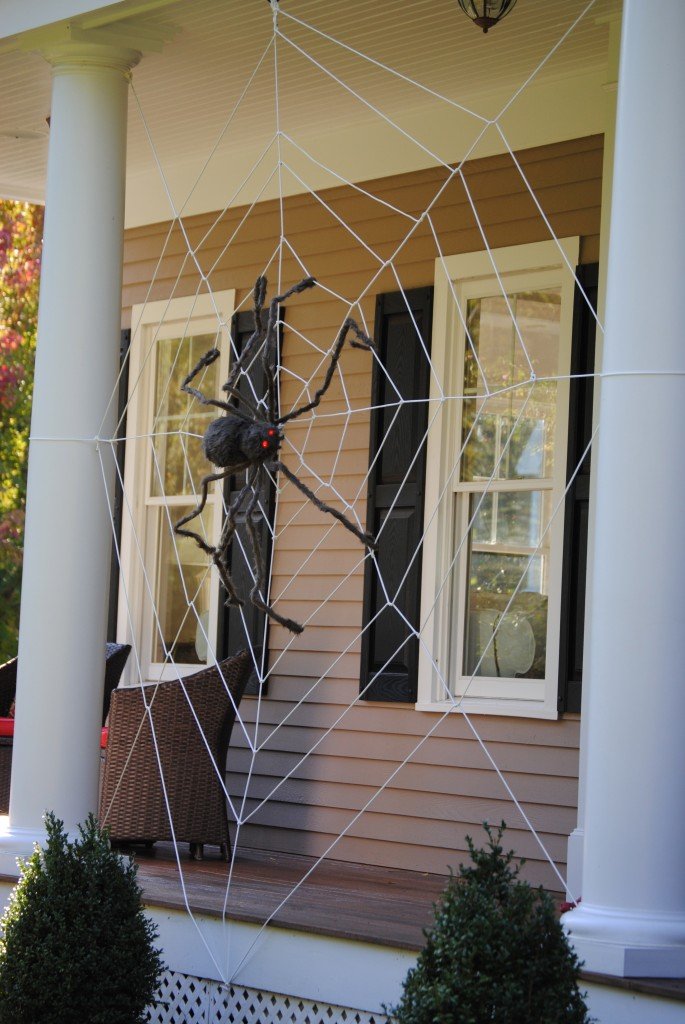
Adding cobwebs is one of the simplest ways to make your garden look haunted, and making your own DIY cobwebs is fun and affordable.

Materials Needed:

  • White yarn, string, or cotton batting
  • Scissors
  • Optional: Plastic spiders or small insect props

How to Make Them:

  1. Stretch the Yarn: Use yarn or string to create a basic web structure between shrubs, trees, or garden stakes.
  2. Add Webbing: Pull and stretch additional string across the main structure in a random pattern to mimic a spider web.
  3. Decorate: Place small plastic spiders or bugs on the web.
  4. Placement: Hang the cobwebs in trees, around garden lights, or near plants to make it look naturally spooky.

Creative Twist: Add a thin layer of glitter to the yarn to give your cobwebs a subtle shimmer under garden lights. It creates an otherworldly glow at night.


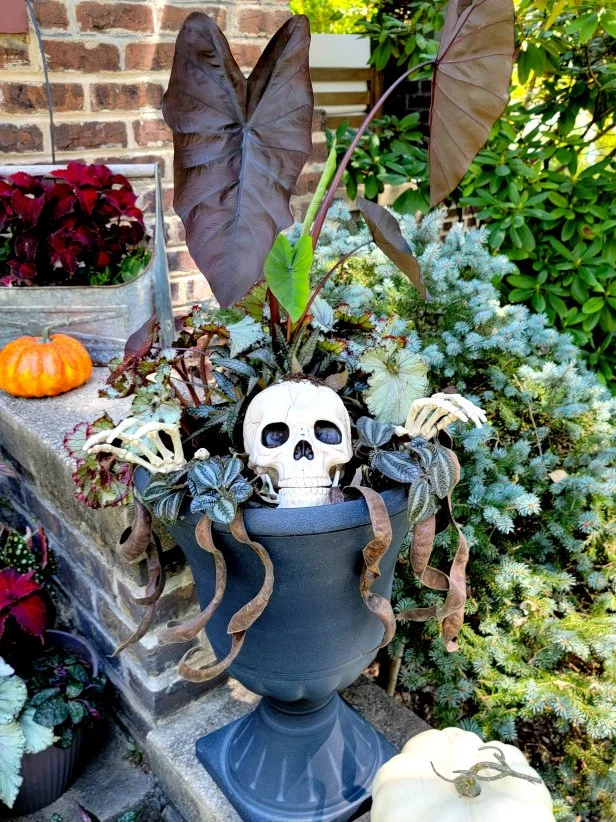
5. Potion Bottles and Witchy Decor

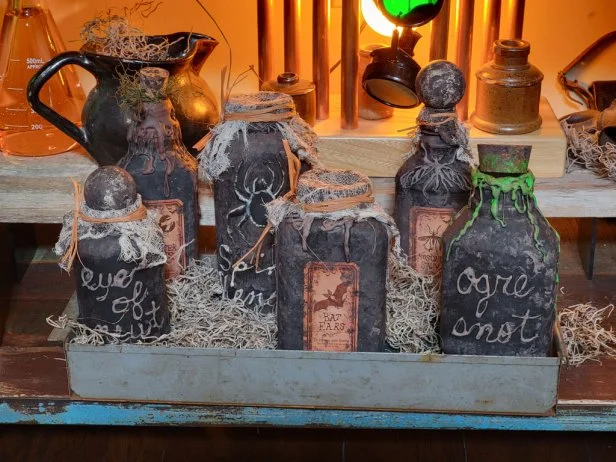
For a truly mystical and spooky garden corner, create a witch’s potion display. It’s perfect for a Halloween-themed centerpiece or focal point.

Materials Needed:

  • Small glass bottles or jars
  • Food coloring or water with glitter
  • Labels: “Potion of Fear,” “Witch’s Brew,” etc.
  • Optional: Cobwebs, small cauldrons, or skulls for added effect

How to Make Them:

  1. Fill Bottles: Fill jars with colored water or mix in glitter for a magical look.
  2. Add Labels: Print or handwrite labels with fun or creepy names.
  3. Display: Arrange the bottles on a table, shelf, or garden bench. Add moss or stones for texture.
  4. Lighting: Place small LED candles behind or underneath jars for a glowing potion effect.

Creative Twist: Add miniature skeleton hands or black feathers around the potion display to enhance the spooky theme.


Bonus Tips for a Safe and Stunning DIY Halloween Garden

  1. Use LED Lights: Candles and open flames can damage plants and pose a fire hazard. LED lights are safe and long-lasting.
  2. Balance Spooky and Whimsical: Mix scary elements with playful touches for a family-friendly display.
  3. Keep Plants Healthy: Avoid placing heavy props directly on delicate plants or blocking sunlight.
  4. Use Durable Materials: Weatherproof your decorations, especially if they’re outside. Plastic, foam, and treated wood hold up better than paper or untreated items.
  5. Layer Effects: Combine lighting, props, and plants for a visually dynamic garden. Layers create depth and make your haunted garden feel immersive.

Creative Ideas to Combine Projects

  • Halloween Pathway: Line your garden path with DIY pumpkin lanterns and hang floating ghosts from nearby trees.
  • Witch’s Corner: Create a potion display next to a cluster of cobweb-covered shrubs and miniature witch hats for a mystical look.
  • Haunted Tree: Attach floating ghosts, spiders, and cobwebs to a single tree or vertical plant wall for a dramatic focal point.

Extra Tip: Play ambient Halloween sounds, like crows, howling wolves, or spooky music, to tie the visual effects together. Sound instantly elevates the haunted atmosphere.


Final Thoughts

With these five DIY Halloween garden projects, your outdoor space can become a spooky, enchanting destination for the season. From glowing pumpkins and floating ghosts to cobwebs and witchy potion bottles, these projects are budget-friendly, creative, and customizable.

The best part? These DIY decorations allow you to mix your love of gardening with seasonal fun, turning your backyard into a playful, haunted wonderland. With a little imagination and effort, your garden can be the highlight of Halloween, delighting guests of all ages and creating memories that last long after the candy is gone.

3 Halloween Decor Ideas for Your Vertical Succulent Wall

3 Halloween Decor Ideas for Your Vertical Succulent Wall

Halloween isn’t just about pumpkin patches and haunted houses — it’s also the perfect time to get creative with your indoor and outdoor vertical succulent walls. These lush, living walls are a favorite among gardeners and interior decorators alike, and with the right touches, they can easily transform into spooky, festive masterpieces for the Halloween season.

Succulents naturally bring texture, color, and depth to a space, and their versatility makes them perfect for holiday decorating. In this article, we’ll explore three Halloween décor ideas specifically designed for vertical succulent walls, complete with step-by-step tips, creative inspiration, and ways to keep your plants healthy while adding festive flair.


1. Spooky Miniature Pumpkin Display

Pumpkins are the quintessential Halloween decoration, and when combined with the vertical structure of a succulent wall, they create an eye-catching, seasonal focal point.

How to Create a Pumpkin Succulent Feature:

Step 1: Choose Your Pumpkins

  • Miniature Pumpkins: Select small, lightweight pumpkins that won’t overpower the wall.
  • Variety in Color: Mix traditional orange pumpkins with white “ghost pumpkins” and striped varieties for visual interest.
  • Alternative: Use faux pumpkins for a longer-lasting display, especially if you want to prevent damage to your succulents.

Step 2: Placement on the Wall

  • Use small shelves, sturdy hooks, or mounted trays to hold the pumpkins securely.
  • Place pumpkins among clusters of succulents, letting greenery peek around the edges for a natural look.
  • Stagger the heights and positions for a dynamic, layered effect.

Step 3: Add Lighting

  • Tiny LED lights or fairy lights wrapped around the pumpkins and succulents create a soft, eerie glow at night.
  • Avoid harsh lights, which can scorch succulents; warm, low-intensity lights are ideal.

Creative Tip: Carve tiny faces or designs on miniature pumpkins. Their proximity to the succulents gives a “peek-a-boo” effect, making the wall whimsical and spooky.


2. Creepy Crawlies Among the Succulents

Nothing says Halloween like a few harmless creepy crawlies. Adding small, realistic insects or spiders to your vertical succulent wall can transform it into a hauntingly detailed centerpiece.

How to Add Creepy Crawlies:

Step 1: Choose Your Decorations

  • Plastic Spiders: Vary sizes for a natural look. Place them in crevices between succulents.
  • Fake Insects: Beetles, ants, or centipedes add subtle eeriness.
  • Glow-in-the-Dark Stickers: Stick them on pots or the backing of the wall to make them visible at night.

Step 2: Placement Tips

  • Cluster a few spiders crawling along trails of succulents.
  • Attach small creepy crawlies to thin wires, letting them dangle among the plants for movement.
  • Avoid overcrowding — a few well-placed insects are more visually effective than filling the wall entirely.

Step 3: Combine With Plants

  • Use succulents with rich textures, like Echeveria rosettes or Haworthia spikes, to enhance the “nesting” look for your spiders.
  • Plants with darker foliage, such as purple or burgundy succulents, naturally amplify the spooky vibe.

Creative Tip: Mix in faux cobwebs between the succulents for an extra Halloween touch. This creates a haunted, abandoned-garden effect without harming the plants.


3. Gothic and Witchy Accents

Vertical succulent walls aren’t just for nature lovers — they can become mini witchy landscapes with the right gothic-inspired decorations.

How to Add Gothic Charm:

Step 1: Miniature Witch Hats and Brooms

  • Place tiny, decorative witch hats on top of larger succulents for a whimsical effect.
  • Attach miniature brooms using thin wires so they appear as if leaning naturally against the plants.

Step 2: Gothic Props

  • Mini Cauldrons: Hang small cauldrons or pots from the succulent wall frame. Fill them with moss, pebbles, or tiny orange fairy lights.
  • Skulls and Bones: Lightweight, artificial skulls can be nestled among the plants. Choose neutral colors that contrast with green foliage.

Step 3: Create a Mystical Atmosphere

  • Use purple or orange LED string lights around the edges of the succulent wall.
  • Add small decorative fog or dry ice in planters at the base of the wall for a mystical effect.
  • Use dark pebbles or moss to line planters and pathways within the wall for an old, haunted look.

Pro Tip: For an elegant twist, use metallic accents like gold-painted leaves or miniature silver cauldrons. These can create a gothic yet sophisticated Halloween theme that still highlights your succulents.


Maintaining Your Succulent Wall During Halloween

Decorating a vertical succulent wall for Halloween is fun, but you also want to keep your plants healthy. Here are some key tips:

  1. Avoid Water Damage:
    • Be careful with water-based props or fog machines. Succulents need well-drained soil to prevent rot.
  2. Limit Heavy Props:
    • Mini pumpkins, skulls, and cauldrons should be lightweight and securely attached. Overweight items can damage plants or the wall structure.
  3. Lighting Safety:
    • Use LED lights instead of candles to prevent heat damage to plants.
    • Avoid string lights that get too hot or touch succulent leaves directly.
  4. Check Sunlight:
    • Make sure decorations don’t block necessary sunlight. Succulents still need light to thrive even during seasonal décor changes.
  5. Seasonal Rotation:
    • Remove Halloween decorations after the season. Store them properly for reuse, ensuring your succulent wall remains healthy and attractive year-round.

Creative Display Ideas

Here are a few creative ways to combine the three main ideas for maximum Halloween impact:

  • Haunted Harvest Wall: Combine miniature pumpkins, LED lights, and creeping spider props for a fun, harvest-themed spooky wall.
  • Witch’s Garden: Use gothic accents like cauldrons and tiny witch hats with dark foliage succulents. Add glow-in-the-dark insects for a magical, eerie feel.
  • Nighttime Glow Wall: Focus on lighting by arranging small pumpkins, LED string lights, and ghostly accents to make your succulent wall the focal point of your garden at night.

Extra Tip: Mix textures and colors in succulents — purple, red, and gray-toned varieties naturally complement Halloween décor.


Final Thoughts: Make Your Vertical Succulent Wall a Halloween Showstopper

A vertical succulent wall offers a unique canvas for Halloween decorations, blending living plants with festive creativity. By combining mini pumpkins, creepy crawlies, and gothic accents, you can design a display that is playful, spooky, and elegant.

Remember to prioritize plant health while decorating and to experiment with layering textures, colors, and props for maximum visual impact. Whether your style leans whimsical, gothic, or classic Halloween, these three ideas can transform your vertical succulent wall into a living celebration of the season.

This Halloween, let your garden wall tell a story of mystery and enchantment — a perfect blend of natural beauty and seasonal spookiness.

6 Ways to Create a Haunted Garden This Halloween

6 Ways to Create a Haunted Garden This Halloween

Halloween isn’t just about costumes, candy, and jack-o’-lanterns — it’s an entire atmosphere of spooky delight. While front porches often get the spotlight, your garden is the perfect canvas for crafting a haunting outdoor experience. With the right mix of plants, props, and lighting, you can turn your backyard into a chilling wonderland that impresses trick-or-treaters and thrills visitors.

In this guide, we’ll explore six creative ways to create a haunted garden this Halloween, complete with tips, tricks, and design ideas to bring your spooky vision to life. Whether you prefer eerie elegance or playful scares, these strategies will transform your garden into a Halloween masterpiece.


1. Transform Your Entrance Into a Portal of Mystery

The first step to a haunted garden is creating an entrance that immediately sets the mood. Think of it as a gateway to another realm, where guests feel the thrill of the unknown.

How to Do It:

  • Spooky Archway: Use twisted branches, dried vines, or black-painted sticks to form an arch over your garden gate. Add hanging cobwebs or tattered fabric to give it an abandoned look.
  • Dim Lighting: Line the entryway with flickering LED lanterns or orange string lights. Avoid bright white lights — dim, warm tones enhance the eerie ambiance.
  • Sound Effects: Install a motion-activated speaker that plays creaking doors, ghostly whispers, or distant howls. This subtle audio cue heightens anticipation as guests enter.

Pro Tip: Scatter autumn leaves or artificial fog around the entrance to create a mysterious, mystical vibe.


2. Create a Haunted Pathway

A garden path can be transformed into a spine-tingling journey that guides visitors through your haunted landscape.

Steps to a Ghostly Walkway:

  • Line with Lights: Place lanterns, glowing pumpkins, or solar-powered LED lights along the path. Use colored lighting like green, purple, or orange for a supernatural effect.
  • Add Motion and Sound: Motion-activated props — like crows, skeletons, or hanging bats — can startle visitors as they move down the path.
  • Use Fog: Small fog machines or dry ice effects create a misty path, perfect for a haunted garden feel.

Extra Touch: Scatter fake leaves, small branches, or gravel for sound effects that crunch or crackle underfoot. This sensory layer adds to the immersive experience.


3. Incorporate Spooky Plants and Foliage

Your garden itself can be a major part of the haunted aesthetic. Certain plants naturally give a chilling vibe due to their colors, shapes, or textures.

Recommended Spooky Plants:

  • Black Mondo Grass: Dark, glossy leaves that resemble shadows.
  • Bloodleaf (Iresine herbstii): Vivid red foliage evokes a dramatic, haunting atmosphere.
  • Ghost Plant (Graptopetalum): Silvery succulents that glow subtly under moonlight.
  • Bat Flower (Tacca chantrieri): Flowers shaped like bats, perfect for dramatic focal points.

Design Tip: Group these plants with pumpkins, skull-shaped planters, or cobweb-covered branches for a layered and immersive haunted look.


4. Build a Mini Graveyard

No haunted garden is complete without a graveyard. A small corner or section of your garden can become a chilling cemetery scene that delights and surprises.

How to Set It Up:

  • Tombstones: Use foam, cardboard, or wood to create tombstones. Paint them gray, crack the edges, and tilt them at different angles for a realistic effect.
  • Skeletons and Bones: Scatter plastic skeleton parts or position them as if emerging from the ground.
  • Moss and Twigs: Add dried moss or twigs around tombstones for an aged, abandoned feel.
  • Lighting: Soft LED candles or lanterns placed around the tombstones cast eerie shadows and highlight the scene.

Creative Touch: Personalize tombstones with humorous or eerie epitaphs such as “R.I.P. Here Lies Pumpkin Pete” or “I Told You I Was Sick.”


5. Introduce Ghosts and Hanging Spirits

Floating ghosts are a classic Halloween element that can be adapted for a garden setting with surprisingly simple materials.

DIY Floating Ghosts:

  • Materials Needed: White fabric or old sheets, foam balls or balloons for heads, string or fishing line, and optional glow sticks or LED lights.
  • Assembly: Drape the fabric over the foam ball to form a ghost’s head. Draw a simple face or leave it blank for an eerie effect.
  • Placement: Hang from tree branches, porch eaves, or shepherd’s hooks. Vary heights for a natural, floating appearance.
  • Lighting: Place a glow stick or small solar light inside the head for an ethereal glow at night.

Extra Effect: Hang lightweight chimes or small wind spinners to add gentle movement and create a sense of life in your floating spirits.


6. Add Finishing Touches: Sound, Scents, and Props

The final step in creating a haunted garden is layering sound, scent, and props to engage multiple senses.

Sound:

  • Play subtle spooky sounds like distant thunder, owl calls, wind howls, or ghostly whispers.
  • Hide Bluetooth speakers in bushes or behind planters for a more immersive effect.

Scent:

  • Use candles, incense, or essential oils with musky, earthy aromas like patchouli, cedarwood, or sandalwood to give your garden a mysterious fragrance.

Props:

  • Pumpkin displays: Carve or paint pumpkins, or stack them to create a focal point.
  • Skeletons: Place skeletons in humorous or creepy positions, like gardening or peeking from bushes.
  • Vintage Décor: Repurpose old lanterns, watering cans, or wooden crates — paint them black or gray for a haunted look.

Pro Tip: Balance spooky and charming elements to create a Halloween garden that’s mysterious, fun, and inviting rather than overwhelmingly scary.


Bonus Tips for a Successful Haunted Garden

  1. Use Layers: Combine plants, lighting, props, and sound in layers to create depth and mystery.
  2. Weatherproof Decorations: Use durable materials and secure props to prevent wind or rain from spoiling your display.
  3. Staggered Lighting: Use dim lights and shadows strategically; don’t over-illuminate — the unknown is scarier than bright lights.
  4. Eco-Friendly Props: Reuse pumpkins, sheets, and containers, and avoid plastics that can damage the environment.
  5. Path Safety: Ensure pathways are safe for walking, even in dim light, while maintaining the spooky vibe.

Final Thoughts

A haunted garden is more than just a collection of decorations — it’s a fully immersive experience. With creative use of plants, eerie lighting, ghostly props, and sound, your garden can become a magical, spooky escape for the Halloween season.

From transforming your entrance into a mystical portal to creating a chilling graveyard or floating spirits, these six strategies give you everything you need to craft a haunted garden that delights visitors and celebrates the eerie elegance of autumn.

So, grab your lanterns, hang your ghosts, and let your garden come alive with Halloween magic. Whether spooky, playful, or a little bit of both, your haunted garden will be the highlight of the season — a space where imagination, creativity, and a touch of fear meet under the moonlit sky.


7 Spooky Plants to Complete Your Halloween Garden

7 Spooky Plants to Complete Your Halloween Garden

As October drifts in and the air grows crisp, gardens begin to take on a mysterious charm — shadows stretch longer, leaves rustle like whispers, and the scent of damp earth fills the night. It’s the perfect time to embrace the spooky season and let your garden join in on the Halloween fun!

While fake cobwebs, glowing pumpkins, and skeleton props create instant chills, the true magic of a Halloween garden lies in its living elements — the plants themselves. With their unusual colors, ghostly shapes, and eerie names, certain plants can bring haunting beauty and spine-tingling atmosphere to your outdoor space.

Whether you want a gothic-inspired garden or a whimsical witch’s herb patch, these seven spooky plants will give your garden a Halloween twist that’s both eerie and enchanting.


1. Black Mondo Grass (Ophiopogon planiscapus ‘Nigrescens’)

If there’s one plant that sets the tone for a haunting garden, it’s Black Mondo Grass. With its inky-black, ribbon-like leaves, this plant looks like something out of a dark fairy tale.

Why It’s Spooky

Black Mondo Grass’s dramatic color makes it seem almost unnatural — a living shadow among your greenery. It’s the perfect plant to create contrast in your Halloween display, especially when paired with bright orange pumpkins or pale white flowers.

How To Grow It

  • Sunlight: Partial shade to full sun.
  • Soil: Well-draining and slightly acidic.
  • Water: Moderate moisture; don’t let it dry out completely.
  • Care Tip: Mulch with dark compost to enhance its eerie color.

Plant it along pathways or around tombstone props for a sleek, gothic effect. It’s low-maintenance, evergreen, and perfect for year-round dark elegance.


2. Bat Flower (Tacca chantrieri)

Nothing says Halloween like a flower that looks like a bat in flight! The Bat Flower is one of nature’s most otherworldly creations — with its deep purple petals and long whisker-like tendrils, it’s a showstopper for any spooky garden.

Why It’s Spooky

Its dramatic shape resembles a bat spreading its wings, and its moody blackish-purple blooms make it look almost supernatural. In dim lighting, it appears to hover like a dark spirit among the leaves.

How To Grow It

  • Sunlight: Indirect light or partial shade.
  • Soil: Moist, well-draining, rich in organic matter.
  • Water: Keep soil consistently damp, but not soggy.
  • Care Tip: Loves humidity — mist regularly or grow in a shaded corner.

This tropical plant thrives in warm climates, but if you’re in a cooler area, you can grow it in containers and bring it indoors when temperatures drop.

Bonus Idea: Place a small spotlight beneath the Bat Flower for a dramatic night-time glow — it’ll look like something straight out of a haunted forest!


3. Devil’s Backbone (Euphorbia tithymaloides)

This bizarrely shaped plant earns its chilling name from its zigzagging stems that resemble a spine — hence, Devil’s Backbone. Its unusual structure and vibrant red-tipped leaves make it a perfect conversation piece for your Halloween display.

Why It’s Spooky

The name alone sets the tone, but its twisted, almost skeletal growth pattern makes it look like it belongs in a witch’s greenhouse. In some cultures, it’s even believed to ward off evil spirits!

How To Grow It

  • Sunlight: Prefers bright, indirect sunlight.
  • Soil: Well-draining potting mix (cactus mix works well).
  • Water: Allow soil to dry between watering.
  • Care Tip: Handle with care — its milky sap can be irritating to skin.

Plant it in quirky skull-shaped pots or alongside dark succulents for an extra creepy aesthetic. Indoors or outdoors, this plant gives major Halloween energy all year long.


4. Dracula Orchid (Dracula simia)

For those who adore gothic elegance, few plants rival the Dracula Orchid, also known as the “Monkey Orchid.” Its eerie, bat-like flowers — complete with fang-like patterns — are hauntingly beautiful.

Why It’s Spooky

This orchid’s name and appearance make it a Halloween superstar. The flower’s shape and dark markings resemble a tiny vampire face — it’s as if Count Dracula himself were hiding in your garden.

How To Grow It

  • Sunlight: Indirect, filtered light.
  • Soil: Moist, well-aerated orchid mix.
  • Water: Keep evenly moist; never let it dry out.
  • Care Tip: Prefers cool, humid environments — perfect for shaded patios or terrariums.

Pro Tip: Pair Dracula Orchids with mossy stones and a misting system to create a mysterious, foggy “vampire corner” in your garden.


5. Ghost Plant (Graptopetalum paraguayense)

Ethereal and otherworldly, the Ghost Plant is a pale, silvery succulent that looks like it was kissed by moonlight. Its ghostly glow and spiral rosettes make it ideal for a Halloween-themed garden display.

Why It’s Spooky

The plant’s powdery, frosted appearance gives it a spectral quality — especially under the moonlight. When mixed with darker plants, it creates a ghostly contrast that’s both haunting and beautiful.

How To Grow It

  • Sunlight: Full sun to partial shade.
  • Soil: Sandy, well-draining cactus mix.
  • Water: Water deeply but infrequently; let soil dry completely between watering.
  • Care Tip: Too much shade can cause it to lose its silvery hue.

Halloween Idea: Plant Ghost Plants in black containers, surrounded by dark gravel or black mondo grass, to enhance their pale, haunting look.

They’re easy to care for, drought-tolerant, and stunning — a subtle nod to the supernatural without needing fake cobwebs.


6. Bloodleaf (Iresine herbstii)

If your Halloween aesthetic leans toward bold and dramatic, Bloodleaf is the plant for you. Its crimson-red foliage looks like it’s glowing under moonlight — or dripping with something far more sinister.

Why It’s Spooky

The name “Bloodleaf” says it all. Its vivid red veins and leaves create an intense, gothic contrast that’s perfect for Halloween displays. It’s as if your garden itself has come alive with dark energy.

How To Grow It

  • Sunlight: Full sun for the deepest color.
  • Soil: Fertile, well-drained soil.
  • Water: Keep consistently moist, but avoid soggy soil.
  • Care Tip: Pinch tips regularly to keep it bushy and vibrant.

Bonus Idea: Combine Bloodleaf with black plants like Black Mondo Grass or dark purple basil for a strikingly sinister display.


7. Witch Hazel (Hamamelis virginiana)

Finally, no Halloween garden is complete without Witch Hazel, the plant whose name alone evokes spells, potions, and midnight rituals. Its golden, spidery blooms appear in late autumn — just when most other plants have faded away.

Why It’s Spooky

Its twisted branches and fragrant yellow flowers look like a spell has just been cast. Historically, Witch Hazel has been used in folk medicine and witchcraft rituals, adding mystical allure to your Halloween setup.

How To Grow It

  • Sunlight: Full sun to partial shade.
  • Soil: Moist but well-draining soil.
  • Water: Regular watering, especially during dry spells.
  • Care Tip: Prune lightly after flowering to maintain its shape.

Pro Tip: Place Witch Hazel near your entryway or pathway to let its sweet fragrance and wild-looking flowers greet Halloween visitors.


Bonus: Designing Your Spooky Garden

Here’s how to tie all your eerie plants together for maximum Halloween charm:

  1. Create Contrast: Mix light and dark foliage — Ghost Plant beside Black Mondo Grass or Bloodleaf near pale pumpkins.
  2. Use Gothic Accents: Add wrought iron fences, lanterns, or gravestone decorations among plants.
  3. Layer Lighting: Use soft amber or purple lights to highlight textures and shadows.
  4. Add Movement: Hang ghostly fabrics or wind chimes among your plants for an atmospheric effect.
  5. Incorporate Scent: Witch Hazel and night-blooming jasmine add an enchanting, mysterious aroma.

Your garden will become a living Halloween display — one that continues to evolve long after the trick-or-treaters have gone home.


Final Thoughts: Nature’s Dark Side Can Be Beautiful

Halloween isn’t just about spooky props — it’s about atmosphere, mystery, and a touch of the unexpected. By choosing plants with dramatic forms, eerie names, and ghostly colors, you can create a garden that celebrates the magic of the season naturally.

From the black shimmer of Mondo Grass to the haunting blooms of Dracula Orchid, these seven spooky plants turn your garden into a living work of Halloween art.

So this October, light the lanterns, scatter some pumpkins, and let your garden come alive with the spirit of the season — dark, enchanting, and irresistibly spooky.

4 Best Outdoor Garden Halloween Decoration Ideas

4 Best Outdoor Garden Halloween Decoration Ideas

As the nights grow cooler and the leaves begin to fall, it’s time to give your garden a hauntingly beautiful makeover for Halloween! October’s magic isn’t just for indoor parties — your garden can become the ultimate spooky showpiece that delights trick-or-treaters, impresses neighbors, and creates a fun, festive atmosphere for your family.

Whether you love eerie elegance, classic jack-o’-lanterns, or spine-chilling surprises, decorating your outdoor garden for Halloween is the perfect way to showcase your creativity.

In this article, we’ll explore four of the best outdoor garden Halloween decoration ideas — from ghostly pathways to haunted planters — complete with tips on how to bring each concept to life easily and affordably.

So grab your pumpkins, lights, and imagination — it’s time to transform your garden into a Halloween wonderland!


1. Create a Spooky Garden Pathway

There’s something magical about a garden pathway that leads visitors through flickering lights, rustling leaves, and eerie shadows. A well-decorated walkway sets the tone before anyone even reaches your front door.

How To Create It

Start with your existing garden path — whether it’s stone, gravel, or stepping-stones — and turn it into a haunted trail.

Step 1: Light the Way (Spookily)

Lighting is everything. Use these options for maximum effect:

  • Lanterns and candles: Line your path with LED candles inside mason jars or black lanterns for a gothic glow.
  • Fairy lights: Weave orange and purple string lights through shrubs or along the edges of the path.
  • Solar lights: Replace regular garden solar lights with Halloween-themed ones shaped like skulls, bats, or pumpkins.

Step 2: Add Sound and Movement

Motion-activated props are perfect here. When someone walks by, let them trigger:

  • A howling ghost or cackling witch sound effect.
  • A fluttering bat that drops from a tree branch.
  • A small fog machine for swirling mist across the path.

Step 3: Surround with Spooky Details

Decorate the sides of your path with:

  • Skeleton hands emerging from the soil.
  • Tombstone props made from painted styrofoam.
  • Creepy vines or black cloth draped over bushes.

Pro Tip: Scatter a few autumn leaves and artificial spider webs along the path for an authentic eerie touch.

By layering light, sound, and texture, your simple garden walkway becomes a chillingly fun experience for anyone who dares to walk through it.


2. Turn Your Garden Into a Haunted Graveyard

What’s Halloween without a graveyard scene? Transforming part of your garden into a spooky cemetery is easier than it looks — and it creates an unforgettable visual impact, especially at night.

What You’ll Need

  • Tombstones (store-bought foam or DIY cardboard ones)
  • Skeletons or bones (plastic versions work great outdoors)
  • Dried moss or straw for an aged look
  • Gray or black spray paint
  • A few eerie lighting effects

How To Build Your Graveyard Scene

Step 1: Set the Scene

Choose a corner of your garden or near your fence for your “graveyard.” Use foam tombstones in varying sizes and tilt some at angles to make it look natural and old.

Step 2: Add Creepy Details

  • Scatter plastic bones and skulls around the base of tombstones.
  • Drape Spanish moss or cobwebs over branches for a decayed effect.
  • Stick a few skeleton arms emerging from the ground — instant “zombies rising”!

Step 3: Light It Just Right

Lighting brings the graveyard to life (or death!).

  • Use blue or green spotlights to create a ghostly glow.
  • Hide a fog machine behind tombstones for a misty, haunted look.
  • Add flickering candles in glass jars for a gothic touch.

Step 4: Add Sound Effects

Subtle spooky sounds — distant thunder, owl hoots, or ghostly moans — make your graveyard immersive. You can use a small Bluetooth speaker hidden among plants.

Pro Tip: Paint “funny” or eerie epitaphs on tombstones for a creative touch, like:

  • “Barry D. Alive – He’ll Be Back.”
  • “I Told You I Was Sick.”

Your haunted garden graveyard will become the highlight of your Halloween decor — creepy yet creative.


3. Design a Pumpkin Wonderland

Pumpkins are the heart of Halloween. You can go classic with carved jack-o’-lanterns or get creative with painted, stacked, or light-up pumpkins. A pumpkin wonderland transforms your garden into a festive, family-friendly Halloween display that’s more magical than macabre.

How To Create It

Step 1: Choose Your Pumpkins

Mix sizes, colors, and shapes — orange, white (“ghost pumpkins”), striped, and warty varieties add personality.

If you’re short on time, foam or plastic pumpkins work beautifully and last year after year.

Step 2: Carve or Decorate

  • Classic carvings: Go for traditional faces — funny, scary, or elegant.
  • Stencil art: Use pumpkin stencils to carve bats, cats, or witch silhouettes.
  • Painted pumpkins: Use black, gold, or pastel paint for a chic, modern garden look.

Pro Tip: Coat real carved pumpkins with petroleum jelly to keep them from rotting too quickly.

Step 3: Arrange Creatively

Cluster pumpkins at:

  • The base of garden steps
  • Along your front gate
  • Around flower beds or near the porch

Mix in hay bales, cornstalks, autumn leaves, and mums (chrysanthemums) for seasonal flair.

Step 4: Light It Up

Add LED candles or fairy lights inside your pumpkins. Soft, warm light makes them glow beautifully after sunset.

Bonus Idea: Stack three pumpkins of different sizes (largest on bottom) and paint or carve them to look like a “Pumpkin Snowman.”

Your garden will feel like a whimsical harvest festival, combining Halloween fun with autumn warmth.


4. Add Ghostly Garden Figures and Floating Spirits

Few things are as spine-tingling — and easy to create — as ghosts drifting through your garden. With just a few supplies, you can make ghost decorations that sway in the breeze and glow eerily at night.

What You’ll Need

  • White fabric (old sheets or cheesecloth)
  • Balloons or foam balls for heads
  • String or fishing line
  • Glow sticks or solar lights (optional)

How To Create Floating Ghosts

Step 1: Make the Ghosts

  1. Drape white fabric over a foam ball or balloon.
  2. Tie a string around the “neck” to hold the shape.
  3. Draw spooky faces with a black marker (or leave them blank for an eerie look).

Step 2: Hang Them in Your Garden

Suspend ghosts from tree branches, porch beams, or shepherd’s hooks using clear fishing line — they’ll seem to float midair.

For added drama, vary the heights and let them move naturally in the wind.

Step 3: Add Lighting

Place glow sticks inside the heads or aim solar lights upward from below. The subtle illumination will make your ghosts glow softly in the dark.

Pro Tip: For a creepier twist, use motion-activated lights or fans that make the ghosts “move” when someone walks by.

You can also make ghostly scarecrows for garden beds — drape white fabric over garden stakes or tomato cages to create standing spirits.


Bonus: Mix and Match Themes

The best Halloween gardens combine multiple ideas to create layers of atmosphere. You can:

  • Lead guests down a spooky pathway that ends in your haunted graveyard.
  • Line your pumpkin wonderland with floating ghosts for a fun-but-spooky vibe.
  • Add creepy music or glowing eyes in the bushes for surprise scares.

Don’t be afraid to blend cute and creepy — contrast bright pumpkins with eerie fog, or mix cheerful scarecrows with dark tombstones.


Safety and Sustainability Tips

While decorating, keep these quick reminders in mind:

  • Use flameless LED candles instead of real flames to avoid fire hazards.
  • Protect electrical cords from rain and moisture.
  • Reuse decorations each year or DIY with recycled materials like old sheets, cardboard, and jars.
  • Avoid plastic litter: Make sure nothing can blow away and harm wildlife.

A beautiful garden is even better when it’s safe and eco-friendly.


Final Thoughts: Make This Halloween Unforgettable

Decorating your garden for Halloween is more than just putting up spooky props — it’s about creating an experience. A well-decorated outdoor space draws smiles, laughter, and maybe even a few playful screams.

Whether you choose a mysterious graveyard, a glowing pumpkin wonderland, a ghostly garden, or a spooky path of lights, your garden can become the heart of your Halloween celebration.

So, grab your broomstick, light those lanterns, and let your creativity run wild — because Halloween magic starts right in your own backyard.


The Easiest Perennials For Beginners

The Easiest Perennials For Beginners

If you’ve ever dreamed of having a lush, colorful garden — one that returns year after year without replanting — then perennials are your best friends. Unlike annuals that bloom for a single season, perennials are the comeback stars of the garden world. Plant them once, and they’ll reward you with flowers, foliage, and texture season after season.

But if you’re new to gardening, the world of perennials can feel overwhelming. Which ones are easy to grow? Which will survive your climate? And how do you keep them blooming without hours of care?

The good news is that many perennials are incredibly forgiving, thriving with minimal attention. Whether you have a sunny backyard, a shady corner, or even just a few containers on your patio, there’s a perennial that will thrive for you.

Here’s a detailed guide to the easiest perennials for beginners, plus expert tips to help them flourish — no green thumb required!


What Makes a Perennial “Easy”?

Before diving into the list, let’s clarify what makes a perennial beginner-friendly.

The best easy-care perennials share these qualities:

  • Low maintenance: Minimal pruning, watering, or dividing needed.
  • Pest and disease resistance: They stay healthy without constant attention.
  • Wide adaptability: Tolerate different soils and climates.
  • Reliable bloomers: Consistent flowers or foliage every year.
  • Drought or shade tolerance: Less dependent on perfect conditions.

Think of these plants as your garden’s backbone — sturdy, beautiful, and dependable.


1. Daylilies (Hemerocallis) — The “Plant-and-Forget” Flower

If you want instant gratification and minimal effort, daylilies are unbeatable. These hardy perennials are famous for thriving in almost any condition — full sun, part shade, poor soil, or neglect.

Why beginners love them:

  • Incredibly resilient and adaptable.
  • Bright, trumpet-shaped blooms in a rainbow of colors.
  • Each bloom lasts one day, but the plant produces many buds.
  • Some varieties re-bloom multiple times in a season.

Care tips:

  • Plant in full sun to partial shade.
  • Water regularly the first year; after that, they tolerate drought.
  • Divide every 3–4 years to keep clumps vigorous.

Bonus: Deer-resistant and pest-free!

Bloom time: Early summer to late fall (depending on variety).


2. Black-Eyed Susan (Rudbeckia hirta) — A Ray of Sunshine

The black-eyed Susan is the ultimate “cheerful” flower — a golden-yellow daisy-like bloom with a dark center that brightens any garden. It’s native to North America, which means it’s perfectly adapted to a range of climates.

Why beginners love them:

  • Thrive in poor soil and full sun.
  • Drought-tolerant once established.
  • Long bloom season — late summer through fall.
  • Attracts pollinators like butterflies and bees.

Care tips:

  • Plant in well-drained soil with full sun exposure.
  • Deadhead spent blooms to encourage continuous flowering.
  • Cut back in late fall or leave seed heads for birds.

Bonus: They naturalize easily, meaning they’ll spread and return year after year with little effort.


3. Coneflower (Echinacea) — Tough and Beautiful

Coneflowers are the perfect combination of beauty and toughness. With their vibrant purple, pink, orange, or white petals and raised centers, they’re both garden staples and pollinator magnets.

Why beginners love them:

  • Extremely drought- and heat-tolerant.
  • Low maintenance — they practically grow themselves.
  • Attract butterflies, bees, and birds (who love the seeds).
  • Long-lasting blooms from midsummer to early fall.

Care tips:

  • Plant in full sun and well-drained soil.
  • Avoid overwatering — they prefer it dry.
  • Leave seed heads in winter for birds and natural beauty.

Pro Tip: Try new hybrid varieties like PowWow Wild Berry or Cheyenne Spirit for vibrant color mixes.


4. Hostas — The Shade Garden Champion

If your garden gets more shade than sun, Hostas are the answer. These lush, leafy perennials come in countless sizes and shades — from deep emerald green to silvery blue and creamy variegations.

Why beginners love them:

  • Virtually carefree and long-lived.
  • Thrive in shade, where many flowers won’t grow.
  • Add beautiful texture and contrast to garden beds.
  • Produce delicate lavender or white blooms in summer.

Care tips:

  • Plant in partial to full shade.
  • Keep soil moist and rich in organic matter.
  • Watch for snails or slugs (their only real enemies).

Bonus: Combine with ferns or astilbes for a lush, woodland-style garden.


5. Sedum (Stonecrop) — The Drought-Defying Succulent

If you’re the “forget to water” type of gardener, Sedum is your soulmate. This hardy succulent thrives on neglect and poor soil, yet produces clusters of star-shaped flowers in late summer and fall.

Why beginners love them:

  • Tolerates heat, drought, and rocky soil.
  • Adds texture and color even when not in bloom.
  • Great for borders, rock gardens, or containers.
  • Attracts bees and butterflies.

Care tips:

  • Needs full sun and well-drained soil.
  • Water only during prolonged dry spells.
  • Cut back spent flower heads in spring.

Popular varieties: Autumn Joy (classic pink blooms), Dragon’s Blood (reddish foliage).

Pro Tip: Sedums look especially striking when paired with ornamental grasses.


6. Shasta Daisy (Leucanthemum × superbum) — The Classic Cottage Flower

No flower says “classic garden” like the Shasta Daisy. With their crisp white petals and sunny yellow centers, these flowers bring a cheerful, timeless look to any space.

Why beginners love them:

  • Hardy and easy to grow.
  • Long blooming season — summer to early fall.
  • Excellent cut flowers.
  • Deer- and rabbit-resistant.

Care tips:

  • Plant in full sun with well-drained soil.
  • Deadhead regularly to extend blooming.
  • Divide clumps every 2–3 years to rejuvenate.

Pro Tip: Pair Shasta Daisies with purple coneflowers for a stunning color contrast.


7. Lavender — The Fragrant All-Rounder

For gardeners who want beauty and scent, lavender is unbeatable. Its purple spikes and silvery foliage bring both elegance and aroma to sunny gardens — and it’s famously low maintenance.

Why beginners love them:

  • Drought-tolerant once established.
  • Beautiful fragrance that deters pests and attracts pollinators.
  • Evergreen foliage adds year-round appeal.
  • Great for borders, containers, or dried arrangements.

Care tips:

  • Plant in full sun with sandy, well-drained soil.
  • Avoid overwatering — it prefers dry roots.
  • Prune lightly after flowering to keep it compact.

Bonus: The scent is a natural stress reliever — perfect for garden relaxation.


8. Peonies — The Rewarding Perennial Classic

Few plants make a bigger statement with so little effort as peonies. Their large, ruffled blooms and heavenly scent make them a garden favorite for generations.

Why beginners love them:

  • Exceptionally long-lived — peonies can thrive for decades.
  • Require very little care once established.
  • Huge, fragrant flowers in late spring.
  • Virtually pest-free and deer-resistant.

Care tips:

  • Plant in full sun and well-drained soil.
  • Don’t bury roots too deep (just below the surface).
  • Support heavy blooms with stakes or rings.
  • Avoid moving them — they dislike disturbance.

Pro Tip: Once established, peonies often bloom more abundantly each year.


9. Coreopsis — The Sunshine Perennial

Also known as tickseed, Coreopsis is a long-blooming, sun-loving perennial that practically glows with happiness. It’s perfect for adding bursts of yellow, gold, or pink to your garden.

Why beginners love them:

  • Blooms all summer long.
  • Drought-tolerant and easy to maintain.
  • Thrives in poor soil.
  • Great for pollinators.

Care tips:

  • Plant in full sun with average to dry soil.
  • Deadhead spent blooms for continuous flowering.
  • Cut back after the first bloom flush to encourage rebloom.

Bonus: Perfect for wildflower gardens and low-maintenance borders.


How to Keep Perennials Happy

Even the easiest perennials benefit from a little routine care:

1. Prepare good soil.
Mix compost or organic matter before planting. Healthy soil = happy plants.

2. Water wisely.
Water deeply but infrequently to encourage strong roots.

3. Mulch.
Apply a 2–3 inch layer to conserve moisture and prevent weeds.

4. Deadhead regularly.
Removing spent flowers encourages reblooming and keeps your garden neat.

5. Divide every few years.
This keeps plants healthy and lets you expand your garden for free!


Final Thoughts: A Beginner’s Garden That Lasts

Starting your first garden doesn’t have to be complicated or high-maintenance. The perennials above — from cheerful daylilies to fragrant lavender — will reward your effort with year-after-year color, fragrance, and beauty.

Plant them once, nurture them through their first season, and then sit back and watch your garden transform into a living masterpiece that grows stronger with each passing year.

With these easy-care perennials, you’ll discover that gardening isn’t about perfection — it’s about patience, joy, and the simple magic of watching something thrive.

How To Grow Lilacs For The Sweetest Spring Fragrance

How To Grow Lilacs For The Sweetest Spring Fragrance

There are few garden pleasures as enchanting as the fragrance of blooming lilacs drifting through the air on a spring morning. Their lush clusters of purple, pink, or white blossoms signal the true arrival of spring, filling your garden — and your senses — with timeless charm.

But growing lilacs isn’t just about beauty; it’s about creating a living memory. Many gardeners remember the scent of lilacs from their childhood homes or old family gardens, and planting one today is like planting nostalgia itself.

Whether you’re cultivating a single lilac bush in your backyard or planning a fragrant hedge, this detailed guide will help you grow healthy, long-lasting lilacs that bloom with the sweetest scent every spring.


Why Grow Lilacs?

Lilacs (Syringa vulgaris) are more than ornamental shrubs — they’re symbols of renewal, affection, and grace. Their beauty lies not only in their soft, clustered blooms but in their unmistakable fragrance, which can perfume your entire garden.

Here’s why lilacs deserve a spot in your garden:

  • Fragrance: Among the most fragrant spring blooms in the world.
  • Longevity: Can live and bloom for decades, even generations.
  • Low Maintenance: Once established, lilacs require minimal care.
  • Pollinator Friendly: Attract bees, butterflies, and hummingbirds.
  • Versatile Landscaping: Perfect as a hedge, specimen plant, or backdrop to other spring flowers.

If you love old-fashioned, cottage-style gardens or romantic spring color, lilacs are simply essential.


Step 1: Choosing the Right Lilac Variety

Not all lilacs are the same. Depending on your space, climate, and color preference, you can choose from several beautiful varieties:

1. Common Lilac (Syringa vulgaris)

  • The most traditional and fragrant type.
  • Grows 8–15 feet tall.
  • Blooms in shades of lavender, purple, pink, and white.

2. Dwarf Korean Lilac (Syringa meyeri ‘Palibin’)

  • Compact size (4–6 feet tall), perfect for small gardens or containers.
  • Blooms slightly later than common lilacs.
  • Strong fragrance and excellent disease resistance.

3. Japanese Tree Lilac (Syringa reticulata)

  • Grows like a small tree (up to 20 feet).
  • Creamy white blooms in early summer.
  • Mildly fragrant and very hardy.

4. Miss Kim Lilac (Syringa patula ‘Miss Kim’)

  • A late-blooming, compact variety (6–8 feet).
  • Deep lavender buds open to pale lilac flowers.
  • Known for its strong, spicy-sweet scent.

5. Bloomerang Lilac (Reblooming Variety)

  • Blooms in spring and again in late summer or fall.
  • Compact and ideal for continuous fragrance.

Pro Tip:
If fragrance is your top priority, go for Syringa vulgaris or Miss Kim — both are known for their exceptionally sweet scents.


Step 2: The Ideal Location — Sunlight and Airflow

Lilacs love the sunshine. To get those abundant, fragrant blooms, you’ll need to provide the right conditions.

Light:

  • Full sun is essential — at least 6 hours of direct sunlight per day.
  • Less sun means fewer flowers and weaker fragrance.

Air Circulation:

  • Lilacs dislike humidity and stagnant air, which can cause fungal diseases.
  • Choose an open spot where breezes can move freely.

Soil:

  • Lilacs prefer well-drained, slightly alkaline soil (pH 6.5–7.5).
  • Avoid soggy, clay-heavy spots — these lead to root rot.

Pro Tip: If your soil is acidic, add garden lime once a year to balance pH and promote better blooming.


Step 3: Planting Lilacs

Best time to plant:

  • Fall or early spring, when the ground is workable but not frozen.

How to plant:

  1. Dig a hole twice as wide and as deep as the root ball.
  2. Mix compost or aged manure into the removed soil to enrich it.
  3. Place the lilac shrub so the top of the root ball is level with the soil surface.
  4. Backfill, gently firming the soil to remove air pockets.
  5. Water deeply.
  6. Add a 2–3 inch layer of mulch, keeping it away from the base of the plant.

Spacing:

  • Space lilac bushes 5–10 feet apart depending on the variety.
  • Give them room to grow — they’ll fill out beautifully over time.

Step 4: Watering and Feeding

Lilacs don’t need constant pampering once established, but they do appreciate consistent care during their early years.

Watering:

  • Water deeply once a week during the first growing season.
  • After establishment, they’re drought-tolerant but still benefit from occasional deep watering in dry periods.

Fertilizing:

  • Feed in early spring with a balanced fertilizer (10-10-10).
  • Avoid high-nitrogen fertilizers (like lawn food) — they promote leafy growth instead of blooms.
  • Every 2–3 years, add compost or aged manure around the base.

Pro Tip: Stop fertilizing by mid-summer to let new growth harden before winter.


Step 5: Pruning for More Blooms

Pruning is key to maintaining your lilac’s shape and encouraging heavy flowering. But timing is everything.

When to prune:

  • Right after the blooms fade in late spring.
  • Pruning too late (after midsummer) removes next year’s flower buds.

How to prune:

  1. Remove spent flower clusters to prevent seed formation.
  2. Cut out dead, weak, or crossing branches.
  3. Every 2–3 years, remove one-third of the oldest stems at the base — this rejuvenates the plant.
  4. Thin out dense growth to improve air circulation.

Pro Tip: Older lilacs that have become woody and unproductive can be rejuvenated by cutting them back to 6–8 inches above the ground in late winter. They’ll regrow stronger and bloom again within 2–3 years.


Step 6: Encouraging Sweet Fragrance and Abundant Blooms

A healthy lilac rewards you with not just flowers, but fragrance that carries across the garden.

To get the most scent and color:

  • Ensure full sun — this is the biggest factor.
  • Don’t overfertilize — too much nitrogen weakens bloom quality.
  • Deadhead after flowering to redirect energy to next year’s buds.
  • Prune lightly and regularly to keep the shrub open and productive.

For extra fragrance indoors, cut lilac stems early in the morning and place them in warm water immediately. Crushing the stem ends slightly helps them absorb water better and keeps blooms fresh longer.


Step 7: Winter Care

Lilacs are hardy plants, especially varieties suited to zones 3–8, but they still benefit from a little winter preparation:

  • Mulch the base with straw or bark to insulate roots.
  • Avoid pruning in winter — you’ll remove the next year’s buds.
  • If snow piles up on branches, gently shake it off to prevent breakage.

Pro Tip: In very cold regions, wrap young lilac stems with burlap during their first winter for protection.


Step 8: Dealing with Common Lilac Problems

Even healthy lilacs can encounter a few issues. Fortunately, most are easy to prevent or fix.

1. Powdery Mildew

  • Appears as white film on leaves.
  • Improve air circulation and avoid overhead watering.
  • Use a natural fungicide if needed.

2. Lack of Blooms

  • Usually due to too much shade, overfertilizing, or pruning too late.
  • Move to a sunnier location or adjust care routine.

3. Borers or Aphids

  • Inspect stems regularly.
  • Remove infested wood or spray with insecticidal soap.

4. Yellowing Leaves

  • May indicate poor drainage or low soil pH.
  • Add lime if soil is acidic and ensure good drainage.

Pro Tip: Once mature, lilacs are remarkably resilient and rarely suffer from serious problems.


Companion Planting Ideas

Lilacs blend beautifully with other spring bloomers for a breathtaking seasonal display:

  • Tulips and Daffodils: Brighten the base with color.
  • Peonies: Their bloom time overlaps beautifully.
  • Hostas or Ferns: Great companions for shaded lilac bases.
  • Mock Orange or Spirea: Extend the blooming season into early summer.

Planting a mix ensures your garden remains colorful even after lilac season ends.


Final Thoughts: A Garden Perfumed by Spring

There’s something magical about growing lilacs. They’re a living link to simpler times — an old-fashioned beauty that rewards patience with fragrance and grace.

From the moment those first buds swell in spring to the heady perfume that follows, a lilac bush transforms your garden into a sanctuary of scent and color. And with the right care — sunlight, pruning, and a little love — it will continue to do so for generations.

So this spring, when you breathe in that sweet, nostalgic fragrance, you’ll know you’ve cultivated more than just a shrub — you’ve grown a memory that blooms anew each year.

6 Flowering Shrubs That Add Color Year-Round

6 Flowering Shrubs That Add Color Year-Round

If you’ve ever dreamed of a garden that bursts with color in every season — from spring’s soft pastels to winter’s vibrant berries — the secret lies in flowering shrubs. These hardy, reliable plants bridge the gap between trees and perennials, offering structure, fragrance, and, most importantly, year-round color.

Unlike annuals that fade away after one season, flowering shrubs are the true backbone of any landscape. They provide a continuous cycle of blooms, foliage, and even decorative fruit, ensuring there’s always something beautiful to admire in your garden.

Here’s a detailed guide to six stunning flowering shrubs that thrive in most climates and bring vibrant hues throughout the year.


1. Camellia — Winter’s Elegant Bloom

Color season: Late fall to early spring
Hardiness zones: 7–10

When most of the garden lies dormant, Camellias step into the spotlight. With their glossy evergreen leaves and rose-like blossoms, these shrubs bring elegance and life to winter landscapes.

Camellias come in shades of white, pink, and deep red, and some varieties like Camellia japonica and Camellia sasanqua can even bloom from October through March.

Why it’s perfect for year-round color:

  • Evergreen foliage stays lush all year.
  • Blooms during the coldest months, when few other plants do.

Care tips:

  • Plant in partial shade and well-drained, acidic soil.
  • Water deeply during dry spells, especially in summer.
  • Mulch with pine needles or compost to retain moisture and acidity.

Bonus tip: If you live in a cooler climate, grow camellias in large pots that can be sheltered during hard freezes.


2. Hydrangea — The Summer Showstopper

Color season: Late spring through fall
Hardiness zones: 3–9

Few shrubs command attention like Hydrangeas. With their big, cloud-like blooms in shades of blue, pink, purple, and white, they bring instant charm and romance to gardens.

The best part? Modern varieties like Endless Summer and Pinky Winky offer repeat blooming, extending color from late spring well into autumn.

Why it’s perfect for year-round color:

  • Flowers last for months and even dry beautifully for winter décor.
  • Sturdy stems and full foliage add structure through all seasons.

Care tips:

  • Hydrangeas thrive in morning sun and afternoon shade.
  • Water consistently — they prefer evenly moist soil.
  • Adjust bloom color by changing soil pH (acidic for blue, alkaline for pink).

Winter interest: Even when blooms fade, dried hydrangea heads catch frost beautifully, adding texture and charm.


3. Azalea — The Spring Superstar

Color season: Early to late spring
Hardiness zones: 5–9

A Southern garden favorite, Azaleas burst into life in spring with masses of vibrant blooms in pink, red, orange, purple, and white. Some evergreen varieties, like Encore Azaleas, even rebloom in fall, offering color beyond the usual season.

Why it’s perfect for year-round color:

  • Evergreen types hold their leaves all winter.
  • Re-blooming varieties provide color twice a year.

Care tips:

  • Plant in dappled sunlight or beneath taller trees.
  • Use acidic, well-drained soil rich in organic matter.
  • Mulch around the base to keep roots cool and moist.

Pro Tip: Avoid heavy pruning — trim right after blooming to prevent cutting off next year’s buds.

Garden style match: Azaleas look beautiful in woodland gardens, shaded borders, or alongside camellias for overlapping color seasons.


4. Forsythia — The Harbinger of Spring

Color season: Late winter to early spring
Hardiness zones: 4–9

Few sights are as uplifting as the golden explosion of Forsythia after a long winter. These bright yellow blooms appear before the leaves, signaling that spring has finally arrived.

Forsythia’s arching branches create a fountain-like display, perfect for hedges, borders, or as a focal shrub in the yard.

Why it’s perfect for year-round color:

  • Early blooms brighten up the dull, post-winter garden.
  • Deep green summer foliage and fall yellow tones extend interest.

Care tips:

  • Plant in full sun for maximum flowering.
  • Prune right after flowering — it blooms on old wood.
  • Keep soil moderately moist but well-drained.

Pro Tip: Use Forsythia as a backdrop for tulips and daffodils for a coordinated early-spring display.


5. Rose of Sharon (Hibiscus syriacus) — The Late-Summer Hero

Color season: Mid-summer through early fall
Hardiness zones: 5–9

When other shrubs begin to fade in the heat, Rose of Sharon bursts into life with tropical-looking blooms in shades of lavender, pink, red, and white.

This hardy hibiscus cousin thrives even in hot, dry summers and adds a lush, exotic flair to any landscape.

Why it’s perfect for year-round color:

  • Long blooming period — from July to October.
  • Attractive seed pods add winter texture.
  • Keeps its structure even after leaves fall.

Care tips:

  • Prefers full sun and well-drained soil.
  • Prune in late winter or early spring to shape and encourage new blooms.
  • Water regularly during dry spells, but avoid soggy soil.

Pro Tip: Pair with ornamental grasses or butterfly bushes for a dazzling late-summer color palette.


6. Abelia — The All-Season Performer

Color season: Spring through fall
Hardiness zones: 6–9

If you want a shrub that works hard all year, Abelia is your answer. This semi-evergreen beauty offers delicate, fragrant, bell-shaped flowers from late spring through autumn, along with glossy leaves that often turn bronze or purple in winter.

Modern cultivars like Kaleidoscope Abelia even feature variegated foliage, creating an ever-changing tapestry of color from season to season.

Why it’s perfect for year-round color:

  • Continuous blooms for months.
  • Foliage color shifts beautifully with the seasons.
  • Compact habit makes it perfect for borders and small gardens.

Care tips:

  • Plant in full sun to partial shade.
  • Tolerates drought once established.
  • Lightly prune in late winter to maintain shape.

Pro Tip: Abelia attracts bees, butterflies, and hummingbirds, making it a pollinator paradise.


Bonus Tips for Year-Round Color

To keep your garden vibrant every month of the year, try these design and maintenance strategies:

  1. Mix bloom times: Combine early bloomers like Forsythia with summer stars like Hydrangeas and fall performers like Abelia.
  2. Add evergreens: Even non-flowering evergreens provide structure and color in winter.
  3. Layer heights and textures: Taller shrubs at the back, medium-sized in the middle, and compact varieties in front create visual depth.
  4. Feed and mulch regularly: Balanced fertilizer and organic mulch keep shrubs healthy and blooming.
  5. Deadhead and prune correctly: Removing spent flowers encourages reblooming and tidier growth.

Final Thoughts: A Garden That Never Sleeps

A truly beautiful garden doesn’t rely on just one season — it evolves, delights, and surprises you all year long. By choosing these six flowering shrubs, you’ll enjoy an ever-changing display of color, texture, and fragrance — from the golden promise of Forsythia in early spring to the graceful blooms of Camellia in winter.

Each of these shrubs brings its own rhythm to your landscape, ensuring your garden is never without life or color.

So grab your gloves, plan your planting spots, and start building your year-round floral masterpiece — one shrub at a time.

How To Prune Rose Bushes for Maximum Blooms

How To Prune Rose Bushes for Maximum Blooms

There’s nothing quite like a rose garden in full bloom — the colors, the fragrance, and the timeless beauty of each petal. But behind every gorgeous rosebush is one secret weapon: proper pruning.

Many gardeners shy away from pruning, fearing they’ll make a wrong cut and damage their plants. The truth? Pruning is one of the most powerful tools you have to encourage strong growth, abundant blooms, and long-lasting health.

Whether you’re nurturing a single hybrid tea rose on your balcony or tending to an entire rose garden, this detailed guide will teach you how to prune rose bushes for maximum blooms — step-by-step, with expert techniques for every type of rose.


Why Pruning Is Essential

Roses, like most flowering shrubs, need pruning not just for appearance, but for survival and productivity. Without it, they become tangled, disease-prone, and bloom less each year.

Here’s what pruning actually does:

  • Stimulates new growth: Roses bloom on new wood, so pruning triggers fresh shoots that will bear more flowers.
  • Improves air circulation: Reduces the risk of fungal diseases like black spot and powdery mildew.
  • Shapes the plant: Keeps bushes compact, balanced, and aesthetically pleasing.
  • Removes dead or weak wood: Directs energy toward strong, productive canes.
  • Encourages larger, longer-lasting blooms: More light and airflow = better flowers.

Think of pruning as a rose’s annual “reset” — removing the old to make room for new beauty.


Step 1: Gather the Right Tools

Before you start cutting, make sure you have sharp, clean tools. Dull blades crush stems and make plants vulnerable to infection.

You’ll need:

  • Bypass pruners: For cutting stems up to ½ inch thick.
  • Loppers: For thicker canes or old wood.
  • Pruning saw: For removing very large or woody branches.
  • Gloves: Heavy-duty rose gloves protect against thorns.
  • Disinfectant: To clean your tools between cuts or between bushes (use rubbing alcohol or a 10% bleach solution).

Pro Tip: Always clean tools before and after pruning — diseases spread quickly through shared tools.


Step 2: Know the Right Time to Prune

Timing is everything when it comes to roses. Pruning too early can expose tender growth to frost damage, while pruning too late can cut off new buds before they bloom.

General rule:

  • Prune in late winter or early spring, just as new buds begin to swell but before leaves fully open.

In warm climates: Prune in January or February.
In cooler regions: Wait until March or early April.

Pro Tip: A simple gardener’s trick — prune when forsythia shrubs start blooming in your area. Nature’s timing rarely fails.


Step 3: Identify Your Rose Type

Different roses grow and bloom in different ways. Knowing what kind of rose you have will help you prune correctly for maximum results.

1. Hybrid Tea, Floribunda, and Grandiflora Roses (Modern Roses)

  • These bloom on new growth each year.
  • Need hard pruning to encourage strong new shoots.

2. Climbing Roses

  • Bloom on old wood (canes from the previous year).
  • Should be lightly pruned after flowering, not in early spring.

3. Shrub or Landscape Roses

  • Bloom on both old and new wood.
  • Require moderate pruning to maintain shape and encourage reblooming.

4. Old Garden Roses or Once-Blooming Varieties

  • Bloom only once on last year’s wood.
  • Don’t prune heavily in early spring — wait until after flowering.

Pro Tip: If you’re unsure of your variety, prune conservatively the first season. Observe how and when it blooms to guide future pruning.


Step 4: Start with Cleanup Cuts

Now that your tools are ready and timing is right, it’s time to begin pruning. Start by clearing out all the dead, damaged, and diseased wood — this “cleanup” stage sets the foundation for healthy new growth.

Here’s how:

  1. Remove all dead wood. Dead canes are brown and dry inside, while healthy ones are green or white when cut.
  2. Cut out damaged or crossing branches. These rub together and cause wounds that invite disease.
  3. Open up the center of the bush. Aim for a vase-like shape that allows sunlight and air to reach the middle.

Pro Tip: Always make cuts at a 45° angle, about ¼ inch above an outward-facing bud. This encourages growth outward, not inward, preventing overcrowding.


Step 5: Prune for Shape and Strength

Now that your rose bush is clean and open, it’s time to shape it for optimal bloom production. The amount you cut depends on your rose type and how vigorously it grows.

For Hybrid Tea and Floribunda Roses:

  • Cut the bush back to 12–18 inches tall.
  • Leave 3–5 of the strongest canes.
  • Remove weak or spindly stems at the base.
  • Shorten remaining canes by about one-third to one-half, always cutting to an outward bud.

For Shrub Roses:

  • Remove about one-third of the plant’s overall size.
  • Focus on removing the oldest, least productive stems to make way for new shoots.

For Climbing Roses:

  • Do not remove the main canes.
  • Instead, prune the side shoots (laterals) back to 2–3 buds after they bloom.
  • Tie and train main canes horizontally — this encourages more flowering shoots along their length.

For Miniature Roses:

  • Cut back lightly — about ⅓ of their height.
  • Remove dead and tangled stems to keep them tidy and blooming freely.

Pro Tip: The goal is to balance strength and productivity — too few canes, and you’ll have fewer blooms; too many, and they’ll compete for energy.


Step 6: Clean Up and Seal (If Needed)

After pruning, clean up all debris around your rose bushes. Dead leaves and cuttings can harbor pests and fungal spores.

Clean-up checklist:

  • Remove fallen leaves, twigs, and old mulch.
  • Dispose of diseased material — don’t compost it.
  • If your climate is humid or disease-prone, apply a protective fungicide spray or organic neem oil.

To seal or not to seal?

  • Most modern gardeners skip sealing cuts, as roses heal naturally.
  • In wet or cold climates, a dab of pruning sealant on thick cuts can help prevent rot.

Step 7: Feed and Mulch After Pruning

Pruning invigorates your roses, but it also demands energy. After pruning, it’s the perfect time to give your plants a nutrient boost.

Feeding routine:

  • Apply a balanced rose fertilizer (like 10-10-10) around the base.
  • Scratch it lightly into the soil and water thoroughly.
  • Organic options: compost, fish emulsion, or aged manure.

Mulching:

  • Add a 2–3 inch layer of organic mulch (wood chips, shredded leaves, or straw) to retain moisture and prevent weeds.
  • Keep mulch a few inches away from the base to prevent rot.

Pro Tip: Roses are heavy feeders. Continue fertilizing every 4–6 weeks through the blooming season for continuous flowers.


Step 8: Summer and Deadheading Pruning

Pruning doesn’t stop in spring! Throughout summer, regular maintenance pruning (or deadheading) keeps blooms coming.

Deadheading tips:

  • Cut spent flowers just above the first five-leaflet leaf below the bloom.
  • This encourages new growth and more blooms.
  • In late summer, stop deadheading to allow rose hips (fruit) to form — this signals the plant to slow down for winter.

Light summer pruning can also help control shape and remove weak shoots.


Step 9: Light Winter Pruning

In cold climates, prune lightly before winter to prevent wind damage. Cut back long, unruly canes to about half their height and tie them loosely to supports.

Then, cover the base with soil, mulch, or straw to protect roots from freezing temperatures.

Pro Tip: Save hard pruning for spring. Winter pruning is just about protection and control, not heavy cutting.


Troubleshooting: Common Rose Pruning Mistakes

Even experienced gardeners make these common mistakes:

Cutting too close to buds: Can damage them and cause dieback.
Always leave about ¼ inch above the bud.

Leaving stubs or ragged cuts: They invite disease.
Use sharp tools for clean cuts at a 45° angle.

Over-pruning: Removes too much growth and delays blooms.
Don’t cut more than half of the healthy wood unless rejuvenating an old, neglected plant.

Ignoring tool hygiene: Spreads fungal infections between bushes.

Disinfect tools regularly during pruning sessions.


Final Thoughts: Pruning Is the Secret to Perfect Roses

Pruning might seem intimidating at first, but once you understand the logic behind each cut, it becomes one of the most satisfying parts of rose care.

Each snip you make is an investment in your rose’s future — guiding its growth, boosting its health, and unlocking its full blooming potential.

So grab your gloves, sharpen those pruners, and get ready to transform your rose bushes into a show-stopping display of color and fragrance.

Because with the right pruning, your roses won’t just survive — they’ll burst into the best bloom of their lives.


Why Your Fig Tree Isn’t Producing Fruit

Why Your Fig Tree Isn’t Producing Fruit

Few things are more disappointing for a gardener than seeing a lush, leafy fig tree—without a single fig in sight. You’ve watered, pruned, and cared for it faithfully, but year after year, the branches stay bare while your hopes for a sweet summer harvest fade away.

Don’t worry — you’re not alone. Fig trees are wonderfully rewarding, but they can also be a little mysterious. When they refuse to fruit, it’s usually their way of signaling that something in their environment isn’t quite right. The good news? Once you understand the reason, it’s often simple to fix.

Here’s an in-depth guide to why your fig tree isn’t producing fruit — and exactly how to get it thriving and fruiting again.


1. Your Tree Is Too Young

One of the most common (and most overlooked) reasons a fig tree won’t produce fruit is simply its age.

Fig trees, like many fruit-bearing plants, need to mature before they can devote energy to reproduction. During their early years, all their effort goes into growing roots, branches, and leaves.

Typical fruiting timeline:

  • Potted fig trees: May begin producing small crops in 2–3 years.
  • Ground-planted fig trees: Usually take 3–5 years to bear a significant harvest.

What to do:
Be patient! While waiting, continue to provide good light, regular watering, and balanced feeding. Avoid over-pruning young trees — they need their leaves to photosynthesize and grow strong.

Pro Tip: Some varieties (like ‘Celeste’ or ‘Brown Turkey’) tend to fruit earlier than others. If you’re starting from scratch, these are great beginner-friendly choices.


2. Not Enough Sunlight

Figs are sun-loving trees, and lack of sunlight is one of the biggest culprits behind poor fruiting. Without at least 6–8 hours of direct sunlight per day, your tree simply won’t have enough energy to produce and ripen fruit.

Signs of low sunlight:

  • Lots of large, dark green leaves but no fruit.
  • Leggy, stretched-out growth.
  • Small or absent new buds.

What to do:

  • Move your potted fig to the sunniest spot available (a south- or west-facing area is best).
  • If it’s an indoor plant, consider using a full-spectrum grow light for 10–12 hours daily.
  • For in-ground trees, prune surrounding plants or branches that may be shading it.

Pro Tip: Figs in cooler climates especially benefit from being planted against a south-facing wall, which reflects warmth and extends sunlight exposure.


3. Irregular Watering Habits

Figs love consistency. Too much or too little water—especially during fruiting season—can cause stress that halts fruit production or causes baby figs to drop prematurely.

Ideal watering routine:

  • Keep the soil evenly moist, not soggy.
  • Water deeply once the top 2 inches of soil feel dry.
  • Avoid letting the tree dry out completely between waterings, especially in hot weather.

Signs of water stress:

  • Dropping leaves or figs before ripening.
  • Yellowing leaves.
  • Cracked fruit (from sudden heavy watering after a dry spell).

What to do:

  • Establish a consistent watering schedule based on your climate.
  • Mulch around the base (but keep mulch a few inches away from the trunk) to retain moisture.
  • Ensure pots and planting sites drain well to prevent root rot.

4. Overfertilizing or Using the Wrong Fertilizer

It’s tempting to feed your fig tree in hopes of encouraging fruit, but too much fertilizer—especially nitrogen—can do more harm than good.

What happens:
Nitrogen promotes leaf and branch growth at the expense of flowers and fruit. The result? A beautiful, bushy fig tree with no figs.

What to do:

  • Use a balanced fertilizer like 10-10-10 or one specifically formulated for fruit trees.
  • Stop fertilizing by mid-summer to allow the tree to focus on fruiting rather than new growth.
  • If your soil is naturally rich, skip fertilizer altogether and top-dress with compost once a year instead.

Pro Tip: If your tree looks lush but produces no fruit, skip the fertilizer for an entire season and observe. You may find that moderation restores fruiting.


5. Pruning Mistakes

Pruning is essential to fig tree health, but improper timing or over-pruning can remove the very branches where fruit would have formed.

Understanding fig fruiting:

  • Most fig varieties produce on new growth (branches that form in the current year).
  • Others, like ‘Celeste,’ can produce a breba crop on old wood (previous year’s branches).

What to do:

  • Prune in late winter or early spring before new growth starts.
  • Focus on removing only dead, diseased, or overcrowded branches.
  • Avoid heavy pruning in early summer, as this removes young shoots that could bear fruit later in the season.

Pro Tip: Learn whether your variety fruits on new or old wood — it’s key to pruning correctly.


6. Temperature and Climate Issues

Fig trees are subtropical by nature, meaning they love warm weather but dislike frost and extreme cold. If temperatures drop below 25°F (-4°C), your fig may suffer damage that delays or stops fruiting for the season.

Cold damage signs:

  • Blackened or shriveled branch tips.
  • No new growth in spring.
  • Leaf regrowth without figs.

What to do:

  • In cold climates, grow figs in containers that can be moved indoors during winter.
  • For in-ground trees, insulate with burlap, mulch, or frost cloth.
  • Don’t prune dead-looking branches until late spring — they may still sprout new growth.

Pro Tip: Consistent warmth in early spring and summer helps fruit set and ripen faster.


7. Lack of Pollination (for Certain Fig Types)

Not all figs need pollination to bear fruit — most common fig varieties (like ‘Brown Turkey’ and ‘Celeste’) are self-pollinating. However, some caprifig varieties require pollination from the fig wasp — and without it, they won’t produce edible figs.

If your tree produces lots of tiny, hard, green figs that never ripen, it could be one of these varieties.

What to do:

  • Confirm the variety of your fig tree. If it’s a caprifig, consider replacing it with a self-fertile type suited to your climate.
  • For self-fertile figs, hand-pollination isn’t necessary, but good airflow and proper watering help flowers and fruit set naturally.

8. Stress or Shock

Figs are sensitive to changes in environment or care routines. Transplanting, moving pots, or a sudden change in light or temperature can cause your tree to drop fruit buds or stop producing temporarily.

What to do:

  • After transplanting, give the tree a few weeks to adjust before fertilizing or pruning.
  • Avoid relocating potted figs once buds start to form.
  • Maintain consistent watering and temperature conditions.

Pro Tip: Once the fig stabilizes, fruit production usually resumes the following season.


9. Pests or Disease

Pests like aphids, scale insects, or root-knot nematodes can weaken your fig tree, limiting its ability to fruit. Fungal infections, such as rust or leaf spot, can also interfere with healthy leaf growth — which means less energy for fruit.

Common pests and issues:

  • Aphids: Cause curling leaves and sticky residue.
  • Scale insects: Appear as small, brown bumps on stems.
  • Fig rust: Causes yellow or brown spots on leaves.
  • Root rot: Caused by overwatering and poor drainage.

What to do:

  • Spray neem oil or insecticidal soap for pests.
  • Remove heavily infected leaves to improve airflow.
  • Ensure the soil drains well and avoid waterlogging.

Pro Tip: A healthy fig tree with good airflow and balanced care rarely suffers serious pest damage. Prevention is key.


10. Variety or Environmental Mismatch

Finally, not every fig variety performs well in every environment. Some figs thrive in dry Mediterranean climates, while others need humidity and warmth.

What to do:

  • Research your variety’s ideal growing zone.
  • If your region’s conditions don’t match, consider growing the fig in a pot and moving it to controlled conditions (greenhouse, sunny windowsill, or sheltered patio).
  • Choose climate-appropriate types like:
    • ‘Brown Turkey’ – Very hardy and reliable.
    • ‘Chicago Hardy’ – Excellent for cooler climates.
    • ‘Kadota’ – Prefers dry, warm weather.

Tips to Encourage Fruiting

If your fig tree is healthy but still reluctant to fruit, try these expert-approved tricks:

  1. Moderate water stress: Slightly reducing water in late summer can encourage fruit ripening.
  2. Pinch back new growth: In early summer, pinch off the tips of young shoots to redirect energy into fruiting rather than leafy growth.
  3. Check for root restriction: Figs fruit best when slightly root-bound — avoid planting in overly large pots.
  4. Add phosphorus: Supplement with bone meal or low-nitrogen fertilizer to support flowering and fruit set.

Final Thoughts: Patience Brings Sweet Rewards

A fig tree’s journey from leaf to fruit can be slow, but it’s worth every moment of care and observation. Whether it’s adjusting sunlight, rethinking fertilizer, or simply waiting for maturity, most fruiting problems have easy fixes.

Remember — once your fig tree settles into the right balance of light, warmth, and nourishment, it will reward you with the sweetest, juiciest harvests year after year.

Because in gardening, as in life, patience truly does bear fruit.