How to Keep Pests Away Without Chemicals

How to Keep Pests Away Without Chemicals

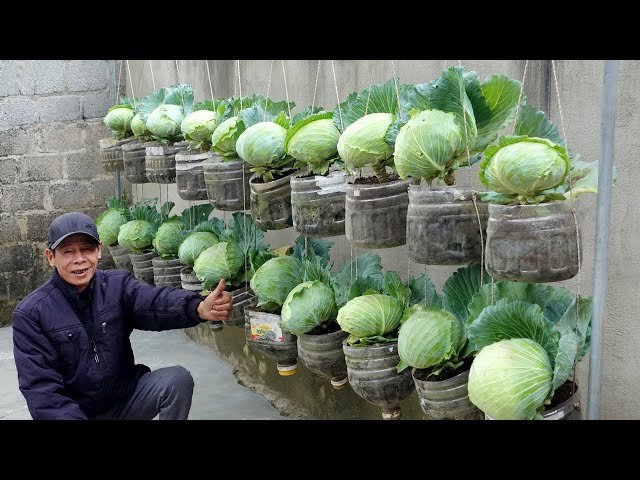
Gardening is one of life’s great joys, but pests can quickly turn a flourishing garden into a frustrating experience. While chemical pesticides offer a quick solution, they can harm beneficial insects, pollinators, pets, and even humans. Fortunately, there are effective, chemical-free ways to keep pests away, ensuring a healthy, thriving garden while maintaining ecological balance.

This comprehensive guide will explore natural pest control methods, preventive strategies, and sustainable techniques to protect your plants without relying on harmful chemicals.


Step 1: Understand Your Pests

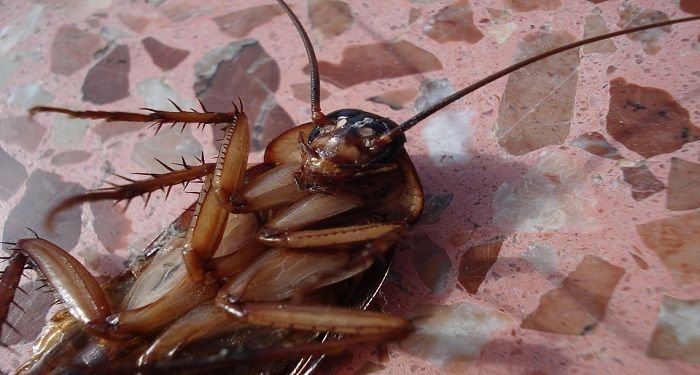
The first step in controlling pests naturally is knowing what you’re dealing with. Common garden pests include:

  • Aphids: Tiny green, black, or white insects that suck sap from leaves and stems.
  • Slugs and Snails: Soft-bodied creatures that chew holes in leaves.
  • Caterpillars: Larvae that eat leaves and can defoliate plants.
  • Whiteflies: Small flying insects that feed on plant sap.
  • Mealybugs and Scale Insects: Sap-sucking pests often covered in waxy coatings.
  • Japanese Beetles and Other Leaf-Eating Insects: Chew on foliage, flowers, and fruits.

Tip: Identify pests early. Check leaves, stems, flowers, and soil for signs like holes, yellowing, or sticky residue. Early detection makes control easier.


Step 2: Practice Good Garden Hygiene

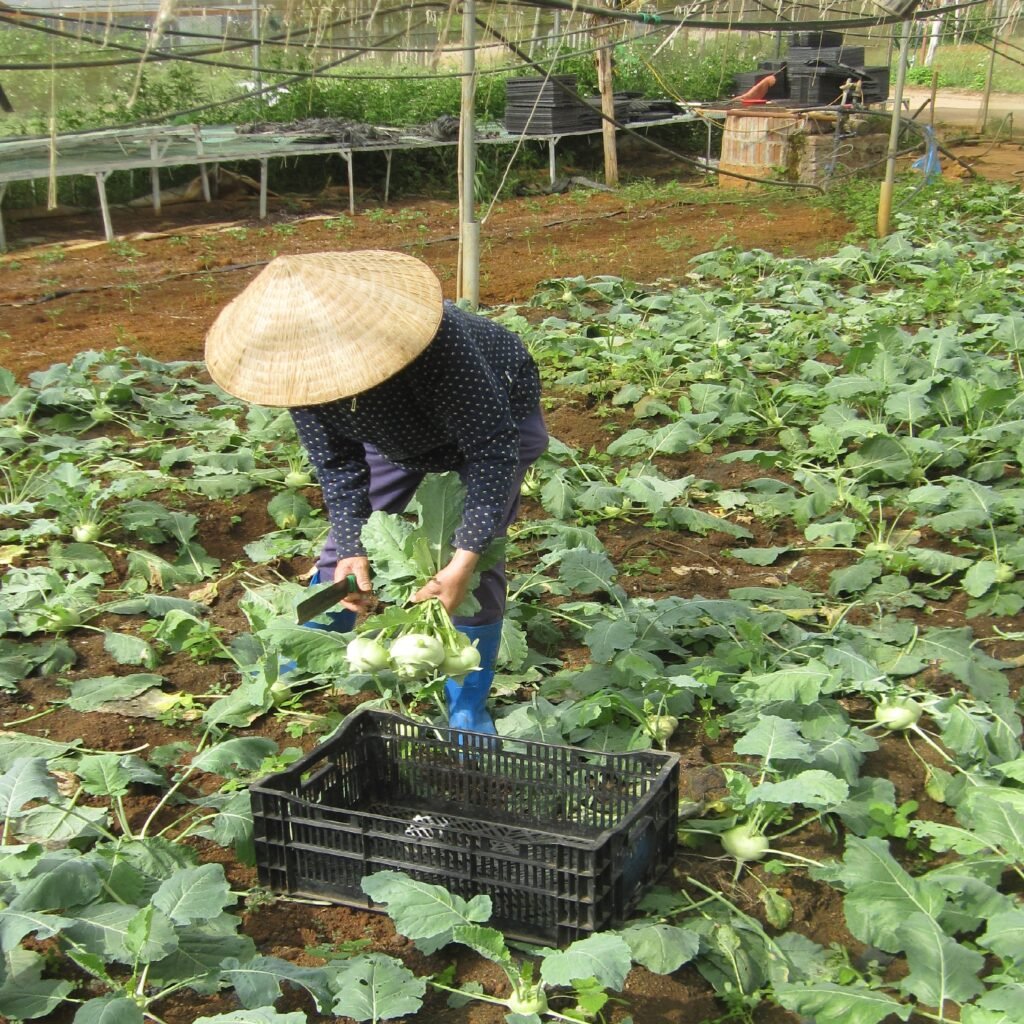
Maintaining a clean, well-organized garden reduces pest infestations naturally:

  • Remove dead leaves and plant debris, which harbor pests.
  • Weed regularly to eliminate hiding spots for insects.
  • Avoid overwatering, as damp conditions encourage slugs, snails, and fungal pests.
  • Rotate crops yearly to prevent soil-borne pests from becoming established.

Tip: Healthy, well-maintained plants are less attractive to pests and more resilient against attacks.


Step 3: Use Companion Planting

Companion planting is a natural pest deterrent strategy. Certain plants repel pests or attract beneficial insects that prey on them:

  • Marigolds: Repel nematodes, aphids, and whiteflies.
  • Basil: Repels mosquitoes and flies; enhances tomato growth.
  • Chives and Garlic: Keep aphids, Japanese beetles, and carrot flies away.
  • Nasturtiums: Attract aphids away from vegetables (acts as a trap crop).
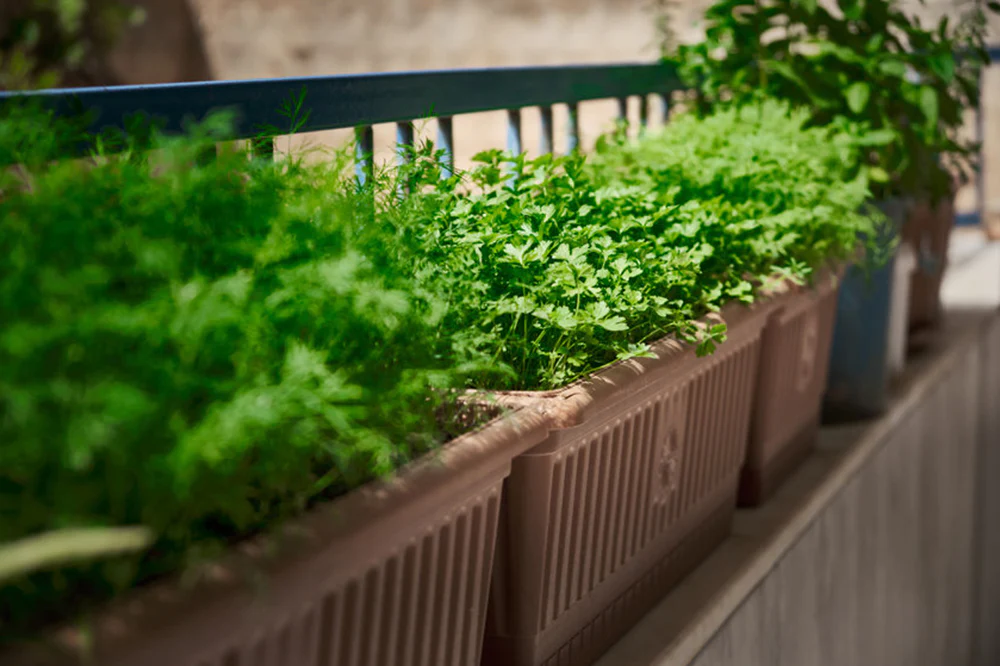
  • Dill and Fennel: Attract ladybugs and parasitic wasps, which are natural predators.

Tip: Plant companion plants strategically near vulnerable crops to maximize their pest-repelling benefits.


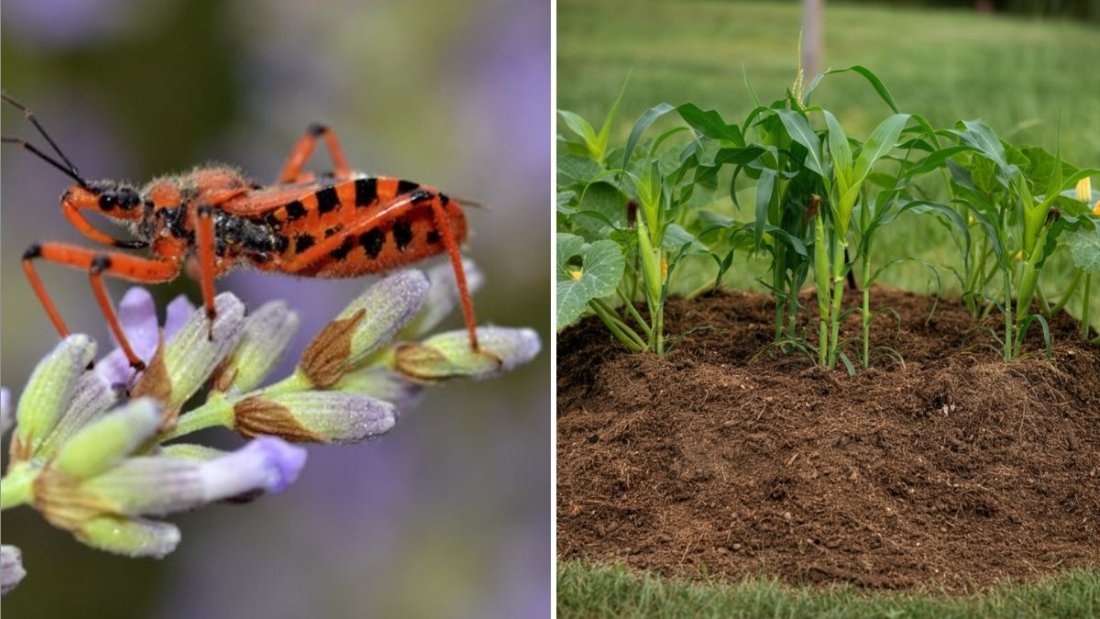
Step 4: Encourage Beneficial Insects

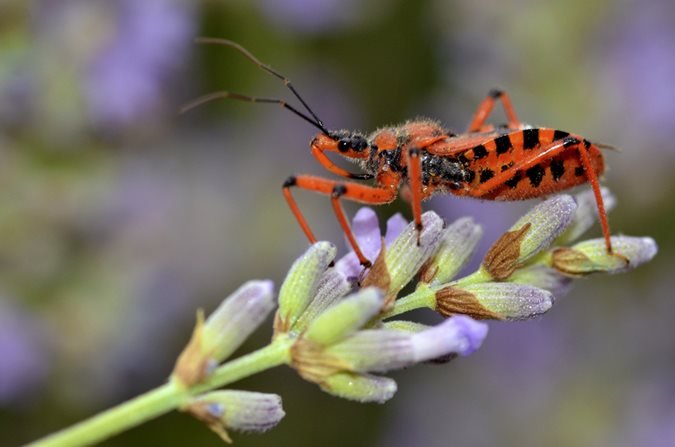
Not all insects are harmful—many act as natural pest controllers:

  • Ladybugs: Eat aphids and scale insects.
  • Lacewings: Feed on aphids, mealybugs, and mites.
  • Parasitic Wasps: Lay eggs inside caterpillars or whiteflies, controlling populations.
  • Predatory Beetles: Consume slugs, snails, and other soft-bodied pests.

Tip: Create a welcoming habitat with flowering plants, herbs, or small water sources to attract and sustain beneficial insects.


Step 5: Physical Barriers and Traps

Simple, non-toxic physical methods are highly effective:

  • Row Covers or Netting: Protect crops from flying insects and birds.
  • Copper Tape: Creates a barrier that slugs and snails avoid.
  • Sticky Traps: Yellow or blue sticky boards attract and trap flying pests like whiteflies and aphids.
  • Handpicking: Remove caterpillars, slugs, or beetles manually when feasible.

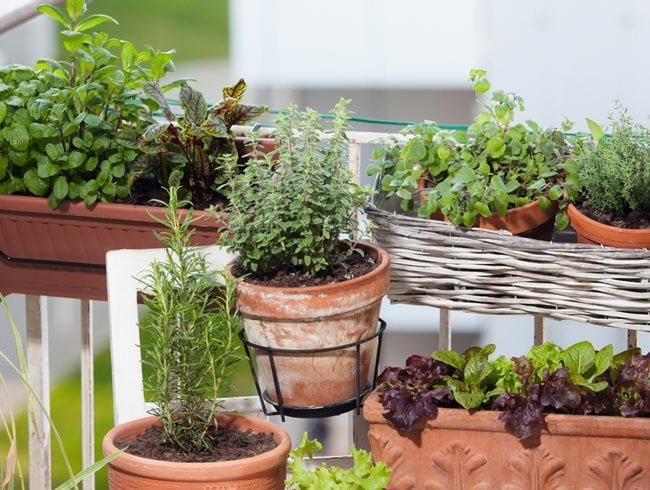
Tip: Combine barriers and traps for maximum protection, especially in small gardens or balconies.


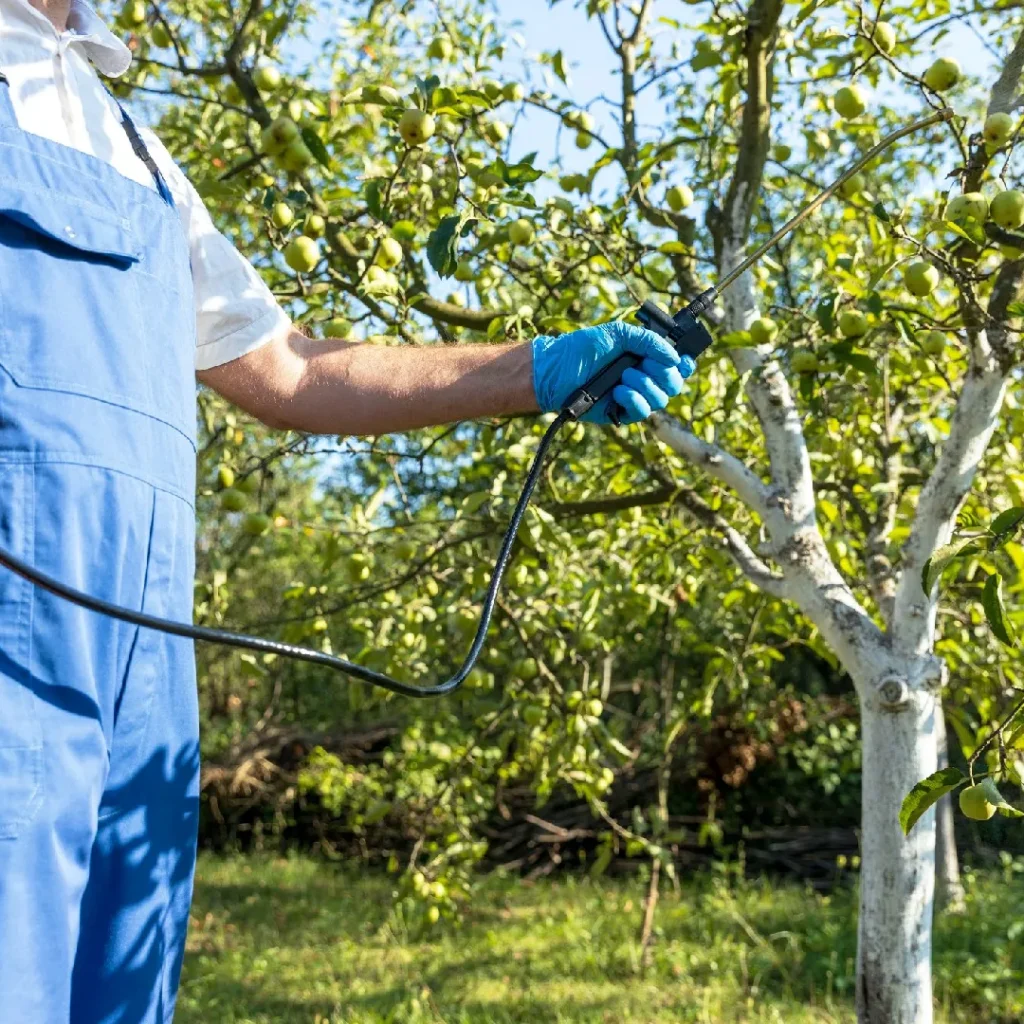
Step 6: Homemade Natural Sprays

Several household ingredients can be turned into effective sprays to repel pests:

1. Neem Oil Spray

  • Mix 2 teaspoons of neem oil and a few drops of mild soap in 1 liter of water.
  • Spray on affected plants weekly.
  • Controls aphids, whiteflies, mealybugs, and caterpillars.

2. Garlic and Chili Spray

  • Blend garlic cloves and hot chilies with water, strain, and spray on plants.
  • Repels insects and some mammals.

3. Soap and Water Spray

  • Mix 1–2 teaspoons of liquid soap in 1 liter of water.
  • Spray on leaves to suffocate soft-bodied pests like aphids and spider mites.

4. Herbal Infusions

  • Make tea from neem, mint, or chamomile and spray directly on plants.
  • Repels pests and promotes plant health.

Tip: Test sprays on a small section first to ensure plants do not get damaged. Reapply after rain for effectiveness.


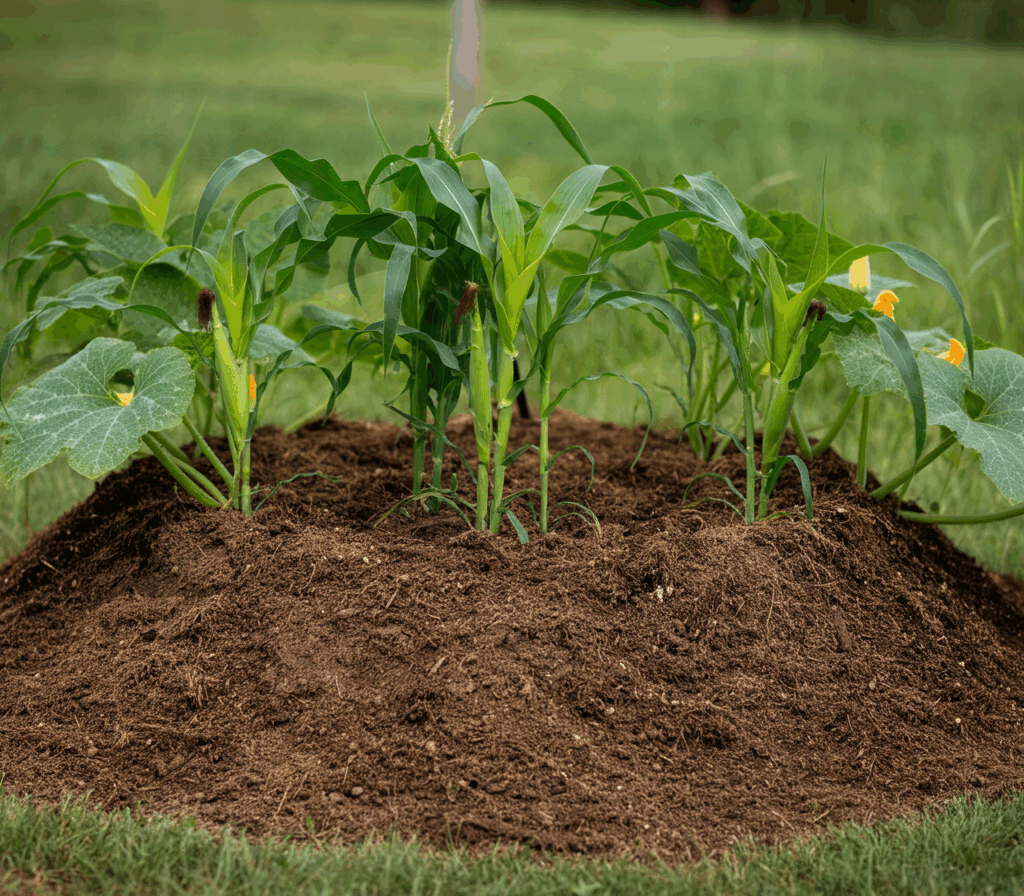
Step 7: Mulching and Soil Management

Healthy soil and proper mulching deter pests naturally:

  • Use organic mulch (straw, wood chips, compost) to reduce weeds and moisture fluctuations.
  • Avoid mulch that stays excessively wet, which can attract slugs and snails.
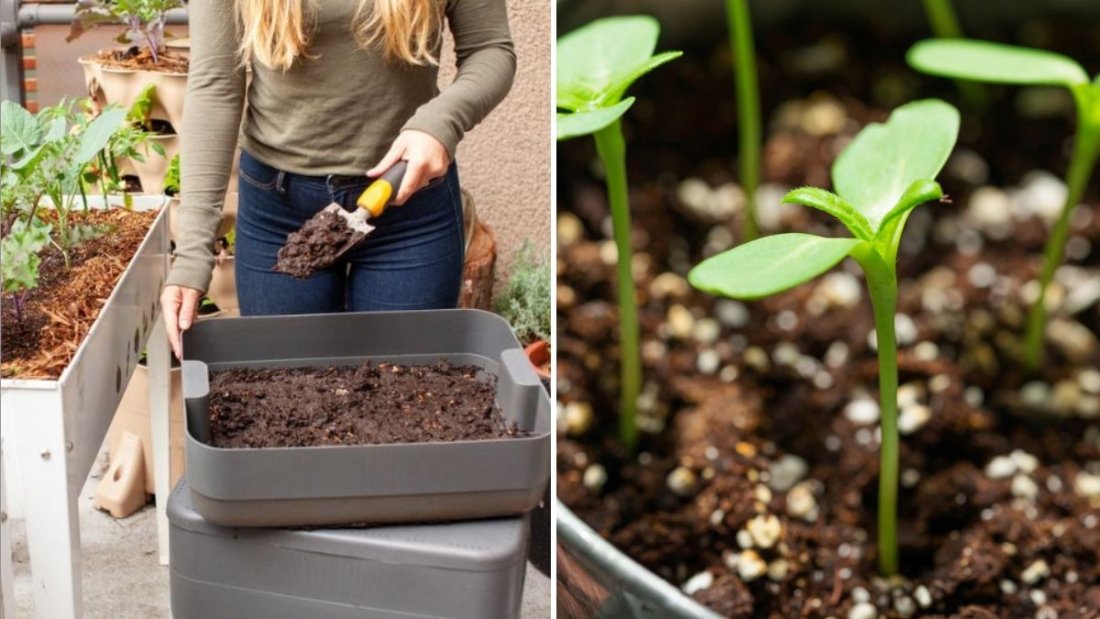
  • Rotate crops and amend soil with compost to maintain nutrient balance, reducing plant susceptibility to pests.

Tip: Mulching also helps beneficial insects like ground beetles thrive, enhancing natural pest control.


Step 8: Crop Rotation and Diversity

Rotating plants annually prevents pests from establishing long-term populations:

  • Avoid planting the same crop in the same location each year.
  • Mix crops in beds to confuse pests and reduce disease spread.
  • Interplant fast-growing vegetables with slower-growing ones for added diversity.

Tip: Companion planting and crop rotation together create a resilient ecosystem that naturally minimizes pest problems.


Step 9: Use Organic Repellents and Amendments

Certain natural products improve plant health and repel pests:

  • Diatomaceous Earth: Fine powder that scratches soft-bodied pests like slugs and aphids.
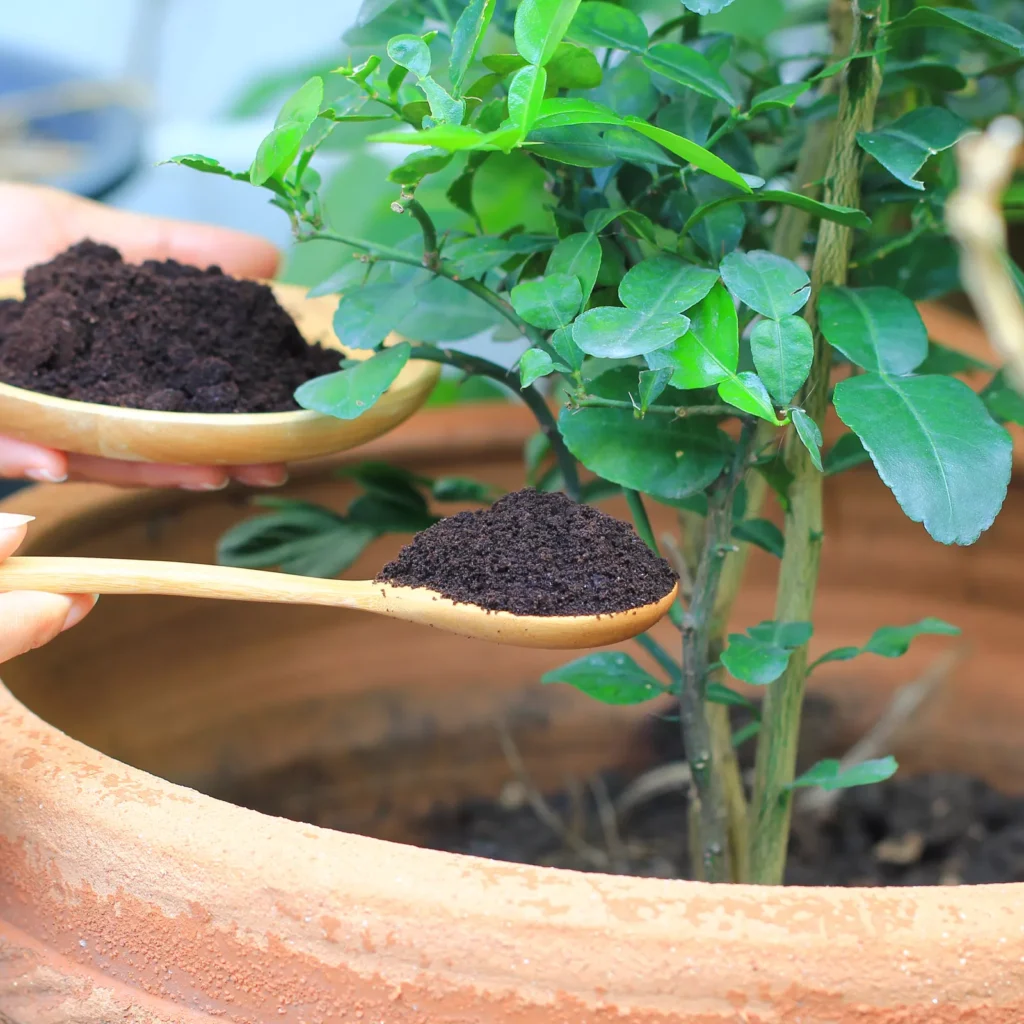
  • Coffee Grounds: Repel slugs and provide nitrogen to soil.
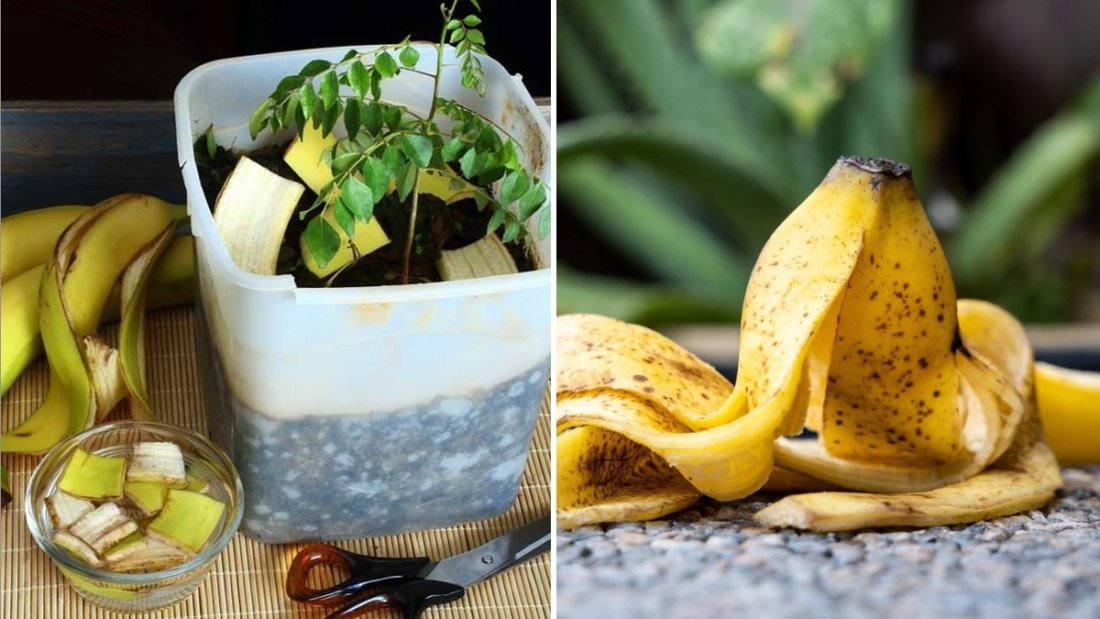
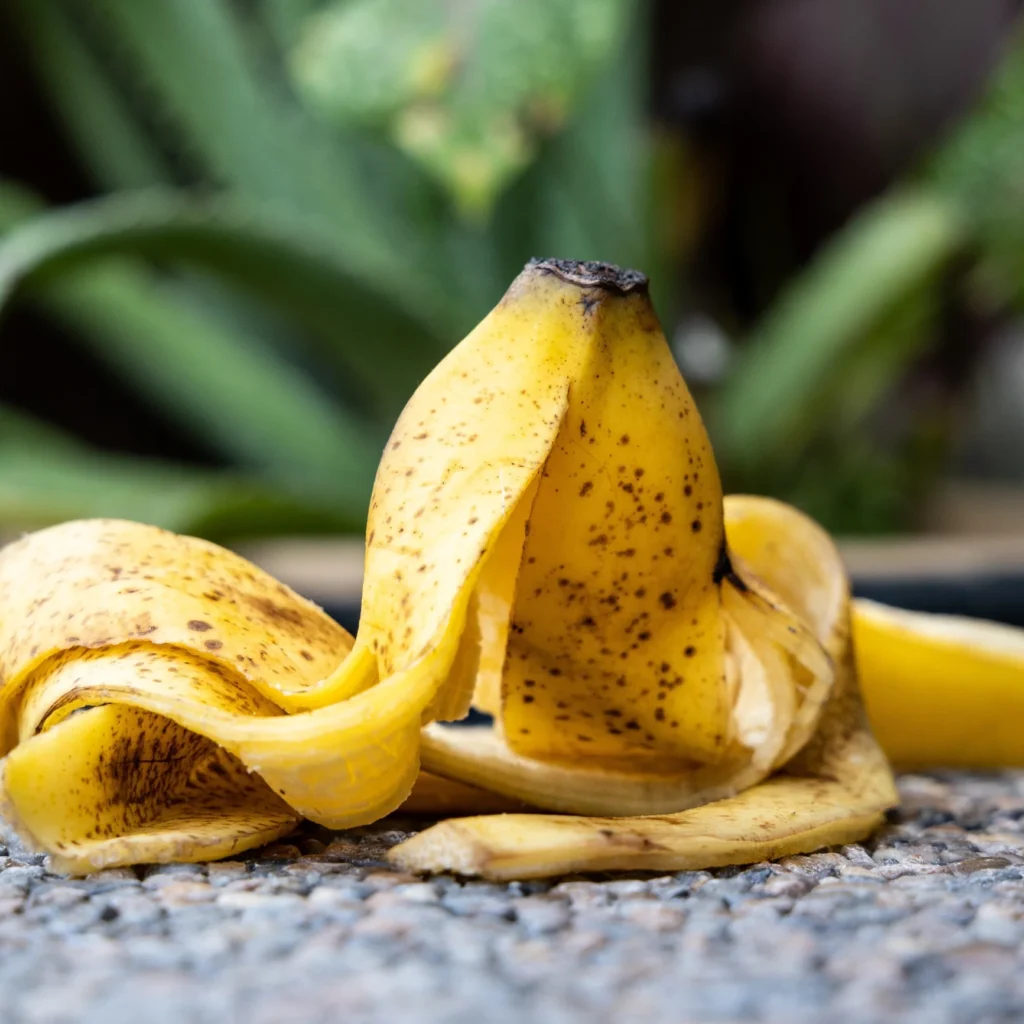
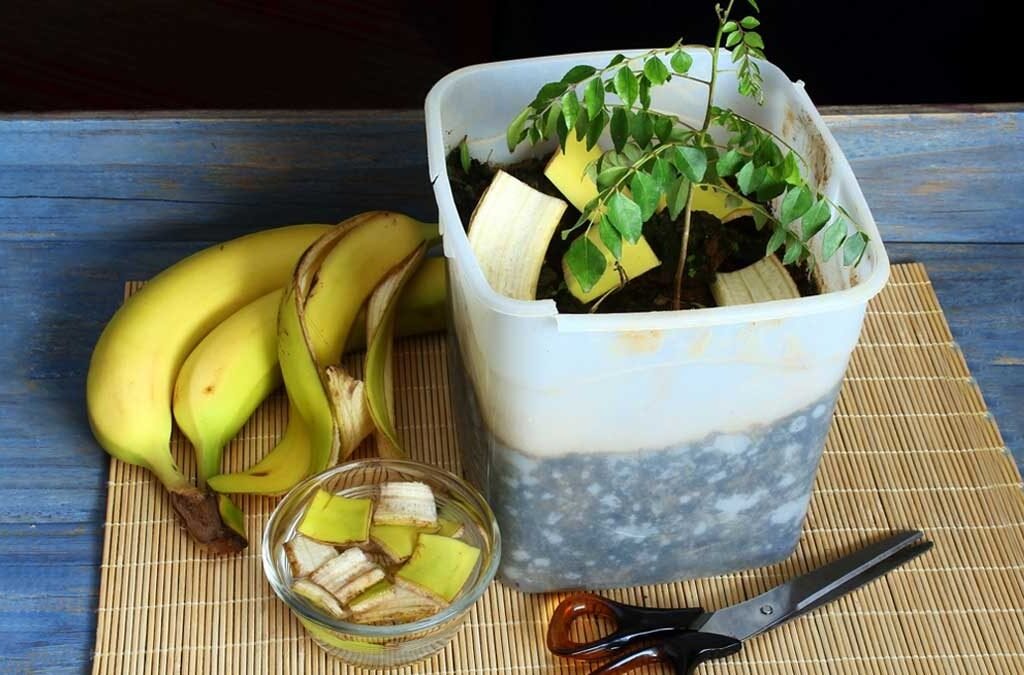
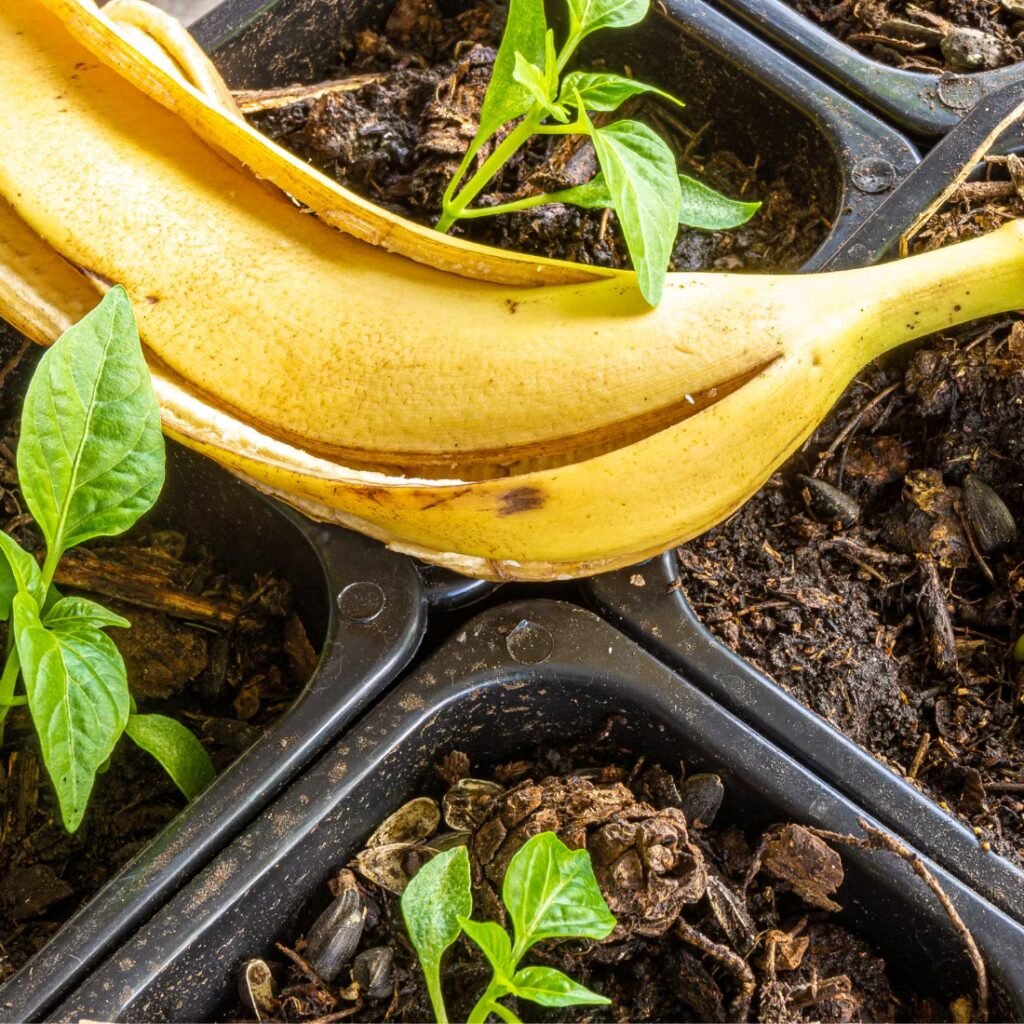
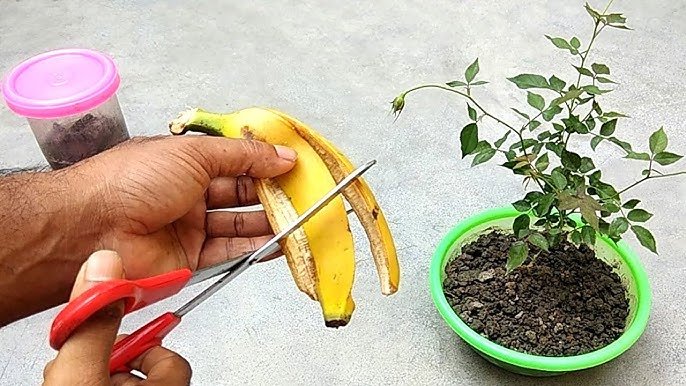
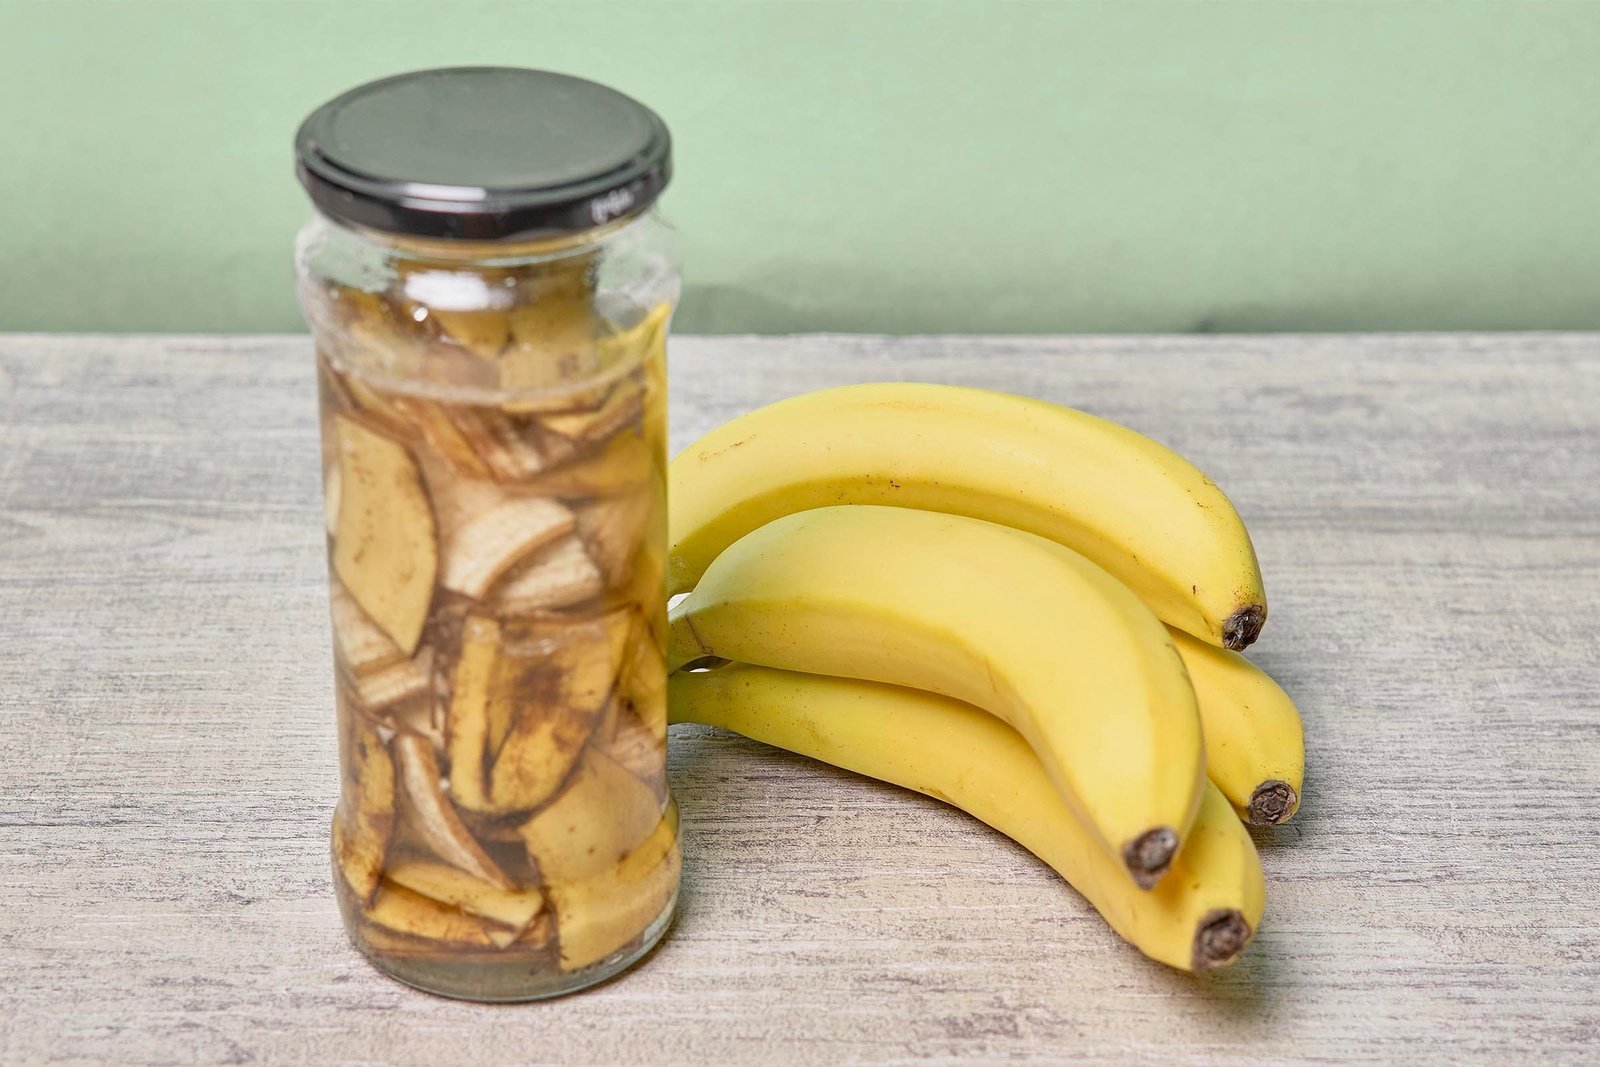
  • Banana Peels: Attract beneficial insects while enriching soil.
  • Eggshells: Act as a barrier for crawling pests and add calcium to soil.

Tip: Spread organic amendments around the base of plants strategically for maximum effect.


Step 10: Regular Monitoring and Early Intervention

Preventive care is the cornerstone of chemical-free pest control:

  • Inspect leaves, stems, flowers, and soil weekly.
  • Remove affected parts promptly to prevent pest spread.
  • Keep records of pest activity to identify recurring problems and adjust strategies.

Tip: Early detection allows natural methods to work effectively, reducing the need for stronger interventions.


Benefits of Chemical-Free Pest Control

  1. Safe for Humans and Pets: No toxic residues on edible crops or in living spaces.
  2. Protects Pollinators: Bees, butterflies, and other beneficial insects thrive.
  3. Environmentally Friendly: Reduces contamination of soil and water.
  4. Promotes Healthy Soil: Organic amendments improve fertility and microbial activity.
  5. Sustainable: Encourages long-term garden resilience.

Tip: Chemical-free gardens foster biodiversity, creating a balanced ecosystem where plants and beneficial organisms coexist.


Step 11: Tips for Success

  • Combine multiple strategies (companion planting, natural sprays, beneficial insects) for maximum effectiveness.
  • Keep plants healthy with proper watering, pruning, and fertilization; strong plants resist pests better.
  • Introduce barriers for vulnerable plants while using natural sprays for existing infestations.
  • Learn from experience: observe which methods work best for your garden’s specific pests.
  • Maintain diversity: growing different plants reduces the risk of large-scale infestations.

Final Thoughts

Keeping pests away without chemicals is not only possible but rewarding and sustainable. By combining preventive practices, natural repellents, companion planting, and beneficial insects, you can maintain a healthy, productive garden while respecting the environment.

Chemical-free pest management promotes plant health, soil vitality, and biodiversity, creating a resilient garden that can thrive year after year. With patience, observation, and consistent care, you can enjoy lush, pest-free plants without compromising safety or environmental integrity.

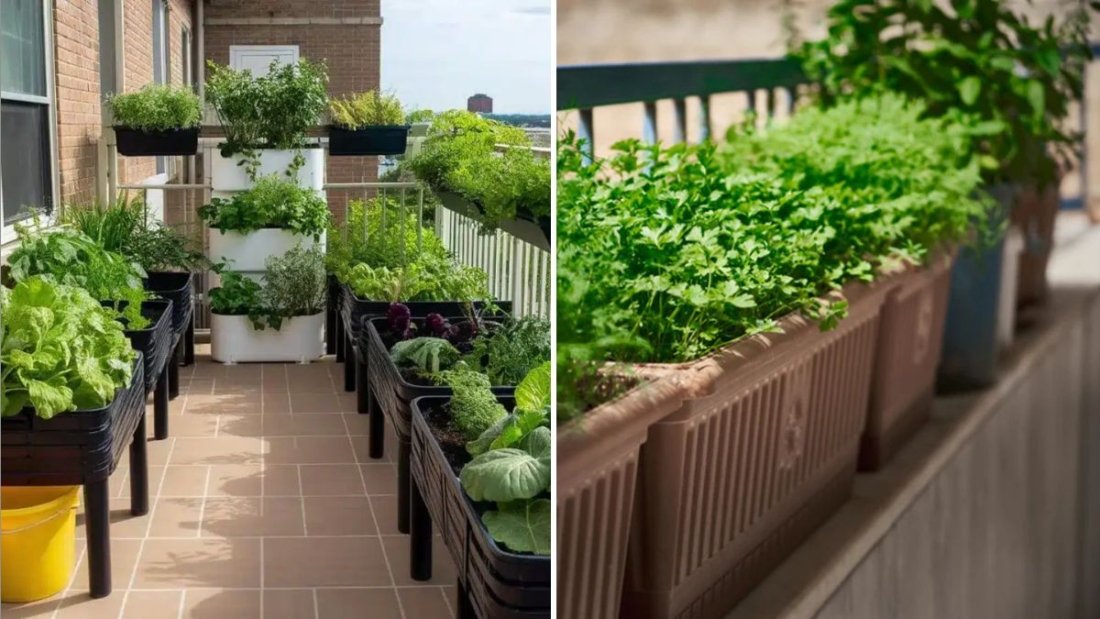
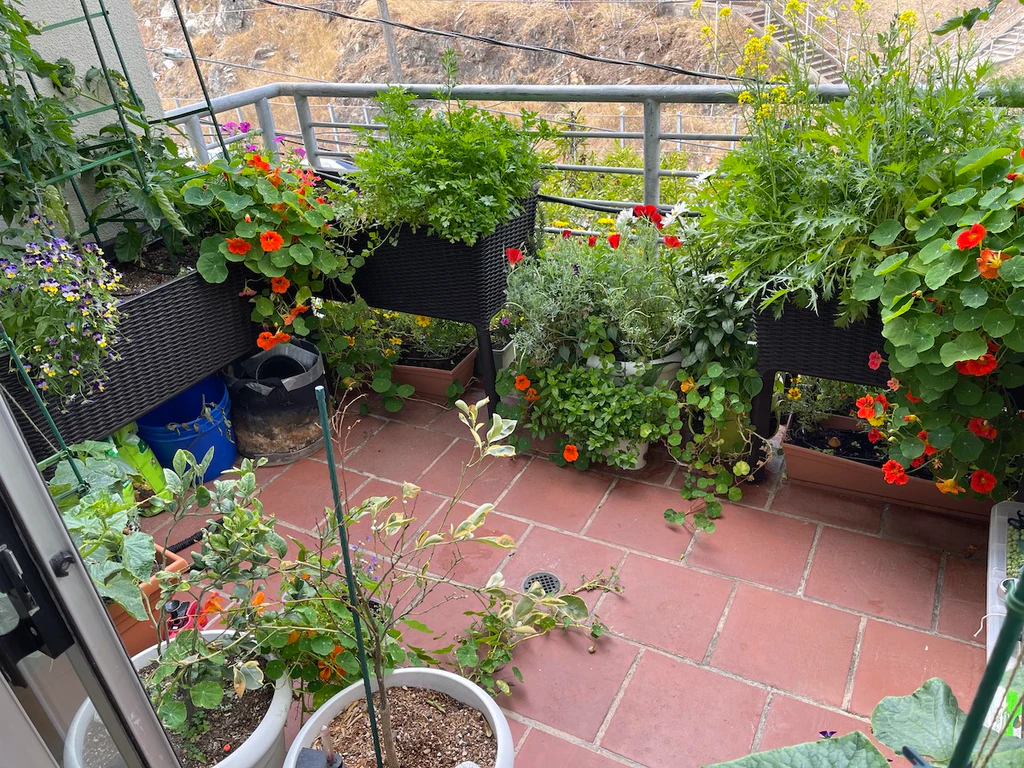
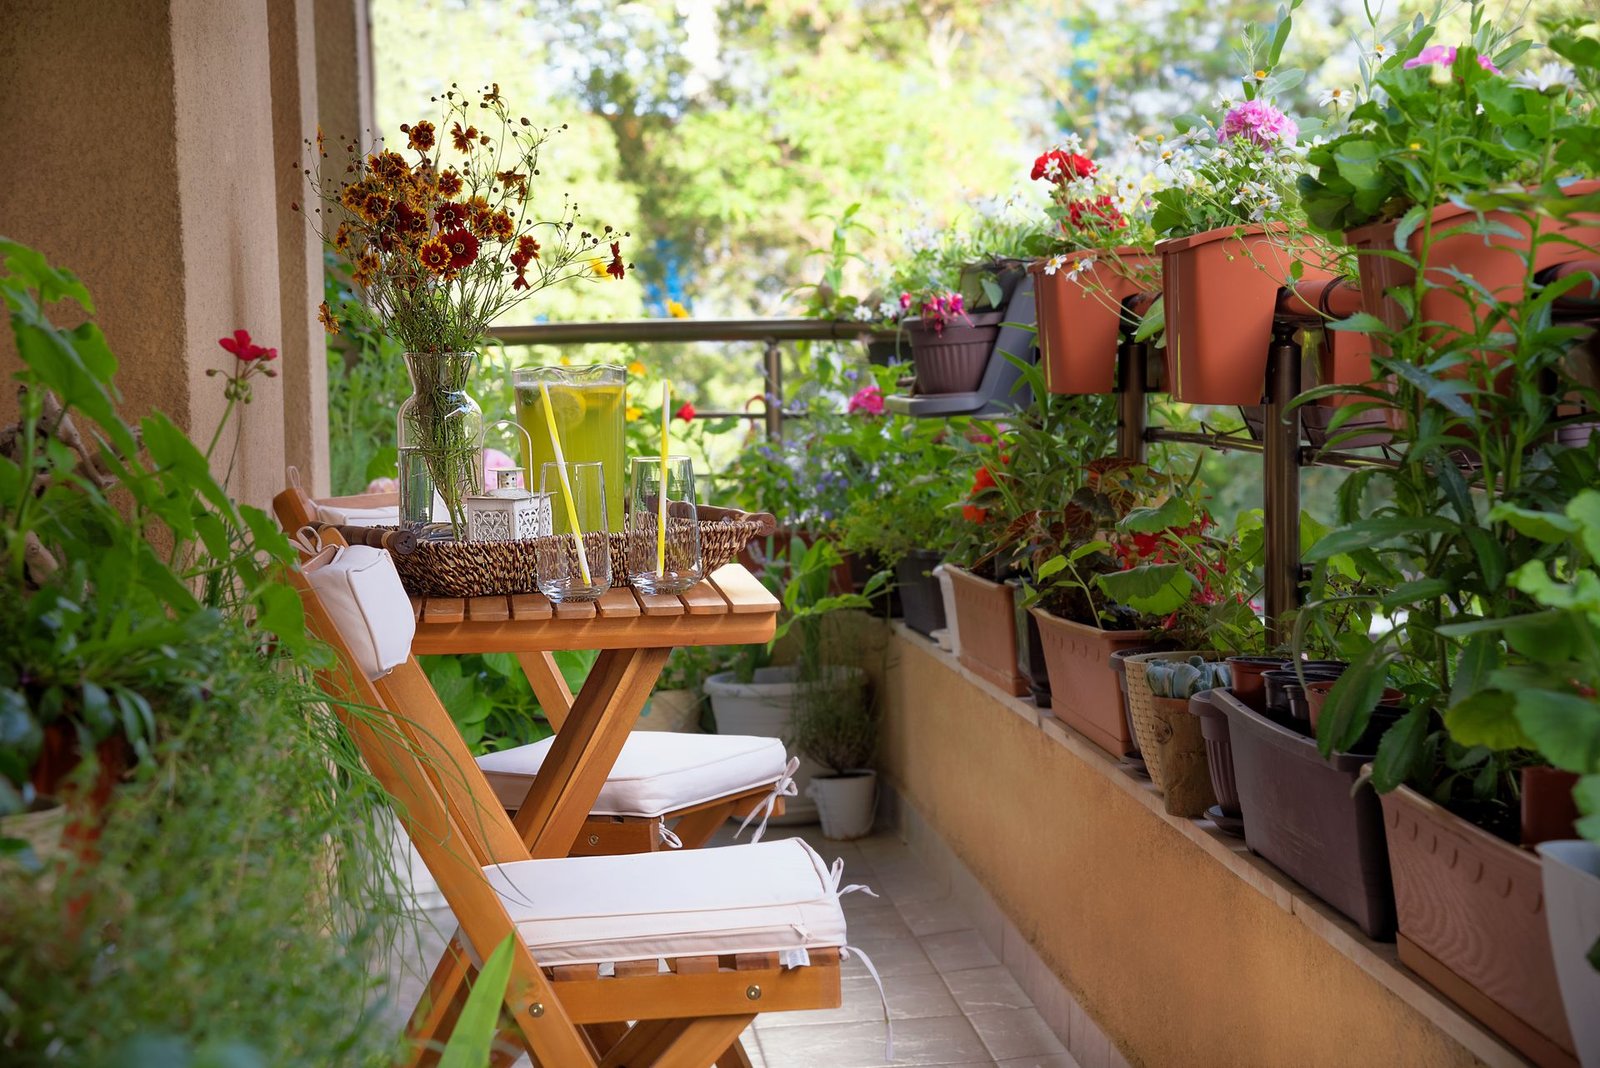
Whether you’re a small balcony gardener or managing a larger backyard, implementing these strategies ensures your garden flourishes naturally, beautifully, and sustainably.

How to Grow Roses That Bloom All Year

How to Grow Roses That Bloom All Year

Roses are timeless symbols of beauty, love, and elegance. While many gardeners enjoy them for their vibrant colors and intoxicating fragrance, keeping roses blooming year-round can feel like a challenge. With the right varieties, care techniques, and environmental considerations, it is entirely possible to enjoy continuous blooms. Growing roses that bloom all year requires understanding their needs, from sunlight and soil to pruning, fertilization, and pest management.

This guide will walk you through how to grow roses that bloom all year, providing detailed, actionable steps for both beginner and experienced gardeners.


Step 1: Choose the Right Rose Varieties

The first step to year-round blooms is selecting rose varieties that are known for continuous flowering. Not all roses bloom throughout the year, so choose repeat-blooming or remontant varieties:

  • Hybrid Tea Roses: Classic long-stemmed roses that produce large, elegant blooms repeatedly.
  • Floribunda Roses: Compact shrubs with clusters of flowers that bloom multiple times.
  • Grandiflora Roses: Tall, elegant plants combining hybrid tea and floribunda traits with continuous flowering.
  • Climbing Roses: Certain climbing varieties bloom repeatedly and can provide vertical beauty.
  • Shrub Roses: Disease-resistant and hardy, with frequent flowering cycles.

Tip: Check the variety’s bloom habit before planting to ensure it fits your goal of year-round flowering.


Step 2: Plant Roses in the Right Location

Sunlight, air circulation, and protection from harsh elements are critical for roses to bloom consistently:

  1. Sunlight: Roses need at least 6 hours of direct sunlight per day. Morning sunlight is especially beneficial to dry dew and prevent fungal diseases.
  2. Air Circulation: Plant roses where air can flow freely to reduce fungal infections and encourage healthy growth.
  3. Soil Drainage: Roses prefer well-draining, loamy soil. Avoid low spots that collect water, which can lead to root rot.

Tip: If you’re planting in containers, choose large pots with proper drainage holes and high-quality potting soil enriched with compost.


Step 3: Prepare the Soil Properly

Healthy soil is the foundation of year-round blooms:

  • Soil pH: Roses thrive in slightly acidic soil, ideally between 6.0 and 6.5.
  • Amendments: Mix compost, aged manure, and organic matter into the soil to improve fertility and structure.
  • Drainage: Raise garden beds or use containers with drainage layers to prevent waterlogging.

Tip: Conduct a soil test to determine nutrient levels and pH, adjusting as necessary for optimal rose growth.


Step 4: Watering Roses Correctly

Consistent moisture is crucial, but overwatering can harm roses:

  • Deep Watering: Water at the base of the plant to encourage deep root growth.
  • Frequency: Water 2–3 times per week in hot weather; adjust depending on rainfall and soil type.
  • Avoid Wetting Foliage: Wet leaves encourage fungal diseases like black spot and powdery mildew.

Tip: Mulch around the base with 2–3 inches of organic material to retain moisture and reduce evaporation.


Step 5: Fertilize for Continuous Blooms

Roses are heavy feeders, especially repeat-blooming varieties. Fertilization supports healthy growth and abundant flowering:

  1. Balanced Fertilizer: Use a rose-specific or general-purpose fertilizer with balanced NPK (Nitrogen, Phosphorus, Potassium).
  2. Frequency: Feed every 4–6 weeks during the growing season; reduce in winter if dormant.
  3. Organic Options: Compost, worm castings, and well-aged manure provide nutrients naturally.
  4. Liquid Fertilizers: Seaweed or fish emulsion can provide a quick nutrient boost and improve flowering.

Tip: Avoid over-fertilizing with nitrogen alone, as it promotes leaf growth at the expense of blooms.


Step 6: Pruning for Year-Round Bloom

Proper pruning encourages new growth and continual flowering:

  • Deadheading: Remove spent flowers regularly to stimulate new blooms.
  • Structural Pruning: Cut back old or weak stems to improve airflow and plant shape.
  • Timing: For repeat-blooming roses, prune lightly throughout the year; heavier pruning can be done in early spring.

Tip: Use clean, sharp pruning shears to prevent disease transmission and damage to the plant.


Step 7: Protect Roses from Pests and Diseases

Year-round blooming requires maintaining healthy plants free from pests and diseases:

Common Pests

  • Aphids
  • Spider mites
  • Thrips
  • Japanese beetles

Common Diseases

  • Black spot
  • Powdery mildew
  • Rust

Prevention and Management:

  • Inspect plants weekly for early signs of pests or disease.
  • Use insecticidal soap or neem oil for organic pest control.
  • Ensure proper spacing and pruning for air circulation.
  • Remove and destroy infected leaves promptly.

Tip: Companion planting with garlic, chives, or marigolds can help deter pests naturally.


Step 8: Extend the Blooming Season

To keep roses flowering almost all year, consider these techniques:

  1. Climate Considerations:
    • In temperate climates, roses may slow down in winter. Use protective coverings or grow in containers to move indoors.
  2. Succession Planting:
    • Plant varieties with staggered bloom times to maintain continuous color.
  3. Encourage New Growth:
    • Regular feeding, deadheading, and pruning stimulate new shoots and buds.
  4. Container Gardening:
    • Allows better control over temperature, soil quality, and watering, enabling extended bloom in colder months.

Tip: Some tropical or subtropical rose varieties can bloom year-round in warm climates without special care.


Step 9: Mulching and Soil Care

Mulching is essential for maintaining consistent soil moisture, suppressing weeds, and protecting roots:

  • Organic Mulch: Use straw, wood chips, or compost.
  • Thickness: 2–3 inches around the base, keeping mulch away from the crown of the plant.
  • Renew Regularly: Refresh mulch as it decomposes or is washed away by rain.

Tip: Mulching also moderates soil temperature, which helps roses maintain growth during seasonal changes.


Step 10: Growing Roses in Containers

Container roses offer flexibility and can thrive year-round with proper care:

  • Pot Selection: Choose large pots to accommodate root growth.
  • Soil Mix: Use high-quality potting soil mixed with compost.
  • Watering: Container soil dries faster, so monitor moisture more frequently.
  • Fertilization: Container roses benefit from more frequent feeding due to nutrient leaching during watering.

Tip: Move containers to sunnier locations during cloudy or winter months to prolong blooming.


Step 11: Winter Care and Year-Round Tips

Even in colder climates, you can encourage continuous blooming:

  • Protect roses from frost using burlap wraps or frost cloths.
  • Apply a layer of mulch or straw around the base for insulation.
  • Reduce watering slightly during dormancy but keep soil from drying out completely.
  • Consider indoor overwintering for container roses with adequate sunlight.

Tip: Ever-blooming varieties like “Knock Out” roses are more resilient and easier to maintain for year-round flowering.


Benefits of Year-Round Blooming Roses

  1. Aesthetic Beauty: Continuous flowers enhance gardens, patios, or indoor spaces.
  2. Fragrance: Enjoy the delightful aroma all year.
  3. Pollinator Attraction: Bees and butterflies visit consistently, supporting biodiversity.
  4. Garden Productivity: Continuous blooms can provide cut flowers for your home or gifts.
  5. Therapeutic Value: Caring for roses throughout the year promotes relaxation and reduces stress.

Final Thoughts

Growing roses that bloom all year is achievable with careful variety selection, proper location, soil preparation, watering, fertilization, pruning, and pest management. The key is consistency in care and understanding the needs of your specific rose varieties.

By choosing repeat-blooming or remontant roses, providing adequate sunlight, maintaining soil health, and protecting plants from pests and diseases, your roses can flourish continuously, providing vibrant color, fragrance, and joy all year long.

Whether planted in the garden or in containers, year-round roses are not just a beautiful addition—they’re a symbol of dedication, patience, and love for gardening. With the right care, you can transform your garden into a haven of color, fragrance, and natural beauty throughout every season.

How to Use Banana Peels for Plant Growth

How to Use Banana Peels for Plant Growth

Bananas are one of the most popular fruits worldwide, but what happens to the peels once you finish eating the fruit? Instead of tossing them in the trash, banana peels can become a natural, nutrient-rich fertilizer for your garden. Packed with essential nutrients like potassium, phosphorus, calcium, and magnesium, banana peels can enhance plant growth, improve flowering, and even deter pests.

In this guide, we’ll explore how to use banana peels for plant growth, covering different methods of application, benefits, precautions, and tips to maximize their effectiveness. Whether you have houseplants, vegetables, or flowering plants, banana peels offer a sustainable, eco-friendly way to nourish your greenery.


Why Banana Peels Are Beneficial for Plants

Banana peels contain a rich blend of nutrients essential for healthy plant development:

  1. Potassium (K): Improves root strength, flower formation, and fruit quality.
  2. Phosphorus (P): Encourages strong root development and aids in energy transfer within the plant.
  3. Calcium: Supports cell wall structure, preventing blossom end rot in fruits like tomatoes.
  4. Magnesium: Essential for photosynthesis, helping plants produce energy.
  5. Trace Elements: Includes zinc, sulfur, and iron that contribute to overall plant health.

Bonus: Using banana peels reduces kitchen waste, making it an eco-friendly gardening practice.


Step 1: Preparing Banana Peels

Before using banana peels, proper preparation ensures maximum nutrient absorption and prevents unwanted issues such as attracting pests.

Methods:

1. Fresh Banana Peels

  • Simply cut the peel into small pieces.
  • Bury them a few inches deep into the soil near the plant’s roots.
  • This allows nutrients to gradually leach into the soil as the peel decomposes.

2. Banana Peel Tea

  • Chop 1–2 banana peels and soak them in 2–4 cups of water for 24–48 hours.
  • Use the liquid to water plants.
  • Provides a quick nutrient boost and is easier to apply to multiple plants.

3. Dried Banana Peels

  • Dry peels in the sun or in a low-temperature oven.
  • Grind into a powder using a blender or mortar.
  • Sprinkle around the base of plants or mix with potting soil.
  • Powdered form reduces odor and decomposes more slowly for gradual nutrient release.

Tip: Always avoid peels with mold or rot, as they may introduce harmful fungi to the soil.


Step 2: Using Banana Peels for Indoor Plants

Banana peels are ideal for houseplants, herbs, and container plants.

Methods:

  1. Direct Burial:
    • Cut peel into small pieces and bury under 1–2 inches of soil in the pot.
    • Best for slow-growing houseplants like ficus or peace lilies.
  2. Banana Peel Tea:
    • Use the liquid to water the plant once every 2–3 weeks.
    • Works well for plants that need frequent hydration and nutrient boosts.
  3. Compost Mix:
    • Chop banana peels and add them to indoor compost bins.
    • Combine with coffee grounds and eggshells for balanced nutrients.

Tips:

  • Rotate which plants receive peels to avoid over-fertilization.
  • Avoid placing large peel pieces on the soil surface, as they may attract fruit flies.

Step 3: Using Banana Peels for Outdoor Plants

Outdoor gardens, including vegetables, flowers, and fruiting plants, benefit significantly from banana peels.

Vegetable Gardens

  • Tomatoes, Peppers, and Eggplants: Bury small pieces near the root zone to prevent blossom end rot and promote fruiting.
  • Leafy Greens: Banana peel tea can provide a nitrogen and potassium boost for lush, healthy leaves.

Flowering Plants

  • Roses, Marigolds, and Geraniums: Use banana peel powder or bury peels around the base to improve flowering and vibrant colors.

Trees and Shrubs

  • Chop peels and mix into the mulch around trees to release nutrients gradually over time.

Tips:

  • Avoid overloading the soil with banana peels; too many can create excess moisture and attract pests.
  • Cover buried peels with soil to accelerate decomposition and prevent fruit flies.

Step 4: Combining Banana Peels with Other Organic Fertilizers

Banana peels work even better when combined with other natural amendments:

  • Compost: Add chopped banana peels to compost bins for a nutrient-rich mix.
  • Coffee Grounds: Mix with peels to provide nitrogen along with potassium and phosphorus.
  • Eggshells: Add calcium along with the potassium from peels for fruiting plants.
  • Worm Castings: Enhance microbial activity and nutrient absorption.

Tip: Combining organic materials creates a balanced fertilizer that supports overall soil health and plant growth.


Step 5: Precautions for Using Banana Peels

While banana peels are beneficial, some precautions are necessary:

  1. Avoid Direct Contact with Leaves: Banana peel juices can sometimes cause leaf burn in sensitive plants.
  2. Control Moisture: Excess moisture from decomposing peels can lead to root rot if not buried properly.
  3. Prevent Pest Attraction: Bury peels or turn them into tea to avoid fruit flies and ants.
  4. Moderation: Use peels sparingly; too much can alter soil pH and nutrient balance.

Step 6: Benefits of Using Banana Peels

  1. Eco-Friendly: Reduces kitchen waste and lowers the need for chemical fertilizers.
  2. Nutrient-Rich: Provides potassium, phosphorus, calcium, and magnesium naturally.
  3. Cost-Effective: Free fertilizer using materials already in your kitchen.
  4. Improves Soil Health: Encourages microbial activity and enhances organic matter.
  5. Enhances Flowering and Fruiting: Boosts plant growth, root development, and yields.

Step 7: Tips for Maximum Effectiveness

  • Chop or blend peels to accelerate decomposition.
  • Use a banana peel every 2–4 weeks depending on plant size and soil quality.
  • Combine with watering and sunlight optimization for best results.
  • Observe plants for signs of nutrient deficiency or over-fertilization.
  • Store extra peels in the fridge for up to a week or freeze for longer-term use.

Step 8: Creative Uses Beyond Fertilizing

  • Pest Deterrent: Some gardeners place peels around plants to deter aphids and rabbits.
  • Seedling Boost: Banana peel tea can help seedlings develop strong roots.
  • Mulch Ingredient: Mix peels with shredded leaves or straw to create organic mulch.
  • Compost Accelerator: High potassium content speeds up decomposition of other organic matter.

Step 9: Sustainable Gardening with Banana Peels

Incorporating banana peels into gardening routines promotes sustainability and eco-conscious practices:

  • Reduces food waste by repurposing peels.
  • Eliminates the need for chemical fertilizers.
  • Supports soil health and encourages biodiversity in the garden.
  • Cost-effective, especially for urban gardeners or balcony gardeners.

Tip: Small steps like using banana peels regularly can make a big difference over time for your garden’s productivity and environmental impact.


Step 10: Final Thoughts

Banana peels are a versatile, nutrient-packed tool for gardeners of all levels. Whether used as fresh chunks, powdered fertilizer, or banana peel tea, they offer an eco-friendly, cost-effective, and safe way to improve plant growth.

By following proper preparation methods, applying them carefully, and combining them with other natural fertilizers, banana peels can:

  • Enhance root development
  • Promote flowering and fruiting
  • Strengthen overall plant health
  • Reduce the need for chemical fertilizers

The beauty of banana peels lies in their simplicity and accessibility. By turning kitchen scraps into garden gold, you can grow healthier, more productive plants while reducing waste.

Whether you’re tending to indoor houseplants, a vegetable garden, or flowering shrubs, banana peels provide a sustainable and effective boost for your plants. Start incorporating them today and watch your garden flourish naturally!

How to Start a Balcony Garden from Scratch

How to Start a Balcony Garden from Scratch

Balcony gardening has become a popular way to bring greenery into urban spaces. Even if you don’t have a backyard, a small balcony can be transformed into a lush, productive, and visually appealing garden. Balcony gardens are perfect for growing flowers, herbs, vegetables, and even small fruiting plants while maximizing limited space.

Starting from scratch might seem daunting, but with careful planning, the right tools, and smart plant selection, you can create a thriving balcony garden. This guide will walk you through how to start a balcony garden from scratch, covering everything from design and container selection to soil, watering, and maintenance.


Step 1: Assess Your Space and Conditions

Before planting, it’s essential to understand your balcony’s environmental conditions:

  1. Sunlight: Determine how many hours of sunlight your balcony receives.
    • Full Sun: 6+ hours of direct sunlight; ideal for vegetables and sun-loving flowers.
    • Partial Sun: 3–6 hours of sunlight; suited for leafy greens, herbs, and shade-tolerant plants.
    • Shade: Less than 3 hours of direct sunlight; best for ferns, ivy, and certain flowering plants.
  2. Weight Limitations: Check the balcony’s load-bearing capacity. Heavy soil and pots can add significant weight.
  3. Wind and Exposure: Balconies are often windy; windbreaks or plant positioning can protect delicate plants.

Tip: Observe your balcony at different times of day to see which areas are sunny, shaded, or sheltered from wind.


Step 2: Plan Your Balcony Garden Layout

A clear plan helps maximize space and accessibility:

  • Vertical Gardening: Use wall-mounted planters, hanging baskets, and trellises to save floor space.
  • Tiered Stands: Multi-level plant stands allow you to fit more plants in a compact area.
  • Rail Planters: Attach planters to the balcony railing for extra planting space.
  • Containers: Arrange pots in clusters for visual appeal while allowing for growth.

Tip: Sketch a layout including plant types, sunlight needs, and water access for better organization.


Step 3: Choose the Right Containers

Selecting the right containers is crucial for plant health and growth:

  1. Material Options:
    • Plastic Pots: Lightweight, affordable, and retain moisture well.
    • Terracotta Pots: Porous, allow aeration, but dry out faster.
    • Fabric Grow Bags: Promote healthy root growth and drainage.
    • Wooden Boxes: Aesthetic, can hold larger plants, but may need lining to prevent rot.
  2. Size Considerations:
    • Choose pots large enough for roots to grow freely.
    • For vegetables, deeper pots are needed for root development (8–12 inches minimum).
  3. Drainage:
    • Ensure containers have drainage holes to prevent waterlogging.
    • Use saucers to catch excess water and protect balcony flooring.

Tip: Mix and match container types for visual appeal and functionality.


Step 4: Select the Right Plants

Balcony gardens are ideal for flowers, herbs, vegetables, and small fruiting plants:

Herbs

  • Basil, mint, rosemary, thyme, coriander, and chives.
  • Require moderate sunlight and well-draining soil.

Vegetables

  • Leafy greens like spinach, lettuce, and kale.
  • Tomatoes, peppers, radishes, and dwarf beans can thrive in large containers.

Flowers

  • Marigolds, petunias, pansies, geraniums, and impatiens.
  • Adds color and attracts pollinators if grown outdoors.

Small Fruit Plants

  • Strawberries, dwarf citrus trees, and cherry tomatoes.
  • Require more sunlight and larger pots for root space.

Tip: Start with easy-to-grow plants suited to your balcony’s light conditions. You can expand variety as you gain experience.


Step 5: Choose the Right Soil

Using the correct soil mix ensures healthy growth:

  • Potting Mix: Lightweight, well-draining, and nutrient-rich; perfect for containers.
  • Compost: Adds nutrients and improves soil structure.
  • Perlite or Vermiculite: Improves aeration and drainage, preventing root rot.

Tip: Avoid using garden soil alone, as it can compact in pots and harbor pests or diseases.


Step 6: Planting Your Balcony Garden

  1. Fill containers with soil mix, leaving 1–2 inches from the rim.
  2. Place seedlings or seeds according to recommended spacing.
  3. Gently press soil around roots and water thoroughly.
  4. Add mulch to retain moisture and reduce evaporation.

Tip: Start with small plants or seedlings for quicker results, especially if you’re new to gardening.


Step 7: Watering and Fertilization

Watering

  • Container plants dry out faster than in-ground plants.
  • Water when the top inch of soil feels dry.
  • Water at the base, avoiding wetting leaves to prevent fungal diseases.

Fertilization

  • Use organic fertilizers like compost, worm castings, or liquid seaweed extract.
  • Feed vegetables and flowering plants every 2–3 weeks during the growing season.

Tip: Self-watering containers or drip irrigation can save time and maintain consistent moisture.


Step 8: Sunlight and Positioning

  • Rotate containers periodically for even growth.
  • Place sun-loving plants where they receive maximum sunlight.
  • Shade-tolerant plants can fill corners or lower levels of tiered stands.

Tip: Use reflective surfaces (mirrors or light-colored walls) to increase sunlight exposure in shaded areas.


Step 9: Pest and Disease Management

Even balcony gardens are susceptible to pests and diseases:

  • Common Pests: Aphids, whiteflies, spider mites, and snails.
  • Organic Pest Control: Neem oil, insecticidal soap, or manual removal.
  • Disease Prevention: Avoid overwatering, ensure good air circulation, and remove diseased leaves promptly.

Tip: Companion planting (e.g., marigolds with tomatoes) can naturally deter pests.


Step 10: Maintenance Tips

  1. Pruning and Pinching: Remove dead leaves and prune overcrowded growth for better air circulation.
  2. Support Plants: Use stakes, trellises, or cages for vining plants like tomatoes or beans.
  3. Regular Observation: Check plants daily for pests, nutrient deficiencies, or water stress.
  4. Seasonal Adjustments: Move containers or use shade cloth in extreme heat; protect from frost in winter.

Tip: Keep a small gardening journal to track watering, fertilization, and growth progress.


Step 11: Creative Enhancements

  • Vertical Walls: Add trellis walls with climbers like ivy or beans for privacy and greenery.
  • Hanging Planters: Ideal for trailing flowers or herbs to save floor space.
  • Decorative Pots: Use colorful or uniquely shaped pots to enhance aesthetics.
  • Lighting: Fairy lights or solar lamps can make the balcony garden visually appealing at night.

Tip: Integrate functional and decorative elements for a balanced, inviting balcony garden.


Benefits of a Balcony Garden

  1. Fresh Produce: Grow your own herbs, vegetables, and fruits.
  2. Mental Well-being: Gardening reduces stress and boosts mood.
  3. Aesthetic Appeal: Adds color, texture, and life to urban spaces.
  4. Environmental Impact: Helps purify air and attract pollinators.
  5. Learning Opportunity: Teaches patience, responsibility, and gardening skills.

Final Thoughts

Starting a balcony garden from scratch is rewarding and achievable, even in small urban spaces. By assessing your space, planning layout, selecting suitable containers and plants, and maintaining proper care, you can create a thriving garden that provides both beauty and sustenance.

A balcony garden is not just a collection of plants—it’s a personal sanctuary where you can relax, experiment, and enjoy the satisfaction of growing your own greenery. With patience, observation, and consistent care, even beginners can transform a bare balcony into a lush, productive, and stunning garden.

Remember: Start small, choose plants suited to your environment, and gradually expand your garden as you gain experience. In no time, your balcony will flourish into a vibrant urban oasis, providing fresh produce, flowers, and a refreshing connection to nature.

How to Fertilize Your Plants Naturally

How to Fertilize Your Plants Naturally

Healthy, vibrant plants start with proper nutrition, and while chemical fertilizers are widely used, natural fertilizers offer a safer, eco-friendly alternative. By using organic materials, you can nourish your plants, improve soil health, and reduce environmental impact. Fertilizing naturally also promotes strong roots, abundant blooms, and robust fruit and vegetable yields.

This guide will show you how to fertilize your plants naturally, including types of organic fertilizers, application methods, timing, and tips for optimal results.


Why Natural Fertilizers Matter

Natural fertilizers provide essential nutrients while enhancing soil structure and microbial activity. Unlike synthetic fertilizers, they:

  1. Feed the Soil: Organic matter improves soil fertility, texture, and water retention.
  2. Support Beneficial Microorganisms: Microbes in healthy soil break down organic matter and make nutrients available to plants.
  3. Reduce Pollution: Chemical fertilizers can leach into waterways, causing environmental damage.
  4. Promote Long-Term Plant Health: Plants absorb nutrients gradually, reducing the risk of nutrient burn or over-fertilization.

Key Nutrients Plants Need:

  • Nitrogen (N): Promotes leafy growth
  • Phosphorus (P): Supports root development and flowering
  • Potassium (K): Strengthens overall plant health and disease resistance

Step 1: Understand Your Plants’ Needs

Before applying any fertilizer, identify the specific nutritional needs of your plants:

  • Leafy Vegetables: High nitrogen requirements for lush foliage (lettuce, spinach, kale).
  • Flowering Plants: Higher phosphorus needs for blooms (roses, hibiscus).
  • Fruiting Plants: Balanced nutrients with slightly more potassium for fruit development (tomatoes, peppers).
  • Houseplants: Varies by species; generally balanced NPK with organic amendments works well.

Tip: Conduct a soil test to determine nutrient deficiencies and avoid unnecessary applications.


Step 2: Choose the Right Natural Fertilizers

Several natural materials can serve as fertilizers, each with unique benefits:

1. Compost

  • Made from decomposed kitchen scraps, garden clippings, and yard waste.
  • Rich in nutrients and beneficial microbes.
  • Improves soil structure and moisture retention.

Application: Spread 1–2 inches of compost around plants or mix into soil before planting.

2. Vermicompost (Worm Castings)

  • Produced by earthworms digesting organic matter.
  • High in nitrogen, phosphorus, and potassium.
  • Enhances microbial activity in soil.

Application: Mix into potting soil or top-dress around plants.

3. Manure

  • Animal manure (cow, horse, chicken) is nutrient-rich.
  • Must be well-aged or composted to prevent burning plants.

Application: Apply 1–2 inches of composted manure around garden beds. Avoid direct contact with roots of young plants.

4. Fish Emulsion

  • Liquid fertilizer made from processed fish.
  • High in nitrogen, ideal for leafy growth.
  • Quickly absorbed by plants.

Application: Dilute according to package instructions and water at the base of plants.

5. Bone Meal

  • Ground animal bones, rich in phosphorus.
  • Encourages strong root growth and flowering.

Application: Mix into soil near the root zone before planting or during transplanting.

6. Coffee Grounds

  • Provides nitrogen and organic matter.
  • Slightly acidic, beneficial for acid-loving plants like azaleas and blueberries.

Application: Sprinkle around plants or mix into compost.

7. Eggshells

  • Source of calcium, essential for cell wall structure.
  • Helps prevent blossom end rot in tomatoes and peppers.

Application: Crush eggshells and mix into soil or compost.

8. Seaweed or Kelp**

  • Contains micronutrients, growth hormones, and trace minerals.
  • Improves stress tolerance and overall plant vigor.

Application: Use as a tea (soak in water) or sprinkle dried powder into soil.


Step 3: Apply Fertilizers Correctly

Proper application ensures nutrients are available when plants need them most.

Top-Dressing

  • Spread organic material (compost, manure, worm castings) on the soil surface.
  • Water in to help nutrients penetrate the root zone.

Soil Incorporation

  • Mix fertilizers into the soil before planting.
  • Ensures even nutrient distribution and encourages deep root growth.

Liquid Fertilization

  • Use liquid fertilizers like fish emulsion or seaweed tea.
  • Apply directly to the soil around the base of plants or as a foliar spray for fast absorption.

Tips:

  • Avoid over-application; too much fertilizer can burn plants or create nutrient imbalances.
  • Water thoroughly after applying granular fertilizers to help nutrients reach roots.

Step 4: Timing Your Fertilization

Timing is critical to maximize nutrient uptake:

  • Seedlings and Young Plants: Use mild, balanced fertilizers to support root development.
  • Vegetative Growth Stage: High-nitrogen fertilizers encourage leafy growth.
  • Flowering Stage: Apply phosphorus-rich fertilizers to promote blooms.
  • Fruiting Stage: Potassium-rich fertilizers enhance fruit development and ripening.

Tip: Follow a regular schedule but adjust according to plant needs, soil quality, and weather conditions.


Step 5: Monitor Plant Health

Regular observation ensures your plants receive adequate nutrition:

  • Nitrogen Deficiency: Yellowing leaves and stunted growth.
  • Phosphorus Deficiency: Dark green or purplish leaves; poor flowering.
  • Potassium Deficiency: Brown leaf edges, weak stems, reduced fruit quality.

Tip: Adjust your fertilization routine based on visual symptoms and soil tests.


Step 6: Combine Fertilizers for Best Results

Using a combination of natural fertilizers can provide balanced nutrition:

  • Mix compost and worm castings for overall soil health.
  • Add bone meal or rock phosphate for flowering and fruiting plants.
  • Use coffee grounds and eggshells to boost nitrogen and calcium levels.

Tip: Layering organic fertilizers helps provide both immediate and long-term nutrient availability.


Step 7: Safety and Sustainability Considerations

  • Use composted manure to reduce the risk of pathogens.
  • Avoid excessive application of nitrogen-rich materials; they can leach into water sources.
  • Rotate crops and vary fertilizer types to maintain soil health and prevent nutrient depletion.
  • Store organic fertilizers in a cool, dry place to maintain their effectiveness.

Benefits of Natural Fertilization

  1. Environmental-Friendly: Reduces chemical runoff and pollution.
  2. Soil Improvement: Enhances soil structure, water retention, and microbial activity.
  3. Cost-Effective: Utilizes kitchen scraps and garden waste.
  4. Safe for Children and Pets: Non-toxic compared to synthetic fertilizers.
  5. Sustainable: Encourages recycling of organic matter and closed-loop gardening.

Quick Tips for Natural Fertilization Success

  • Rotate fertilizers for balanced nutrition.
  • Mulch after applying fertilizers to reduce nutrient loss and retain moisture.
  • Use natural fertilizers gradually for a slow, steady nutrient release.
  • Keep a gardening journal to track plant responses and fertilization schedules.
  • Consider companion planting to naturally boost soil fertility.

Conclusion

Fertilizing your plants naturally is a safe, effective, and eco-friendly way to promote healthy growth, vibrant flowers, and abundant fruits and vegetables. By understanding plant needs, choosing appropriate fertilizers, applying them correctly, and monitoring plant health, you can create a thriving garden without relying on chemical products.

From compost and worm castings to bone meal, coffee grounds, and seaweed, the options are abundant and easily accessible. Integrating these natural methods into your gardening routine enhances soil fertility, plant resilience, and sustainability.

With patience, observation, and proper technique, you can nourish your garden naturally, ensuring a productive, beautiful, and environmentally responsible outdoor space year-round.

How I Grew Papaya at Home from a Ripe Fruit: A Complete Step-by-Step Guide for Beginners

How I Grew Papaya at Home from a Ripe Fruit: A Complete Step-by-Step Guide for Beginners

Have you ever eaten a sweet, juicy papaya and wondered if you could grow one just like it at home? The good news is — you absolutely can! All it takes is a single ripe papaya, a few seeds, and a bit of patience.

Inspired by the viral YouTube video “How I Grew Papaya at Home from a Ripe Fruit,” many home gardeners have discovered just how easy and rewarding it is to grow papaya trees in their backyards, balconies, or even large pots.

In this guide, we’ll walk you through the entire process step-by-step — from extracting seeds to harvesting your very own papayas. You don’t need fancy tools or professional experience; this method works beautifully for beginners and small-space gardeners alike.

Let’s turn that leftover papaya from your kitchen into a thriving fruit-bearing plant!


Why Grow Papaya at Home?

Papaya (Carica papaya) is a tropical fruit known for its sweet flavor, vibrant color, and countless health benefits. It’s rich in vitamin C, enzymes, and antioxidants — perfect for digestion and immunity.

But beyond nutrition, growing papaya at home offers several advantages:

Fast-growing: Papaya plants can produce fruit within 8–10 months of planting.
Low maintenance: They thrive with minimal care in sunny spots.
Compact and productive: Even one tree can yield dozens of fruits annually.
Beautiful addition: Its lush green leaves and tall trunk add a tropical vibe to your garden.

And the best part? You can start your papaya journey with seeds from a fruit you already have at home.


Step 1: Choosing the Right Ripe Papaya

The process begins with the right fruit. Choose a fully ripe, healthy papaya that’s soft to touch and has a deep orange-yellow color.

Tips for selecting the perfect papaya:

  • Avoid overripe or bruised ones.
  • Choose from a local or hybrid variety that grows well in your region.
  • For container growing, smaller or “dwarf papaya” types work best.

Once you’ve eaten your delicious papaya, save those precious seeds — they’re the foundation of your new tree.


Step 2: Collecting and Cleaning the Seeds

Papaya seeds are small, round, and black with a jelly-like coating. This outer layer prevents germination, so it’s important to remove it before planting.

Here’s how to prepare the seeds:

  1. Scoop out the seeds from the ripe papaya.
  2. Place them in a bowl of water and rub gently with your fingers to remove the gelatinous covering.
  3. Rinse thoroughly 2–3 times.
  4. Spread the clean seeds on a paper towel and dry them in shade for 2–3 days.

Avoid drying under direct sunlight — it can damage seed viability.

You can store these dried seeds in a paper envelope for up to 6 months or plant them immediately for best results.


Step 3: Germinating Papaya Seeds

Before planting, it’s helpful to pre-germinate the seeds to ensure faster sprouting.

Easy germination method:

  1. Take 10–15 dried seeds and wrap them in a damp paper towel or cotton cloth.
  2. Place the wrapped seeds in a zip-lock bag or airtight container.
  3. Keep them in a warm, dark place (around 25–30°C).
  4. Check after 7–10 days — small white sprouts will start to appear.

This method ensures you only plant the seeds that are actually viable, saving time and space.


Step 4: Preparing the Soil and Container

Papayas prefer light, well-draining soil rich in organic matter. Heavy clay soil can cause waterlogging, leading to root rot.

Best soil mix recipe:

  • 40% garden soil
  • 30% compost or well-rotted cow dung
  • 20% sand or perlite (for aeration)
  • 10% coco peat (for moisture retention)

Mix these well and fill a large container or grow bag.

Container requirements:

  • Minimum 20–25 liters capacity
  • Depth: At least 18–24 inches
  • Drainage holes: Essential to prevent excess moisture buildup

If you have ground space, you can plant directly in soil — just ensure it’s a sunny, open spot.


Step 5: Planting the Sprouted Seeds

Once your seeds have sprouted, it’s time to plant them.

Planting steps:

  1. Make small holes about ½ inch deep in the soil.
  2. Place one sprouted seed per hole (you can plant 3–4 per container to start).
  3. Cover lightly with soil and water gently.

Keep the soil moist but not soggy. Germination typically takes 2–3 weeks, and you’ll see small seedlings emerging.

When they grow 6–8 inches tall, select the healthiest and most vigorous seedling and carefully remove the others.


Step 6: Ideal Sunlight and Temperature

Papayas are sun-loving tropical plants that need plenty of light to thrive.

Sunlight: At least 6–8 hours of direct sunlight daily.
Temperature: Ideal range is 25–35°C.

Keep your container or garden bed in a warm, open area. During cooler months, move the pot indoors near a sunny window or use a transparent cover to trap warmth.


Step 7: Watering and Moisture Management

Papayas love moisture but dislike waterlogging.

Watering tips:

  • Water every 2–3 days or when the topsoil feels dry.
  • Ensure good drainage in containers.
  • Avoid splashing water on leaves — it can invite fungal infections.
  • During hot summers, increase frequency slightly.

Mulching the surface with straw or dry leaves helps retain soil moisture naturally.


Step 8: Fertilizing for Healthy Growth

Papayas grow rapidly and need regular feeding to stay healthy.

Fertilizer schedule:

  • At planting: Mix compost and bone meal into the soil.
  • After 1 month: Add organic compost or vermicompost.
  • During flowering and fruiting: Feed every 15–20 days with liquid compost tea or banana peel fertilizer.

Tip: Avoid too much nitrogen; it encourages leafy growth but delays fruiting. Instead, focus on potassium and phosphorus for flower and fruit development.


Step 9: Transplanting (If Necessary)

If you started your papaya in a small pot or seed tray, transplant it once it reaches 8–10 inches in height.

Transplanting steps:

  1. Choose a new pot (at least 25 liters capacity).
  2. Fill with fresh, nutrient-rich soil mix.
  3. Carefully remove the plant without damaging roots.
  4. Replant it at the same depth as before and water thoroughly.

Papayas do not like root disturbance, so handle them gently during transplanting.


Step 10: Pollination — Ensuring Fruit Formation

Papayas can have male, female, or bisexual flowers.

  • Male plants: Only produce pollen.
  • Female plants: Need pollen to produce fruit.
  • Bisexual plants: Contain both organs and can self-pollinate.

If you grow from seeds, you may get a mix. To ensure fruiting, it’s best to grow at least 3 plants together and later keep only the ones that bear female or bisexual flowers.

Hand-pollination tip:
If natural pollination is low, gently transfer pollen from male to female flowers using a soft brush in the morning.


Step 11: Common Problems and Natural Solutions

Even healthy papaya plants can face challenges.

1. Yellow Leaves:

  • Usually caused by overwatering or poor drainage.
  • Solution: Improve drainage, reduce watering, and add compost.

2. Fungal Infections:

  • Appear as white powdery spots or leaf wilting.
  • Solution: Spray neem oil (1 tbsp per liter of water) every 10 days.

3. Pests (aphids, mealybugs):

  • Spray with neem oil or soapy water solution.
  • Keep plants well-ventilated.

4. No Fruits:

  • Often due to absence of male flowers or pollination failure.
  • Solution: Ensure male-female flower ratio or hand-pollinate.

Step 12: When and How to Harvest Papayas

Within 8–10 months, your papaya tree will start to bear fruits.

Signs your papaya is ready to harvest:

  • The skin color changes from dark green to yellow-orange.
  • The fruit feels slightly soft to touch.
  • A sweet aroma develops near the stem area.

Use a sharp knife to cut the fruit with a short stem attached. Handle gently to avoid bruising.

After harvesting, allow the fruit to ripen fully at room temperature for 2–3 days before enjoying its sweet flavor.


Step 13: Growing Papayas Year-Round

Papayas can be grown in any season if you provide the right environment:

Summer: Perfect for natural sunlight and quick growth.
Monsoon: Protect roots from excess rainwater.
Winter: Use plastic covers or move pots indoors.

For a continuous harvest, plant new seeds every 4–6 months. Papaya plants remain productive for 2–3 years before gradually declining.


Step 14: Benefits of Homegrown Papayas

Homegrown papayas are fresher, cleaner, and far more flavorful than store-bought ones.

Top benefits:
No pesticides or chemicals.
Zero waste — reuse seeds and compost.
Beautiful greenery in your space.
Continuous supply of nutritious fruit.
Sense of achievement and relaxation from gardening.

Plus, papaya leaves and seeds can be used for natural remedies, composting, and skincare.


Step 15: Final Tips for Success

Grow at least 3–4 plants to ensure pollination.
Keep consistent moisture but never waterlog.
Ensure full sun exposure daily.
Add organic fertilizer regularly.
Prune lower leaves to maintain airflow.

With these steps, your small seed will soon become a tall, fruit-bearing beauty — rewarding you with fresh, sweet papayas straight from your home garden!


Conclusion: Your Own Papaya Paradise

Growing papaya from a ripe fruit is one of the most satisfying home gardening experiences. It’s fast, easy, and requires minimal effort — yet gives you abundant, delicious results.

By following the method from “How I Grew Papaya at Home from a Ripe Fruit,” you’ll not only enjoy organic, homegrown papayas but also experience the joy of turning kitchen waste into life.

So next time you enjoy a ripe papaya, don’t throw those seeds away — plant them! In a few months, you could be harvesting your very own tropical fruit, right from your balcony or backyard.

Your garden, your fruit, your reward — nature’s sweetest gift to your home.

How to Grow Melons in Plastic Containers Easily: A Beginner’s Guide to High-Yield Home Gardening

How to Grow Melons in Plastic Containers Easily: A Beginner’s Guide to High-Yield Home Gardening

Imagine cutting open a juicy, sweet melon that you grew yourself — right from your balcony or backyard. No farmland, no complicated setup — just a simple plastic container, a few seeds, and the right method.

That’s the promise of the viral YouTube video “How to Grow Melons Easily with High Productivity in Plastic Containers for Beginners.” It shows how anyone — even total beginners — can grow delicious, high-yield melons in limited space, using nothing more than creativity and care.

Melons are often thought of as field crops, but with the right approach, they thrive beautifully in containers. Whether it’s muskmelon, cantaloupe, or small watermelons, you can enjoy your own harvest without a garden.

This 1200-word blog post will walk you through everything you need to know — from choosing the best melon varieties for containers to achieving maximum productivity with minimal effort. Let’s get started!


Why Grow Melons in Containers?

Growing melons in containers is becoming increasingly popular — and for good reason.

Space-saving: Perfect for balconies, patios, or rooftops.
Control over soil & nutrients: You decide the quality — no pests or diseases from garden soil.
Mobility: You can move containers for better sunlight or rain protection.
High yield in small space: With proper care, you can grow 2–3 melons per plant — or more!

Container-grown melons are cleaner, fresher, and chemical-free — a delicious reward for your effort.


Step 1: Choosing the Right Melon Variety

Not all melons are suited for container growing. Choose compact, fast-growing varieties that don’t need excessive root space.

Best melon varieties for container gardening:
Cantaloupe (Muskmelon): Sweet aroma, moderate size, and adaptable.
Mini Watermelons (Sugar Baby, Bush Sugar Baby): Small fruit, high productivity.
Honeydew: Thrives in warm, sunny areas; smooth rind, sweet flesh.
Golden Melon: Compact and great for beginners.

If you’re starting for the first time, go with Cantaloupe or Sugar Baby watermelon — they’re reliable and forgiving.


Step 2: Choosing the Right Container

Melons need enough root space to spread and develop fruits properly.

Ideal container features:

  • Depth: Minimum 15–18 inches (38–45 cm)
  • Width: At least 20 inches (50 cm) wide
  • Drainage holes: Must-have to prevent root rot
  • Material: Plastic, clay, or grow bags — plastic holds moisture best

You can even reuse old paint buckets, tubs, or plastic crates. Just make sure you drill drainage holes at the bottom.

Pro Tip: Place a saucer or tray underneath to collect excess water and prevent mess.


Step 3: Preparing the Ideal Soil Mix

Healthy soil = healthy melons. The goal is well-draining yet nutrient-rich soil that supports both foliage and fruit growth.

Best soil mix recipe:

  • 40% garden soil or topsoil
  • 30% compost or cow dung manure
  • 20% coco peat or peat moss
  • 10% sand or perlite (for aeration)

Mix well and fill your container, leaving 2 inches of space from the top.

Optional boost: Add a handful of bone meal or neem cake for extra calcium and pest protection.


Step 4: Seed Selection and Germination

You can use store-bought seeds or extract them from a ripe, organic melon.

To germinate seeds:

  1. Soak the seeds in warm water for 8–10 hours.
  2. Wrap them in a damp paper towel or cloth and keep them in a warm place (25–30°C).
  3. In 3–5 days, you’ll notice small white roots emerging — perfect for planting.

This pre-sprouting step increases germination rate and saves time.


Step 5: Planting Melon Seeds in Containers

Once sprouted, it’s time to plant!

Steps:

  1. Make small holes about 1 inch deep in the soil.
  2. Place one sprouted seed per hole (2–3 seeds per pot).
  3. Cover gently with soil and water lightly.

Once seedlings grow to 3–4 inches tall, thin them — keep only the healthiest plant and remove the weaker ones. This ensures maximum productivity.


Step 6: Providing Sunlight and Temperature

Melons are sun-loving plants that thrive in warm climates.

Light and temperature requirements:
Sunlight: 6–8 hours of direct sun daily.
Temperature: Ideal range is 25°C–35°C (77°F–95°F).

If you live in a cooler area, use a clear plastic cover or greenhouse setup to trap heat. Indoors, place the container near a south-facing window or use grow lights.


Step 7: Watering Melon Plants Properly

Melons need consistent moisture — but not soggy soil. Overwatering can cause root rot and split fruits.

Watering tips:

  • Keep the soil moist but not waterlogged.
  • Water deeply 2–3 times per week, depending on weather.
  • Use mulch (dry leaves, straw, or coco husk) on top of the soil to retain moisture.
  • Reduce watering once fruits start to mature — this increases sweetness.

Remember: uneven watering = cracked or bland melons.


Step 8: Supporting the Vines — Trellis or Ground

Melons naturally sprawl, so you can let them trail over the ground or train them upward for space efficiency.

Trellis setup benefits:

  • Keeps fruits off the soil (prevents rotting).
  • Improves air circulation and reduces pests.
  • Saves space and looks neat.

Use bamboo sticks, wire mesh, or plastic netting to create a simple trellis. As fruits grow, support them using cloth or net slings to prevent breaking from weight.


Step 9: Fertilizing for Maximum Productivity

Melons are heavy feeders — they need balanced nutrition throughout their growth.

Fertilizing schedule:

  • At planting: Mix compost and bone meal in soil.
  • After 3 weeks: Add liquid compost tea or seaweed fertilizer.
  • During flowering: Use potassium-rich fertilizer (banana peel fertilizer or wood ash).
  • During fruiting: Feed once every 10 days with organic fertilizer.

Avoid too much nitrogen — it makes plants leafy but reduces fruit yield.


Step 10: Pollination — Key to Fruit Formation

Melons produce male and female flowers separately, so pollination is crucial. In open spaces, bees do the job naturally, but in balconies or indoors, you may need to hand-pollinate.

How to hand-pollinate:

  1. Identify male flowers (thin stems) and female flowers (tiny bulge behind petals).
  2. Use a small brush or cotton swab.
  3. Gently transfer pollen from male to female flower.

Within a few days, the small bulge behind the female flower will start to grow — your first melon!


Step 11: Managing Pests and Diseases Naturally

Common issues include aphids, whiteflies, and powdery mildew.

Organic prevention tips:

  • Spray neem oil (1 tbsp per liter of water) every 10 days.
  • Avoid wetting leaves when watering.
  • Ensure good airflow around plants.
  • Remove yellowing leaves regularly.

Healthy soil and sunlight go a long way in preventing most diseases naturally.


Step 12: Watching Growth and Fruit Development

Once pollination succeeds, you’ll see melons forming within 7–10 days.

During this stage:

  • Avoid moving pots too much.
  • Support growing fruits with cloth nets if grown vertically.
  • Keep soil moist but not wet.
  • Trim excess vines to direct nutrients to developing melons.

Within 40–60 days (depending on variety), your melons will start reaching maturity.


Step 13: Harvesting Melons — The Sweet Reward

Knowing when to harvest melons is key to getting the perfect taste.

Signs of ripeness:

  • The fruit changes color (becomes more golden or deep green).
  • The stem begins to crack or detach slightly.
  • Sweet aroma near the stem area.
  • When tapped, it sounds hollow.

Use scissors to cut the fruit — avoid pulling. Let it rest in shade for 1–2 days before enjoying its full sweetness.

One healthy plant can yield 2–4 medium-sized melons, even in containers.


Step 14: Growing Melons All Year Round

You can enjoy melons in every season with the right strategy:

Summer: Perfect for natural sunlight — rapid growth.
Monsoon: Protect plants from heavy rain; ensure drainage.
Winter: Grow indoors or under a transparent plastic cover.

For continuous harvests, sow new seeds every 2 months.


Step 15: Benefits of Homegrown Melons

Homegrown melons are fresher, safer, and more satisfying than store-bought ones.

Benefits include:
100% organic: No chemical fertilizers or pesticides.
Water-efficient: Containers use less water than ground farming.
Eco-friendly: Recycle plastic containers for sustainable gardening.
Perfect for beginners: Simple, low-maintenance process.
Cost-saving: Grow more, spend less!

And of course, the flavor — homegrown melons are sweeter and more aromatic, thanks to fresh ripening on the vine.


Step 16: Final Tips for Beginners

  • Rotate containers between crops to maintain soil health.
  • Keep your melons warm — they dislike cold weather.
  • Always check drainage before watering.
  • Talk to your plants! Monitoring daily helps you catch issues early.

Once you see your first ripe melon, you’ll understand why so many beginners fall in love with this process.


Conclusion: Your Balcony Can Be a Mini Melon Farm

You don’t need a big garden or fancy equipment — just a container, good soil, sunlight, and patience.

Following the method from “How to Grow Melons Easily with High Productivity in Plastic Containers for Beginners,” you can grow sweet, juicy melons all year long, even in small spaces.

From seed to harvest, this journey is not just about food — it’s about the joy of nurturing life. Watching vines grow, flowers bloom, and fruits form under your care is one of gardening’s greatest pleasures.

So grab a few seeds, a container, and start today — your homegrown melon harvest is just weeks away!

How to Grow Peanuts at Home Without a Garden: Easy Home Gardening Tips for a Big Harvest

How to Grow Peanuts at Home Without a Garden: Easy Home Gardening Tips for a Big Harvest

When people think of peanuts, they often imagine large farm fields stretching to the horizon. But what if you could grow your own basket of fresh, crunchy peanuts — right from your balcony, backyard, or even your apartment balcony?

The viral YouTube video “[Home Gardening] Tips for Growing Peanuts at Home — Harvest a Whole Basket Without a Garden!” proves that it’s absolutely possible. With a few simple tricks, you can grow healthy, organic peanuts in containers — no big yard or farmland needed.

Peanuts (also called groundnuts) are one of the most rewarding crops to grow at home. They’re rich in protein, easy to care for, and surprisingly resilient. Plus, watching the unique process of how they grow — from a yellow flower that buries itself into the soil to form peanuts underground — is fascinating and fun for gardeners of all ages.

In this 1200-word guide, you’ll learn everything you need to know to grow peanuts at home successfully — from choosing seeds and soil to harvesting a basket full of nuts.


Step 1: Understanding How Peanuts Grow

Before we get our hands dirty, let’s understand what makes peanuts unique.

Unlike most plants that bear fruits or seeds above the ground, peanuts grow underground. The plant produces small yellow flowers that, after pollination, send pegs (called “gynophores”) into the soil. These pegs develop into peanut pods beneath the surface.

This means peanuts need loose, well-draining soil and space to spread horizontally — even when growing in containers.

Peanut plants belong to the legume family, which means they can fix nitrogen in the soil, improving soil fertility naturally. That’s great news for home gardeners who want a sustainable, organic setup.


Step 2: Choosing the Right Peanut Variety

There are several peanut varieties, but not all are ideal for container or home growing. Choose compact, early-maturing varieties that thrive in pots.

Recommended peanut types for home gardening:

  • Virginia Peanuts: Large pods, mild flavor, suitable for warm climates.
  • Spanish Peanuts: Small plants, high yield — great for containers.
  • Valencia Peanuts: Sweet flavor, quick growth cycle (about 90 days).
  • Runner Peanuts: Excellent for spreading growth, but needs more space.

If you’re growing peanuts for the first time, Spanish or Valencia peanuts are your best choice — they grow fast, adapt well to pots, and produce abundantly.


Step 3: Preparing the Seeds (Peanuts)

You can use raw, unroasted peanuts — but make sure they’re in-shell and untreated (no salt or preservatives).

Steps to prepare seeds:

  1. Remove the shells gently, keeping the thin, papery skin intact.
  2. Soak the peanuts in water overnight (8–10 hours).
  3. Drain and dry them for a few hours before planting.

This soaking step helps soften the seed coat and speeds up germination.


Step 4: Choosing the Right Container

Peanut plants need room for roots and pods to grow underground.

Ideal container features:

  • Depth: At least 12–15 inches (30–40 cm).
  • Width: 18–20 inches for spreading branches.
  • Drainage: Several holes to prevent waterlogging.

You can use plastic tubs, grow bags, buckets, or wooden boxes. If you have limited space, consider vertical stacking or railing planters for multiple batches.


Step 5: Preparing the Perfect Soil Mix

Peanuts need light, sandy, and loose soil for easy root penetration and pod formation.

Ideal soil mix:

  • 40% garden soil or topsoil
  • 40% compost or cow manure
  • 20% coarse sand or coco peat

Mix well and fill your container, leaving 2 inches from the top.

Pro Tip: Avoid clay soil — it holds too much moisture and makes it hard for peanuts to develop properly.


Step 6: Planting Peanut Seeds

Now it’s time to sow!

Steps to plant:

  1. Place 2–3 seeds per container, spacing them 4–6 inches apart.
  2. Bury each seed about 2 inches deep.
  3. Cover lightly with soil and water gently.

Place the container in a sunny location — peanuts love warmth and full light.


Step 7: Sunlight and Temperature Requirements

Peanuts thrive in warm weather. They need 6–8 hours of direct sunlight every day.

Ideal growing conditions:

  • Temperature: 22°C–32°C (72°F–90°F)
  • Humidity: Moderate to low
  • Light: Full sun

If you’re growing indoors, position the container near a south-facing window or use LED grow lights for consistent exposure.


Step 8: Watering Properly

Peanuts like consistent moisture — but they don’t like soggy soil.

Watering tips:

  • Keep soil slightly moist, not wet.
  • Water every 2–3 days in hot weather.
  • Avoid overwatering, especially once flowering begins.
  • Reduce watering near harvest time to let pods mature.

Too much water can rot developing peanuts underground, so aim for balance.


Step 9: Flowering and Peg Formation

About 30–40 days after planting, your peanut plants will start blooming with small yellow flowers.

This is where the magic begins:

  • The flowers will self-pollinate.
  • After pollination, the flower stem (peg) bends down into the soil.
  • The peg burrows into the soil and starts forming peanut pods underground.

To support this stage, keep soil loose and soft — gently till the top layer around the plants after flowering.


Step 10: Fertilizing and Feeding Naturally

Peanuts fix their own nitrogen, so they don’t need much fertilizer. But they benefit from a few organic boosts.

Every 3–4 weeks:

  • Add a handful of compost or vermicompost around the base.
  • Mix wood ash or banana peel powder to provide potassium.
  • Avoid nitrogen-rich fertilizers (they encourage leafy growth, not pods).

A balanced, organic feeding routine will ensure healthy plants and a rich harvest.


Step 11: Managing Pests and Common Problems

Peanut plants are generally hardy, but they can attract a few pests.

Common pests:

  • Aphids
  • Whiteflies
  • Leaf miners

Natural control tips:

  • Spray neem oil (1 tbsp per liter of water) every two weeks.
  • Remove yellowing or damaged leaves.
  • Maintain good airflow by not overcrowding plants.

If ants appear, sprinkle turmeric powder or coffee grounds around the soil — it deters them naturally.


Step 12: Growth Stages and Care

Peanuts take around 100–120 days to mature. During this period:

  • Keep the soil loose for easy peg penetration.
  • Trim excess branches if plants become too bushy.
  • Watch for yellowing leaves — it’s a sign of maturity approaching.

You’ll notice the plant’s leaves start to dry as pods ripen underground.


Step 13: Harvesting Peanuts — The Fun Part!

Harvesting peanuts is one of the most satisfying parts of home gardening.

How to harvest:

  1. Stop watering 7–10 days before harvest.
  2. Loosen the soil gently using your hands or a garden fork.
  3. Pull out the entire plant by the base.
  4. Shake off the soil — you’ll see bunches of peanuts clinging to the roots!

Lay the plants out in a warm, dry place for a week to cure. Once the pods are dry, remove them from the roots and store them in a cool, dry area.

You’ll be amazed — even from a few pots, you can harvest a full basket of homegrown peanuts!


Step 14: Growing Peanuts Year-Round

You can grow peanuts all year in warm climates or indoors with grow lights.

For continuous harvests:

  • Sow new seeds every 3 months.
  • Reuse the same container after mixing in fresh compost.
  • Rotate with leafy greens or herbs to maintain soil fertility.

In colder climates, start seeds indoors and move them outdoors once temperatures rise.


Step 15: Using and Storing Homegrown Peanuts

Fresh peanuts can be used in countless delicious ways:

  • Boiled peanuts: Soft and flavorful snack.
  • Roasted peanuts: Crunchy, aromatic treat.
  • Peanut butter: Homemade, preservative-free goodness.
  • Cooking: Add to curries, salads, and stir-fries for protein and texture.

To store them:

  • Keep unshelled peanuts in a dry, airy container.
  • Avoid plastic bags — moisture causes mold.
  • For long-term use, roast and store in airtight jars.

Step 16: Benefits of Growing Peanuts at Home

Growing peanuts at home offers far more than just food — it’s a sustainable, rewarding experience.

Top benefits:
Fresh and organic: No chemicals, no preservatives.
Soil-friendly: Peanuts improve soil health naturally.
Low maintenance: Requires minimal care and water.
Space-saving: Perfect for balconies or small yards.
Economical: Saves money and reduces grocery waste.
Nutrient-rich: High in protein, fiber, and healthy fats.

Plus, homegrown peanuts taste better — richer, nuttier, and fresher than anything from the store!


Conclusion: Harvest a Basket of Peanuts Without a Garden

With the right approach, you don’t need a farm to enjoy a basket full of peanuts — just a sunny corner, a few containers, and a bit of patience.

The “[Home Gardening] Tips for Growing Peanuts at Home — Harvest a Whole Basket Without a Garden!” method shows that anyone can grow peanuts, even in small urban spaces. Watching those yellow flowers transform into buried treasures beneath the soil is one of the most rewarding gardening experiences ever.

So grab a handful of raw peanuts, prepare your pot, and start your peanut garden today. Soon, you’ll be pulling up your very own harvest — fresh, crunchy, and proudly homegrown.

How to Grow Carrots at Home Easily: Enjoy Fresh, Clean Carrots Every Season

How to Grow Carrots at Home Easily: Enjoy Fresh, Clean Carrots Every Season

There’s something magical about pulling a fresh, vibrant orange carrot straight out of the soil — crisp, sweet, and spotless. Imagine having that experience not just once a year, but in every season, right in your own home.

The viral YouTube video “How to Grow Carrots at Home Very Simple, Every Season Has Clean Carrots to Eat” shows just how easy and rewarding it is to grow carrots without needing a big garden or expensive tools. With the right container, soil mix, and care, anyone — even beginners — can enjoy a steady supply of homegrown carrots that are cleaner, tastier, and healthier than store-bought ones.

This detailed 1200-word guide will walk you through everything you need to know: from choosing the best carrot variety and preparing soil to harvesting perfect carrots year-round. Let’s get your carrot garden started!


Why Grow Carrots at Home?

Carrots are among the easiest and most rewarding vegetables to grow at home. They don’t need much space and thrive well in pots, grow bags, or containers.

Here’s why growing your own carrots is worth it:

No Chemicals: You control what goes into your soil — no pesticides or additives.
Fresh Anytime: Harvest crunchy carrots whenever you want.
Clean and Hygienic: Homegrown carrots are free from mud, insects, and residue.
Perfect for Small Spaces: Even apartment balconies or windowsills can host a mini carrot garden.
Year-Round Possibility: With the right setup, you can grow carrots in all seasons.

Home gardening not only saves money but also gives the satisfaction of growing your own healthy food.


Step 1: Choosing the Right Carrot Variety

Not all carrot types are ideal for container or home gardening. Choose short and medium-root varieties that grow well in limited soil depth.

Best carrot varieties for home growing:

  • Nantes: Sweet flavor, uniform size, and easy to grow.
  • Chantenay: Short and thick roots, great for containers.
  • Mini or Baby Carrots: Perfect for shallow pots or boxes.
  • Imperator: Long, slender roots for deeper containers.

If you’re just starting out, Nantes or Chantenay varieties are highly recommended — they’re forgiving and yield consistently.


Step 2: Choosing the Right Container

Carrots grow underground, so container depth is key.

Ideal container features:

  • Depth: At least 12 inches (30 cm) deep for medium carrots.
  • Width: 12–18 inches wide for multiple plants.
  • Drainage holes: Essential to prevent waterlogging.

You can use plastic pots, grow bags, old buckets, or even recycled bottles — just make sure the depth suits your chosen variety.

If you’re short on space, try vertical gardening with stacked containers or hanging pots.


Step 3: Preparing the Perfect Soil Mix

Carrots need loose, well-draining, and nutrient-rich soil. Hard or compacted soil leads to crooked or stunted carrots.

Recommended soil mix:

  • 40% garden soil or topsoil
  • 40% compost or well-rotted cow manure
  • 20% sand or coco peat

This mix ensures proper aeration for root growth and moisture retention.

Pro Tip: Avoid fresh manure or excess nitrogen fertilizer — it causes carrots to fork or split.


Step 4: Sowing the Seeds

Carrot seeds are tiny, so handle them carefully.

Steps to sow:

  1. Fill the container with prepared soil, leaving 1–2 inches at the top.
  2. Sprinkle seeds evenly across the surface — spacing about 1 inch apart.
  3. Cover lightly with a thin layer (¼ inch) of fine soil or compost.
  4. Mist gently with water using a spray bottle.
  5. Cover the pot with a damp cloth or plastic sheet until seeds germinate (usually 7–10 days).

Keep the soil consistently moist during this stage — never let it dry out.


Step 5: Providing Sunlight and Ideal Temperature

Carrots love cool to moderate temperatures and plenty of light.

  • Sunlight: 5–6 hours of direct sunlight daily.
  • Temperature: 15°C–25°C (59°F–77°F) for best growth.

In hot climates, place containers where they get morning sun and afternoon shade. If you’re growing indoors, position them near a south-facing window or use LED grow lights.


Step 6: Watering Properly

Carrots need regular, gentle watering. Uneven watering can lead to cracked or deformed roots.

Tips for watering:

  • Keep soil evenly moist, not soggy.
  • Water lightly every morning or every alternate day.
  • Avoid flooding — too much water suffocates the roots.
  • In hot weather, mist the top layer to prevent drying.

You’ll know you’re watering right when the soil feels moist about 1 inch deep.


Step 7: Thinning and Spacing

Once seedlings are about 2–3 inches tall, thin them to avoid overcrowding.

  • Keep one healthy plant every 2 inches (5 cm).
  • Gently pull out the extras — use them in salads as baby greens!

Proper spacing ensures each carrot has enough room to grow straight and plump.


Step 8: Feeding Your Carrots Naturally

Carrots are light feeders, but a small nutrient boost helps them thrive.

Feed your plants every 15 days with:

  • Organic liquid fertilizer: Mix 2 tablespoons of seaweed extract or compost tea in 1 liter of water.
  • Homemade mix: Blend banana peel powder, eggshell powder, and a pinch of Epsom salt for added calcium and potassium.

Avoid high nitrogen fertilizers (like urea) as they promote leafy tops instead of healthy roots.


Step 9: Managing Pests and Diseases Naturally

Homegrown carrots are less prone to pests, but it’s good to stay alert.

Common pests:

  • Aphids (tiny insects on leaves)
  • Carrot flies (larvae that attack roots)

Prevention tips:

  • Rotate your containers — don’t plant carrots in the same soil repeatedly.
  • Spray neem oil (1 tbsp per liter of water) every two weeks.
  • Keep the garden area clean and remove yellowing leaves.

Healthy soil and proper drainage naturally deter most issues.


Step 10: Seasonal Growing Tips — Grow Carrots Year-Round

One of the most exciting parts of the “Every Season Has Clean Carrots to Eat” method is growing continuously.

Here’s how to adjust for each season:

Spring: Ideal for sowing — carrots grow quickly and evenly.
Summer: Use shade nets and water more frequently to keep soil cool.
Monsoon: Ensure good drainage and cover pots during heavy rain.
Winter: Perfect weather — roots become sweeter due to cool temperatures.

By staggering your plantings every 3–4 weeks, you’ll have fresh carrots ready for harvest throughout the year!


Step 11: Checking Growth and Care Routine

During growth, keep an eye on your plants:

  • Healthy carrot leaves are bright green and upright.
  • If leaves yellow, check for overwatering or lack of nutrients.
  • Loosen the topsoil occasionally to promote air flow.

When carrot tops start pushing slightly above the soil, it’s a sign they’re nearing maturity.


Step 12: Harvesting Your Carrots

Depending on variety, carrots are ready to harvest 70–90 days after sowing.

How to harvest:

  1. Water the soil lightly to soften it.
  2. Hold the leaves near the base and pull gently.
  3. If soil is hard, use a small fork to loosen it first.
  4. Brush off soil and rinse the carrots clean.

You’ll notice how clean, smooth, and fresh homegrown carrots look — no dirt clinging to them like store-bought ones!


Step 13: Replanting for the Next Harvest

After harvesting, you can reuse your soil and start again easily.

  1. Remove leftover roots and mix in some fresh compost.
  2. Add a bit of sand for aeration.
  3. Sow new seeds right away.

This cycle ensures you’ll have carrots every month with minimal effort.


Step 14: Bonus — Growing Carrots in Water (No Soil Method)

If you want to experiment, you can regrow carrot tops in water.

How to do it:

  1. Cut the top 1 inch of a carrot (with the green stem base).
  2. Place it in a shallow dish with water, ensuring the base is submerged.
  3. Change the water every 2–3 days.
  4. Within a week, new leaves and tiny roots will appear!

While this method won’t grow full carrots, you can use the greens in salads and soups.


Step 15: Storing and Using Homegrown Carrots

After harvesting, here’s how to keep them fresh:

  • Remove the leafy tops (they draw moisture from roots).
  • Store carrots in a perforated bag in the fridge.
  • You can also blanch and freeze them for long-term storage.

Use your clean homegrown carrots for:

  • Salads, soups, and stews
  • Juices and smoothies
  • Stir-fries and healthy snacks

Step 16: Benefits of Growing Carrots at Home

Homegrown carrots aren’t just delicious — they’re incredibly healthy and eco-friendly too.

Benefits include:

  • High in Vitamin A and antioxidants.
  • Boosts eye health and immunity.
  • No exposure to chemicals or wax coatings.
  • Encourages sustainable living and reduces waste.
  • A relaxing hobby that brings joy to daily life.

When you bite into a crisp, sweet carrot you’ve grown yourself, it’s not just food — it’s an accomplishment.


Conclusion: Simple Steps to a Year-Round Carrot Garden

Growing carrots at home doesn’t require a big garden, fancy tools, or expert skills. Just a container, the right soil, and a little patience — and you’ll have clean, organic carrots growing in every season.

The method shared in “How to Grow Carrots at Home Very Simple, Every Season Has Clean Carrots to Eat” is proof that nature rewards simplicity. Once you see those green tops and pull out your first perfect carrot, you’ll be hooked.

So, roll up your sleeves, grab a handful of seeds, and start your home carrot garden today. Fresh, crisp, chemical-free carrots are just a few weeks away — and they’ll taste better than any you’ve ever bought!


Housewives’ Dream Cabbage Garden: How to Grow Fresh Cabbage in Plastic Bottles at Home

Housewives’ Dream Cabbage Garden: How to Grow Fresh Cabbage in Plastic Bottles at Home

Imagine stepping out to your balcony or kitchen window and harvesting crisp, green cabbage heads — all grown in recycled plastic bottles. It’s not only possible, but also incredibly easy. The viral YouTube video “Housewives’ Dream Cabbage Garden: Growing Cabbage in Plastic Bottles” has shown how ordinary plastic waste can be transformed into a mini vegetable garden that produces fresh, organic cabbage right at home.

This method is perfect for those who dream of gardening but lack space or soil. Whether you live in a high-rise apartment or a small home, you can grow cabbage vertically using nothing more than plastic bottles, water, and sunlight.

In this complete 1200-word guide, we’ll explore the secrets behind growing cabbage in bottles — from choosing the right seeds and creating the perfect setup to caring for plants until harvest. Let’s turn your household recycling into a housewives’ dream garden!


Why Cabbage Is Perfect for Bottle Gardening

Cabbage is one of the easiest and most rewarding vegetables to grow in containers. It’s a cool-season crop that thrives in well-drained environments and moderate sunlight — making it ideal for balconies, windowsills, and small gardens.

By growing cabbage in plastic bottles, you can:
Save space through vertical gardening.
Reuse waste bottles sustainably.
Avoid soil-borne pests and diseases.
Control watering and nutrition precisely.
Harvest clean, chemical-free cabbage anytime.

This method is both eco-friendly and economical — perfect for housewives, beginners, and city gardeners alike.


Step 1: Choosing the Right Cabbage Variety

Before starting, select a variety of cabbage that fits your space and climate.

Best varieties for bottle growing include:

  • Golden Acre: Compact and matures early (65–70 days).
  • Red Express: Vibrant purple color and small heads.
  • Copenhagen Market: Classic green variety with firm heads.
  • Savoy Cabbage: Beautiful crinkled leaves and soft texture.

Choose compact or dwarf varieties since they adapt better to small containers.


Step 2: Collecting and Preparing Plastic Bottles

You can grow cabbage using 1- to 2-liter plastic bottles — the kind used for soft drinks or water.

How to prepare the bottles:

  1. Clean thoroughly to remove any residue or labels.
  2. Cut the bottle horizontally — either halfway or near the bottom third.
    • Use the bottom half for planting.
    • You can also keep the top half inverted to act as a mini greenhouse cover.
  3. Drill or poke drainage holes at the bottom using a heated nail or knife.
  4. Add a layer of small stones or gravel for extra drainage.

For vertical setups, you can hang bottles on a balcony wall, fence, or railing using twine or metal hooks.


Step 3: Preparing the Potting Mix

Since we’re not using soil from the ground, it’s important to create a light, fertile potting mix that supports root growth.

Ideal potting mix (per bottle):

  • 40% garden soil or compost.
  • 30% coco peat or peat moss (for moisture retention).
  • 20% sand or perlite (for drainage).
  • 10% organic manure or vermicompost (for nutrients).

Mix thoroughly and fill each bottle up to 3–4 inches below the rim. This space allows water to soak in without overflowing.


Step 4: Sowing the Seeds

You can either sow cabbage seeds directly in the bottles or start them in a seed tray and transplant later.

For direct sowing:

  1. Sow 3–4 seeds per bottle.
  2. Cover lightly with a thin layer of coco peat or compost.
  3. Mist the surface gently to moisten it.
  4. Keep in a semi-shaded area until germination.

For transplanting:

  1. Grow seeds separately in a tray or small pots until seedlings have 4–5 true leaves (about 3–4 weeks).
  2. Transplant one healthy seedling per bottle.
  3. Press gently and water well after transplanting.

Step 5: Proper Light and Temperature

Cabbage loves cool, bright conditions.

  • Place bottles in a sunny area that receives 4–6 hours of direct sunlight daily.
  • In extremely hot weather, provide partial shade using a cloth or net.
  • Maintain temperatures between 15°C and 25°C (59°F–77°F).

If you’re growing indoors, place bottles near a south-facing window or use LED grow lights for 10–12 hours a day.


Step 6: Watering the Right Way

One of the biggest advantages of bottle gardening is controlled watering. Cabbage needs consistent moisture, but waterlogging can harm its roots.

Watering tips:

  • Water gently when the top inch of soil feels dry.
  • Avoid pouring too much — instead, mist slowly until evenly moist.
  • In hot weather, water daily; in cooler months, every 2–3 days is enough.
  • Add a small saucer or drip tray under each bottle to collect excess water.

Pro tip: Use a spray bottle or narrow-spout watering can to prevent soil displacement.


Step 7: Feeding Your Cabbage Plants

Cabbage is a heavy feeder, meaning it needs regular nutrition for healthy leaf and head formation.

Feed your plants every 10–14 days with:

  • Organic liquid fertilizer: Mix 2 tablespoons of compost tea or seaweed extract in 1 liter of water.
  • Homemade fertilizer: Combine banana peel powder, eggshell powder, and a pinch of Epsom salt in water for calcium and potassium boost.
  • Hydroponic nutrient solution (optional): For those who prefer scientific precision, a mild NPK solution (10:5:5) works wonders.

Avoid over-fertilizing, as this can burn the roots or lead to leafy overgrowth without proper heads.


Step 8: Supporting Growth and Preventing Pests

Cabbage grown in bottles faces fewer pests than soil gardens, but you should still stay vigilant.

Common pests: Aphids, caterpillars, and whiteflies.
Natural pest remedies:

  • Spray a neem oil solution (1 tbsp per liter of water) once a week.
  • Use garlic or chili spray to deter insects naturally.
  • Encourage beneficial insects like ladybugs if growing outdoors.

You can also place a fine mesh or net over young plants to protect them from butterflies that lay eggs.


Step 9: Mulching and Moisture Retention

To keep your mini cabbage garden thriving, retain moisture with mulching.

Add a thin layer of dry leaves, rice husk, or straw on top of the soil in each bottle. This prevents evaporation, keeps roots cool, and reduces weed growth.

If you’re using transparent bottles, wrap them with brown paper or cloth to block sunlight from heating the roots.


Step 10: Monitoring Growth

Within 2–3 weeks of transplanting, your cabbage plants will develop sturdy outer leaves.

Growth timeline:

  • Weeks 1–3: Seed germination and early growth.
  • Weeks 4–6: Leaf expansion — add nutrients every 10 days.
  • Weeks 7–10: Cabbage head formation — reduce nitrogen slightly to encourage compact heads.
  • Weeks 10–12: Ready for harvest!

Keep an eye on leaf color — healthy cabbage leaves are bright green and crisp. Yellowing or curling may indicate nutrient imbalance or excessive heat.


Step 11: Harvesting Cabbage from Plastic Bottles

Your cabbage is ready to harvest when the head feels firm and tight when pressed gently.

To harvest:

  1. Cut the cabbage head at the base using a sharp knife.
  2. Leave the outer leaves and roots in place — sometimes, small secondary heads may grow back.
  3. Rinse thoroughly and store in the refrigerator.

Each bottle can yield a medium-sized cabbage head (500–700g) — fresh, organic, and homegrown!


Step 12: Recycling and Replanting

After harvesting, don’t throw away the setup — simply refresh and reuse.

  1. Remove the old root system and top 2 inches of used soil.
  2. Refill with fresh compost and coco peat mix.
  3. Plant a new seedling immediately for continuous production.

This cycle allows you to grow cabbage year-round, ensuring a steady supply for your kitchen without needing a large garden.


Step 13: Creative Display Ideas for Your Bottle Cabbage Garden

Make your cabbage garden not only functional but also decorative!

Vertical Wall Garden: Attach bottles to a wooden frame or metal rack.
Hanging Garden: Suspend bottles using ropes or macramé hangers.
Window Garden: Line them up on a sunny windowsill for easy access.
Balcony Railing Setup: Tie bottles securely along railings for space efficiency.

The lush green cabbages will give your home a fresh, natural look while adding beauty to your space.


Step 14: Benefits of Growing Cabbage in Plastic Bottles

This sustainable gardening technique offers numerous benefits:

  • Eco-Friendly: Reuses waste bottles and reduces plastic pollution.
  • Budget-Friendly: No need for expensive pots or soil beds.
  • Space-Saving: Ideal for small homes and balconies.
  • Healthier Produce: No pesticides or chemicals.
  • Therapeutic Hobby: Gardening relieves stress and boosts happiness.

It’s truly a “housewives’ dream” because it combines sustainability, creativity, and nutrition — all from your home.


Conclusion: Your Dream Cabbage Garden Awaits

Growing cabbage in plastic bottles is proof that you don’t need a backyard or fancy equipment to create a lush, productive garden. With just a few recycled bottles, some soil mix, and care, you can harvest fresh, crunchy cabbages right from your balcony or window.

The “Housewives’ Dream Cabbage Garden” idea is more than a viral trend — it’s a lifestyle shift toward sustainability, self-sufficiency, and smarter gardening.

So, don’t throw away those bottles — transform them into your very own mini cabbage farm. Once you taste the freshness of homegrown cabbage, you’ll never look at store-bought vegetables the same way again.