How to Turn an Old Tire Into a Super Easy Cabbage Garden: Grow Fresh, Big Cabbages from Seeds at Home

How to Turn an Old Tire Into a Super Easy Cabbage Garden: Grow Fresh, Big Cabbages from Seeds at Home

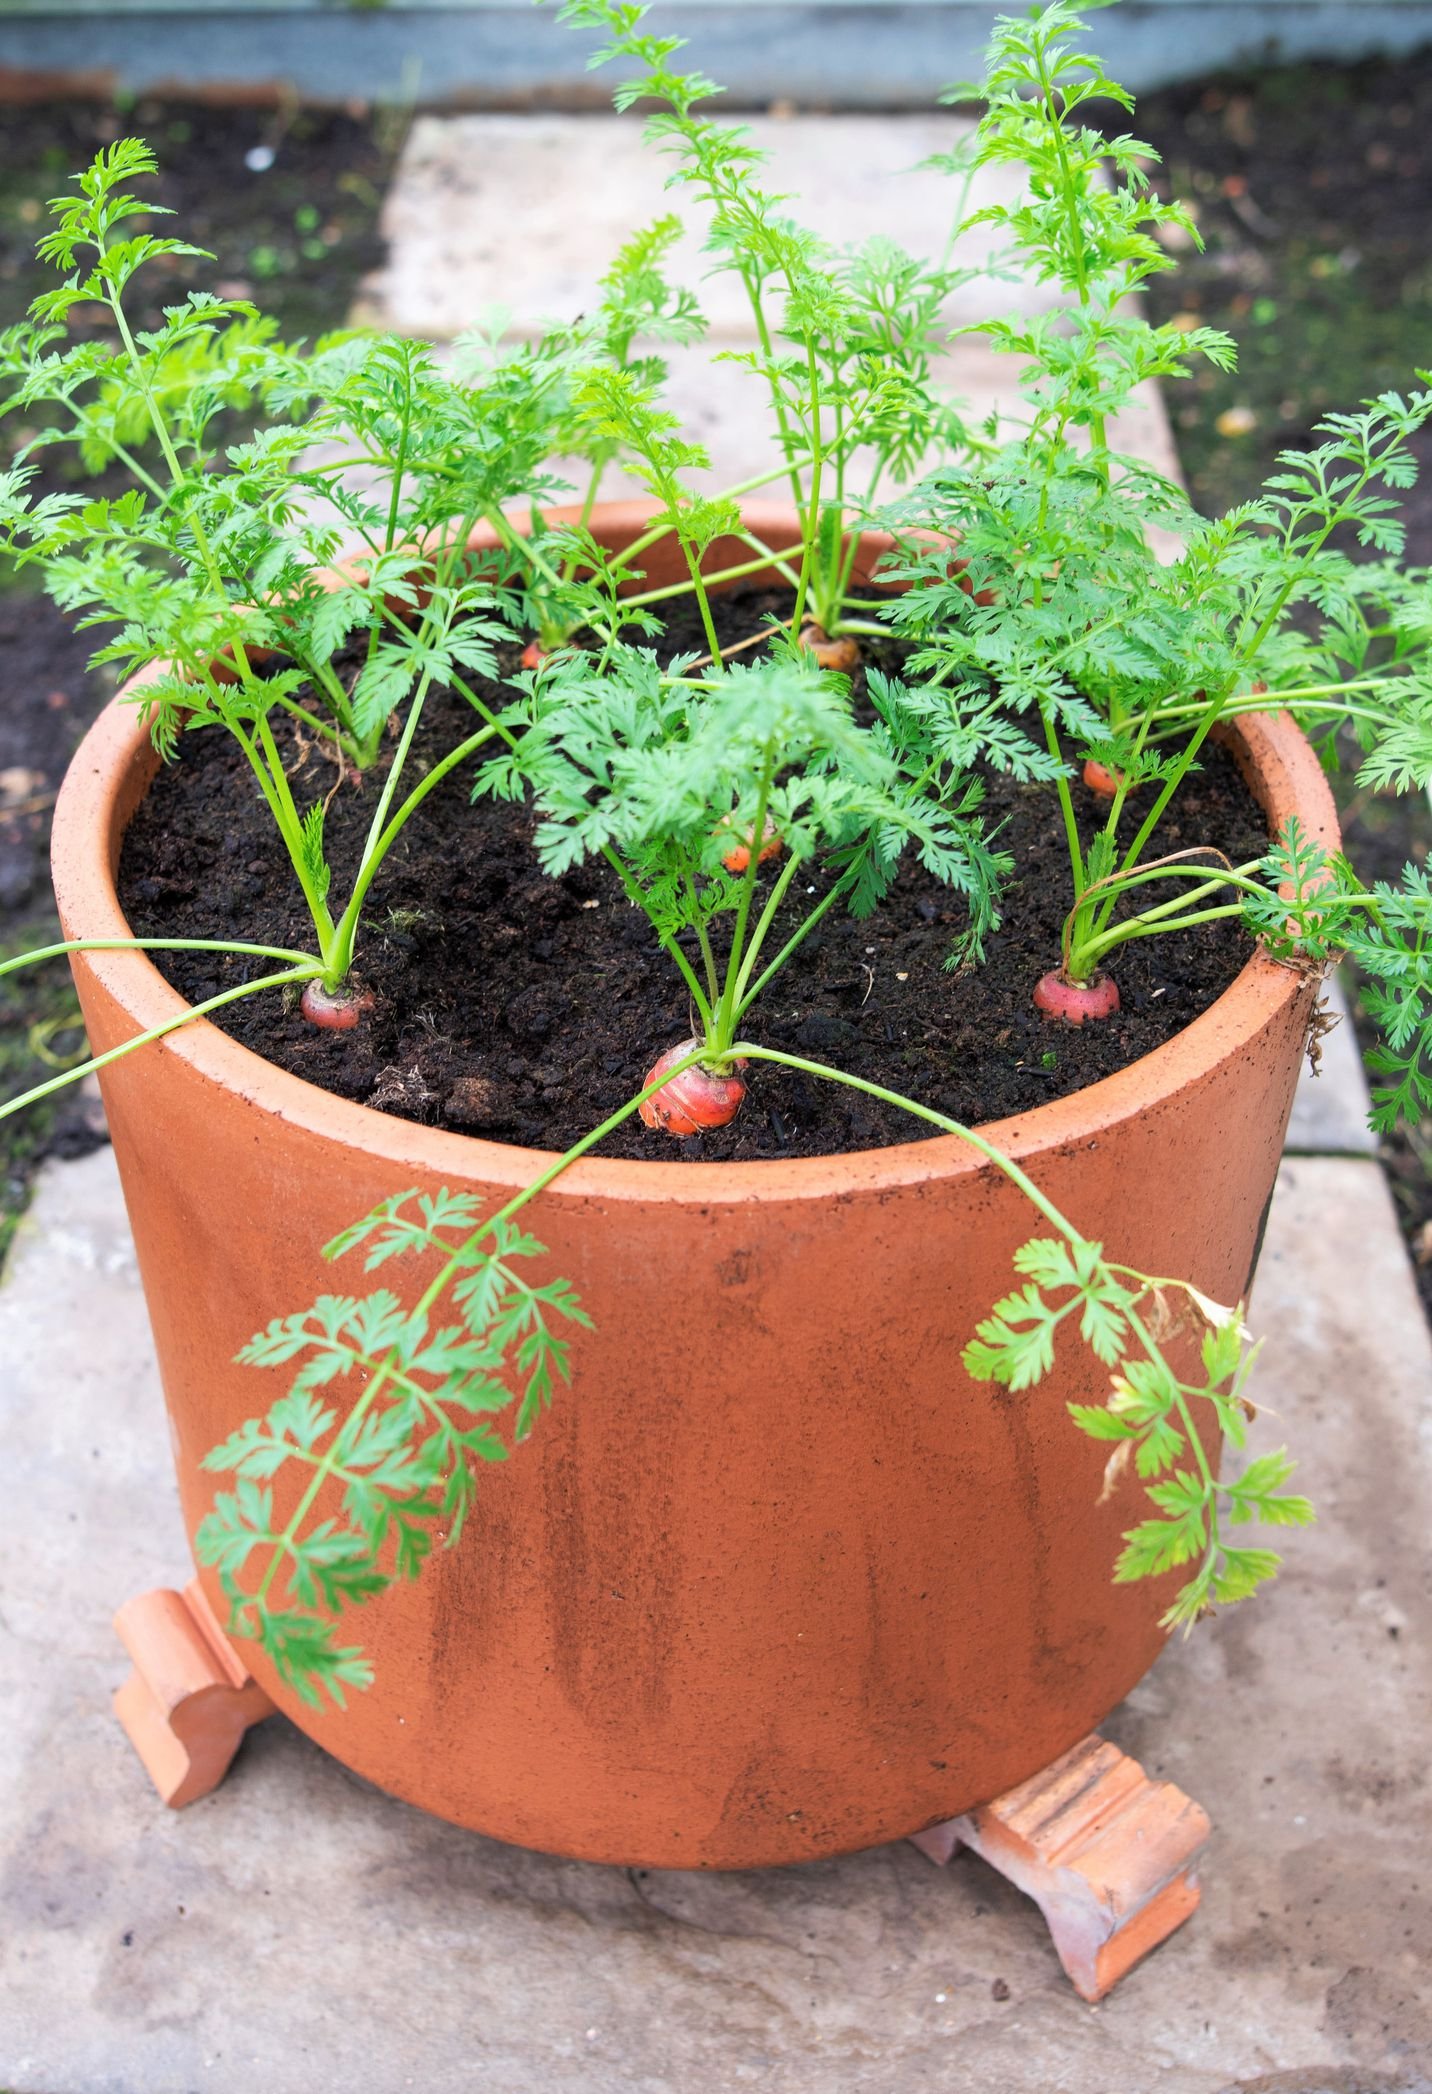
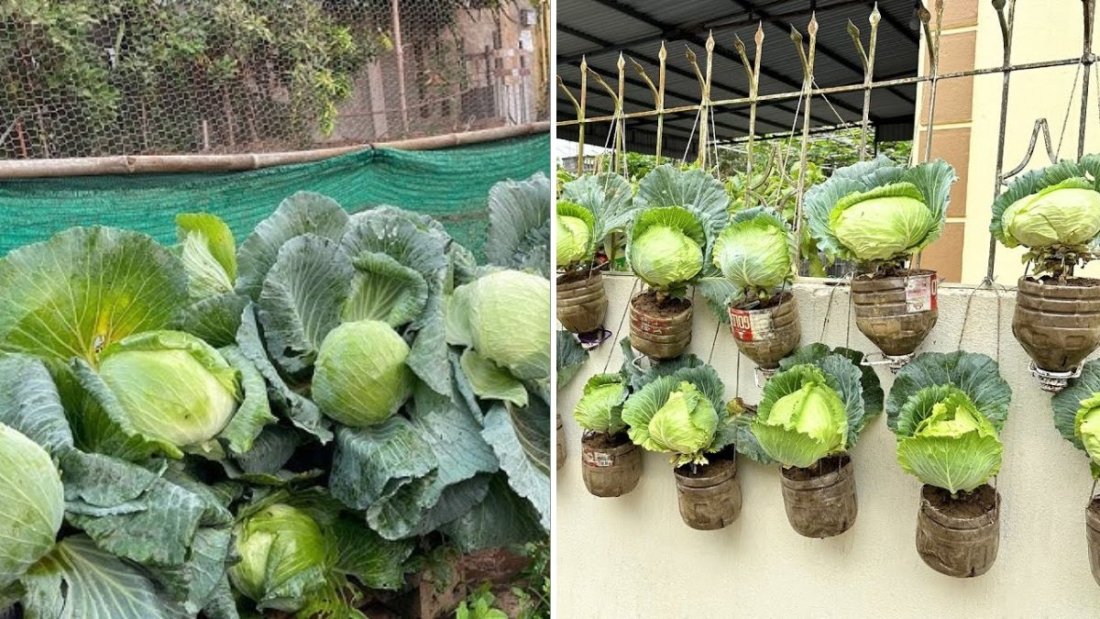
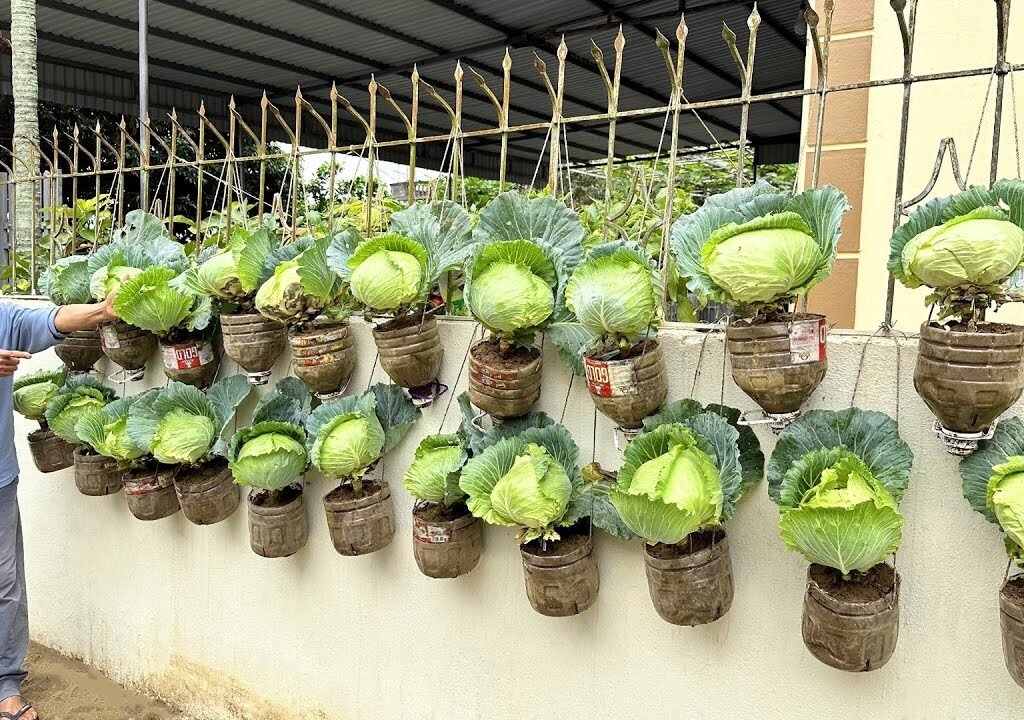
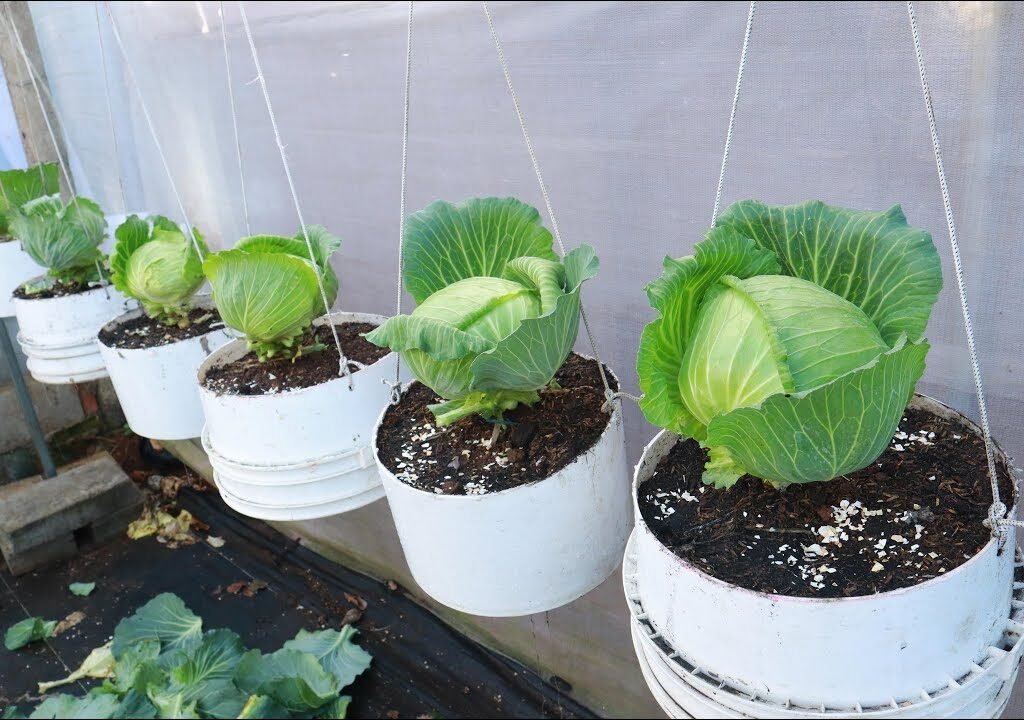
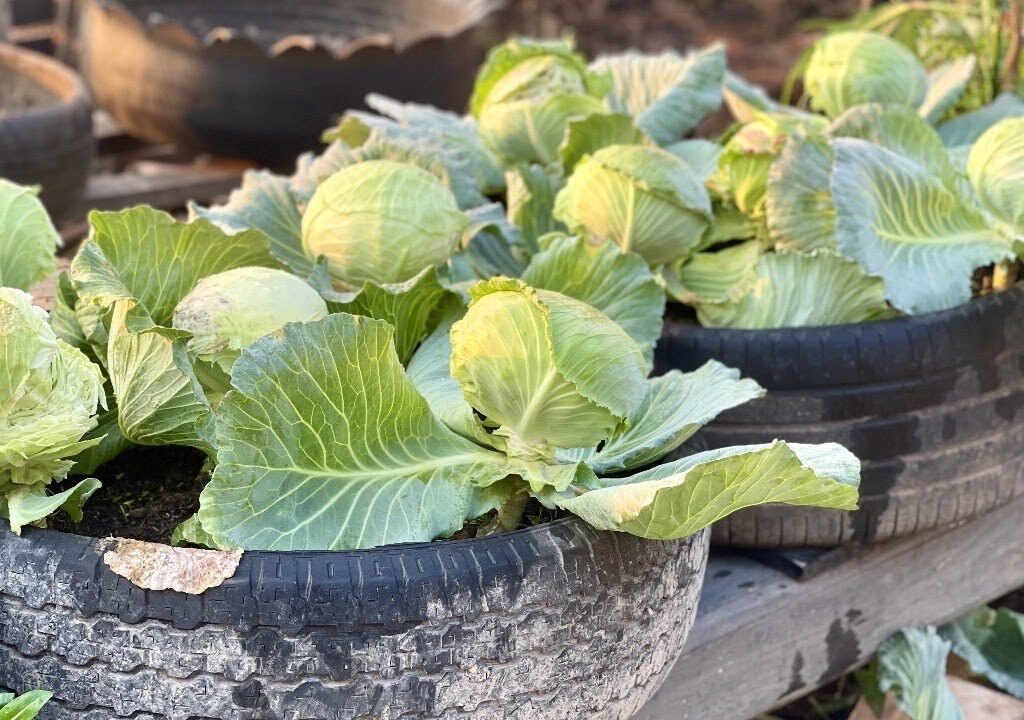
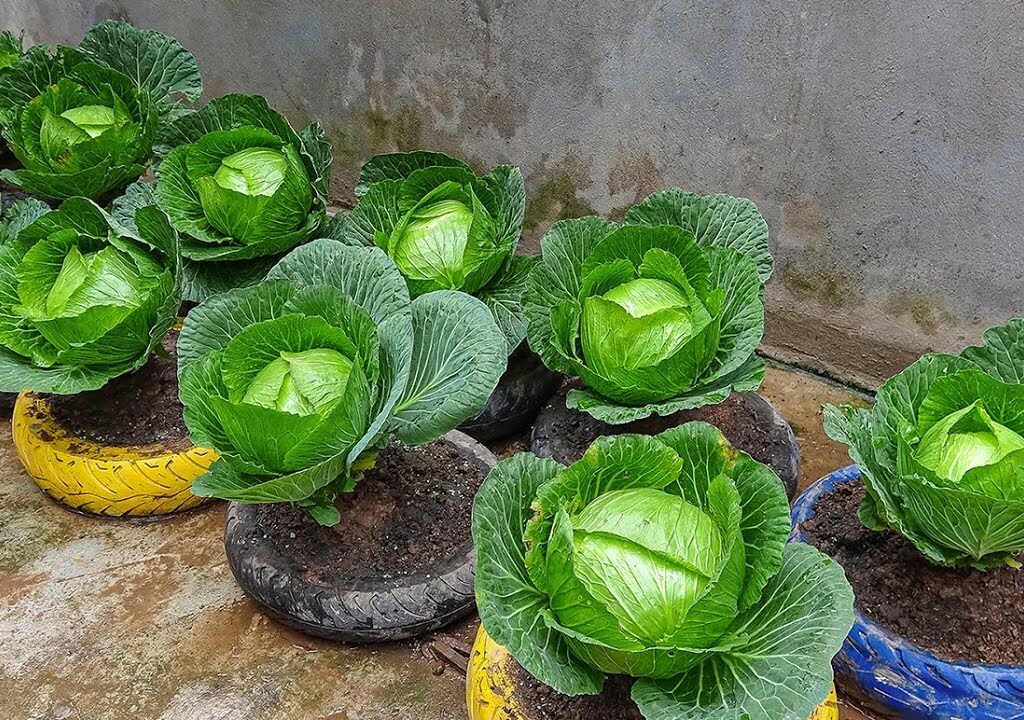
Ever looked at an old, unused tire lying around and thought it was just junk? Think again! With a little creativity, that tire can become a super productive, space-saving garden — perfect for growing fresh, healthy cabbage right at home.

Cabbage is one of America’s favorite cool-weather vegetables. It’s packed with vitamins, easy to grow, and versatile in the kitchen — from coleslaw to soups to stir-fries. But what if you don’t have much garden space? Or you want to try a fun, sustainable way to grow your own veggies?

That’s where the old tire gardening method comes in. Not only does it recycle waste, but it also creates a warm, nutrient-rich microenvironment that helps cabbage grow faster and bigger — even from seeds!

In this guide, you’ll learn step-by-step how to grow cabbage from seeds using an old tire, plus helpful tips to maximize your harvest.


Why Use an Old Tire for Gardening?

Before we dive into cabbage-growing, let’s talk about why old tires make fantastic garden planters.

1. Great Heat Retention:
Tires absorb warmth during the day and release it at night, helping cabbage seeds germinate faster — especially in cooler U.S. climates.

2. Perfect Shape and Depth:
Their round, deep structure allows cabbage roots to grow freely and stay well-aerated.

3. Budget-Friendly:
Why spend on new pots when you can reuse what you already have?

4. Portable and Durable:
Tires can be placed anywhere — balcony, patio, driveway, or backyard — and withstand harsh weather for years.

5. Eco-Friendly:
Repurposing tires helps reduce landfill waste and promotes sustainable living.

With a single old tire, you can turn an eyesore into a lush, green, edible garden.


What You’ll Need to Get Started

You don’t need fancy equipment — just some basic materials and a little effort.

Supplies:

  • 1 old car or truck tire (cleaned thoroughly)
  • Potting soil or garden soil mix
  • Organic compost or aged manure
  • Cabbage seeds (choose your preferred variety)
  • Watering can or hose
  • Gardening gloves
  • Optional: mulch (straw, dried leaves, or wood chips)

Best Cabbage Varieties for Tire Gardens (U.S. climates):

  • Golden Acre: Fast-maturing and compact.
  • Savoy: Crinkled, tender leaves and cold-tolerant.
  • Red Express: Beautiful reddish-purple heads.
  • Late Flat Dutch: Great for larger tires and big heads.

Step-by-Step: How to Grow Cabbage from Seeds in an Old Tire

Let’s turn that tire into a mini cabbage paradise!


Step 1: Clean and Prepare the Tire

Start by cleaning the tire to remove any dirt, oil, or debris. Scrub it with soap and water, then rinse thoroughly.

If you want, paint the tire’s outer surface with eco-friendly paint to give it a fresh, decorative look — plus, it keeps it cooler under strong sun.

Place the tire in a sunny area that gets at least 6 hours of sunlight per day.


Step 2: Create Drainage

Good drainage is key for healthy cabbage roots.

  • Place a layer of gravel, pebbles, or broken clay pieces at the bottom of the tire.
  • If possible, drill 3–4 small holes through the bottom rubber to let excess water escape.

Step 3: Fill with Nutrient-Rich Soil

Cabbage is a heavy feeder, meaning it needs nutrient-dense soil.

Mix the following for perfect tire-garden soil:

  • 60% high-quality potting mix or garden soil
  • 30% organic compost or aged manure
  • 10% sand or coco peat for better drainage

Fill the tire nearly to the top, leaving about 1–2 inches of space from the rim.

Pro Tip: Add crushed eggshells or a handful of wood ash to boost calcium and prevent “cabbage head splitting.”


Step 4: Sow the Cabbage Seeds

Now comes the exciting part — planting your seeds!

  1. Make small holes (½ inch deep) about 4–6 inches apart in the soil.
  2. Drop 2–3 seeds into each hole.
  3. Cover lightly with soil and water gently.

In about 7–10 days, the seeds will germinate. Once the seedlings are about 3 inches tall, thin them out — keeping the strongest plant every 10–12 inches.


Step 5: Watering and Sunlight Care

Cabbage loves consistent moisture but hates soggy soil. Keep the soil evenly moist by watering every 2–3 days or when the top inch feels dry.

Place the tire garden in a spot that gets full to partial sunlight — ideally 6–8 hours daily.

If you live in a hotter U.S. region (like Texas or Florida), provide some afternoon shade to prevent heat stress.


Step 6: Feeding for Faster Growth

After 3 weeks, start feeding your cabbage plants to help them grow larger heads.

Use:

  • Organic compost tea every 2 weeks, or
  • A balanced fertilizer (10-10-10 NPK) once a month.

Avoid over-fertilizing — too much nitrogen makes big leaves but small heads.


Step 7: Mulching and Weed Control

Cover the soil with mulch (straw, leaves, or shredded bark) to:

  • Retain moisture
  • Suppress weeds
  • Keep soil temperature stable

Mulching also reduces the need for frequent watering — perfect for busy gardeners!


Step 8: Pest Protection

Cabbage can attract a few common pests like:

  • Cabbage worms
  • Aphids
  • Slugs and snails

To protect your tire garden:

  • Spray with neem oil or a mild soap-water solution weekly.
  • Use mesh netting or row covers to block insects.
  • Sprinkle crushed eggshells or diatomaceous earth around plants to deter slugs.

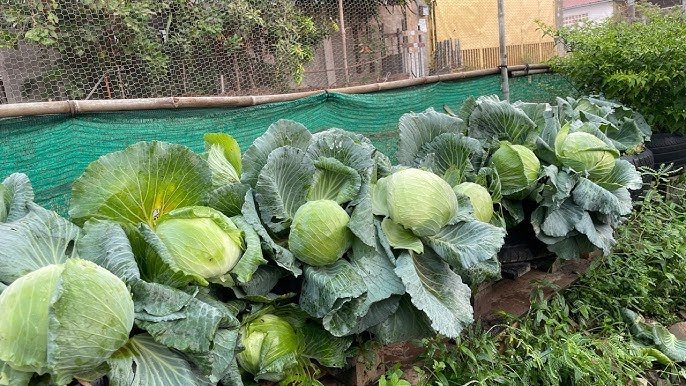
Step 9: Harvesting Your Homegrown Cabbage

Depending on the variety, your cabbage will be ready to harvest in 70–100 days.

You’ll know it’s ready when:

  • The head feels firm and compact when squeezed.
  • The outer leaves start to curl slightly.

Use a sharp knife to cut the cabbage head at the base, leaving a few lower leaves intact — these can produce a second, smaller head in a few weeks!


Bonus Tip: Keep Your Tire Garden Productive Year-Round

  • Spring & Fall: Perfect for growing full-sized cabbage.
  • Summer: Use the tire to grow heat-tolerant greens like spinach or kale.
  • Winter: Move the tire to a sunny porch or greenhouse for cold-weather crops.

This way, your tire garden stays active throughout the year — no downtime, no wasted space.


Common Mistakes to Avoid

MistakeProblemSolution
OverwateringRoot rot, stunted growthWater only when topsoil feels dry
Crowded seedlingsSmall headsThin to 10–12 inches apart
Too much fertilizerLoose or splitting headsUse compost, not excessive chemical feed
Poor drainageYellowing leavesAdd gravel and holes at the bottom
Lack of sunlightWeak, floppy plantsEnsure at least 6 hours of sun daily

The Eco-Friendly Impact: Turning Trash Into Treasure

Old tires are one of the hardest materials to recycle — they take hundreds of years to decompose. By turning them into productive planters, you’re helping the planet while growing your own food.

You’re also:

  • Reducing waste
  • Saving money on store-bought produce
  • Creating a self-sustaining mini garden right in your backyard

It’s a small step toward a greener, more sustainable lifestyle — and it starts with just one tire.


Health Benefits of Homegrown Cabbage

Cabbage isn’t just easy to grow — it’s one of the healthiest veggies around.

High in Vitamin C: Boosts immunity.
Rich in Fiber: Supports digestion.
Low in Calories: Great for weight management.
Packed with Antioxidants: Helps reduce inflammation.

Freshly harvested cabbage tastes sweeter, crunchier, and more flavorful than store-bought — and you’ll know it’s completely chemical-free.


Final Thoughts: From Tire to Table

Who knew that something as ordinary as an old tire could transform into a thriving vegetable garden? With just a bit of effort, you can grow cabbage from seeds effortlessly, even in limited spaces.

This DIY project is eco-friendly, budget-friendly, and beginner-approved. Whether you’re an urban gardener or a suburban homesteader, this method guarantees a rewarding harvest — lush green leaves and compact, crisp heads ready for your next meal.

Lazy Gardener’s Hack: How to Grow Green Onions 10x Faster With Almost No Effort (Wish I Knew This Sooner!)

Lazy Gardener’s Hack: How to Grow Green Onions 10x Faster With Almost No Effort (Wish I Knew This Sooner!)

If you think gardening takes too much time or effort — think again! Green onions (also called scallions or spring onions) are one of the easiest vegetables to grow, even for people who consider themselves lazy gardeners.

Whether you live in a city apartment or have a suburban backyard, green onions grow fast, require minimal care, and keep producing again and again. And with a few simple tricks, you can make them 10 times more productive — no fancy equipment, no green thumb required.

In this guide, you’ll learn how to grow green onions effortlessly, using everyday materials you probably already have at home. You’ll also discover the secret methods that help your onions regrow continuously, giving you an endless supply of fresh greens for cooking — all while saving money and time.


Why Green Onions Are Perfect for Busy (or Lazy) Gardeners

Green onions are the ultimate low-maintenance vegetable. They don’t demand special soil, fertilizers, or constant attention. Once you plant them, they practically take care of themselves!

Here’s why Americans love growing green onions at home:

Fast Growth: Ready to harvest in as little as 20–25 days.
Low Effort: Water occasionally, and they’ll thrive.
Space-Saving: Grow them in pots, bottles, or small planters.
Regrows Easily: Cut them once, and they grow back — over and over again!
Great Indoors or Outdoors: Perfect for windowsills, balconies, or gardens.

If you’ve struggled with other veggies before, green onions will restore your gardening confidence.


What You’ll Need to Start

No big garden? No problem. You can grow green onions from scraps or seeds using just a few simple items:

  • A few green onion bulbs or leftover roots from your grocery store bundle
  • A small pot, container, or recycled bottle
  • Potting soil (or even water for hydroponic growth)
  • Watering can or spray bottle
  • Access to sunlight or a bright window

Optional: Organic fertilizer or compost to boost growth.


Method 1: Regrow Green Onions From Kitchen Scraps

This is the lazy gardener’s dream method — no seeds, no soil preparation, just reuse what’s already in your kitchen.

Step 1: Save the Roots

After using the green tops for cooking, save the white root ends (at least 1–2 inches long).

Step 2: Place in Water

  • Fill a small glass or jar with about 1–2 inches of water.
  • Place the roots in the jar, ensuring they’re fully submerged but not floating.

Put the jar on a sunny windowsill, such as in your kitchen.

Step 3: Watch the Magic Happen

Within 3–5 days, you’ll see new green shoots emerging from the top. In just a week, they’ll be tall enough to harvest again!

Pro Tip: Change the water every 2–3 days to prevent mold and bacteria buildup.

Step 4: Transplant (Optional)

Once roots grow longer and stronger (after about 10 days), you can transplant them into soil for even faster and healthier growth.


Method 2: Growing Green Onions in Soil

For even higher yields, plant green onions directly in containers or garden soil. It’s still effortless but gives you bigger, stronger plants.

Step 1: Choose a Container

A small pot or recycled plastic bottle works great. Just make sure it has drainage holes.

Step 2: Fill With Soil

Use a light, well-draining mix:

  • 60% garden soil or potting mix
  • 30% compost
  • 10% sand or perlite

This keeps the soil airy and prevents soggy roots.

Step 3: Plant the Roots

Insert each onion root about 1 inch deep, spacing them 1–2 inches apart.
Water gently right after planting.

Step 4: Light and Watering

Place the pot in a sunny area — green onions love sunlight!
Water every 2–3 days or when the soil feels dry on top. Avoid overwatering; soggy soil can cause root rot.

Step 5: Harvesting

You can start harvesting the greens when they reach about 6–8 inches tall, usually within 3–4 weeks.

Simply snip the tops about 1 inch above the root, and they’ll regrow again and again!


Secret Tricks to Make Green Onions 10x More Productive

Want your onions to grow faster and thicker? Here are some tried-and-true American gardening hacks:

1. Give Them Enough Light

Green onions thrive in 6–8 hours of sunlight per day. Indoors, place them near a south-facing window or under a grow light.

2. Don’t Let the Soil Dry Out Completely

Consistent moisture = faster regrowth. Keep the soil slightly damp at all times.

3. Add Natural Fertilizers

Once a month, feed with organic compost tea or diluted fish emulsion. This keeps the greens vibrant and flavorful.

4. Cut, Don’t Pull

When harvesting, never pull the plant out. Just cut the leaves and leave the roots intact — they’ll keep regenerating!

5. Rotate Your Batches

Start new roots every 2–3 weeks so you always have a continuous supply of green onions growing.

6. Use Deep Containers

The deeper the pot, the longer and thicker your onions will grow.

7. Add Eggshells or Coffee Grounds

Crushed eggshells or used coffee grounds mixed into the soil add calcium and nitrogen, improving productivity naturally.


How to Grow Green Onions Year-Round

You don’t have to wait for spring or summer. Green onions grow beautifully indoors all year long in most parts of the U.S.

Here’s how to adapt to each season:

  • Spring/Summer: Grow outdoors or on balconies; they love the warmth.
  • Fall/Winter: Move pots indoors near a sunny window. You can even use LED grow lights to mimic sunlight.

Maintain a mild indoor temperature (between 60–75°F) for best growth.


Common Green Onion Mistakes (and How to Avoid Them)

MistakeWhat HappensEasy Fix
OverwateringRoots rot, growth slowsUse well-draining soil and don’t let pots sit in water
Too little sunlightThin, pale leavesMove to a brighter window
Harvesting too lowRoots stop regrowingLeave at least 1 inch of stalk above the root
Forgetting to change waterMold and bad odor (for water-grown onions)Change water every 2–3 days
No nutrientsWeak or slow growthAdd compost or organic fertilizer monthly

Creative Ways to Grow Green Onions Indoors

If you’re short on space, try these fun ideas to make your mini-garden both functional and stylish:

  1. Hanging Bottle Planters: Cut plastic bottles in half and hang them by a window for vertical gardening.
  2. Mason Jar Setup: Regrow onion roots in glass jars for a rustic, farmhouse-style kitchen look.
  3. Hydroponic Tray System: Use a shallow container filled with water and pebbles for a continuous indoor harvest.
  4. Windowsill Trays: Perfect for compact apartments or dorm rooms — just line up a few pots near the light.

Green onions double as kitchen decor and fresh produce — pretty and practical!


Health Benefits of Fresh Green Onions

Growing your own green onions isn’t just convenient — it’s also healthier and tastier.

Rich in Vitamin K and C, which support immunity and bone health.
Packed with antioxidants that fight inflammation.
Adds a fresh, mild onion flavor to salads, soups, and stir-fries.
100% chemical-free when grown at home.

Plus, harvesting fresh onions straight from your windowsill feels incredibly rewarding — even for those who never thought they’d be gardeners!


Eco-Friendly and Budget-Smart Gardening

Regrowing green onions from scraps is one of the most sustainable ways to garden.

  • You’re reducing food waste by reusing leftovers.
  • You’re saving money — no need to buy new onions every week.
  • You’re cutting down on plastic packaging from store produce.

Over time, this simple habit can make your kitchen both greener and cleaner — literally and figuratively.


Real-Life Results: The “Too Late” Lesson

Many gardeners admit they discovered this hack too late. After years of throwing away onion roots, they realized they could have been growing an endless supply of fresh scallions for free all along.

Once you try it, you’ll wonder why you didn’t start sooner. With just a few jars or pots, you’ll always have fresh, homegrown green onions within arm’s reach — perfect for topping omelets, soups, tacos, and salads.


Final Thoughts: Gardening Made Effortless

If you’ve ever wanted to garden but felt too busy or inexperienced, green onions are your perfect starting point.

They’re fast, forgiving, and endlessly rewarding. With a bit of sunlight and water, you’ll enjoy crisp, flavorful greens all year round — no big garden, no special skills needed.

So go ahead, grab those leftover onion roots from your fridge, stick them in a jar, and start your lazy gardening journey today. You’ll be amazed at how easy it is to grow more than you ever imagined — all from what you once threw away….

Pothos Growing Made Easy: The Ultimate American Guide to Lush, Low-Maintenance Indoor Vines

Pothos Growing Made Easy: The Ultimate American Guide to Lush, Low-Maintenance Indoor Vines

If you’re looking for a beautiful, low-maintenance houseplant that thrives almost anywhere, look no further than the Pothos plant (Epipremnum aureum) — also known as Devil’s Ivy. Loved by beginners and plant enthusiasts alike, pothos is one of the easiest indoor plants to grow in the U.S.

With its vibrant green, heart-shaped leaves and ability to grow in low light and inconsistent watering, this vine adds a touch of tropical charm to homes, offices, and apartments. From trailing gracefully down bookshelves to climbing walls and trellises, pothos can turn any corner into a lush, green paradise.

In this comprehensive guide, you’ll learn everything you need to know about pothos growing — from propagation to care, watering schedules, common mistakes, and styling ideas — all tailored for American homes and climates.


What Makes Pothos So Popular

Pothos is practically the poster child for low-maintenance plants. Here’s why it’s a favorite in U.S. households:

  • Tolerates Low Light: Perfect for apartments or offices without bright windows.
  • Forgiving with Water: Survives occasional neglect — great for busy schedules.
  • ir-Purifying: Removes toxins like formaldehyde, benzene, and carbon monoxide.
  • Grows Fast: Perfect for creating lush green displays or hanging plant decor.
  • Easy to Propagate: One cutting can grow into multiple new plants.

Whether you’re a plant newbie or an experienced grower, pothos is an essential addition to your indoor plant collection.


Choosing the Right Pothos Variety

Pothos comes in many beautiful varieties, each with its own unique color and leaf pattern. Here are some of the most popular types you can find in the U.S.:

  1. Golden Pothos:
    The most common type, featuring green leaves with yellow variegation.
  2. Marble Queen Pothos:
    Elegant white and green marbled leaves — bright and eye-catching.
  3. Jade Pothos:
    Solid green leaves, perfect for low-light rooms.
  4. Neon Pothos:
    Bright, electric-green leaves that bring a pop of color to your space.
  5. Manjula Pothos:
    Curly leaves with creamy white and light green patches — a collector’s favorite.
  6. Cebu Blue Pothos:
    Silvery-blue leaves with a slightly metallic sheen — rare and exotic-looking.

Pro Tip: Mix different pothos varieties in one space to create a layered, tropical vibe.


Where to Grow Pothos Indoors

One of the best things about pothos is its versatility. It grows happily almost anywhere indoors, including:

  • Living rooms
  • Bedrooms
  • Bathrooms (yes, it loves humidity!)
  • Kitchens
  • Offices or workspaces

Lighting Needs:
Pothos prefers bright, indirect light but can also tolerate low-light conditions. However, variegated varieties (like Golden or Marble Queen) need more light to maintain their color.

Avoid direct sunlight, as it can burn the leaves.


How to Grow Pothos: Step-by-Step

Step 1: Choosing a Pot and Soil

Select a well-draining pot with drainage holes. Pothos doesn’t like soggy roots.

For soil, use a light, well-aerated potting mix such as:

  • 2 parts all-purpose potting soil
  • 1 part perlite
  • 1 part coco coir or peat moss

This mix keeps roots healthy by ensuring good airflow and drainage.


Step 2: Planting Pothos

If you bought a small pothos plant or propagated a cutting:

  1. Fill your pot halfway with soil mix.
  2. Place the plant in the center, spreading out the roots.
  3. Add more soil until the roots are fully covered.
  4. Press gently and water thoroughly.

Step 3: Watering Schedule

Water only when the top 1–2 inches of soil feel dry. Overwatering is the #1 cause of pothos problems.

In general:

  • Summer: Water once every 5–7 days.
  • Winter: Water every 10–14 days.

Pro Tip: If the leaves droop slightly, it’s a natural reminder your plant is thirsty.


Step 4: Fertilizing Pothos

Feed your pothos with a balanced liquid fertilizer (10-10-10) every 4–6 weeks during spring and summer. In winter, reduce feeding since the plant’s growth slows down.

Avoid overfertilizing — too many nutrients can burn the roots or cause yellow leaves.


Step 5: Pruning for Shape and Health

Regular pruning keeps your pothos bushy and prevents leggy vines.

  • Use clean scissors to trim stems just above a leaf node.
  • You can replant the cuttings to grow new pothos!

Pruning also stimulates new growth, making your plant fuller and healthier.


Step 6: Propagating Pothos in Water or Soil

One of the most rewarding parts of pothos growing is propagation. It’s simple and fun!

Propagation in Water:

  1. Cut a 4–6 inch section of vine below a node (where a leaf meets the stem).
  2. Remove the lower leaves, leaving 1–2 at the top.
  3. Place the cutting in a glass of clean water.
  4. Change the water every 3–5 days.
  5. Within 2–3 weeks, roots will start forming.

Once roots are 2–3 inches long, you can transfer the cutting into soil.

Propagation in Soil:

  • Dip the cutting in rooting hormone (optional) and plant directly in moist soil.
  • Keep the soil lightly damp until new growth appears.

Common Problems and How to Fix Them

Even though pothos is easy to grow, it can face a few minor issues. Here’s how to troubleshoot:

ProblemCauseSolution
Yellow leavesOverwateringLet soil dry out before watering again
Brown tipsDry air or underwateringIncrease humidity and water more regularly
Pale leavesLack of sunlightMove to a brighter area
Drooping leavesUnderwatering or cold temperaturesAdjust watering and avoid drafts
Root rotPoor drainageUse well-draining soil and a pot with holes

Extra Tip: Wipe leaves with a damp cloth monthly to remove dust and keep them glossy.


Pothos and Indoor Decor Ideas

Pothos isn’t just a plant—it’s a decor statement. Here are creative ways to style it around your home:

  1. Hanging Baskets: Let vines cascade beautifully from ceiling hooks.
  2. Wall Climbing: Use adhesive hooks or trellises for vertical growth.
  3. Bookshelf Plant: Perfect for draping along shelves or desk edges.
  4. Bathroom Plant: Loves the humidity — just ensure indirect light.
  5. Kitchen Corner Accent: Adds freshness and color near windows.

For a trendy American home look, pair pothos with modern ceramic pots or woven baskets for a cozy, boho vibe.


Seasonal Care Tips for U.S. Growers

Spring and Summer:

  • Active growth period — water and fertilize more often.
  • Great time for pruning and propagation.

Fall and Winter:

  • Growth slows — water less frequently.
  • Keep away from cold drafts or heating vents.

If you live in northern states with harsh winters, ensure your pothos stays indoors in warm, bright conditions.


The Benefits of Growing Pothos

Growing pothos offers more than beauty — it brings health and happiness into your space.

Air Purification: NASA studies show pothos removes airborne toxins.
Improves Mood: Greenery boosts mental health and productivity.
Boosts Humidity: Naturally increases indoor moisture levels.
Educational for Kids: Great starter plant to teach responsibility.
Sustainable Living: Propagate and share plants with friends instead of buying new ones.


Pothos Growing Mistakes to Avoid

  1. Overwatering: The most common issue — always check soil moisture first.
  2. Too Little Light: Leads to dull leaves and slow growth.
  3. Ignoring Pruning: Causes long, leggy vines with fewer leaves.
  4. No Drainage Holes: Roots can suffocate and rot.
  5. Skipping Fertilizer: Results in weak, pale growth over time.

Consistency is key — pothos doesn’t demand much, but it thrives on balance.


Final Thoughts: A Perfect Green Companion

If you want a vibrant, low-effort indoor plant, pothos is the answer. It’s hardy, fast-growing, and adaptable to almost any environment — from sunny living rooms to dim offices.

With a little care, your pothos will reward you with lush, trailing vines and cleaner indoor air, creating a peaceful, nature-inspired haven in your home.

So whether you’re a beginner or an experienced gardener, give pothos a spot in your space — and watch it flourish with very little effort.

How to Grow Carrots in Plastic Bottles: The Smart, Space-Saving Way to Harvest Fresh Carrots at Home

How to Grow Carrots in Plastic Bottles: The Smart, Space-Saving Way to Harvest Fresh Carrots at Home

Imagine harvesting crisp, sweet, homegrown carrots — all from a few empty plastic bottles sitting on your balcony or kitchen windowsill. Sounds too good to be true? It’s not! Growing carrots in plastic bottles is one of the easiest, most eco-friendly, and space-saving ways to garden at home.

This simple method not only helps you grow fresh, organic carrots in small spaces, but it also gives a second life to plastic waste. Whether you live in an apartment, townhouse, or suburban home, this trick lets you enjoy the taste of real, homegrown carrots without needing a full garden.

In this step-by-step guide, you’ll learn how to grow carrots in plastic bottles—from setup to harvest—along with expert tips to get big, bright, and flavorful roots every time.


Why Grow Carrots in Plastic Bottles?

Carrots are one of America’s favorite vegetables—crunchy, colorful, and packed with vitamins A and C. Traditionally grown in garden beds, they can also thrive in containers if you provide the right soil depth and conditions.

Here’s why using plastic bottles is a genius move for home gardeners:

  1. Eco-Friendly: Reduces plastic waste by repurposing bottles that would otherwise end up in landfills.
  2. Space-Saving: Perfect for balconies, patios, and small urban spaces.
  3. Beginner-Friendly: No need for fancy equipment or large plots.
  4. Moisture Control: Clear bottles make it easy to monitor root growth and soil moisture.
  5. Healthy Harvests: Cleaner roots with fewer pests and diseases than ground-grown carrots.

It’s a smart and sustainable gardening hack that delivers both convenience and results.


Choosing the Right Carrot Variety

Not all carrots are created equal when it comes to growing in containers. Some varieties grow long and deep, while others stay short and sweet—perfect for plastic bottles.

Here are the best carrot types for bottle gardening:

  • Thumbelina: Small, round carrots that mature quickly.
  • Paris Market: Compact and flavorful, ideal for shallow containers.
  • Little Finger: Sweet, tender, and only 3–4 inches long.
  • Nantes: Cylindrical and smooth, perfect for medium-depth bottles.

Pro Tip: Choose short or medium-sized carrot varieties for the best results in plastic bottles.


What You’ll Need

You don’t need a big budget or professional gear. Here’s your simple supply list:

  • 1 or more plastic bottles (1.5–2 liters)
  • Sharp scissors or a knife
  • Good-quality potting mix
  • Compost or organic fertilizer
  • Carrot seeds
  • Watering can or spray bottle
  • Sunny windowsill, balcony, or outdoor space

Optional: A small hand trowel and marker to label your bottles.


Step-by-Step Guide: How to Grow Carrots in Plastic Bottles

Step 1: Prepare the Bottles

Start by cleaning your bottles thoroughly to remove any residue. Cut off the top portion (about 3–4 inches) of the bottle to create an open planter.

Next, use a hot nail or scissors to make 5–6 small drainage holes at the bottom. Proper drainage is essential to prevent root rot.

If you plan to hang the bottles, make two small holes near the rim and thread wire or twine through them for support.


Step 2: Prepare the Soil Mix

Carrots need light, loose, and well-draining soil for their roots to grow straight and long. A compact mix will result in short or deformed carrots.

Here’s a simple, proven recipe for the perfect carrot soil mix:

  • 60% potting soil
  • 30% fine sand or coco peat
  • 10% organic compost

Mix these ingredients thoroughly and fill the bottle almost to the top, leaving about 2 inches of space from the rim.

Pro Tip: Avoid using heavy clay soil — it restricts root growth.


Step 3: Sow the Carrot Seeds

Sprinkle carrot seeds evenly on the soil surface. Since the seeds are tiny, try mixing them with a bit of sand to spread them more evenly.

Cover the seeds with a thin layer of soil (¼ inch thick) and mist gently with water. Don’t bury them too deep—carrots need light to germinate.

Place the bottles in a sunny area where they’ll receive at least 6 hours of sunlight daily.


Step 4: Water and Care

Keep the soil moist but not soggy. Overwatering can cause the seeds to rot, while underwatering can stunt growth.

Water gently using a spray bottle or watering can with small holes to avoid washing away seeds.

During the first 7–10 days, you’ll see tiny sprouts emerging. At this stage, maintain consistent moisture and warmth (ideally 60–70°F).


Step 5: Thin the Seedlings

Once your seedlings reach about 2 inches tall, thin them out to prevent crowding. Leave one plant every 2 inches apart.

Don’t throw away the thinned seedlings—they’re edible and can be added to salads or smoothies!

Proper spacing allows each carrot root to develop fully, ensuring big, well-shaped carrots instead of thin, tangled ones.


Step 6: Feed and Maintain Growth

After 2–3 weeks, when the plants are established, feed them with a diluted liquid fertilizer or compost tea every 10–14 days.

Avoid fertilizers high in nitrogen — they promote leafy tops instead of strong roots. Instead, choose a balanced fertilizer with more phosphorus and potassium for root development.

Keep rotating the bottles every few days for even sunlight exposure, especially if they’re indoors.


Step 7: Watch for Pests and Problems

Carrots are relatively pest-free, but container-grown plants can still attract a few insects.

Common issues include:

  • Aphids: Spray with neem oil or soapy water.
  • Root rot: Avoid overwatering and ensure good drainage.
  • Leggy growth: Caused by insufficient sunlight—move to a sunnier spot.

Healthy carrot plants will have lush, green tops and steady upward growth.


Step 8: Harvest Time!

Depending on the variety, carrots are ready to harvest in 60–80 days after sowing. You’ll know it’s time when you see the orange or white tops slightly poking out of the soil.

To harvest:

  • Loosen the soil gently with your fingers.
  • Hold the base of the leaves and pull upward slowly.
  • Rinse and enjoy your crunchy, sweet homegrown carrots!

Pro Tip: For baby carrots, you can harvest a few earlier (after 45 days) for tender, flavorful roots.


Tips for Bigger, Healthier Carrots

  1. Use Deep Bottles:
    The deeper your container, the longer your carrots can grow. Try cutting a 2-liter bottle vertically to create more root depth.
  2. Don’t Let Soil Dry Out:
    Uneven watering causes split or misshapen carrots. Keep soil evenly moist.
  3. Avoid Overcrowding:
    Give each seedling enough room—spacing is key to producing fat, healthy roots.
  4. Fertilize Smartly:
    Go easy on nitrogen; too much makes lush tops but small roots. Use potassium-rich fertilizers instead.
  5. Harvest on Time:
    Leaving carrots in the soil too long can make them tough and woody.
  6. Reuse Bottles:
    After harvesting, refill the bottles with fresh soil and sow new seeds for a continuous supply!

Eco-Friendly and Budget-Friendly Gardening

Growing carrots in plastic bottles isn’t just fun—it’s a sustainable lifestyle choice.

You’re reducing plastic waste, saving space, and producing your own organic food at home. Plus, it’s a great DIY gardening project for kids and families, teaching them how food grows while promoting recycling.

This method also works beautifully for other root and leafy vegetables like:

  • Radishes
  • Beets
  • Spinach
  • Lettuce

With a few bottles and a bit of creativity, you can turn any balcony or window into a thriving mini garden.


Common Mistakes to Avoid

MistakeProblem CausedSolution
Using heavy soilRoots can’t expand properlyUse light, sandy soil
Planting seeds too deepPoor germinationCover seeds lightly
OverwateringRotting rootsEnsure good drainage
Not thinning seedlingsCrowded, deformed rootsSpace plants 2 inches apart
Lack of sunlightWeak growthProvide 6+ hours of sun daily

The Joy of Homegrown Carrots

There’s nothing quite like pulling your first homegrown carrot out of the soil — bright, crunchy, and bursting with flavor. And the best part? You’ve grown it sustainably, using nothing more than a recycled bottle and a bit of care.

This DIY project proves that you don’t need a big garden to grow real food. With just a few plastic bottles, you can harvest carrots all year long — fresh, chemical-free, and delicious.

So next time you finish a soda or water bottle, don’t toss it out — turn it into your next gardening success story!

How to Grow Big, Juicy White Radishes in Planters: The Easy Home Gardening Guide for Huge Harvests

How to Grow Big, Juicy White Radishes in Planters: The Easy Home Gardening Guide for Huge Harvests

If you’ve ever dreamed of harvesting big, white, crunchy radishes straight from your balcony, patio, or backyard, this guide is for you. You don’t need a large garden or fancy tools to enjoy homegrown radishes — just a simple planter, good soil, and a few smart growing tricks.

Radishes are one of the easiest root vegetables to grow, and with the right planter setup, you can grow a lot of large, sweet white radishes even in small spaces. Whether you’re new to gardening or an experienced grower, this step-by-step method will help you achieve healthy, high-yielding plants that produce beautiful radishes every time.

Let’s explore how to grow big, white radishes in containers — the simple, space-saving way to enjoy fresh veggies all season long.


Why Grow White Radishes in a Planter?

White radishes — often called Daikon or Japanese radishes — are long, crisp, and mildly sweet. Unlike the small red radishes often found in grocery stores, these varieties can grow up to 10–14 inches long when given the right conditions.

Here’s why growing them in planters is such a great idea:

  1. Space-Saving: Perfect for balconies, patios, or small backyards.
  2. Clean and Controlled: Planters reduce pest issues and allow better soil management.
  3. Year-Round Growing: Easily move containers to control light and temperature.
  4. Perfect for Beginners: Simple, low-maintenance, and fast-growing (ready in 30–60 days).
  5. Health Benefits: Rich in vitamin C, fiber, potassium, and digestive enzymes.

Container gardening makes it easy to grow these nutritious roots even if you don’t have a traditional garden plot.


Choosing the Right Variety

Before planting, it’s important to choose the right white radish variety for your space and climate. Some popular types include:

  • Daikon Minowase: A classic long white radish known for its size and mild flavor.
  • Snow Belle: Small, round white radishes that mature quickly.
  • Sakurajima Giant: One of the largest radish types, great for gardeners looking for impressive yields.
  • Icicle Radish: Slender, 5-inch roots that grow well in small planters.

For container gardening, Icicle and Minowase are the best options because they grow deep and uniform without needing too much space.


What You’ll Need

To grow your own batch of white radishes in planters, gather these basic supplies:

  • A deep planter or container (at least 12–15 inches deep)
  • Good-quality potting soil (loose and well-draining)
  • Organic compost or aged manure
  • Radish seeds (white variety of your choice)
  • Watering can or spray bottle
  • A sunny location (balcony, deck, or windowsill)

Optional: Garden gloves, trowel, and mulch (like straw or coco coir).


Step-by-Step Guide: How to Grow Big White Radishes in a Planter

Step 1: Prepare the Planter

Choose a deep container — radishes are root crops, so depth is more important than width. The container should be at least 12 inches deep and have good drainage holes.

Fill it with a mix of 70% loose garden soil and 30% compost. Avoid heavy clay soil, as it can restrict root growth. The goal is a soft, airy texture that allows roots to expand easily.


Step 2: Sow the Seeds

Once your soil is ready:

  • Make small holes about ½ inch deep and 2 inches apart.
  • Drop one seed in each hole and cover lightly with soil.
  • Water gently to keep the soil evenly moist.

You can plant multiple rows if your planter is wide enough. Keep about 2 inches of space between each row to ensure proper airflow and root growth.

Tip: White radishes don’t like being transplanted — always sow seeds directly into the planter instead of starting them in seed trays.


Step 3: Provide Sunlight and Water

Place your planter in a sunny spot that receives at least 5–6 hours of direct sunlight daily.

Radishes love sunlight but can tolerate light shade in the afternoon, especially in warmer regions.

  • Water regularly — the soil should remain slightly moist but never waterlogged.
  • If you’re in a hot climate, water daily in small amounts.
  • Overwatering can cause the roots to crack, while underwatering can lead to spongy, bitter radishes.

Maintaining consistent moisture is key to getting big, crisp roots.


Step 4: Thin the Seedlings

After about 5–7 days, the seedlings will sprout. When they reach 2–3 inches tall, thin them out so that each plant is spaced about 3 inches apart.

This ensures that every radish has enough space to develop large, healthy roots. The thinned seedlings can be eaten as microgreens — a nutritious bonus from your planter garden!


Step 5: Feed the Plants

White radishes grow fast and don’t need heavy feeding, but a little nutrient boost can make a big difference in root size and flavor.

Feed them once with a mild organic fertilizer (like compost tea, diluted fish emulsion, or vermicompost extract) about 2 weeks after germination.

Avoid high-nitrogen fertilizers — they promote leafy growth instead of large roots. Aim for a balanced nutrient mix with phosphorus and potassium to encourage strong, deep root formation.


Step 6: Maintain and Monitor Growth

To ensure the best results:

  • Keep the soil loose — gently stir the surface once a week to improve airflow.
  • Mulch lightly with straw or shredded leaves to prevent soil drying.
  • Watch for pests like aphids or flea beetles. Spray neem oil or soapy water if needed.

Radishes grow quickly, and within 25–30 days, you’ll start seeing the white tops peeking through the soil — a sign they’re nearly ready to harvest!


Step 7: Harvesting Your White Radishes

Harvest time depends on the variety, but most white radishes are ready in 30–60 days. The roots should be firm, smooth, and about 6–10 inches long for standard varieties.

Here’s how to harvest them:

  • Gently loosen the soil around the root using your fingers or a small trowel.
  • Grasp the base of the plant and pull straight up.
  • Avoid yanking, as it may break the root.

After harvesting, rinse the radishes in cool water and store them in the refrigerator for up to a week. For best taste and crunch, use them fresh in salads, stir-fries, or pickled dishes.


Tips for Growing Bigger and Healthier White Radishes

  1. Deep Containers = Big Roots
    The deeper the soil, the larger your radishes will grow. Use containers at least 12–15 inches deep for full-size Daikon.
  2. Consistent Moisture
    Fluctuating moisture levels cause cracks or irregular roots. Keep the soil evenly moist throughout.
  3. Cooler Weather Grows Sweeter Radishes
    White radishes grow best in cool weather (50°F–70°F). In the U.S., the ideal planting seasons are early spring and fall.
  4. Avoid Overcrowding
    Each plant needs space for its root to expand — proper thinning is key for big radishes.
  5. Harvest on Time
    Don’t wait too long — overripe radishes become woody and lose sweetness.

Troubleshooting Common Problems

ProblemCauseSolution
Small rootsOvercrowding or poor sunlightThin seedlings and ensure full sun exposure
Cracked rootsUneven wateringMaintain steady moisture levels
Pest damageAphids, leaf minersSpray neem oil weekly
Yellow leavesNutrient deficiencyAdd a light compost or seaweed feed
Spongy textureHigh temperature or over-maturityHarvest earlier and keep planters in partial shade

The Benefits of Growing Radishes in Planters

  • Accessibility: Easy to move and manage, especially for urban gardeners.
  • Clean Harvest: Roots stay free of pests and soil diseases.
  • Continuous Crop: Sow new seeds every 2 weeks for a steady supply.
  • Eco-Friendly: Reuse planters and organic compost to reduce waste.

It’s a sustainable, rewarding way to grow fresh produce right where you live — no large plot required.


Conclusion: From Planter to Plate

Growing big, white radishes in a planter is one of the easiest and most satisfying gardening projects you can try. With just a bit of care, sunshine, and consistent watering, you’ll enjoy crisp, juicy radishes that taste far better than anything from the store.

This method works beautifully for urban gardeners, beginners, or anyone wanting fresh vegetables without the need for a full garden. So grab a deep planter, sow your seeds, and in just a few weeks, you’ll be harvestng fresh, organic white radishes — straight from your balcony to your table

Grow Bitter Melon Fast in Plastic Tubs: Step-by-Step Guide for Super High Yields at Home

Grow Bitter Melon Fast in Plastic Tubs: Step-by-Step Guide for Super High Yields at Home

Bitter melon, also known as bitter gourd or karela, is a powerhouse vegetable prized for its medicinal benefits and unique flavor. Packed with vitamins, antioxidants, and compounds that support blood sugar management, it’s a favorite in American and international kitchens alike.

Growing bitter melon at home doesn’t require a backyard garden — with plastic tubs, you can cultivate this nutritious vegetable efficiently and harvest a super high yield. This method is perfect for urban gardeners, apartment dwellers, and beginners looking for fast, productive growth.

In this guide, you’ll learn everything from selecting seeds and preparing tubs to planting, supporting, fertilizing, and harvesting bitter melon successfully. By the end, you’ll be ready to enjoy fresh, homegrown bitter melons all season long.


1. Why Grow Bitter Melon in Plastic Tubs?

Bitter melon is a vigorous vine that can produce abundant fruit with proper care. Using plastic tubs offers several advantages:

Benefits of Tub Gardening:

  • Space-efficient: Ideal for patios, balconies, and small yards.
  • High yield: Large tub volume encourages strong vine growth and fruiting.
  • Mobility: Move tubs to catch sunlight or avoid harsh weather.
  • Control over soil and nutrients: Prevent soil-borne diseases and pests.
  • Beginner-friendly: Simple setup with minimal tools required.

Plastic tubs allow for excellent drainage, aeration, and root expansion, leading to faster growth and bigger harvests compared to traditional pots.


2. Choosing the Right Bitter Melon Variety

Not all bitter melon varieties perform equally well in containers. For plastic tubs, compact and high-yielding varieties work best.

Popular Varieties for Tub Gardening:

  • Indian Bitter Melon (Karela): Smooth, elongated, and fast-growing.
  • Chinese Bitter Melon: Lighter green, slightly sweeter, high-yielding.
  • Hybrid Varieties: Developed for container growth, disease resistance, and high production.

Pro Tip: If your goal is continuous harvest, choose early-maturing or hybrid varieties that produce multiple fruits per vine.


3. Materials You’ll Need

You don’t need a full garden bed to grow bitter melon. Here’s what you’ll need:

Materials List:

  • Plastic tubs (minimum 15–20 gallons)
  • Potting soil or garden soil mixed with compost
  • Organic compost or vermicompost
  • Bitter melon seeds
  • Trellis, bamboo sticks, or netting for vine support
  • Watering can or spray bottle
  • Optional: Mulch to retain soil moisture

Tip: Reuse large plastic storage tubs or detergent containers for a budget-friendly setup. Ensure they have drainage holes at the bottom.


4. Preparing Plastic Tubs

Proper tub preparation ensures healthy root development and prevents waterlogging.

Step-by-Step Preparation:

  1. Drill 4–6 drainage holes at the bottom of each tub.
  2. Fill the tub ¾ full with a well-draining soil mix.
  3. Lightly water the soil to moisten it.
  4. Position tubs in a sunny location with at least 6–8 hours of sunlight daily.

Pro Tip: If using large vining varieties, leave room around the tub for vines to climb.


5. Preparing the Soil Mix

Bitter melon thrives in loose, fertile soil rich in organic matter.

Ideal Soil Mix:

  • 50% potting soil
  • 30% compost or organic manure
  • 20% perlite or sand for drainage

Soil pH: 6.0–6.5 (slightly acidic to neutral)

Tip: Adding bone meal or slow-release fertilizer promotes flowering and fruiting.


6. Planting Bitter Melon Seeds

Bitter melon seeds can germinate quickly if planted properly.

Step 1: Pre-Soak Seeds

  • Soak seeds in water for 24 hours to soften the hard seed coat.
  • Optional: Scratch the seed coat lightly to improve germination.

Step 2: Plant Seeds in Tub

  • Sow 2–3 seeds per tub, 1 inch deep.
  • Cover lightly with soil and water gently.
  • Germination occurs in 7–10 days under warm conditions.

Step 3: Thinning Seedlings

  • Once seedlings emerge, thin to 1–2 strong plants per tub to ensure maximum growth.

Pro Tip: Keep the soil consistently moist but avoid waterlogging.


7. Providing Support for Vines

Bitter melon is a climbing vine and requires vertical support to maximize fruit production.

Support Options:

  • Trellis or bamboo sticks
  • Netting or fencing for the vine to climb
  • Tie vines loosely with soft string or twine

Tip: Keeping the vine off the soil prevents rot, reduces pests, and improves air circulation.


8. Watering and Moisture Management

Consistent watering is key for fast growth and high yield.

Watering Guidelines:

  • Water deeply 2–3 times per week or whenever the top inch of soil feels dry.
  • Water at the base of the plant to prevent leaf fungal diseases.
  • Mulch around the base to retain moisture and reduce evaporation.

9. Fertilizing Bitter Melon

Container-grown bitter melon relies entirely on your care for nutrients.

Feeding Schedule:

  • At planting: Mix compost or slow-release fertilizer into the soil.
  • After 3–4 weeks: Feed with a balanced liquid fertilizer every 2 weeks.
  • During flowering and fruiting: Switch to a fertilizer rich in phosphorus and potassium to boost flower and fruit production.

Tip: Organic options like fish emulsion, banana peel fertilizer, or compost tea work exceptionally well.


10. Pollination: Ensuring Fruit Production

Bitter melon produces male and female flowers. Pollination is required for fruit set.

Pollination Tips:

  • Outdoors, bees and insects usually handle pollination.
  • Indoors or low-bee areas: hand-pollinate using a small brush or cotton swab.
  • Transfer pollen from male to female flowers gently.

11. Common Pests and Problems

Even in tubs, bitter melon can face pests and diseases.

Common Issues:

  • Aphids and whiteflies: Spray with neem oil or insecticidal soap.
  • Powdery mildew: Avoid overhead watering and improve air circulation.
  • Yellow leaves: Could indicate nutrient deficiency or overwatering.

Pro Tip: Inspect plants regularly and remove any diseased leaves promptly.


12. Harvesting Bitter Melon

Bitter melon grows quickly — from planting to harvest usually takes 50–70 days, depending on variety.

How to Harvest:

  • Pick fruits when they are bright green and firm (before turning yellow).
  • Regular harvesting encourages more flowers and fruits.
  • Use scissors or gently twist off fruits to avoid damaging the vine.

Tip: Leaving fruits too long reduces yield and flavor.


13. Maximizing Yield in Plastic Tubs

  • Grow one strong plant per tub to allow adequate root expansion.
  • Use vertical trellises to save space and prevent vine damage.
  • Mulch and feed regularly for larger, healthier fruits.
  • Consider planting staggered batches to enjoy continuous harvests.

14. Fun Fact: Bitter Melon’s Health Benefits

Bitter melon is rich in vitamins C, A, and B-complex, and contains compounds that may help control blood sugar and boost immunity. Growing it at home ensures fresh, chemical-free vegetables right at your doorstep.


15. Conclusion: Fast, High-Yield Bitter Melon Gardening

Growing bitter melon in plastic tubs is a brilliant, beginner-friendly method for urban gardeners. It’s space-efficient, cost-effective, and highly productive, making it perfect for American homes with limited outdoor space.

With a few plastic tubs, good soil, seeds, and proper care, you can enjoy fresh, crisp, and nutritious bitter melons all season. This method not only maximizes yield but also gives you healthy, homegrown produce without a full garden.

Start your tub garden today and experience the satisfaction of harvesting bitter melon at home — fresh, organic, and completely yours!

Amazing Idea: How to Grow Cucumbers from Seed at Home Using Sacks – Easy Step-by-Step Guide for Beginners

Amazing Idea: How to Grow Cucumbers from Seed at Home Using Sacks – Easy Step-by-Step Guide for Beginners

Imagine walking into your backyard or balcony and picking fresh, crisp cucumbers straight from your own plants. Growing cucumbers from seed at home is not only fun and rewarding but also surprisingly easy, especially when using the sack method, a clever technique perfect for small spaces.

This method, popular among urban gardeners, allows you to grow cucumbers in sacks or large bags with minimal soil, no garden beds, and maximum yield. Whether you live in an apartment, a small backyard, or even on a rooftop, you can enjoy a continuous supply of fresh cucumbers without complicated gardening setups.

In this comprehensive guide, you’ll learn everything from selecting seeds and preparing sacks to watering, fertilizing, supporting, and harvesting your homegrown cucumbers.


1. Why Grow Cucumbers in Sacks?

Cucumbers are fast-growing, nutritious, and versatile, but they do require support and sufficient soil to thrive. The sack method offers several advantages:

Benefits of Growing Cucumbers in Sacks:

  • Space-saving: Perfect for balconies, patios, and small yards.
  • Affordable: Uses sacks or bags you likely already have.
  • High-yield: Large root space promotes more fruit production.
  • Portable: Move sacks to catch sunlight or protect from harsh weather.
  • Beginner-friendly: Easy setup with minimal tools and effort.

This approach is ideal for American urban gardeners or anyone who wants a productive cucumber harvest without a full garden.


2. Choosing the Right Cucumber Variety

Selecting the right cucumber variety is key for success, especially in containers or sacks.

Best Cucumber Varieties for Sacks:

  • Bush varieties: Compact, ideal for limited space.
    • Example: Bush Champion, Patio Snacker
  • Vining varieties: Produce longer fruits; require support.
    • Example: Marketmore 76, Straight Eight
  • Pickling cucumbers: Smaller fruits, great for pickles.
    • Example: Boston Pickling, National Pickling

Pro Tip: If growing in sacks, choose a variety suited for container growth, or ensure you provide vertical support for vining types.


3. Materials Needed for Cucumber Sack Gardening

You don’t need a garden bed to start. Here’s what you’ll need:

Materials List:

  • Large sacks or grow bags (15–20 gallons or bigger)
  • Good-quality potting soil
  • Organic compost or vermicompost
  • Cucumber seeds
  • Stakes, trellis, or bamboo sticks for support
  • Watering can or spray bottle
  • Optional: Mulch to retain moisture

Tip: Reuse old rice or potato sacks for an eco-friendly and budget-friendly approach.


4. Preparing the Sacks

Proper preparation ensures your cucumbers have the right soil depth and drainage for strong growth.

Step-by-Step Preparation:

  1. Fill each sack ¾ full with a mix of potting soil and compost.
  2. Create a small depression at the top for planting seeds.
  3. If sacks are solid, poke holes at the bottom for drainage.
  4. Place sacks in a sunny spot, ensuring at least 6–8 hours of sunlight daily.

5. Preparing the Soil Mix

Cucumbers thrive in loose, fertile soil with excellent drainage.

Ideal Soil Mix for Cucumber Sacks:

  • 50% potting soil
  • 30% compost
  • 20% sand or coco peat for aeration

Pro Tip: Add a handful of bone meal or slow-release fertilizer to promote flowering and fruiting.


6. Planting Cucumbers from Seed

Planting cucumber seeds in sacks is straightforward and highly rewarding.

Step 1: Pre-soak Seeds

  • Soak seeds in water for 4–6 hours to improve germination.

Step 2: Plant Seeds

  • Plant 2–3 seeds per sack, ½–1 inch deep.
  • Cover lightly with soil and water gently.

Step 3: Thinning Seedlings

  • After seedlings sprout (5–7 days), thin to one strong plant per sack.

Tip: Keep sacks moist but avoid overwatering, as cucumbers dislike soggy roots.


7. Watering and Moisture Management

Cucumbers need consistent moisture, especially during flowering and fruiting.

Watering Tips:

  • Water deeply every 2–3 days (more often in hot climates).
  • Water at the base of the plant, avoiding wetting leaves to prevent fungal disease.
  • Use mulch to retain soil moisture and regulate temperature.

8. Fertilizing Cucumbers

Because cucumber roots are confined to sacks, nutrients can deplete quickly. Regular feeding ensures strong growth.

Feeding Schedule:

  • At planting: Mix compost or slow-release fertilizer into soil.
  • After 3–4 weeks: Apply a balanced liquid fertilizer every 2 weeks.
  • During flowering and fruiting: Use a fertilizer higher in potassium and phosphorus for larger, tastier cucumbers.

9. Supporting Your Plants

Vining cucumbers need vertical support to save space and prevent rot.

How to Provide Support:

  • Use bamboo sticks, a trellis, or netting.
  • Tie vines loosely with soft strings.
  • Ensure good air circulation to reduce fungal disease risk.

Tip: Bush varieties may not need support but still benefit from stakes to keep fruits off the soil.


10. Pollination: Ensuring a Healthy Harvest

Cucumber flowers produce male and female blooms. Successful fruiting depends on pollination.

Pollination Tips:

  • Outdoors, bees and insects usually handle pollination.
  • Indoors or low-bee areas: hand-pollinate using a small brush or cotton swab.
  • Transfer pollen from male to female flowers gently.

11. Common Pests and Problems

Even in sacks, cucumbers can face pests and diseases.

Common Issues:

  • Aphids and whiteflies: Spray with neem oil solution.
  • Powdery mildew: Improve airflow, avoid wetting leaves, or use baking soda spray.
  • Yellow leaves: Could indicate nutrient deficiency or overwatering.

Pro Tip: Inspect plants weekly to catch issues early and maintain healthy growth.


12. Harvesting Cucumbers

Cucumbers grow quickly — from seed to harvest usually takes 50–70 days, depending on variety.

How to Harvest:

  • Pick fruits 6–8 inches long for crisp, tender cucumbers.
  • Harvest regularly to encourage continuous production.
  • Use scissors or gently twist to avoid damaging the vine.

Tip: Leaving cucumbers on the vine too long can reduce overall yield.


13. Maximizing Yield from Sack Gardening

  • Grow one plant per sack for maximum root space.
  • Rotate sacks occasionally to ensure even sunlight exposure.
  • Mulch regularly and feed with compost tea for larger, tastier fruits.
  • Consider planting staggered batches every 2–3 weeks for continuous harvest.

14. Fun Fact: Cucumbers Are Mostly Water

Cucumbers are about 95% water, making them refreshing and hydrating. Growing your own ensures chemical-free, fresh cucumbers, perfect for salads, pickles, or summer drinks.


15. Conclusion: Fresh Cucumbers Anywhere, Anytime

Growing cucumbers from seed in sacks is a brilliant, beginner-friendly gardening idea. It’s space-efficient, cost-effective, and highly productive, making it perfect for urban or small-space gardeners.

With just a few sacks, some soil, seeds, and sunlight, you can enjoy crisp, flavorful cucumbers straight from your home — no garden required. Whether you’re using them in salads, smoothies, or pickles, homegrown cucumbers will elevate your meals and bring the joy of gardening right to your doorstep.

Start today and watch your mini cucumber farm thrive — fresh, organic, and completely yours!

Brilliant Idea: How to Grow Peanuts at Home Easily – A Beginner’s Guide to Fresh, Nutty Harvests

Brilliant Idea: How to Grow Peanuts at Home Easily – A Beginner’s Guide to Fresh, Nutty Harvests

Imagine biting into a fresh, crunchy peanut that you grew yourself — no store-bought nuts, no pesticides, just pure, homegrown goodness. Growing peanuts at home might sound complicated, but it’s surprisingly simple, fun, and rewarding, even for beginners.

Peanuts, also known as groundnuts, are native to South America but are now widely cultivated across the world, including in American home gardens. They’re nutrient-rich, versatile, and an incredible addition to your homegrown pantry.

This guide will walk you step-by-step through growing peanuts at home, from planting seeds to harvesting and storing them. Whether you have a small backyard, balcony, or even just a sunny windowsill, you can enjoy fresh, organic peanuts in a few months.


1. Why Grow Peanuts at Home?

Peanuts are not just delicious; they’re also incredibly beneficial for your health and your wallet. Here’s why growing them at home is worth it:

Benefits of Homegrown Peanuts:

  • Fresh and Organic: Control the soil and avoid harmful pesticides.
  • Nutritious: Rich in protein, healthy fats, and antioxidants.
  • Cost-Effective: Save money compared to store-bought nuts.
  • Educational: Fun project for kids and gardening beginners.
  • Sustainable: Growing your own reduces food waste and packaging.

Homegrown peanuts are perfect for snacking, peanut butter, or even roasting at home, making them a versatile crop for every household.


2. Choosing the Right Peanut Variety

Not all peanuts are ideal for home growing. For beginners, small and fast-maturing varieties work best, especially if you’re growing in containers or limited spaces.

Popular Peanut Varieties for Home Gardening:

  • Virginia: Large nuts, excellent for roasting.
  • Spanish: Smaller, flavorful nuts; great for snacking and baking.
  • Valencia: Sweet taste; produces multiple nuts per pod.
  • Runner: Perfect for peanut butter and consistent yields.

Pro Tip: Choose seeds labeled as raw peanut seeds, not roasted, salted, or processed nuts, because only raw seeds can germinate.


3. Materials You’ll Need to Grow Peanuts

Growing peanuts at home doesn’t require fancy tools. Here’s what you’ll need:

Basic Supplies:

  • Raw peanut seeds (with shells intact)
  • Deep containers or pots (10–12 inches minimum depth)
  • Potting soil or garden soil mixed with compost
  • Sunny spot or grow lights
  • Watering can or spray bottle
  • Fertilizer (organic compost, bone meal, or slow-release fertilizer)

Optional: Mulch to retain moisture and protect young seedlings.


4. Preparing the Soil

Peanuts are legumes, which means they fix nitrogen in the soil, but they still need well-draining, loose soil to develop healthy pods underground.

Ideal Soil Mix for Peanuts:

  • 50% potting soil
  • 30% organic compost
  • 20% sand or perlite for drainage

Soil pH: 6.0–6.5 (slightly acidic to neutral)

Tip: Avoid heavy clay soils, as they can stunt pod development and increase the risk of rot.


5. Planting Peanuts Step-by-Step

Planting peanuts is simple, but timing and spacing are crucial.

Step 1: Prepare the Seeds

  • Remove peanuts from their shells carefully (leave the seed coat on if possible).
  • Optional: Soak seeds in water for 4–6 hours to speed up germination.

Step 2: Fill Containers with Soil

  • Fill pots about 2–3 inches below the rim.
  • Moisten soil lightly before planting.

Step 3: Plant the Seeds

  • Place seeds 2 inches deep, with the pointed end facing downward.
  • Space seeds 4–6 inches apart if planting multiple peanuts in one pot.
  • Cover lightly with soil and water gently.

Step 4: Find a Sunny Spot

Peanuts love sunlight — aim for 6–8 hours of direct sun per day.
If indoors, place pots near a bright window or use LED grow lights for 12–14 hours daily.


6. Watering and Care

Peanuts need consistent moisture, but overwatering can cause rot, especially in containers.

Watering Tips:

  • Keep the soil evenly moist during germination and early growth.
  • Reduce watering slightly once plants are mature to prevent fungal issues.
  • Water in the morning to allow soil to dry slightly before evening.

Fertilizing Peanuts:

  • At planting: Mix compost or bone meal into the soil.
  • Mid-growth: Add a balanced organic fertilizer for healthy leaves and flowers.
  • Avoid excessive nitrogen — peanuts fix their own nitrogen and too much can reduce pod production.

7. Flowering and Pegging: Understanding Peanut Growth

Peanuts have a unique growth cycle:

Flowering Stage:

  • After 30–40 days, yellow flowers appear above ground.
  • Flowers are self-pollinating, so you don’t need insects.

Peg Formation (Underground Pod Development):

  • Fertilized flowers form pegs, which grow downward into the soil.
  • The pods develop underground — a key difference from other nuts or vegetables.
  • Keep the soil loose so pegs can penetrate easily.

Tip: Mulching helps protect pegs and pods from drying out or pests.


8. Common Problems and How to Prevent Them

Even in home containers, peanuts may face some challenges.

ProblemCauseSolution
Yellowing leavesOverwatering or nutrient deficiencyReduce water; add compost tea
Stunted growthPoor sunlightMove to sunnier location or use grow lights
Fungal diseaseOverly wet soilImprove drainage; avoid overhead watering
PestsAphids, mitesUse neem oil or insecticidal soap

9. Harvesting Peanuts

Patience is key — peanuts take 90–120 days to mature. Signs they are ready:

  • Leaves turn yellow and start to wilt
  • Pods are fully formed underground

How to Harvest:

  1. Gently loosen soil around the plant.
  2. Carefully lift the entire plant, keeping pods intact.
  3. Shake off excess soil and let the plant dry in a warm, airy place for 2–3 weeks.

Freshly harvested peanuts can then be roasted, boiled, or stored for future use.


10. Storage and Usage

  • Roasting: Spread peanuts on a baking sheet and roast at 350°F for 15–20 minutes.
  • Boiling: Boil peanuts in salted water for a soft, savory snack.
  • Storage: Store dried peanuts in airtight containers in a cool, dark place.

Growing your own ensures chemical-free, fresh, and flavorful peanuts ready to enjoy anytime.


11. Growing Peanuts in Containers: Extra Tips for Beginners

  • Use deep pots for better pod development.
  • Rotate containers occasionally for even sunlight.
  • Thin seedlings if overcrowded to ensure larger pods.
  • Consider growing multiple containers for continuous harvests.

12. Fun Fact: Peanuts Are Legumes, Not Nuts!

Many people assume peanuts are nuts, but they’re actually legumes, related to beans and lentils. This makes them protein-packed and soil-friendly, as they naturally fix nitrogen, improving soil fertility for future crops.

Growing peanuts at home not only gives you delicious nuts but also enhances the health of your garden soil for other plants.


13. Conclusion: Homegrown Peanuts Made Simple

Growing peanuts at home is a brilliant, beginner-friendly gardening project. With just a few plastic containers, soil, and peanut seeds, you can enjoy fresh, organic peanuts in just a few months.

This method is perfect for urban gardeners, balcony growers, or anyone looking to try something new and rewarding. Whether you roast them, boil them, or make peanut butter, homegrown peanuts add a unique flavor and pride to your kitchen.

So grab some raw peanut seeds, prepare your containers, and start growing — your fresh, crunchy, and nutritious peanut harvest awaits!

How to Grow Onions in Plastic Cups at Home: Easy Indoor Gardening for Big Yields (American Guide Inspired by NY Sokhom)

How to Grow Onions in Plastic Cups at Home: Easy Indoor Gardening for Big Yields (American Guide Inspired by NY Sokhom)

If you think you need a backyard or a full garden bed to grow onions, think again! Growing onions in plastic cups is a simple, space-saving, and affordable method that anyone can do — even if you live in an apartment or have limited space.

This smart method, popularized by NY Sokhom’s practical gardening techniques, shows how you can grow Indian or red onions indoors using basic materials you already have at home.

Whether you’re a beginner gardener or an urban dweller looking to grow your own food, this guide will walk you step-by-step through the process of growing onions in plastic cups — from selecting bulbs and preparing the soil to watering, fertilizing, and harvesting.

By the end of this article, you’ll have the confidence to start your own mini onion garden right on your windowsill — saving money while enjoying fresh, flavorful onions all year round!


1. Why Grow Onions in Plastic Cups?

Onions are one of the most essential ingredients in every American kitchen. They flavor soups, salads, stir-fries, and countless dishes — and growing them at home ensures freshness, organic quality, and a satisfying gardening experience.

Benefits of Growing Onions in Plastic Cups:

  • Space-efficient: Perfect for balconies, kitchens, or windowsills.
  • Low-cost setup: Uses recycled plastic cups and minimal soil.
  • Fast results: You’ll see green shoots in just 5–7 days!
  • Pest-free environment: Easier to control pests indoors.
  • Great for kids and beginners: Simple, fun, and educational project.

This method is ideal for Indian onions, red onions, or yellow onions, all of which adapt well to container or cup gardening.


2. Choosing the Right Onion Type

Not all onions are the same when it comes to growth rate and bulb size. For plastic cup gardening, it’s best to choose small to medium-sized onion varieties that thrive in limited soil space.

Best Onion Varieties for Cup Growing:

  • Red Onions (Indian type): Flavorful and fast-growing.
  • Yellow Onions: Sweet and mild flavor; great for salads.
  • Spring Onions (Green onions): Perfect for continuous harvesting.
  • Shallots: Compact and excellent for container growing.

Tip: Choose firm, healthy bulbs — avoid any that are soft, moldy, or sprouting excessively before planting.


3. Materials You’ll Need

You don’t need fancy gardening tools or pots. Just a few basic items will do!

Materials List:

  • Plastic cups (16–20 oz size, with drainage holes)
  • Potting mix or garden soil
  • Organic compost or vermicompost
  • Onion bulbs or sets
  • A tray or shallow container (to hold the cups)
  • Watering can or spray bottle

Optional: Baking soda, neem oil, or cinnamon powder for pest prevention.


4. Preparing the Plastic Cups

Proper cup preparation ensures healthy root growth and prevents waterlogging — one of the biggest problems in container gardening.

Step-by-Step Cup Prep:

  1. Take clean, transparent or semi-transparent plastic cups.
  2. Using a heated nail or small drill, poke 4–5 small drainage holes at the bottom.
  3. Place all cups on a tray to collect excess water.
  4. If you want to grow multiple onions, line up 6–10 cups for a mini garden setup.

You can even decorate your cups or label them with onion types — fun for families or school gardening projects!


5. Preparing the Soil Mix

Onions need loose, fertile, and well-draining soil to form bulbs efficiently.

Best Soil Mix for Onions in Cups:

  • 50% potting soil
  • 30% compost or cow manure
  • 20% perlite, coco peat, or sand

Mix thoroughly until the texture feels light and crumbly.

Pro Tip: Add a teaspoon of bone meal or wood ash for an extra phosphorus boost, which helps bulb development.


6. Planting the Onion Bulbs

Now comes the fun part — planting your onions!

How to Plant Onions in Cups:

  1. Fill each plastic cup about ¾ full with the soil mix.
  2. Place one onion bulb in the center, with the pointed tip facing upward.
  3. Gently press it down so that one-third of the bulb is above the soil.
  4. Water lightly until the soil feels moist (not soggy).

Within 3–5 days, you’ll notice green shoots emerging — a sure sign your onion is growing strong!


7. Finding the Perfect Growing Spot

Onions love sunlight — they need it for both bulb and leaf growth.

Ideal Conditions:

  • Sunlight: 6–8 hours of direct sunlight daily.
  • Temperature: Between 65°F–80°F (18°C–27°C).
  • Placement: Sunny window ledge, balcony, or patio.

If you’re growing indoors, use a grow light or LED lamp to ensure your onions receive enough light each day.


8. Watering and Care

Onions don’t like “wet feet.” Overwatering can cause rot, especially in plastic containers.

Watering Tips:

  • Water only when the top inch of soil feels dry.
  • Use a spray bottle or light watering can for even moisture.
  • Avoid getting water on the bulb itself — focus on soil moisture.

Place the cups on a tray with gravel to help with drainage and prevent fungal buildup.


9. Feeding and Fertilizing

Since plastic cups hold limited soil, nutrients deplete faster. Regular feeding ensures steady growth and strong bulbs.

Feeding Schedule:

  • After 2 weeks: Add a diluted liquid fertilizer (10-10-10).
  • Every 10–14 days: Feed with compost tea or fish emulsion.
  • During bulb formation: Switch to potassium-rich feed (like banana peel fertilizer).

Organic fertilizers not only boost growth but also improve flavor and reduce chemical residue.


10. Managing Pests Naturally

Even in indoor setups, you might encounter small pests like fungus gnats or aphids.

Natural Pest Remedies:

  • Spray with neem oil solution (1 tsp neem oil + 1 quart water).
  • Sprinkle cinnamon powder on soil to prevent fungus.
  • Keep the area well-ventilated to avoid mold or mildew.

Avoid chemical pesticides — they’re unnecessary for such small-scale, controlled gardens.


11. Pruning and Growth Maintenance

Once the green shoots reach 6–8 inches, you can start trimming them lightly.

Tips for Maintenance:

  • Use scissors to snip the tops of green leaves for cooking — this encourages more growth.
  • Remove any yellow or wilted leaves to prevent disease spread.
  • Rotate the cups weekly for even sunlight exposure.

Your onion greens will regrow multiple times before the bulb matures completely.


12. Harvesting Onions from Plastic Cups

Depending on the variety and conditions, onions can be ready to harvest in 60–90 days.

When and How to Harvest:

  • When leaves turn yellow and fall over, your bulbs are mature.
  • Stop watering for a week before harvest to let bulbs firm up.
  • Gently loosen the soil and pull the bulb upward by the base.

Rinse off soil and dry the bulbs in a warm, airy spot for 5–7 days before storage.

If you prefer green onions (scallions), you can harvest them much earlier — around 20–25 days after planting.


13. Reusing Onion Bulbs for Continuous Growth

Want to keep your onion cycle going? You can regrow onions from the base of harvested bulbs!

Regrowing Method:

  1. Cut off the onion base (about 1 inch thick).
  2. Let it dry for 24 hours.
  3. Plant it in a new cup with fresh soil.
  4. Water and place in sunlight — green shoots appear within a week!

This method lets you enjoy endless onion harvests without constantly buying new bulbs.


14. Troubleshooting Common Problems

ProblemCauseSolution
Onion bulb not growingNot enough sunlightMove to a sunnier spot or use a grow light
Yellowing leavesOverwatering or poor drainageReduce watering and check holes
Mold on soilPoor air circulationRemove mold, sprinkle cinnamon, improve airflow
No bulb formationCrowded roots or nutrient deficiencyUse bigger cups or add fertilizer

15. Bonus Tip: Growing Onions Hydroponically in Cups

For advanced gardeners, try a hydroponic version — grow onion bulbs in water using plastic cups suspended over jars.
Just add water, change it weekly, and watch the roots grow! It’s an excellent science experiment and home décor idea rolled into one.


Conclusion: Grow Smart, Eat Fresh

Growing onions in plastic cups is a simple, low-cost, and sustainable gardening hack that proves you don’t need a big yard to grow your own vegetables. Inspired by NY Sokhom’s innovative techniques, this method helps you enjoy fresh, organic onions year-round, even in tight spaces.

With just a few cups, soil, and bulbs, you can turn your kitchen or balcony into a mini onion farm — saving money, reducing waste, and adding homegrown flavor to every meal.

So grab those plastic cups, pick your favorite onion variety, and start your indoor onion-growing journey today. You’ll be amazed at how fast and rewarding it can be!

How to Grow Zucchini in Containers: A Step-by-Step Guide for High Yields Even Without a Garden

How to Grow Zucchini in Containers: A Step-by-Step Guide for High Yields Even Without a Garden

Imagine stepping outside your kitchen door and picking crisp, green zucchini straight from a pot. Sounds too good to be true? It’s not!

Growing zucchini in containers is one of the easiest and most rewarding ways to produce fresh vegetables at home — even if you don’t have a backyard. Whether you live in an apartment, a townhouse, or a home with limited space, container gardening lets you enjoy delicious, organic zucchini all season long.

In this guide, you’ll learn exactly how to grow zucchini in a container, from choosing the right pot and soil to watering, fertilizing, and harvesting your homegrown bounty.

By the end, you’ll know how to turn a small corner of your patio or balcony into a zucchini-producing powerhouse — perfect for stir-fries, salads, and summer grilling.


1. Why Grow Zucchini in Containers?

Zucchini (also called courgette) is one of the most productive and low-maintenance vegetables you can grow. One or two plants can yield enough zucchini for an entire family — even when grown in pots.

Benefits of Container-Grown Zucchini:

  • Space-efficient: Perfect for patios, balconies, and decks.
  • Pest control: Easier to monitor and protect from insects.
  • Mobility: Move pots to capture more sunlight or avoid frost.
  • Better soil control: Avoid poor garden soil or weeds.
  • Aesthetic appeal: Adds greenery and freshness to small spaces.

With just a few containers and proper care, you can enjoy a steady supply of zucchini throughout summer — even if you’ve never gardened before.


2. Choosing the Right Container

Zucchini plants are fast-growing and need space for their roots to spread. The container you choose plays a major role in their success.

Ideal Container Size:

  • Minimum: 5 gallons (18–20 inches deep)
  • Ideal: 10–15 gallons for vigorous growth and higher yields

If you’re growing bush varieties (compact types), one plant per container works perfectly. For vining varieties, use larger pots or support trellises to guide their growth.

Best Container Types:

  • Plastic or resin pots: Lightweight and retain moisture.
  • Fabric grow bags: Great airflow, prevents root rot.
  • Wooden barrels or crates: Natural insulation for roots.

Pro Tip: Ensure your container has drainage holes at the bottom. Zucchini roots dislike standing water.


3. The Perfect Soil Mix for Zucchini

Zucchini loves well-draining, nutrient-rich soil. The key is balancing moisture retention with airflow around the roots.

DIY Potting Mix Recipe:

  • 40% high-quality potting soil
  • 40% organic compost
  • 20% perlite or coco peat for drainage

Optional: Add a handful of slow-release fertilizer or worm castings to give your plant a nutrient boost.

Ideal Soil pH:

Keep between 6.0 and 7.5 — slightly acidic to neutral soil helps zucchini absorb nutrients efficiently.


4. Choosing the Right Zucchini Variety

Not all zucchini varieties perform equally well in containers. For best results, go for compact or bush types that stay small but produce abundantly.

Top Zucchini Varieties for Containers:

  • Bush Baby: Compact, early producer.
  • Raven: Dark green fruit, perfect for small spaces.
  • Black Beauty: Classic flavor, grows well in pots.
  • Patio Star: Specifically bred for container gardening.
  • Eight Ball: Round zucchini ideal for grilling and stuffing.

You can start from seeds or seedlings — both work well for container setups.


5. Planting Zucchini: Step-by-Step

Step 1: Fill the Container

Fill your pot with the prepared soil mix, leaving about 2 inches of space at the top.

Step 2: Plant the Seeds or Seedlings

  • If planting seeds, sow 2–3 seeds about 1 inch deep.
  • Once seedlings emerge (after 5–7 days), thin out and keep the strongest plant.
  • If planting nursery seedlings, place one plant per container.

Step 3: Position in Sunlight

Zucchini thrives in full sun — at least 6–8 hours of direct light daily.
Place your pot on a south-facing patio, balcony, or sunny windowsill.


6. Watering and Moisture Control

Zucchini plants need consistent moisture to produce tender, juicy fruits. However, overwatering can suffocate the roots.

Watering Tips:

  • Water deeply 2–3 times per week (more often in hot climates).
  • Always check soil moisture — it should feel damp, not soggy.
  • Water early in the morning to allow foliage to dry by evening.

To prevent evaporation, mulch the surface with straw, shredded leaves, or coco husk. This keeps the soil cool and reduces watering frequency.


7. Feeding Your Container Zucchini

Container-grown plants rely entirely on you for nutrients, so feeding regularly ensures lush growth and abundant harvests.

Feeding Schedule:

  • At planting: Mix organic compost or slow-release fertilizer.
  • Every 2 weeks: Feed with a balanced liquid fertilizer (10-10-10).
  • During flowering: Switch to a bloom-boosting fertilizer rich in phosphorus and potassium.

Organic options like fish emulsion, compost tea, or banana peel fertilizer work beautifully to boost fruiting and flavor.


8. Supporting and Pruning for Maximum Growth

Zucchini grows fast, and even bush types can sprawl. Keeping your plant well-shaped ensures proper airflow and disease prevention.

Pruning Tips:

  • Remove yellowing or damaged leaves to promote air circulation.
  • Trim lower leaves to prevent soil splashing during watering.
  • Don’t over-prune — keep enough foliage for photosynthesis.

For vining zucchini, add a small trellis or tomato cage to help it climb. This saves space and keeps fruits off the soil, reducing rot.


9. Pollination: Helping Your Zucchini Produce Fruit

Zucchini plants produce separate male and female flowers, and they need pollination to set fruit.

Male vs. Female Flowers:

  • Male flowers: Grow on thin stems and appear first.
  • Female flowers: Have a tiny zucchini behind the blossom.

If you’re growing indoors or have limited bees, use a small brush to hand-pollinate:

  1. Gently collect pollen from a male flower.
  2. Dab it inside the center of a female flower.

Within a few days, you’ll see the fruit start to swell!


10. Common Pests and How to Prevent Them

Even in containers, zucchini can attract some pests. Here’s how to protect your plants naturally.

Common Pests:

  • Aphids: Spray with neem oil or insecticidal soap.
  • Squash bugs: Remove by hand and destroy eggs under leaves.
  • Powdery mildew: Prevent with good airflow and baking soda spray (1 tsp baking soda + 1 quart water).

Avoid overwatering and overcrowding — these conditions attract pests and fungal problems.


11. Harvesting Zucchini the Right Way

The best part of growing zucchini is harvesting — and it happens quickly!

When to Harvest:

  • Usually 45–60 days after planting.
  • Pick fruits when they’re 6–8 inches long for best flavor.
  • Use scissors or pruning shears to cut rather than twist.

Frequent harvesting encourages more fruit production — the more you pick, the more your plant gives!


12. Maximizing Yield from Your Container

To keep your zucchini plant productive all season:

  • Feed regularly with compost or fertilizer.
  • Harvest frequently to prevent oversized fruit.
  • Keep removing dead leaves to promote airflow.
  • Rotate the container weekly to ensure even sunlight.

With proper care, each zucchini plant can yield 10–20 pounds of produce throughout the growing season — impressive for a single pot!


13. Troubleshooting Common Issues

ProblemCauseSolution
Yellow leavesOverwatering or nutrient deficiencyReduce watering, add compost tea
No fruitPoor pollinationHand-pollinate flowers manually
Powdery spotsFungal infectionSpray with baking soda solution weekly
Drooping plantHeat stress or root rotMove to shade temporarily, check drainage

14. Winter Care & Saving Seeds

If you live in a colder region, zucchini won’t survive frost. However, you can save seeds for next season or grow indoors year-round under LED grow lights.

How to Save Seeds:

  1. Let one zucchini over-mature on the vine until thick and yellow.
  2. Scoop out seeds, rinse, and dry completely.
  3. Store in a cool, dry place for next season’s planting.

Conclusion: Fresh Zucchini, Anywhere, Anytime

Growing zucchini in containers proves that you don’t need a big garden to grow big results. With the right setup, even a small balcony can produce baskets of fresh, delicious zucchini ready for summer grilling, pasta dishes, or salads.

It’s affordable, rewarding, and sustainable — perfect for anyone who wants to live a greener, healthier lifestyle.

So grab a pot, some soil, and a few seeds — and get ready to enjoy your own homegrown zucchini harvest right from your patio. You’ll be amazed at how easy and satisfying it is!