Fig trees (Ficus carica) are among the most rewarding fruit trees you can grow. Their large, hand-shaped leaves, sweet honey-flavored fruit, and easy-going nature make them a favorite of gardeners everywhere. But here’s a little secret: you don’t need to buy an expensive fig tree from a nursery.
With just one healthy branch and a little patience, you can start your own fig tree from cuttings — and it’s easier than you might think.
This guide walks you through everything you need to know about growing fig trees from cuttings — from choosing the right branch to rooting, transplanting, and caring for your new plant. Whether you’re a seasoned gardener or a beginner, you’ll be amazed at how simple and satisfying this process can be.
Why Grow Fig Trees From Cuttings?
Starting fig trees from cuttings has several benefits:
- It’s Free (or Nearly Free): You can propagate dozens of new trees from one parent plant.
- True to Type: Cuttings produce an exact genetic clone of the parent tree, so you’ll get the same delicious fruit.
- Fast Results: Fig cuttings can root in as little as 4–6 weeks and may bear fruit within 1–2 years.
- Fun & Rewarding: Watching roots and leaves emerge from a stick is truly magical for gardeners of all skill levels.
Step 1: Choose the Right Time for Taking Fig Cuttings
The best time to take fig cuttings depends on your local climate and whether you’re propagating indoors or outdoors.
- Late Winter to Early Spring (Dormant Season): Ideal for hardwood cuttings. The plant is resting, which reduces stress and increases rooting success.
- Late Spring to Early Summer: You can also root softwood or semi-hardwood cuttings taken from actively growing branches, but they’ll require more humidity and care.
Pro Tip: If you’re a beginner, start with hardwood cuttings in late winter—they’re more forgiving and root easily with minimal equipment.
Step 2: Select a Healthy Parent Fig Tree
The success of your new fig tree depends heavily on the health of the parent.
Choose a parent tree that:

- Produces sweet, high-quality fruit.
- Has no signs of disease, rot, or pest damage.
- Is mature (at least 2–3 years old).
Avoid taking cuttings from weak, diseased, or overly young plants.
Step 3: Take the Cuttings
You’ll need a sharp pair of pruning shears or a clean knife.
How to take fig cuttings:
- Select a branch that’s ½ to ¾ inch thick (about pencil width).
- Cut sections that are 6 to 10 inches long with 3–5 nodes (the little bumps where leaves or roots can grow).
- Make the bottom cut just below a node and the top cut about ½ inch above a node.
- Remove any leaves from the lower half of the cutting.
If you’re not planting them right away, wrap the cuttings in a damp paper towel, seal them in a plastic bag, and store them in the refrigerator for up to two weeks.
Optional: Dip the bottom end of each cutting into rooting hormone powder to boost root development.
Step 4: Prepare the Planting Medium
Fig cuttings root best in a moist, well-draining medium that provides both air and stability.
Good options include:
- 1 part perlite + 1 part peat moss
- 1 part coarse sand + 1 part compost
- Pre-mixed seed-starting soil
Avoid heavy garden soil—it can suffocate the roots or lead to rot.

Tip: If you plan to root cuttings indoors, use individual pots or plastic cups with drainage holes for easy transplanting later.
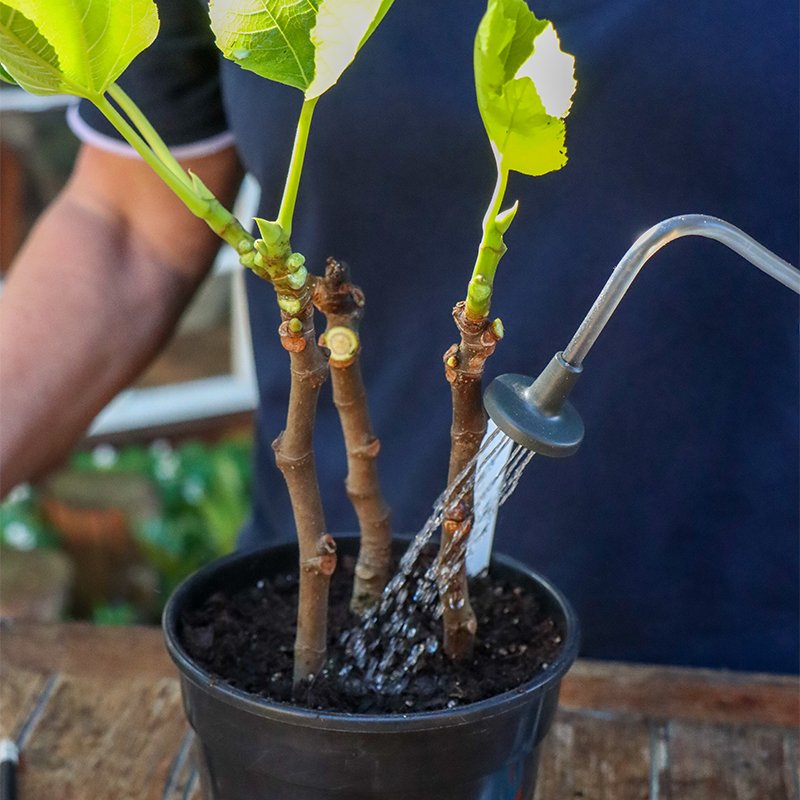
Step 5: Plant and Water the Cuttings
- Fill your container with the prepared soil mix.
- Insert the cutting 2–3 inches deep, making sure at least one or two nodes are buried under the soil.
- Firm the soil gently around the cutting to hold it upright.
- Water thoroughly until moisture drains from the bottom.
If planting multiple cuttings, space them at least 2 inches apart in a tray or pot.
Step 6: Create the Ideal Rooting Environment
Cuttings root best in warm, humid conditions.
If Rooting Indoors:
- Place the pots in a bright, indirect light (like a sunny windowsill).
- Maintain temperatures between 70–80°F (21–27°C).
- Cover the cuttings with a clear plastic dome or bag to retain humidity.
Important: Vent the plastic daily for a few minutes to prevent mold growth.
If Rooting Outdoors:
- Choose a shaded, sheltered location to prevent the cuttings from drying out.
- Cover with a plastic bottle or mini greenhouse structure to maintain moisture.
Keep the soil consistently moist but not soggy. Roots typically start forming in 4–6 weeks.
Step 7: Check for Root Development
After about a month, gently tug on the cutting. If you feel resistance, roots are forming!
To confirm:
- Carefully remove one cutting and check for white, fibrous roots emerging from the buried nodes.
Once the roots are at least 1–2 inches long, your fig cuttings are ready to transplant into larger pots.

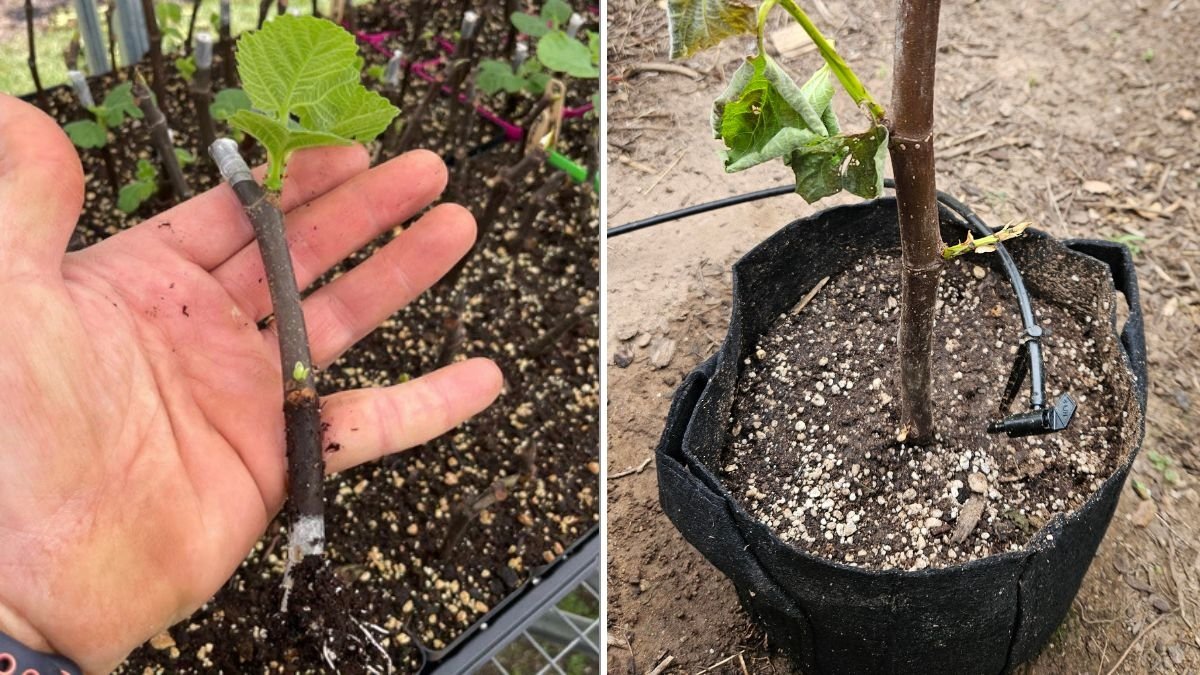
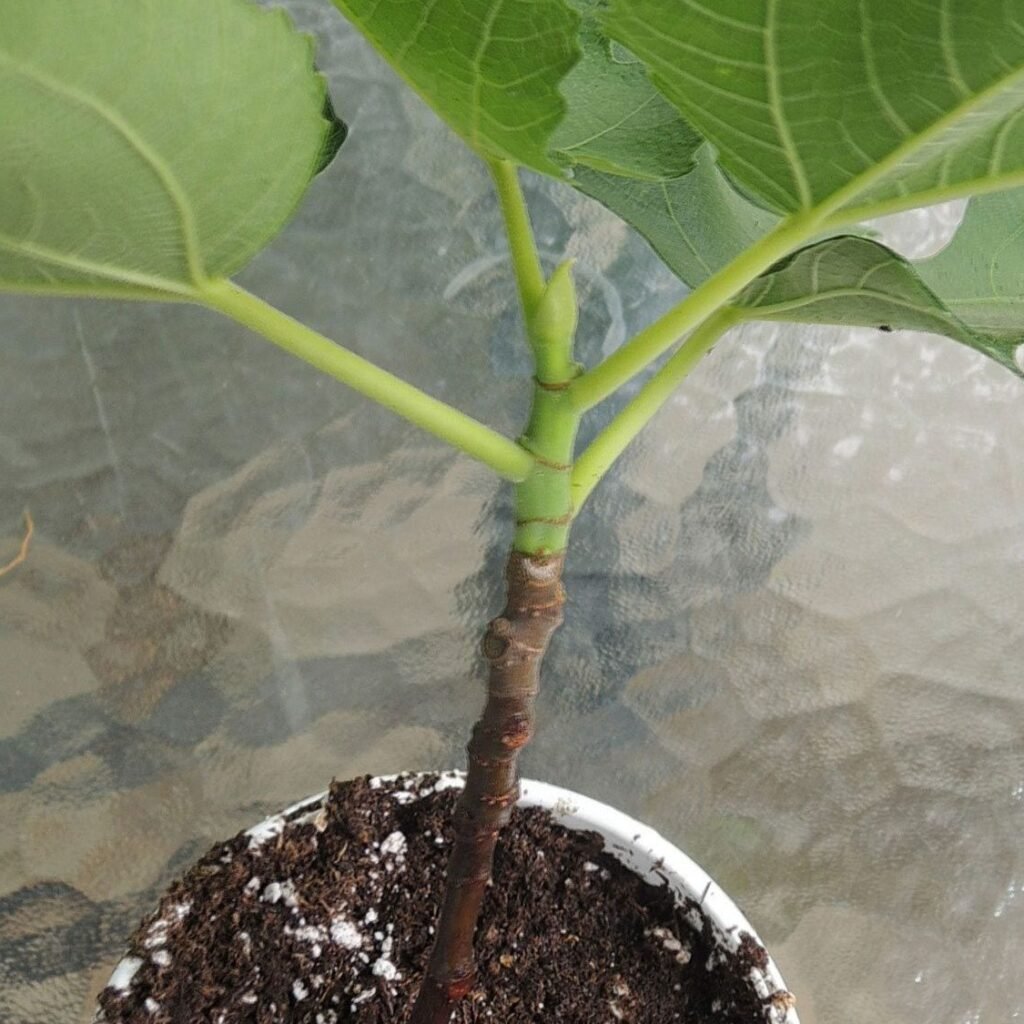
Step 8: Transplant Your Rooted Fig Cuttings
Transplant rooted cuttings into 6- to 8-inch pots filled with a nutrient-rich potting mix.
Transplanting steps:
- Handle gently to avoid damaging the roots.
- Plant each cutting at the same depth it was rooting.
- Water thoroughly.
- Place the pots in bright, indirect sunlight for the first week, then move to full sun as they adjust.
As your fig trees grow taller and stronger, they can be transplanted into:
- Larger containers (15–20 gallons) for patio gardening, or
- Directly into the ground, if you live in a warm climate.
Tip: Figs are hardy in USDA zones 7–11, but you can grow them indoors or in containers even in cooler areas.
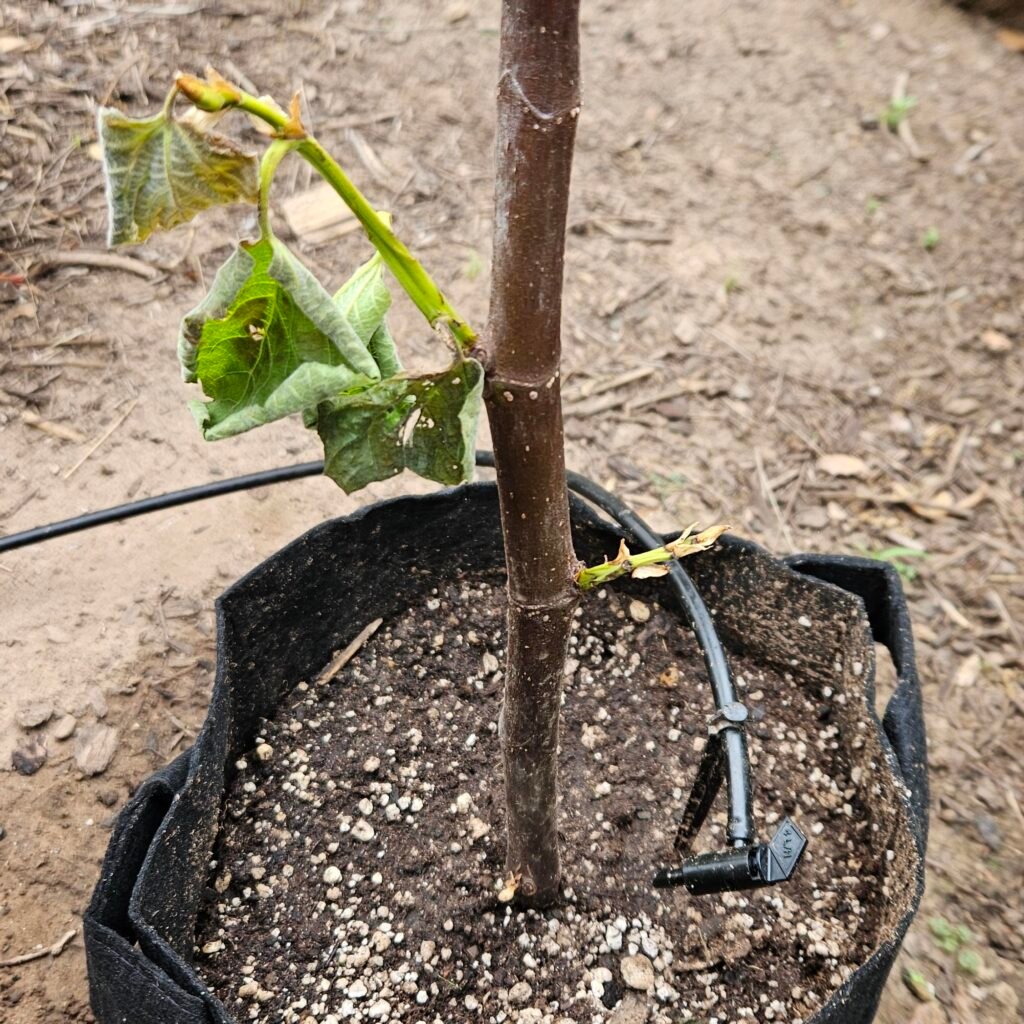
Step 9: Caring for Young Fig Trees
After transplanting, fig trees grow quickly with the right care.
Light:
Figs love full sun (at least 6–8 hours daily). If growing indoors, place near a south-facing window or use grow lights.
Water:
Keep the soil evenly moist but not waterlogged. Let the top inch of soil dry before watering again.
Fertilizer:
Feed every 4–6 weeks during the growing season with a balanced fertilizer (10-10-10) or compost tea. Avoid overfertilizing, which can produce leafy growth at the expense of fruit.

Pruning:
Pinch back the growing tip after 4–5 leaves appear. This encourages branching and a stronger, bushier shape.
Pests:
Watch for aphids, scale, and spider mites. A quick spray of neem oil or insecticidal soap usually keeps them under control.
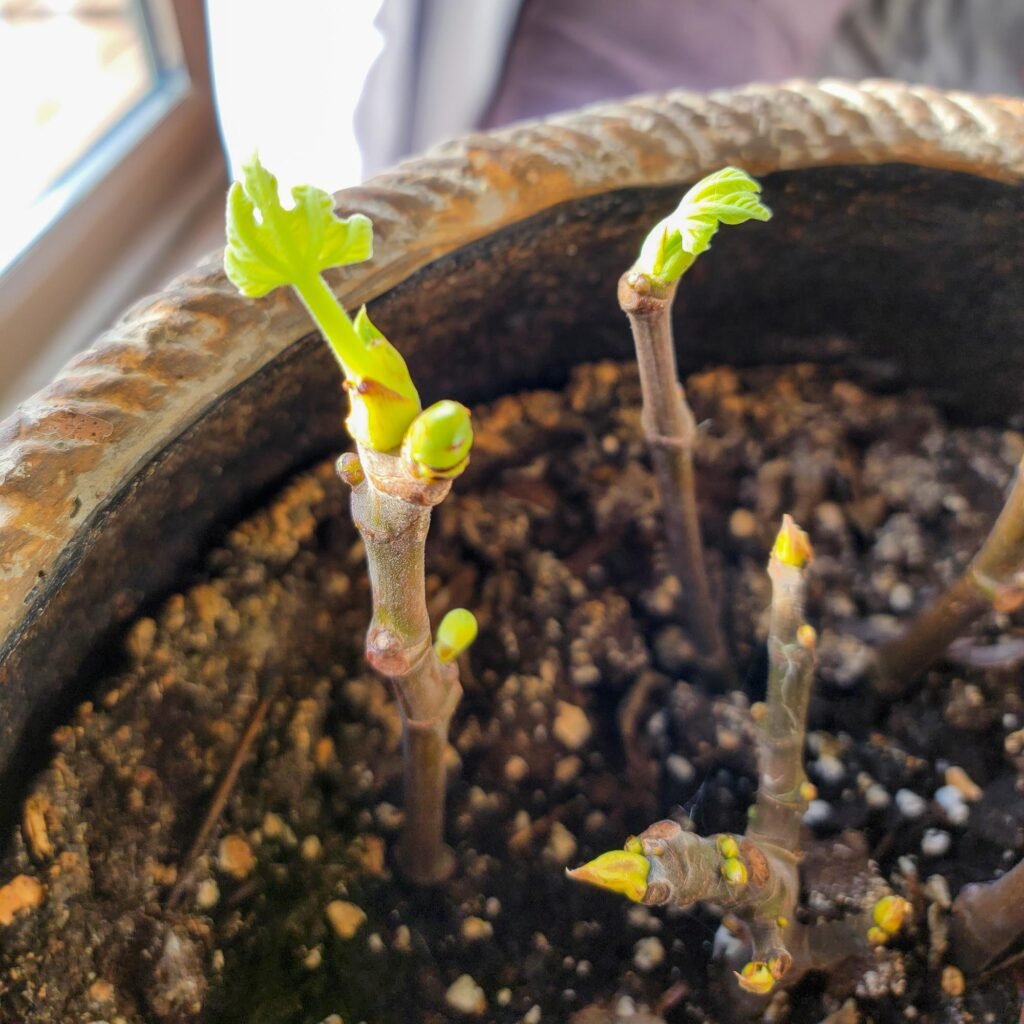
Step 10: Overwintering Your Fig Trees
If you live in a region where winters drop below freezing, your young fig trees will need protection.
Two simple options:
- Bring Indoors: Move container-grown figs indoors before frost. Place them in a cool, bright area (like a basement window). Water lightly every few weeks to keep roots alive.
- Outdoor Protection: If planted in the ground, wrap the trunk with burlap and mulch heavily around the base.
Figs naturally go dormant in winter, so don’t worry if they lose their leaves — they’ll regrow once spring arrives.
When Will Your New Fig Tree Bear Fruit?
Patience pays off! Most fig trees started from cuttings will begin producing fruit within 1–2 years, sometimes even sooner if rooted early in the season.
For best results:
- Keep the plant in full sun.
- Don’t let it dry out during the growing season.
- Repot every 2–3 years to refresh the soil and encourage healthy growth.
Bonus Tip: Once your fig tree is mature, you can repeat the process and propagate even more trees — they make thoughtful gifts for friends and family!

Common Problems (and Easy Fixes)
| Problem | Likely Cause | Quick Fix |
|---|---|---|
| Cuttings turn black or mushy | Overwatering or poor drainage | Let soil dry slightly, ensure drainage holes |
| No roots after 8 weeks | Low temperature or dry air | Increase warmth/humidity, mist regularly |
| Yellow leaves | Nutrient deficiency | Apply balanced fertilizer |
| Mold on soil surface | Poor ventilation | Remove cover briefly each day, reduce watering |
Final Thoughts
Starting a fig tree from cuttings isn’t just an affordable way to expand your garden—it’s a satisfying experience that connects you directly with the cycle of growth. With a few simple materials, patience, and regular care, you can transform a small branch into a thriving tree that provides shade, beauty, and delicious fruit for years to come.
Whether you’re growing your fig indoors on a sunny windowsill or outdoors in a pot, each leaf and branch is proof of your green thumb at work.
So go ahead — find a healthy fig tree, grab your pruning shears, and start growing your own. Before you know it, you’ll be harvesting sweet, sun-ripened figs straight from your very own tree.
Leave A Comment