When people think of peanuts, they often imagine large farm fields stretching to the horizon. But what if you could grow your own basket of fresh, crunchy peanuts — right from your balcony, backyard, or even your apartment balcony?
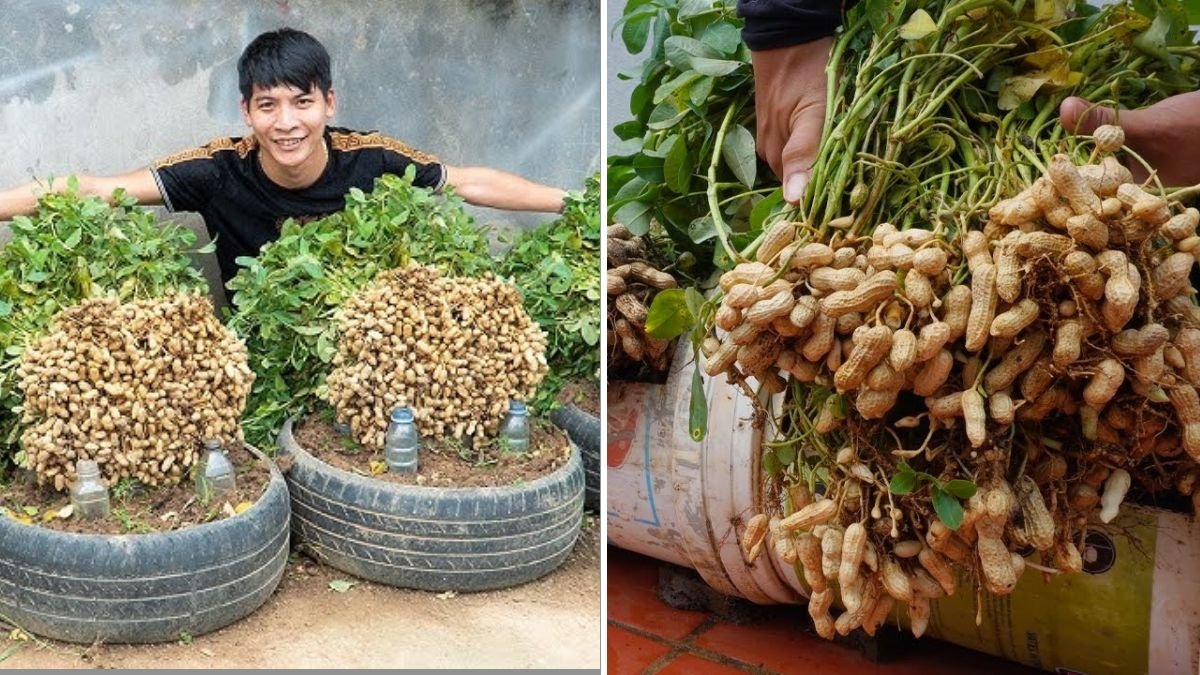
The viral YouTube video “[Home Gardening] Tips for Growing Peanuts at Home — Harvest a Whole Basket Without a Garden!” proves that it’s absolutely possible. With a few simple tricks, you can grow healthy, organic peanuts in containers — no big yard or farmland needed.
Peanuts (also called groundnuts) are one of the most rewarding crops to grow at home. They’re rich in protein, easy to care for, and surprisingly resilient. Plus, watching the unique process of how they grow — from a yellow flower that buries itself into the soil to form peanuts underground — is fascinating and fun for gardeners of all ages.
In this 1200-word guide, you’ll learn everything you need to know to grow peanuts at home successfully — from choosing seeds and soil to harvesting a basket full of nuts.
Step 1: Understanding How Peanuts Grow
Before we get our hands dirty, let’s understand what makes peanuts unique.
Unlike most plants that bear fruits or seeds above the ground, peanuts grow underground. The plant produces small yellow flowers that, after pollination, send pegs (called “gynophores”) into the soil. These pegs develop into peanut pods beneath the surface.
This means peanuts need loose, well-draining soil and space to spread horizontally — even when growing in containers.
Peanut plants belong to the legume family, which means they can fix nitrogen in the soil, improving soil fertility naturally. That’s great news for home gardeners who want a sustainable, organic setup.
Step 2: Choosing the Right Peanut Variety
There are several peanut varieties, but not all are ideal for container or home growing. Choose compact, early-maturing varieties that thrive in pots.
Recommended peanut types for home gardening:

- Virginia Peanuts: Large pods, mild flavor, suitable for warm climates.
- Spanish Peanuts: Small plants, high yield — great for containers.
- Valencia Peanuts: Sweet flavor, quick growth cycle (about 90 days).
- Runner Peanuts: Excellent for spreading growth, but needs more space.
If you’re growing peanuts for the first time, Spanish or Valencia peanuts are your best choice — they grow fast, adapt well to pots, and produce abundantly.
Step 3: Preparing the Seeds (Peanuts)
You can use raw, unroasted peanuts — but make sure they’re in-shell and untreated (no salt or preservatives).
Steps to prepare seeds:
- Remove the shells gently, keeping the thin, papery skin intact.
- Soak the peanuts in water overnight (8–10 hours).
- Drain and dry them for a few hours before planting.
This soaking step helps soften the seed coat and speeds up germination.
Step 4: Choosing the Right Container
Peanut plants need room for roots and pods to grow underground.
Ideal container features:
- Depth: At least 12–15 inches (30–40 cm).
- Width: 18–20 inches for spreading branches.
- Drainage: Several holes to prevent waterlogging.
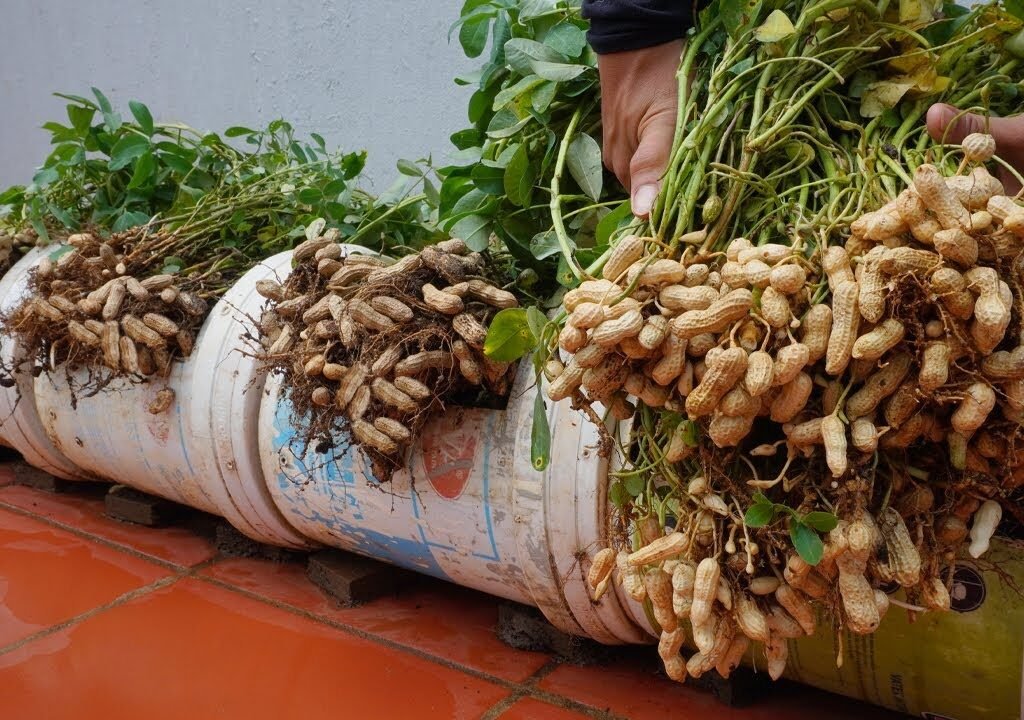
You can use plastic tubs, grow bags, buckets, or wooden boxes. If you have limited space, consider vertical stacking or railing planters for multiple batches.
Step 5: Preparing the Perfect Soil Mix
Peanuts need light, sandy, and loose soil for easy root penetration and pod formation.
Ideal soil mix:
- 40% garden soil or topsoil
- 40% compost or cow manure
- 20% coarse sand or coco peat
Mix well and fill your container, leaving 2 inches from the top.

Pro Tip: Avoid clay soil — it holds too much moisture and makes it hard for peanuts to develop properly.
Step 6: Planting Peanut Seeds
Now it’s time to sow!
Steps to plant:
- Place 2–3 seeds per container, spacing them 4–6 inches apart.
- Bury each seed about 2 inches deep.
- Cover lightly with soil and water gently.
Place the container in a sunny location — peanuts love warmth and full light.
Step 7: Sunlight and Temperature Requirements
Peanuts thrive in warm weather. They need 6–8 hours of direct sunlight every day.
Ideal growing conditions:
- Temperature: 22°C–32°C (72°F–90°F)
- Humidity: Moderate to low
- Light: Full sun
If you’re growing indoors, position the container near a south-facing window or use LED grow lights for consistent exposure.
Step 8: Watering Properly
Peanuts like consistent moisture — but they don’t like soggy soil.
Watering tips:
- Keep soil slightly moist, not wet.
- Water every 2–3 days in hot weather.
- Avoid overwatering, especially once flowering begins.
- Reduce watering near harvest time to let pods mature.
Too much water can rot developing peanuts underground, so aim for balance.

Step 9: Flowering and Peg Formation
About 30–40 days after planting, your peanut plants will start blooming with small yellow flowers.
This is where the magic begins:
- The flowers will self-pollinate.
- After pollination, the flower stem (peg) bends down into the soil.
- The peg burrows into the soil and starts forming peanut pods underground.
To support this stage, keep soil loose and soft — gently till the top layer around the plants after flowering.
Step 10: Fertilizing and Feeding Naturally
Peanuts fix their own nitrogen, so they don’t need much fertilizer. But they benefit from a few organic boosts.
Every 3–4 weeks:
- Add a handful of compost or vermicompost around the base.
- Mix wood ash or banana peel powder to provide potassium.
- Avoid nitrogen-rich fertilizers (they encourage leafy growth, not pods).
A balanced, organic feeding routine will ensure healthy plants and a rich harvest.
Step 11: Managing Pests and Common Problems
Peanut plants are generally hardy, but they can attract a few pests.
Common pests:
- Aphids
- Whiteflies
- Leaf miners
Natural control tips:
- Spray neem oil (1 tbsp per liter of water) every two weeks.
- Remove yellowing or damaged leaves.
- Maintain good airflow by not overcrowding plants.
If ants appear, sprinkle turmeric powder or coffee grounds around the soil — it deters them naturally.

Step 12: Growth Stages and Care
Peanuts take around 100–120 days to mature. During this period:
- Keep the soil loose for easy peg penetration.
- Trim excess branches if plants become too bushy.
- Watch for yellowing leaves — it’s a sign of maturity approaching.
You’ll notice the plant’s leaves start to dry as pods ripen underground.
Step 13: Harvesting Peanuts — The Fun Part!
Harvesting peanuts is one of the most satisfying parts of home gardening.
How to harvest:
- Stop watering 7–10 days before harvest.
- Loosen the soil gently using your hands or a garden fork.
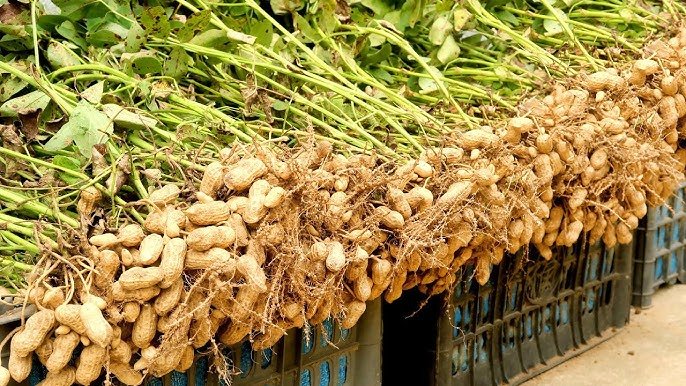
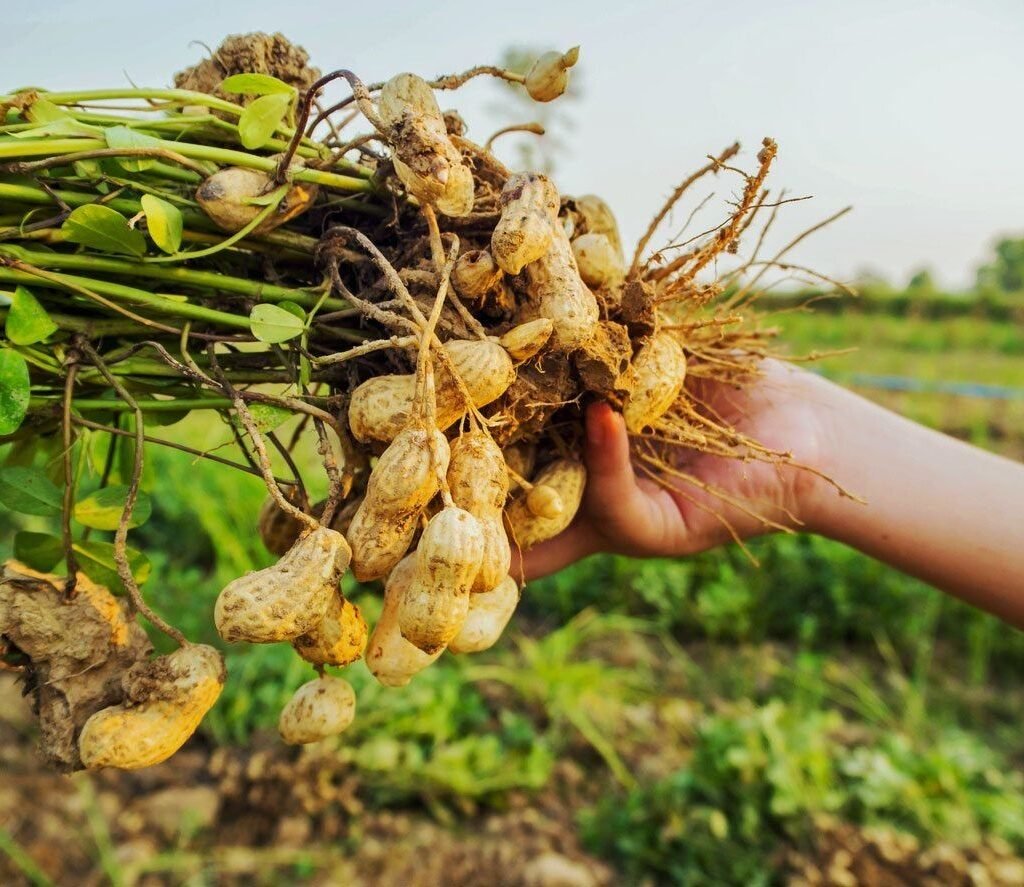
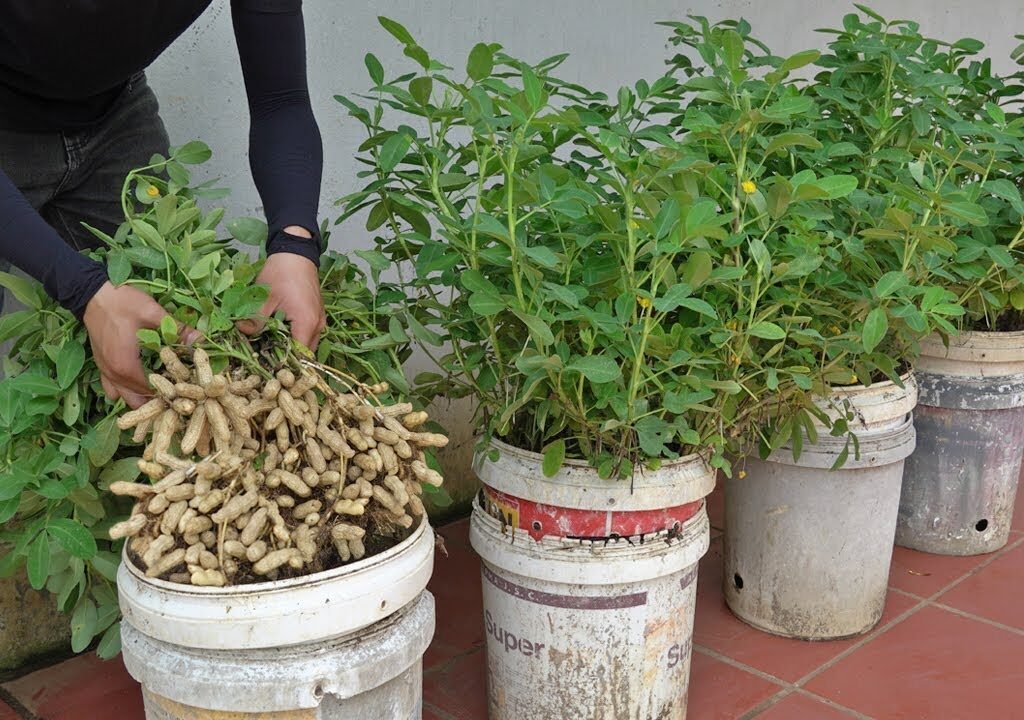
- Pull out the entire plant by the base.
- Shake off the soil — you’ll see bunches of peanuts clinging to the roots!
Lay the plants out in a warm, dry place for a week to cure. Once the pods are dry, remove them from the roots and store them in a cool, dry area.
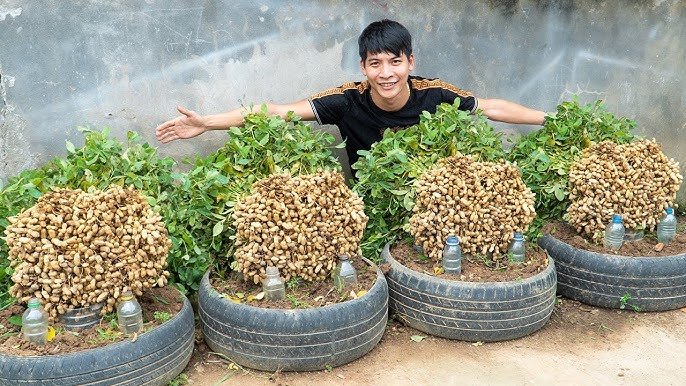
You’ll be amazed — even from a few pots, you can harvest a full basket of homegrown peanuts!
Step 14: Growing Peanuts Year-Round
You can grow peanuts all year in warm climates or indoors with grow lights.
For continuous harvests:
- Sow new seeds every 3 months.
- Reuse the same container after mixing in fresh compost.
- Rotate with leafy greens or herbs to maintain soil fertility.
In colder climates, start seeds indoors and move them outdoors once temperatures rise.
Step 15: Using and Storing Homegrown Peanuts
Fresh peanuts can be used in countless delicious ways:

- Boiled peanuts: Soft and flavorful snack.
- Roasted peanuts: Crunchy, aromatic treat.
- Peanut butter: Homemade, preservative-free goodness.
- Cooking: Add to curries, salads, and stir-fries for protein and texture.
To store them:
- Keep unshelled peanuts in a dry, airy container.
- Avoid plastic bags — moisture causes mold.
- For long-term use, roast and store in airtight jars.
Step 16: Benefits of Growing Peanuts at Home
Growing peanuts at home offers far more than just food — it’s a sustainable, rewarding experience.
Top benefits:
Fresh and organic: No chemicals, no preservatives.
Soil-friendly: Peanuts improve soil health naturally.
Low maintenance: Requires minimal care and water.
Space-saving: Perfect for balconies or small yards.
Economical: Saves money and reduces grocery waste.
Nutrient-rich: High in protein, fiber, and healthy fats.
Plus, homegrown peanuts taste better — richer, nuttier, and fresher than anything from the store!
Conclusion: Harvest a Basket of Peanuts Without a Garden
With the right approach, you don’t need a farm to enjoy a basket full of peanuts — just a sunny corner, a few containers, and a bit of patience.
The “[Home Gardening] Tips for Growing Peanuts at Home — Harvest a Whole Basket Without a Garden!” method shows that anyone can grow peanuts, even in small urban spaces. Watching those yellow flowers transform into buried treasures beneath the soil is one of the most rewarding gardening experiences ever.
So grab a handful of raw peanuts, prepare your pot, and start your peanut garden today. Soon, you’ll be pulling up your very own harvest — fresh, crunchy, and proudly homegrown.
Leave A Comment