Imagine cutting open a juicy, sweet melon that you grew yourself — right from your balcony or backyard. No farmland, no complicated setup — just a simple plastic container, a few seeds, and the right method.
That’s the promise of the viral YouTube video “How to Grow Melons Easily with High Productivity in Plastic Containers for Beginners.” It shows how anyone — even total beginners — can grow delicious, high-yield melons in limited space, using nothing more than creativity and care.
Melons are often thought of as field crops, but with the right approach, they thrive beautifully in containers. Whether it’s muskmelon, cantaloupe, or small watermelons, you can enjoy your own harvest without a garden.
This 1200-word blog post will walk you through everything you need to know — from choosing the best melon varieties for containers to achieving maximum productivity with minimal effort. Let’s get started!
Why Grow Melons in Containers?
Growing melons in containers is becoming increasingly popular — and for good reason.
Space-saving: Perfect for balconies, patios, or rooftops.
Control over soil & nutrients: You decide the quality — no pests or diseases from garden soil.
Mobility: You can move containers for better sunlight or rain protection.
High yield in small space: With proper care, you can grow 2–3 melons per plant — or more!
Container-grown melons are cleaner, fresher, and chemical-free — a delicious reward for your effort.
Step 1: Choosing the Right Melon Variety
Not all melons are suited for container growing. Choose compact, fast-growing varieties that don’t need excessive root space.
Best melon varieties for container gardening:
Cantaloupe (Muskmelon): Sweet aroma, moderate size, and adaptable.
Mini Watermelons (Sugar Baby, Bush Sugar Baby): Small fruit, high productivity.
Honeydew: Thrives in warm, sunny areas; smooth rind, sweet flesh.
Golden Melon: Compact and great for beginners.
If you’re starting for the first time, go with Cantaloupe or Sugar Baby watermelon — they’re reliable and forgiving.
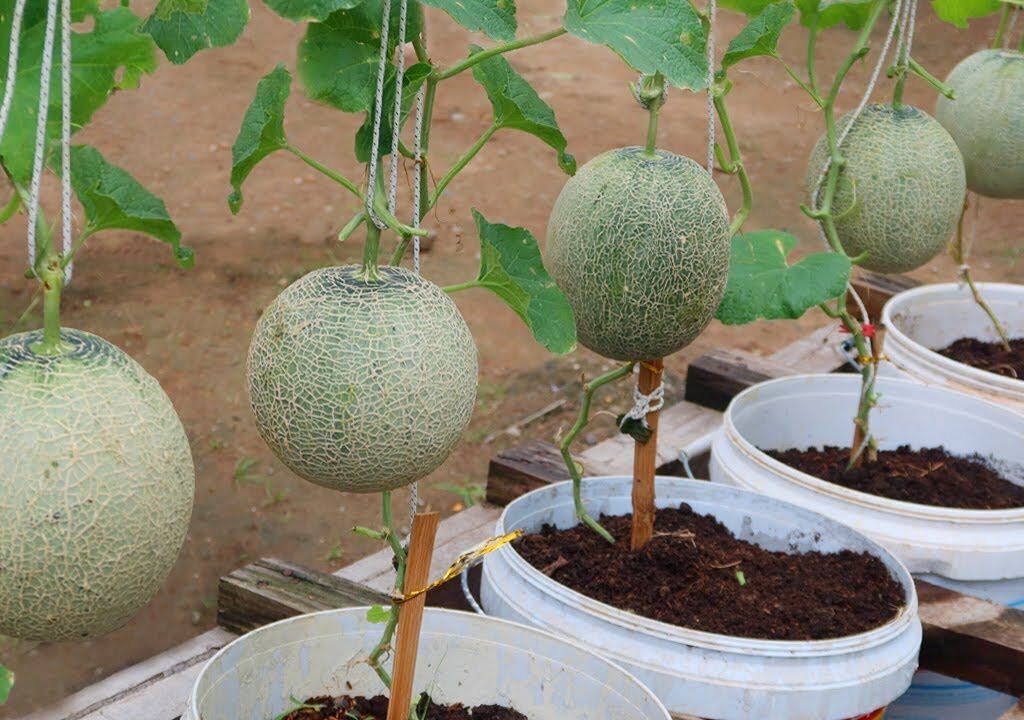
Step 2: Choosing the Right Container
Melons need enough root space to spread and develop fruits properly.

Ideal container features:
- Depth: Minimum 15–18 inches (38–45 cm)
- Width: At least 20 inches (50 cm) wide
- Drainage holes: Must-have to prevent root rot
- Material: Plastic, clay, or grow bags — plastic holds moisture best
You can even reuse old paint buckets, tubs, or plastic crates. Just make sure you drill drainage holes at the bottom.
Pro Tip: Place a saucer or tray underneath to collect excess water and prevent mess.
Step 3: Preparing the Ideal Soil Mix
Healthy soil = healthy melons. The goal is well-draining yet nutrient-rich soil that supports both foliage and fruit growth.
Best soil mix recipe:
- 40% garden soil or topsoil
- 30% compost or cow dung manure
- 20% coco peat or peat moss
- 10% sand or perlite (for aeration)
Mix well and fill your container, leaving 2 inches of space from the top.
Optional boost: Add a handful of bone meal or neem cake for extra calcium and pest protection.
Step 4: Seed Selection and Germination
You can use store-bought seeds or extract them from a ripe, organic melon.
To germinate seeds:
- Soak the seeds in warm water for 8–10 hours.
- Wrap them in a damp paper towel or cloth and keep them in a warm place (25–30°C).
- In 3–5 days, you’ll notice small white roots emerging — perfect for planting.
This pre-sprouting step increases germination rate and saves time.
Step 5: Planting Melon Seeds in Containers
Once sprouted, it’s time to plant!

Steps:
- Make small holes about 1 inch deep in the soil.
- Place one sprouted seed per hole (2–3 seeds per pot).
- Cover gently with soil and water lightly.
Once seedlings grow to 3–4 inches tall, thin them — keep only the healthiest plant and remove the weaker ones. This ensures maximum productivity.
Step 6: Providing Sunlight and Temperature
Melons are sun-loving plants that thrive in warm climates.
Light and temperature requirements:
Sunlight: 6–8 hours of direct sun daily.
Temperature: Ideal range is 25°C–35°C (77°F–95°F).
If you live in a cooler area, use a clear plastic cover or greenhouse setup to trap heat. Indoors, place the container near a south-facing window or use grow lights.
Step 7: Watering Melon Plants Properly
Melons need consistent moisture — but not soggy soil. Overwatering can cause root rot and split fruits.
Watering tips:
- Keep the soil moist but not waterlogged.
- Water deeply 2–3 times per week, depending on weather.
- Use mulch (dry leaves, straw, or coco husk) on top of the soil to retain moisture.
- Reduce watering once fruits start to mature — this increases sweetness.
Remember: uneven watering = cracked or bland melons.
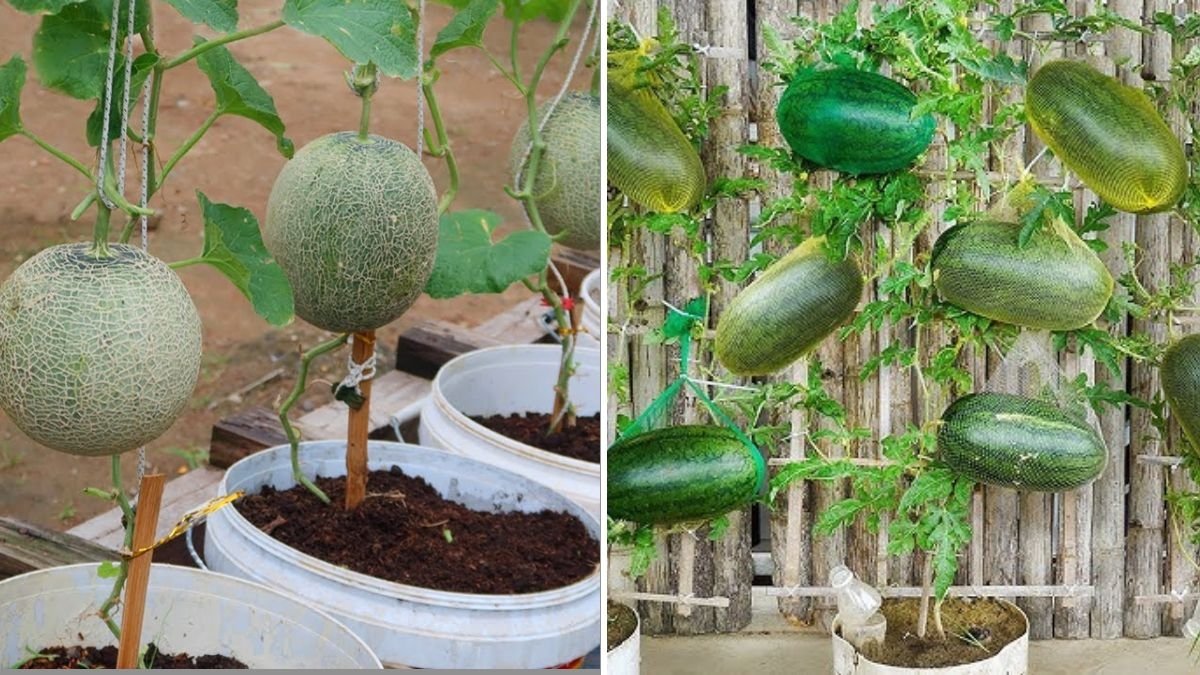
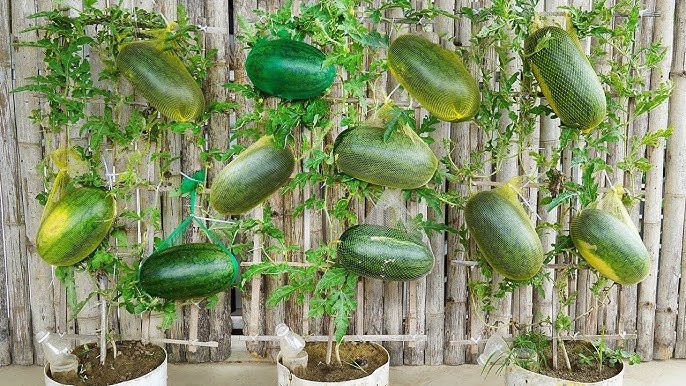
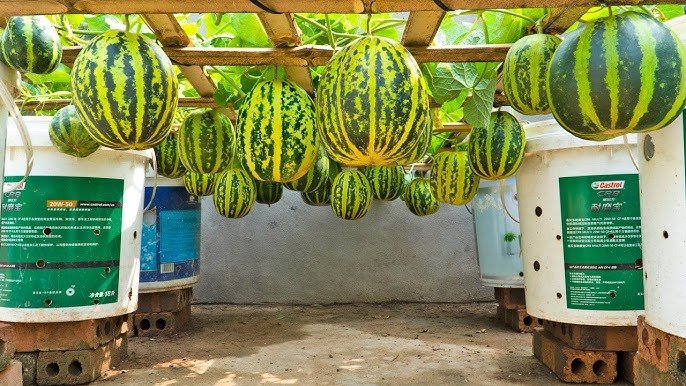
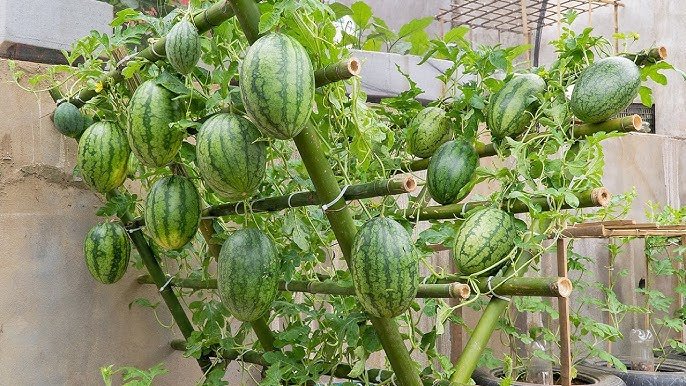
Step 8: Supporting the Vines — Trellis or Ground
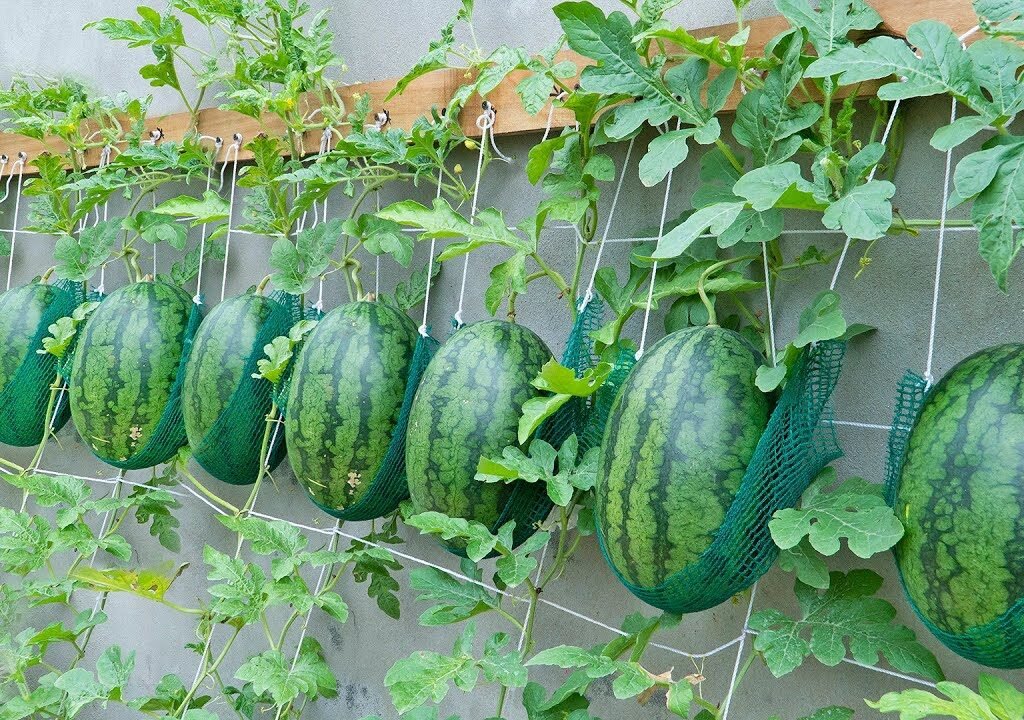
Melons naturally sprawl, so you can let them trail over the ground or train them upward for space efficiency.
Trellis setup benefits:
- Keeps fruits off the soil (prevents rotting).
- Improves air circulation and reduces pests.
- Saves space and looks neat.
Use bamboo sticks, wire mesh, or plastic netting to create a simple trellis. As fruits grow, support them using cloth or net slings to prevent breaking from weight.

Step 9: Fertilizing for Maximum Productivity
Melons are heavy feeders — they need balanced nutrition throughout their growth.
Fertilizing schedule:
- At planting: Mix compost and bone meal in soil.
- After 3 weeks: Add liquid compost tea or seaweed fertilizer.
- During flowering: Use potassium-rich fertilizer (banana peel fertilizer or wood ash).
- During fruiting: Feed once every 10 days with organic fertilizer.
Avoid too much nitrogen — it makes plants leafy but reduces fruit yield.
Step 10: Pollination — Key to Fruit Formation
Melons produce male and female flowers separately, so pollination is crucial. In open spaces, bees do the job naturally, but in balconies or indoors, you may need to hand-pollinate.
How to hand-pollinate:
- Identify male flowers (thin stems) and female flowers (tiny bulge behind petals).
- Use a small brush or cotton swab.
- Gently transfer pollen from male to female flower.
Within a few days, the small bulge behind the female flower will start to grow — your first melon!
Step 11: Managing Pests and Diseases Naturally
Common issues include aphids, whiteflies, and powdery mildew.
Organic prevention tips:
- Spray neem oil (1 tbsp per liter of water) every 10 days.
- Avoid wetting leaves when watering.
- Ensure good airflow around plants.
- Remove yellowing leaves regularly.
Healthy soil and sunlight go a long way in preventing most diseases naturally.
Step 12: Watching Growth and Fruit Development
Once pollination succeeds, you’ll see melons forming within 7–10 days.
During this stage:

- Avoid moving pots too much.
- Support growing fruits with cloth nets if grown vertically.
- Keep soil moist but not wet.
- Trim excess vines to direct nutrients to developing melons.
Within 40–60 days (depending on variety), your melons will start reaching maturity.
Step 13: Harvesting Melons — The Sweet Reward
Knowing when to harvest melons is key to getting the perfect taste.
Signs of ripeness:
- The fruit changes color (becomes more golden or deep green).
- The stem begins to crack or detach slightly.
- Sweet aroma near the stem area.
- When tapped, it sounds hollow.
Use scissors to cut the fruit — avoid pulling. Let it rest in shade for 1–2 days before enjoying its full sweetness.
One healthy plant can yield 2–4 medium-sized melons, even in containers.
Step 14: Growing Melons All Year Round
You can enjoy melons in every season with the right strategy:
Summer: Perfect for natural sunlight — rapid growth.
Monsoon: Protect plants from heavy rain; ensure drainage.
Winter: Grow indoors or under a transparent plastic cover.
For continuous harvests, sow new seeds every 2 months.
Step 15: Benefits of Homegrown Melons
Homegrown melons are fresher, safer, and more satisfying than store-bought ones.
Benefits include:
100% organic: No chemical fertilizers or pesticides.
Water-efficient: Containers use less water than ground farming.
Eco-friendly: Recycle plastic containers for sustainable gardening.
Perfect for beginners: Simple, low-maintenance process.
Cost-saving: Grow more, spend less!
And of course, the flavor — homegrown melons are sweeter and more aromatic, thanks to fresh ripening on the vine.

Step 16: Final Tips for Beginners
- Rotate containers between crops to maintain soil health.
- Keep your melons warm — they dislike cold weather.
- Always check drainage before watering.
- Talk to your plants! Monitoring daily helps you catch issues early.
Once you see your first ripe melon, you’ll understand why so many beginners fall in love with this process.
Conclusion: Your Balcony Can Be a Mini Melon Farm
You don’t need a big garden or fancy equipment — just a container, good soil, sunlight, and patience.
Following the method from “How to Grow Melons Easily with High Productivity in Plastic Containers for Beginners,” you can grow sweet, juicy melons all year long, even in small spaces.
From seed to harvest, this journey is not just about food — it’s about the joy of nurturing life. Watching vines grow, flowers bloom, and fruits form under your care is one of gardening’s greatest pleasures.
So grab a few seeds, a container, and start today — your homegrown melon harvest is just weeks away!
Leave A Comment