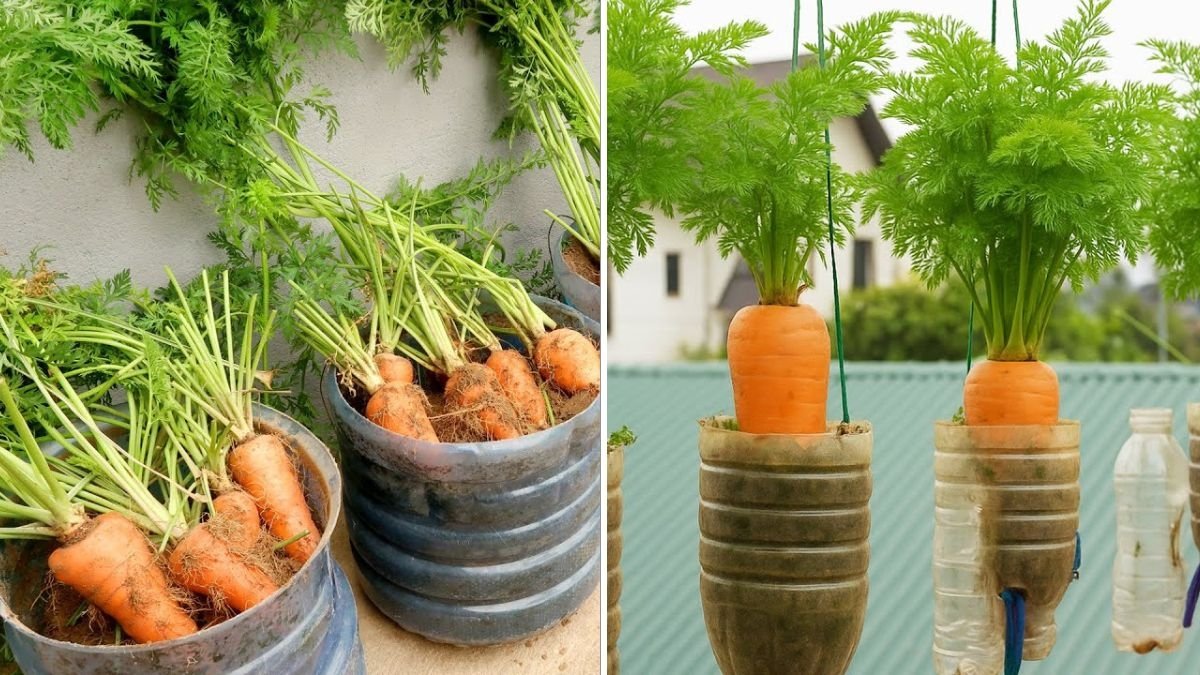
Imagine harvesting crisp, sweet, homegrown carrots — all from a few empty plastic bottles sitting on your balcony or kitchen windowsill. Sounds too good to be true? It’s not! Growing carrots in plastic bottles is one of the easiest, most eco-friendly, and space-saving ways to garden at home.
This simple method not only helps you grow fresh, organic carrots in small spaces, but it also gives a second life to plastic waste. Whether you live in an apartment, townhouse, or suburban home, this trick lets you enjoy the taste of real, homegrown carrots without needing a full garden.
In this step-by-step guide, you’ll learn how to grow carrots in plastic bottles—from setup to harvest—along with expert tips to get big, bright, and flavorful roots every time.
Why Grow Carrots in Plastic Bottles?
Carrots are one of America’s favorite vegetables—crunchy, colorful, and packed with vitamins A and C. Traditionally grown in garden beds, they can also thrive in containers if you provide the right soil depth and conditions.
Here’s why using plastic bottles is a genius move for home gardeners:
- Eco-Friendly: Reduces plastic waste by repurposing bottles that would otherwise end up in landfills.
- Space-Saving: Perfect for balconies, patios, and small urban spaces.
- Beginner-Friendly: No need for fancy equipment or large plots.
- Moisture Control: Clear bottles make it easy to monitor root growth and soil moisture.
- Healthy Harvests: Cleaner roots with fewer pests and diseases than ground-grown carrots.
It’s a smart and sustainable gardening hack that delivers both convenience and results.
Choosing the Right Carrot Variety
Not all carrots are created equal when it comes to growing in containers. Some varieties grow long and deep, while others stay short and sweet—perfect for plastic bottles.
Here are the best carrot types for bottle gardening:

- Thumbelina: Small, round carrots that mature quickly.
- Paris Market: Compact and flavorful, ideal for shallow containers.
- Little Finger: Sweet, tender, and only 3–4 inches long.
- Nantes: Cylindrical and smooth, perfect for medium-depth bottles.
Pro Tip: Choose short or medium-sized carrot varieties for the best results in plastic bottles.
What You’ll Need
You don’t need a big budget or professional gear. Here’s your simple supply list:
- 1 or more plastic bottles (1.5–2 liters)
- Sharp scissors or a knife
- Good-quality potting mix
- Compost or organic fertilizer
- Carrot seeds
- Watering can or spray bottle
- Sunny windowsill, balcony, or outdoor space
Optional: A small hand trowel and marker to label your bottles.
Step-by-Step Guide: How to Grow Carrots in Plastic Bottles
Step 1: Prepare the Bottles
Start by cleaning your bottles thoroughly to remove any residue. Cut off the top portion (about 3–4 inches) of the bottle to create an open planter.
Next, use a hot nail or scissors to make 5–6 small drainage holes at the bottom. Proper drainage is essential to prevent root rot.
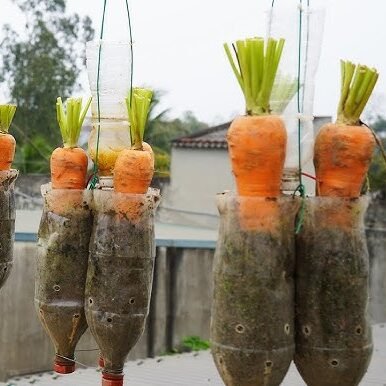
If you plan to hang the bottles, make two small holes near the rim and thread wire or twine through them for support.
Step 2: Prepare the Soil Mix
Carrots need light, loose, and well-draining soil for their roots to grow straight and long. A compact mix will result in short or deformed carrots.
Here’s a simple, proven recipe for the perfect carrot soil mix:

- 60% potting soil
- 30% fine sand or coco peat
- 10% organic compost
Mix these ingredients thoroughly and fill the bottle almost to the top, leaving about 2 inches of space from the rim.
Pro Tip: Avoid using heavy clay soil — it restricts root growth.
Step 3: Sow the Carrot Seeds
Sprinkle carrot seeds evenly on the soil surface. Since the seeds are tiny, try mixing them with a bit of sand to spread them more evenly.
Cover the seeds with a thin layer of soil (¼ inch thick) and mist gently with water. Don’t bury them too deep—carrots need light to germinate.
Place the bottles in a sunny area where they’ll receive at least 6 hours of sunlight daily.
Step 4: Water and Care
Keep the soil moist but not soggy. Overwatering can cause the seeds to rot, while underwatering can stunt growth.
Water gently using a spray bottle or watering can with small holes to avoid washing away seeds.
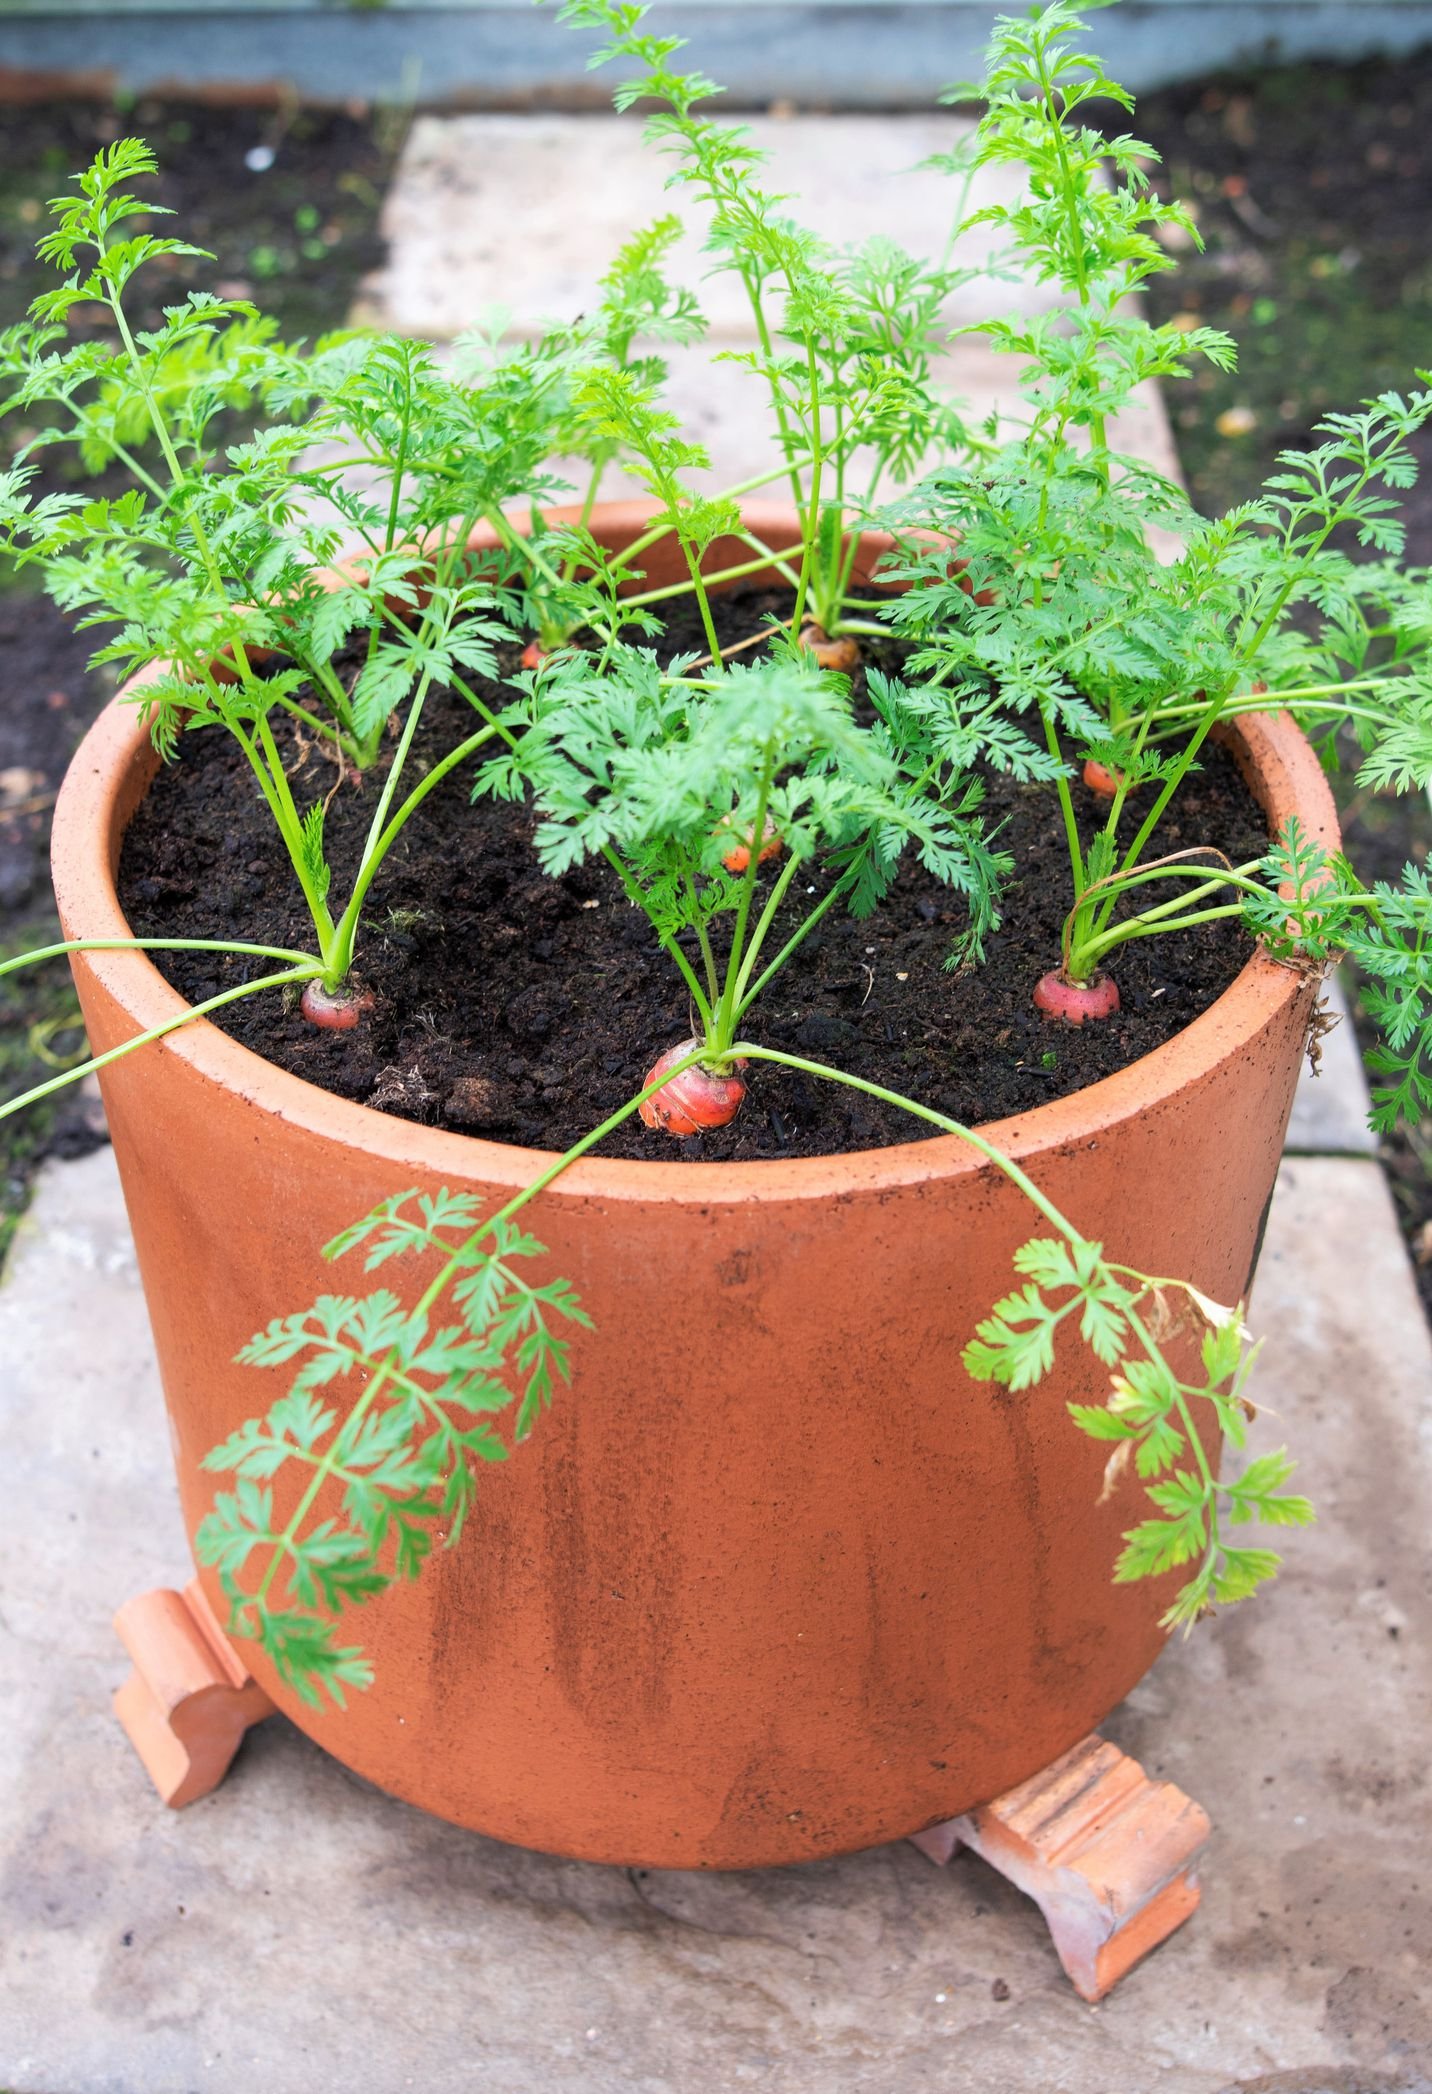
During the first 7–10 days, you’ll see tiny sprouts emerging. At this stage, maintain consistent moisture and warmth (ideally 60–70°F).

Step 5: Thin the Seedlings
Once your seedlings reach about 2 inches tall, thin them out to prevent crowding. Leave one plant every 2 inches apart.
Don’t throw away the thinned seedlings—they’re edible and can be added to salads or smoothies!
Proper spacing allows each carrot root to develop fully, ensuring big, well-shaped carrots instead of thin, tangled ones.
Step 6: Feed and Maintain Growth
After 2–3 weeks, when the plants are established, feed them with a diluted liquid fertilizer or compost tea every 10–14 days.
Avoid fertilizers high in nitrogen — they promote leafy tops instead of strong roots. Instead, choose a balanced fertilizer with more phosphorus and potassium for root development.
Keep rotating the bottles every few days for even sunlight exposure, especially if they’re indoors.
Step 7: Watch for Pests and Problems
Carrots are relatively pest-free, but container-grown plants can still attract a few insects.
Common issues include:

- Aphids: Spray with neem oil or soapy water.
- Root rot: Avoid overwatering and ensure good drainage.
- Leggy growth: Caused by insufficient sunlight—move to a sunnier spot.
Healthy carrot plants will have lush, green tops and steady upward growth.
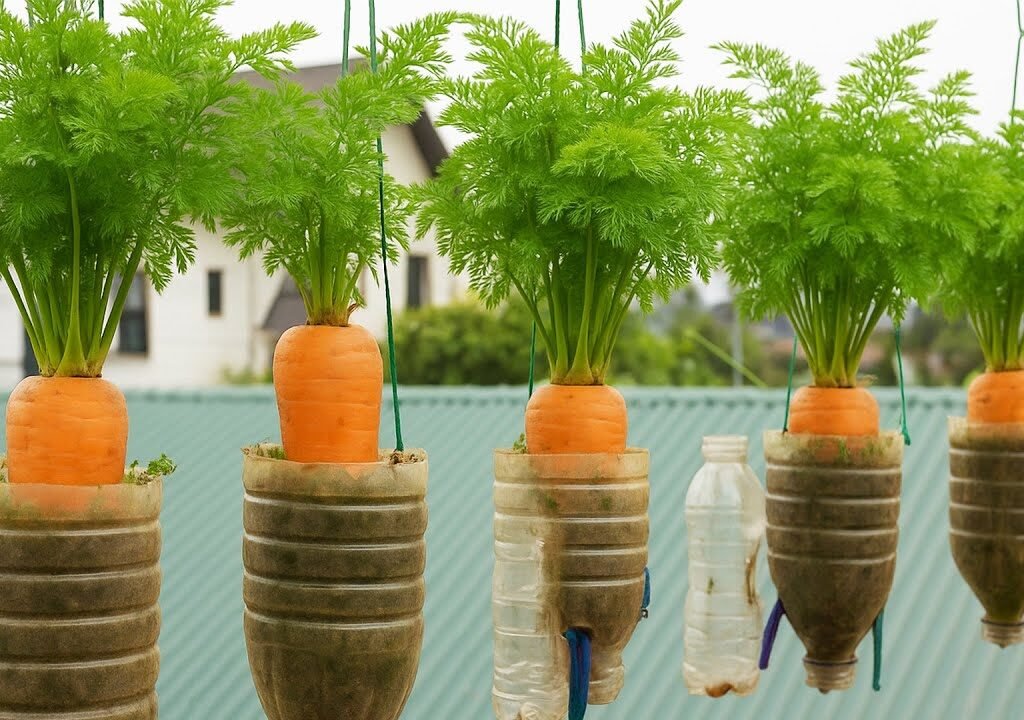
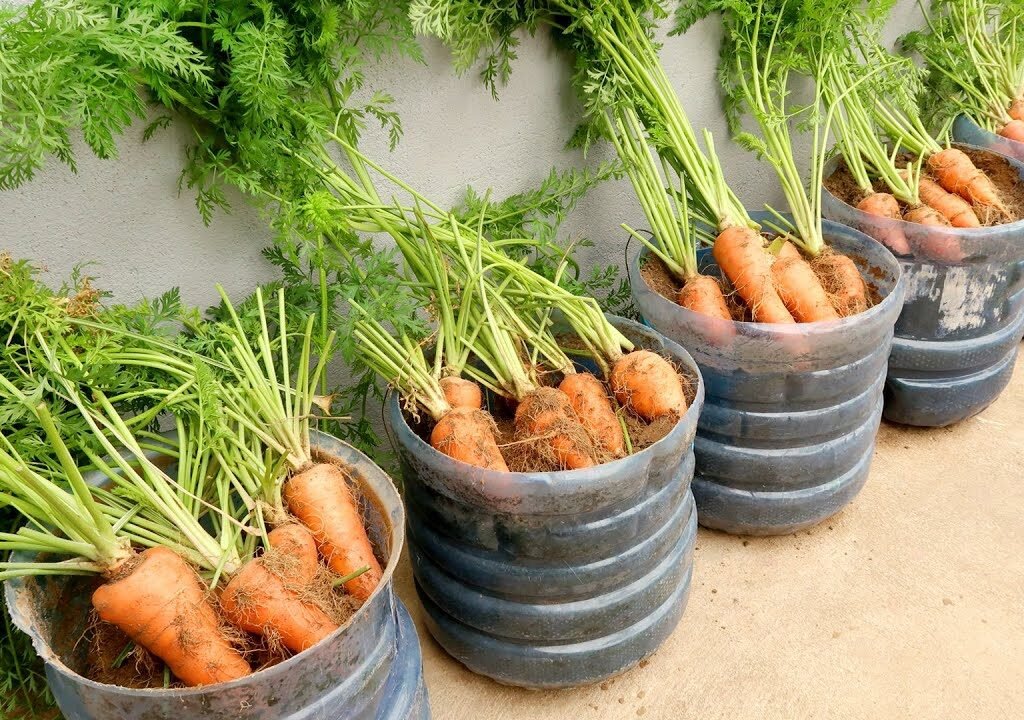
Step 8: Harvest Time!
Depending on the variety, carrots are ready to harvest in 60–80 days after sowing. You’ll know it’s time when you see the orange or white tops slightly poking out of the soil.
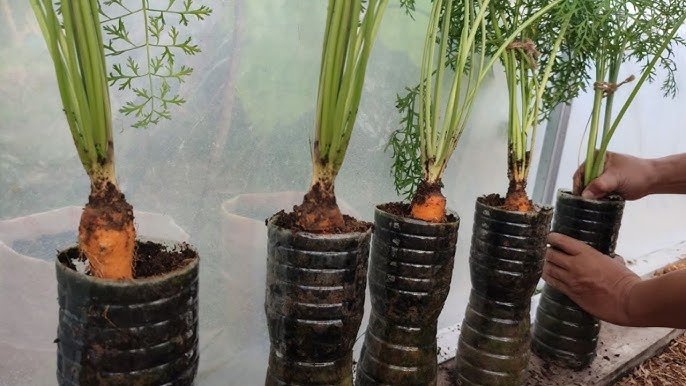
To harvest:
- Loosen the soil gently with your fingers.
- Hold the base of the leaves and pull upward slowly.
- Rinse and enjoy your crunchy, sweet homegrown carrots!
Pro Tip: For baby carrots, you can harvest a few earlier (after 45 days) for tender, flavorful roots.
Tips for Bigger, Healthier Carrots
- Use Deep Bottles:
The deeper your container, the longer your carrots can grow. Try cutting a 2-liter bottle vertically to create more root depth. - Don’t Let Soil Dry Out:
Uneven watering causes split or misshapen carrots. Keep soil evenly moist. - Avoid Overcrowding:
Give each seedling enough room—spacing is key to producing fat, healthy roots. - Fertilize Smartly:
Go easy on nitrogen; too much makes lush tops but small roots. Use potassium-rich fertilizers instead. - Harvest on Time:
Leaving carrots in the soil too long can make them tough and woody. - Reuse Bottles:
After harvesting, refill the bottles with fresh soil and sow new seeds for a continuous supply!
Eco-Friendly and Budget-Friendly Gardening
Growing carrots in plastic bottles isn’t just fun—it’s a sustainable lifestyle choice.
You’re reducing plastic waste, saving space, and producing your own organic food at home. Plus, it’s a great DIY gardening project for kids and families, teaching them how food grows while promoting recycling.
This method also works beautifully for other root and leafy vegetables like:
- Radishes
- Beets
- Spinach
- Lettuce
With a few bottles and a bit of creativity, you can turn any balcony or window into a thriving mini garden.

Common Mistakes to Avoid
| Mistake | Problem Caused | Solution |
|---|---|---|
| Using heavy soil | Roots can’t expand properly | Use light, sandy soil |
| Planting seeds too deep | Poor germination | Cover seeds lightly |
| Overwatering | Rotting roots | Ensure good drainage |
| Not thinning seedlings | Crowded, deformed roots | Space plants 2 inches apart |
| Lack of sunlight | Weak growth | Provide 6+ hours of sun daily |
The Joy of Homegrown Carrots
There’s nothing quite like pulling your first homegrown carrot out of the soil — bright, crunchy, and bursting with flavor. And the best part? You’ve grown it sustainably, using nothing more than a recycled bottle and a bit of care.
This DIY project proves that you don’t need a big garden to grow real food. With just a few plastic bottles, you can harvest carrots all year long — fresh, chemical-free, and delicious.
So next time you finish a soda or water bottle, don’t toss it out — turn it into your next gardening success story!
Leave A Comment