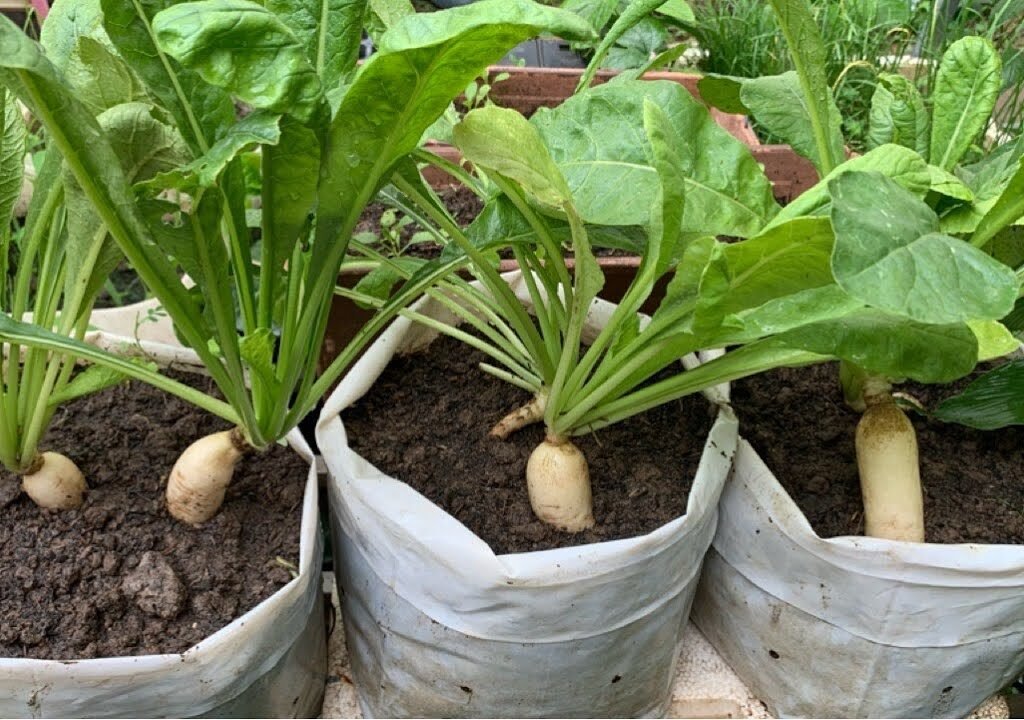
If you’ve ever dreamed of harvesting big, white, crunchy radishes straight from your balcony, patio, or backyard, this guide is for you. You don’t need a large garden or fancy tools to enjoy homegrown radishes — just a simple planter, good soil, and a few smart growing tricks.
Radishes are one of the easiest root vegetables to grow, and with the right planter setup, you can grow a lot of large, sweet white radishes even in small spaces. Whether you’re new to gardening or an experienced grower, this step-by-step method will help you achieve healthy, high-yielding plants that produce beautiful radishes every time.
Let’s explore how to grow big, white radishes in containers — the simple, space-saving way to enjoy fresh veggies all season long.
Why Grow White Radishes in a Planter?
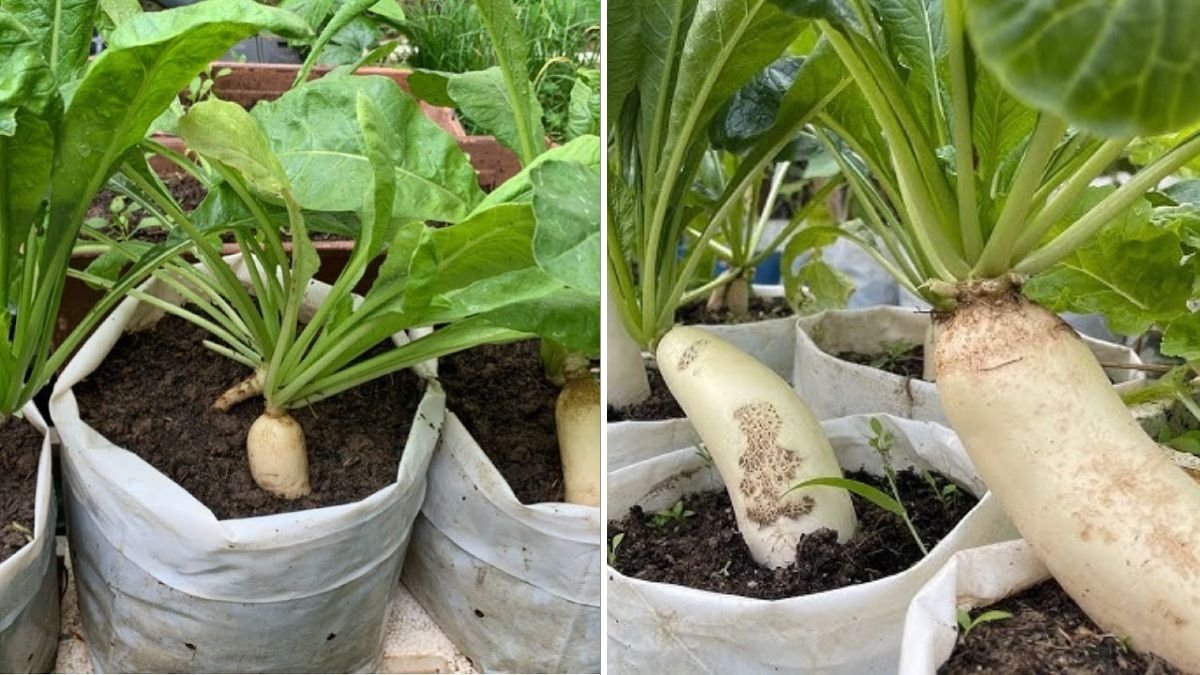
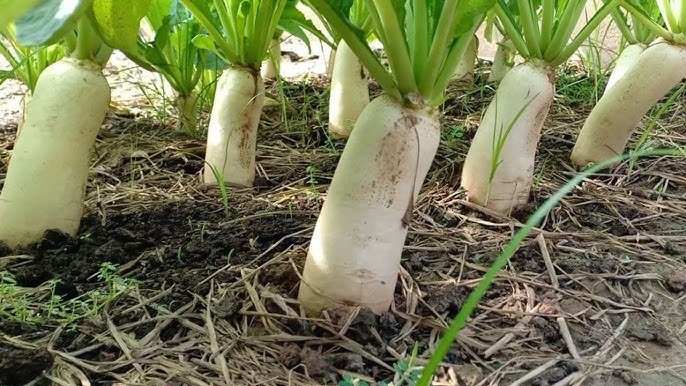
White radishes — often called Daikon or Japanese radishes — are long, crisp, and mildly sweet. Unlike the small red radishes often found in grocery stores, these varieties can grow up to 10–14 inches long when given the right conditions.
Here’s why growing them in planters is such a great idea:
- Space-Saving: Perfect for balconies, patios, or small backyards.
- Clean and Controlled: Planters reduce pest issues and allow better soil management.
- Year-Round Growing: Easily move containers to control light and temperature.
- Perfect for Beginners: Simple, low-maintenance, and fast-growing (ready in 30–60 days).
- Health Benefits: Rich in vitamin C, fiber, potassium, and digestive enzymes.
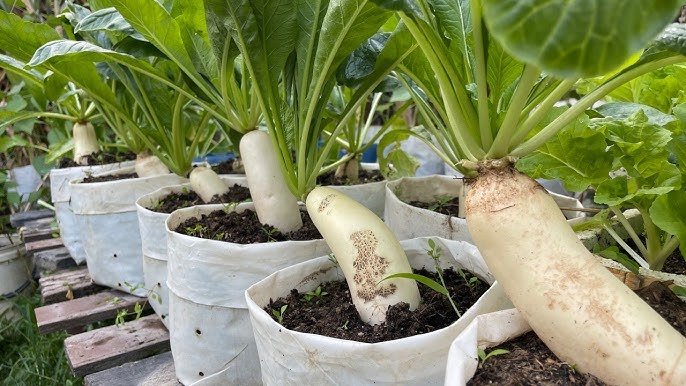
Container gardening makes it easy to grow these nutritious roots even if you don’t have a traditional garden plot.
Choosing the Right Variety
Before planting, it’s important to choose the right white radish variety for your space and climate. Some popular types include:
- Daikon Minowase: A classic long white radish known for its size and mild flavor.
- Snow Belle: Small, round white radishes that mature quickly.
- Sakurajima Giant: One of the largest radish types, great for gardeners looking for impressive yields.
- Icicle Radish: Slender, 5-inch roots that grow well in small planters.
For container gardening, Icicle and Minowase are the best options because they grow deep and uniform without needing too much space.
What You’ll Need
To grow your own batch of white radishes in planters, gather these basic supplies:
- A deep planter or container (at least 12–15 inches deep)
- Good-quality potting soil (loose and well-draining)
- Organic compost or aged manure
- Radish seeds (white variety of your choice)
- Watering can or spray bottle
- A sunny location (balcony, deck, or windowsill)
Optional: Garden gloves, trowel, and mulch (like straw or coco coir).
Step-by-Step Guide: How to Grow Big White Radishes in a Planter
Step 1: Prepare the Planter
Choose a deep container — radishes are root crops, so depth is more important than width. The container should be at least 12 inches deep and have good drainage holes.
Fill it with a mix of 70% loose garden soil and 30% compost. Avoid heavy clay soil, as it can restrict root growth. The goal is a soft, airy texture that allows roots to expand easily.
Step 2: Sow the Seeds
Once your soil is ready:
- Make small holes about ½ inch deep and 2 inches apart.
- Drop one seed in each hole and cover lightly with soil.
- Water gently to keep the soil evenly moist.
You can plant multiple rows if your planter is wide enough. Keep about 2 inches of space between each row to ensure proper airflow and root growth.
Tip: White radishes don’t like being transplanted — always sow seeds directly into the planter instead of starting them in seed trays.
Step 3: Provide Sunlight and Water
Place your planter in a sunny spot that receives at least 5–6 hours of direct sunlight daily.
Radishes love sunlight but can tolerate light shade in the afternoon, especially in warmer regions.
- Water regularly — the soil should remain slightly moist but never waterlogged.
- If you’re in a hot climate, water daily in small amounts.
- Overwatering can cause the roots to crack, while underwatering can lead to spongy, bitter radishes.
Maintaining consistent moisture is key to getting big, crisp roots.
Step 4: Thin the Seedlings
After about 5–7 days, the seedlings will sprout. When they reach 2–3 inches tall, thin them out so that each plant is spaced about 3 inches apart.
This ensures that every radish has enough space to develop large, healthy roots. The thinned seedlings can be eaten as microgreens — a nutritious bonus from your planter garden!
Step 5: Feed the Plants
White radishes grow fast and don’t need heavy feeding, but a little nutrient boost can make a big difference in root size and flavor.
Feed them once with a mild organic fertilizer (like compost tea, diluted fish emulsion, or vermicompost extract) about 2 weeks after germination.
Avoid high-nitrogen fertilizers — they promote leafy growth instead of large roots. Aim for a balanced nutrient mix with phosphorus and potassium to encourage strong, deep root formation.
Step 6: Maintain and Monitor Growth
To ensure the best results:
- Keep the soil loose — gently stir the surface once a week to improve airflow.
- Mulch lightly with straw or shredded leaves to prevent soil drying.
- Watch for pests like aphids or flea beetles. Spray neem oil or soapy water if needed.
Radishes grow quickly, and within 25–30 days, you’ll start seeing the white tops peeking through the soil — a sign they’re nearly ready to harvest!
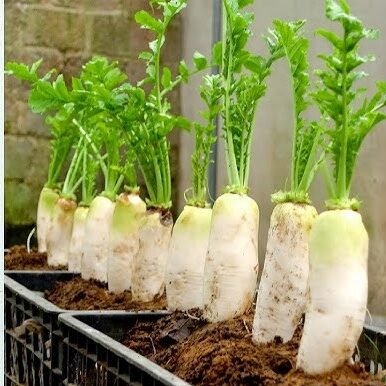
Step 7: Harvesting Your White Radishes
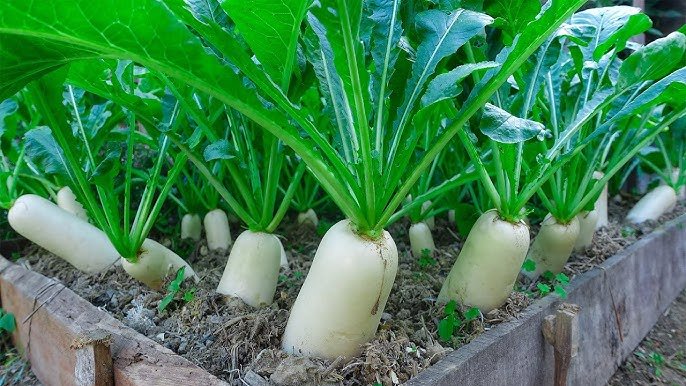
Harvest time depends on the variety, but most white radishes are ready in 30–60 days. The roots should be firm, smooth, and about 6–10 inches long for standard varieties.
Here’s how to harvest them:
- Gently loosen the soil around the root using your fingers or a small trowel.
- Grasp the base of the plant and pull straight up.
- Avoid yanking, as it may break the root.
After harvesting, rinse the radishes in cool water and store them in the refrigerator for up to a week. For best taste and crunch, use them fresh in salads, stir-fries, or pickled dishes.
Tips for Growing Bigger and Healthier White Radishes
- Deep Containers = Big Roots
The deeper the soil, the larger your radishes will grow. Use containers at least 12–15 inches deep for full-size Daikon. - Consistent Moisture
Fluctuating moisture levels cause cracks or irregular roots. Keep the soil evenly moist throughout. - Cooler Weather Grows Sweeter Radishes
White radishes grow best in cool weather (50°F–70°F). In the U.S., the ideal planting seasons are early spring and fall. - Avoid Overcrowding
Each plant needs space for its root to expand — proper thinning is key for big radishes. - Harvest on Time
Don’t wait too long — overripe radishes become woody and lose sweetness.
Troubleshooting Common Problems
| Problem | Cause | Solution |
|---|---|---|
| Small roots | Overcrowding or poor sunlight | Thin seedlings and ensure full sun exposure |
| Cracked roots | Uneven watering | Maintain steady moisture levels |
| Pest damage | Aphids, leaf miners | Spray neem oil weekly |
| Yellow leaves | Nutrient deficiency | Add a light compost or seaweed feed |
| Spongy texture | High temperature or over-maturity | Harvest earlier and keep planters in partial shade |
The Benefits of Growing Radishes in Planters
- Accessibility: Easy to move and manage, especially for urban gardeners.
- Clean Harvest: Roots stay free of pests and soil diseases.
- Continuous Crop: Sow new seeds every 2 weeks for a steady supply.
- Eco-Friendly: Reuse planters and organic compost to reduce waste.
It’s a sustainable, rewarding way to grow fresh produce right where you live — no large plot required.
Conclusion: From Planter to Plate
Growing big, white radishes in a planter is one of the easiest and most satisfying gardening projects you can try. With just a bit of care, sunshine, and consistent watering, you’ll enjoy crisp, juicy radishes that taste far better than anything from the store.
This method works beautifully for urban gardeners, beginners, or anyone wanting fresh vegetables without the need for a full garden. So grab a deep planter, sow your seeds, and in just a few weeks, you’ll be harvestng fresh, organic white radishes — straight from your balcony to your table
Leave A Comment