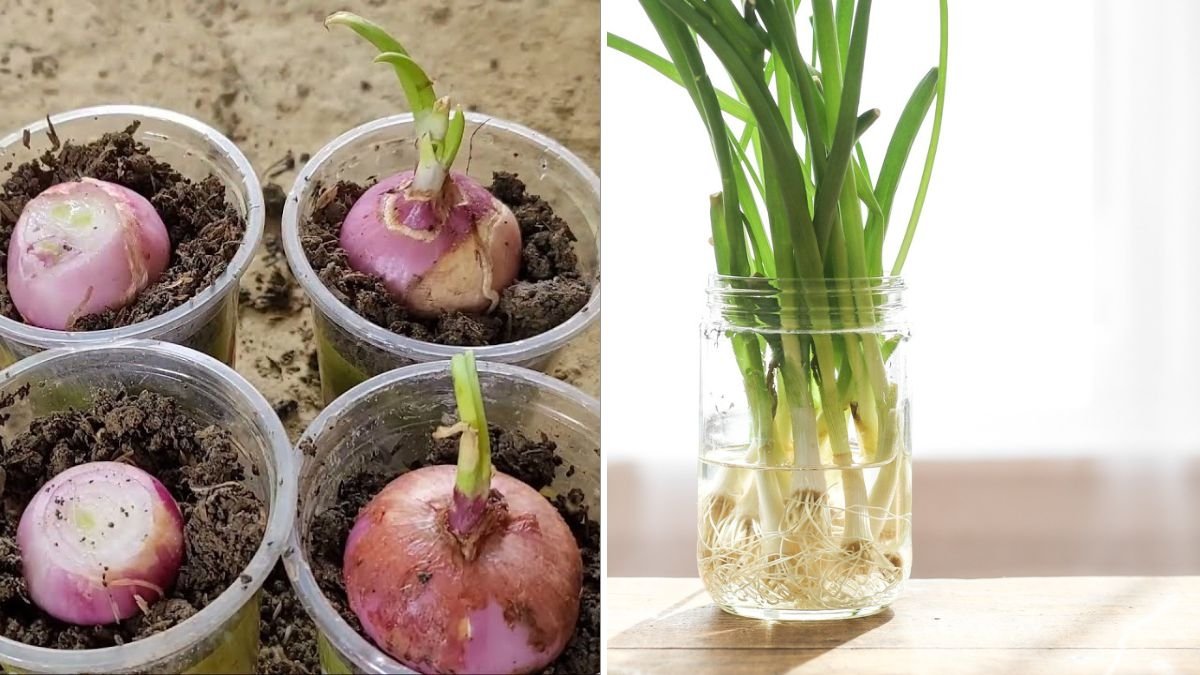
If you think you need a backyard or a full garden bed to grow onions, think again! Growing onions in plastic cups is a simple, space-saving, and affordable method that anyone can do — even if you live in an apartment or have limited space.
This smart method, popularized by NY Sokhom’s practical gardening techniques, shows how you can grow Indian or red onions indoors using basic materials you already have at home.
Whether you’re a beginner gardener or an urban dweller looking to grow your own food, this guide will walk you step-by-step through the process of growing onions in plastic cups — from selecting bulbs and preparing the soil to watering, fertilizing, and harvesting.
By the end of this article, you’ll have the confidence to start your own mini onion garden right on your windowsill — saving money while enjoying fresh, flavorful onions all year round!
1. Why Grow Onions in Plastic Cups?
Onions are one of the most essential ingredients in every American kitchen. They flavor soups, salads, stir-fries, and countless dishes — and growing them at home ensures freshness, organic quality, and a satisfying gardening experience.
Benefits of Growing Onions in Plastic Cups:
- Space-efficient: Perfect for balconies, kitchens, or windowsills.
- Low-cost setup: Uses recycled plastic cups and minimal soil.
- Fast results: You’ll see green shoots in just 5–7 days!
- Pest-free environment: Easier to control pests indoors.
- Great for kids and beginners: Simple, fun, and educational project.
This method is ideal for Indian onions, red onions, or yellow onions, all of which adapt well to container or cup gardening.
2. Choosing the Right Onion Type
Not all onions are the same when it comes to growth rate and bulb size. For plastic cup gardening, it’s best to choose small to medium-sized onion varieties that thrive in limited soil space.
Best Onion Varieties for Cup Growing:
- Red Onions (Indian type): Flavorful and fast-growing.
- Yellow Onions: Sweet and mild flavor; great for salads.
- Spring Onions (Green onions): Perfect for continuous harvesting.
- Shallots: Compact and excellent for container growing.
Tip: Choose firm, healthy bulbs — avoid any that are soft, moldy, or sprouting excessively before planting.
3. Materials You’ll Need
You don’t need fancy gardening tools or pots. Just a few basic items will do!
Materials List:
- Plastic cups (16–20 oz size, with drainage holes)
- Potting mix or garden soil
- Organic compost or vermicompost
- Onion bulbs or sets
- A tray or shallow container (to hold the cups)
- Watering can or spray bottle
Optional: Baking soda, neem oil, or cinnamon powder for pest prevention.
4. Preparing the Plastic Cups
Proper cup preparation ensures healthy root growth and prevents waterlogging — one of the biggest problems in container gardening.
Step-by-Step Cup Prep:
- Take clean, transparent or semi-transparent plastic cups.
- Using a heated nail or small drill, poke 4–5 small drainage holes at the bottom.
- Place all cups on a tray to collect excess water.
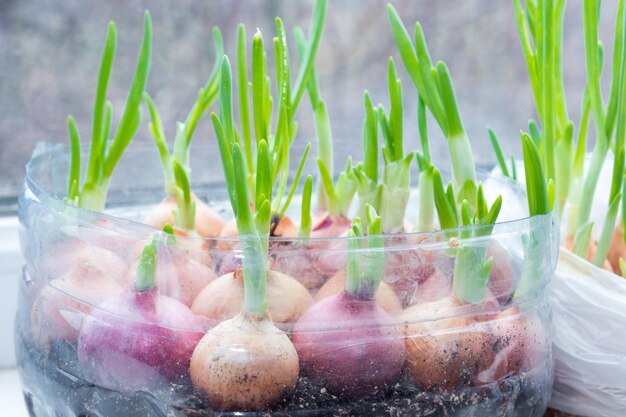
- If you want to grow multiple onions, line up 6–10 cups for a mini garden setup.
You can even decorate your cups or label them with onion types — fun for families or school gardening projects!
5. Preparing the Soil Mix
Onions need loose, fertile, and well-draining soil to form bulbs efficiently.
Best Soil Mix for Onions in Cups:
- 50% potting soil
- 30% compost or cow manure
- 20% perlite, coco peat, or sand
Mix thoroughly until the texture feels light and crumbly.
Pro Tip: Add a teaspoon of bone meal or wood ash for an extra phosphorus boost, which helps bulb development.
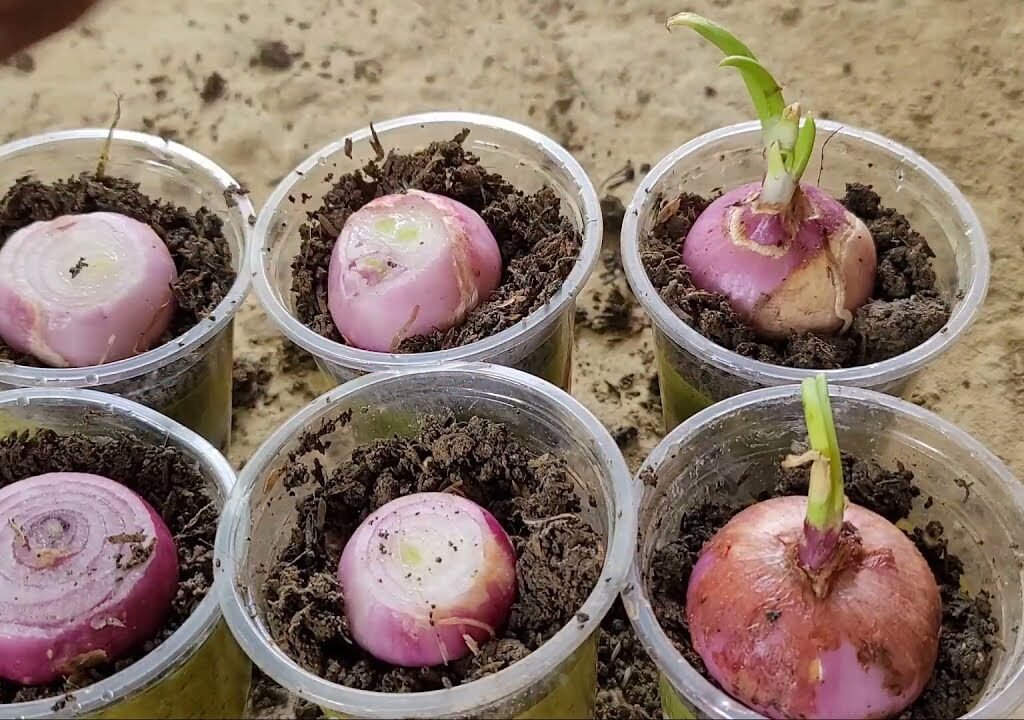
6. Planting the Onion Bulbs
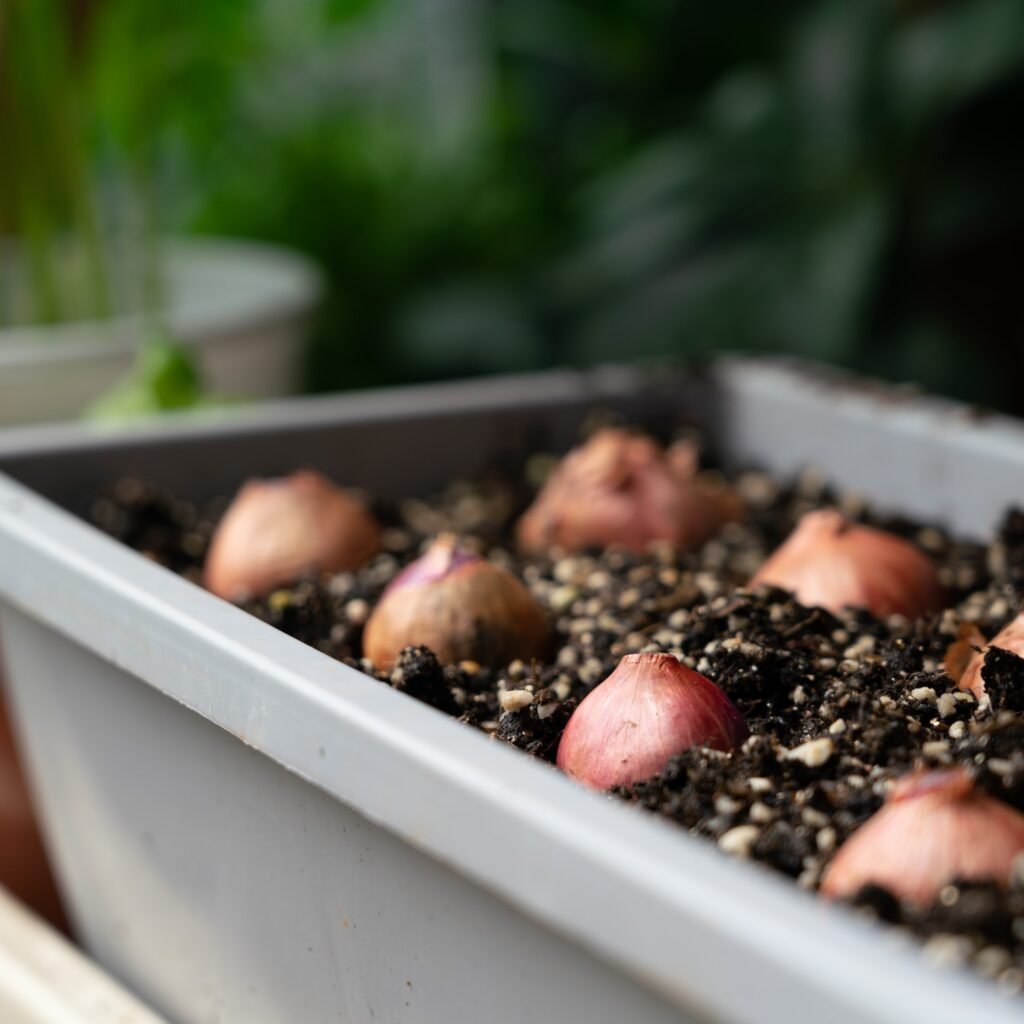
Now comes the fun part — planting your onions!
How to Plant Onions in Cups:
- Fill each plastic cup about ¾ full with the soil mix.
- Place one onion bulb in the center, with the pointed tip facing upward.
- Gently press it down so that one-third of the bulb is above the soil.
- Water lightly until the soil feels moist (not soggy).
Within 3–5 days, you’ll notice green shoots emerging — a sure sign your onion is growing strong!
7. Finding the Perfect Growing Spot
Onions love sunlight — they need it for both bulb and leaf growth.
Ideal Conditions:
- Sunlight: 6–8 hours of direct sunlight daily.
- Temperature: Between 65°F–80°F (18°C–27°C).
- Placement: Sunny window ledge, balcony, or patio.
If you’re growing indoors, use a grow light or LED lamp to ensure your onions receive enough light each day.
8. Watering and Care
Onions don’t like “wet feet.” Overwatering can cause rot, especially in plastic containers.
Watering Tips:
- Water only when the top inch of soil feels dry.
- Use a spray bottle or light watering can for even moisture.
- Avoid getting water on the bulb itself — focus on soil moisture.
Place the cups on a tray with gravel to help with drainage and prevent fungal buildup.
9. Feeding and Fertilizing
Since plastic cups hold limited soil, nutrients deplete faster. Regular feeding ensures steady growth and strong bulbs.
Feeding Schedule:
- After 2 weeks: Add a diluted liquid fertilizer (10-10-10).
- Every 10–14 days: Feed with compost tea or fish emulsion.
- During bulb formation: Switch to potassium-rich feed (like banana peel fertilizer).
Organic fertilizers not only boost growth but also improve flavor and reduce chemical residue.
10. Managing Pests Naturally
Even in indoor setups, you might encounter small pests like fungus gnats or aphids.
Natural Pest Remedies:
- Spray with neem oil solution (1 tsp neem oil + 1 quart water).
- Sprinkle cinnamon powder on soil to prevent fungus.
- Keep the area well-ventilated to avoid mold or mildew.
Avoid chemical pesticides — they’re unnecessary for such small-scale, controlled gardens.
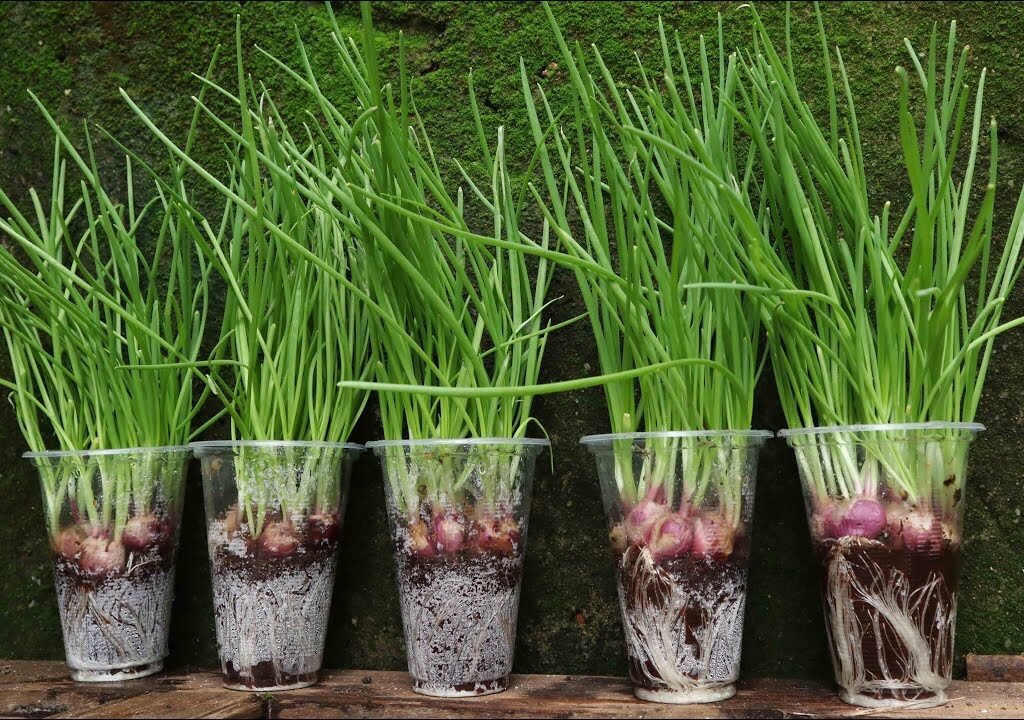
11. Pruning and Growth Maintenance
Once the green shoots reach 6–8 inches, you can start trimming them lightly.
Tips for Maintenance:
- Use scissors to snip the tops of green leaves for cooking — this encourages more growth.
- Remove any yellow or wilted leaves to prevent disease spread.
- Rotate the cups weekly for even sunlight exposure.
Your onion greens will regrow multiple times before the bulb matures completely.
12. Harvesting Onions from Plastic Cups
Depending on the variety and conditions, onions can be ready to harvest in 60–90 days.
When and How to Harvest:
- When leaves turn yellow and fall over, your bulbs are mature.
- Stop watering for a week before harvest to let bulbs firm up.
- Gently loosen the soil and pull the bulb upward by the base.
Rinse off soil and dry the bulbs in a warm, airy spot for 5–7 days before storage.
If you prefer green onions (scallions), you can harvest them much earlier — around 20–25 days after planting.
13. Reusing Onion Bulbs for Continuous Growth
Want to keep your onion cycle going? You can regrow onions from the base of harvested bulbs!
Regrowing Method:
- Cut off the onion base (about 1 inch thick).
- Let it dry for 24 hours.
- Plant it in a new cup with fresh soil.
- Water and place in sunlight — green shoots appear within a week!
This method lets you enjoy endless onion harvests without constantly buying new bulbs.
14. Troubleshooting Common Problems
| Problem | Cause | Solution |
|---|---|---|
| Onion bulb not growing | Not enough sunlight | Move to a sunnier spot or use a grow light |
| Yellowing leaves | Overwatering or poor drainage | Reduce watering and check holes |
| Mold on soil | Poor air circulation | Remove mold, sprinkle cinnamon, improve airflow |
| No bulb formation | Crowded roots or nutrient deficiency | Use bigger cups or add fertilizer |
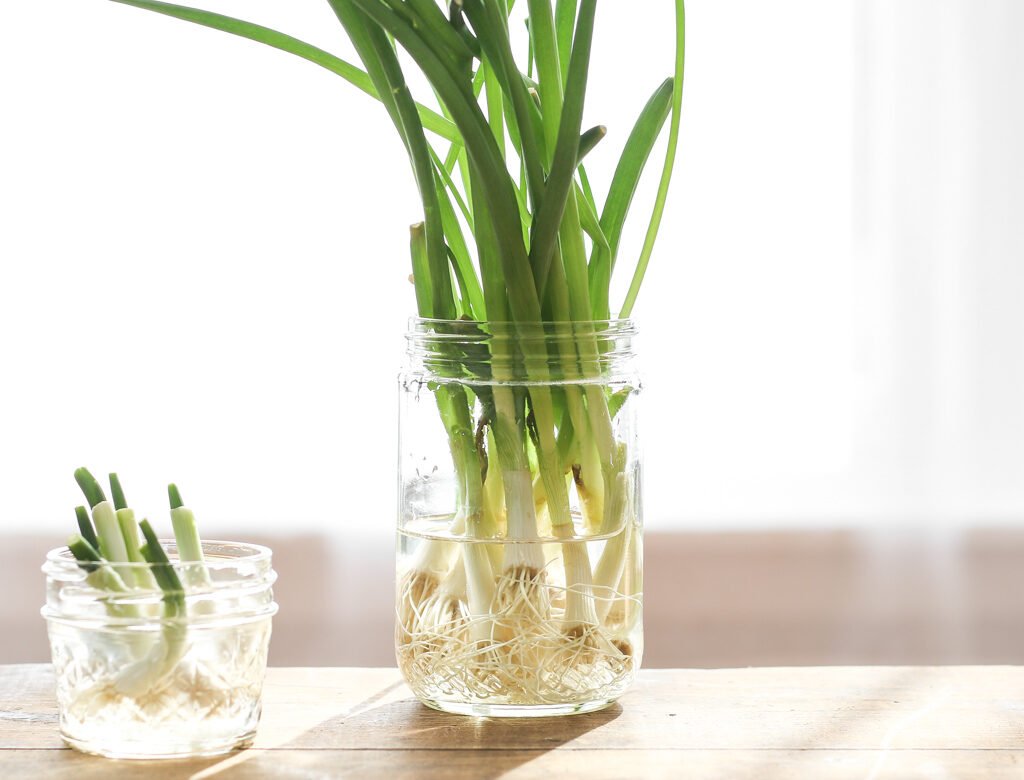
15. Bonus Tip: Growing Onions Hydroponically in Cups
For advanced gardeners, try a hydroponic version — grow onion bulbs in water using plastic cups suspended over jars.
Just add water, change it weekly, and watch the roots grow! It’s an excellent science experiment and home décor idea rolled into one.
Conclusion: Grow Smart, Eat Fresh
Growing onions in plastic cups is a simple, low-cost, and sustainable gardening hack that proves you don’t need a big yard to grow your own vegetables. Inspired by NY Sokhom’s innovative techniques, this method helps you enjoy fresh, organic onions year-round, even in tight spaces.
With just a few cups, soil, and bulbs, you can turn your kitchen or balcony into a mini onion farm — saving money, reducing waste, and adding homegrown flavor to every meal.
So grab those plastic cups, pick your favorite onion variety, and start your indoor onion-growing journey today. You’ll be amazed at how fast and rewarding it can be!
Leave A Comment